TL;DR
Open a free Amazon Business account
Business pricing, bulk buying and tax-exempt orders.
Create a free accountAs an affiliate, we earn on qualifying purchases.
Using a whetstone effectively involves progressing through different grit levels—starting coarse, then medium, and finishing fine—to create a sharp, polished edge. Following this sequence improves blade longevity and performance.
Ever tried sharpening a dull knife and wondered why it still feels dull after hours of work? The secret lies in understanding grit progression—moving through different abrasive levels in the right order. It’s like sanding wood: start rough, then fine-tune until smooth. If you want blades that cut clean and last longer, mastering grit progression on your whetstone is your best move.
This guide breaks down exactly how to choose the right grit levels, move smoothly through each stage, and stay current with recent sharpening innovations. No fluff, just practical steps to get your knives razor-sharp and keep them that way, even off-grid or in a manual kitchen.
Start with coarse grit only when your blade is very dull or damaged—otherwise, skip to finer grits for routine sharpening.
Progression from coarse to fine grit removes scratches step-by-step, leading to a sharper, more polished edge.
Testing the edge with paper or hair shaving helps determine when each grit stage is complete.
Keeping your stones flat and clean is key to consistent, effective sharpening.
Recent innovations like hybrid stones and guided systems make grit progression easier and more precise.
What Are Grit Sizes and Why They Matter
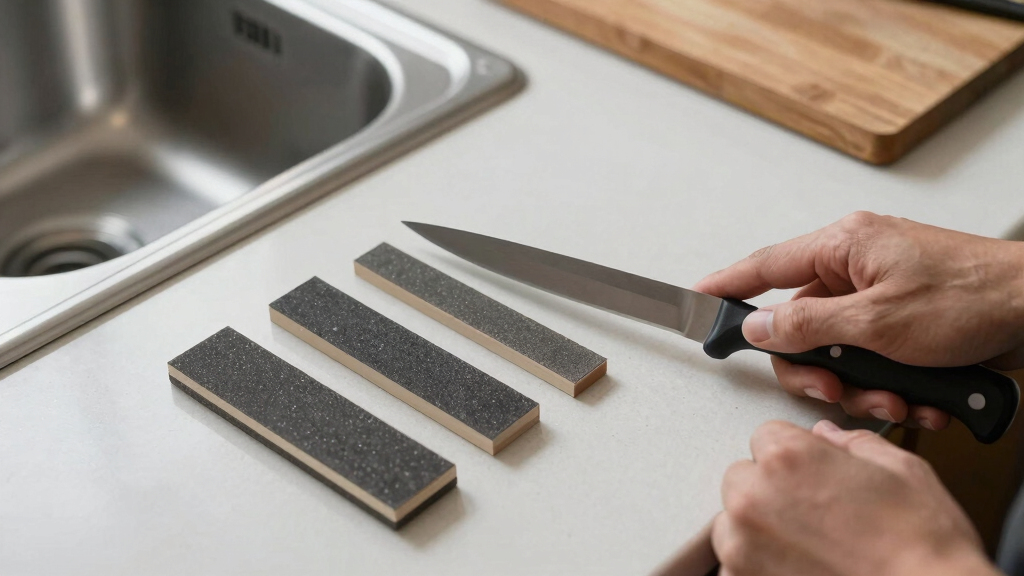
Grit size determines how abrasive a whetstone is—rougher grains remove material quickly, finer grains polish and hone. Coarse stones start around 200–400 grit, perfect for fixing chips or dull edges. Medium stones range from 800–2000 grit, refining the edge after coarse work. Fine stones, from 3000–8000 grit, give that razor-sharp finish, making slicing effortless. Beyond that, extra-fine stones (>8000 grit) can polish to a mirror finish, ideal for straight razors or high-end kitchen knives.
Understanding grit sizes is crucial because it directly influences the quality and longevity of your sharpened edge. Using too coarse a grit for finishing can leave scratches and micro-damage, which dulls the blade faster over time. Conversely, starting with too fine a grit when the blade is very dull can waste time and effort, as it won’t effectively remove the damage or reshape the edge. Think of grit size as a tradeoff between material removal speed and surface finish: coarser grits act quickly but leave rougher surfaces, while finer grits refine and polish but require more patience. Properly selecting and progressing through grit levels ensures a balanced approach—efficient sharpening that results in a durable, razor-sharp edge.
Imagine sharpening a carrot peeler—using coarse grit is like sanding rough wood; fine grit is like polishing glass. The grit size guides your progression, ensuring you don’t just sharpen, but also refine and polish your blade.

Intelitopia Complete Knife Sharpening Stone Set – Dual Grit Whetstone 400/1000 3000/8000 Knife Sharpener with Leather Strop, Flattening Stone, Bamboo Base, 3 Non-slip Rubber Bases & Angle Guide
- Complete Knife Sharpening Kit: Includes all essential sharpening tools
- Dual Grit Whetstone: 400/1000 and 3000/8000 grit options
- Durable Corundum Material: High-quality aluminum oxide for sharpening
As an affiliate, we earn on qualifying purchases.
As an affiliate, we earn on qualifying purchases.
Step-by-Step: How to Use Grit Progression on Your Whetstone
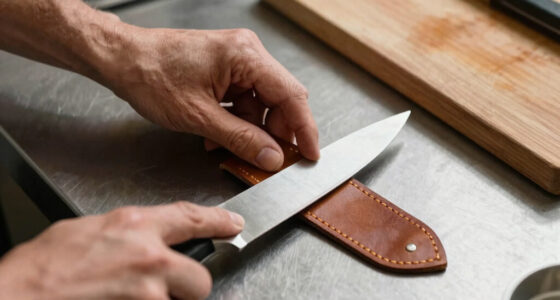
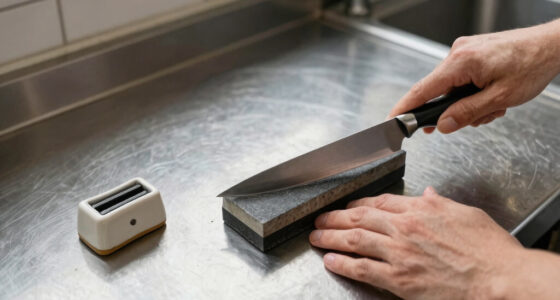
- Start with a coarse grit (200–400) if the blade is very dull or damaged. Use about 10–15 passes per side, maintaining a consistent angle. This step is about removing the bulk of the damage and reshaping the edge. Rushing here can lead to uneven edges or micro-damage that complicates later stages.
- Move to a medium grit (800–2000) to refine the edge. Repeat the same number of passes, focusing on even pressure and angle. This stage smooths out the scratches from the coarse grit, creating a better foundation for polishing. Skipping or rushing this step can leave micro-scratches that detract from the final sharpness and durability.
- Finish with a fine grit (3000–8000) for polishing. Test the sharpness after each stage by slicing paper or shaving hair. This stage enhances the blade’s ability to cut smoothly, reduces friction, and prolongs edge retention. Proper finishing ensures the edge is not just sharp but also resilient against micro-damage.
- Optional: Use an extra-fine grit for mirror polishing, especially for high-end or showpiece blades. This adds a reflective, mirror-like finish that not only looks impressive but also minimizes surface imperfections that can trap debris and dull the edge faster.
For example, if your chef’s knife has a nick, start with coarse grit to repair the damage. Then work your way up through the levels, each time removing the scratches from the previous grit and revealing a cleaner, sharper edge. The tradeoff is time versus quality: rushing through the steps may save time initially but compromises the edge’s strength and longevity in the long run.
Intelitopia Complete Knife Sharpening Stone Set – Dual Grit Whetstone 400/1000 3000/8000 Knife Sharpener with Leather Strop, Flattening Stone, Bamboo Base, 3 Non-slip Rubber Bases & Angle Guide
- Complete Knife Sharpening Kit: Includes all essential sharpening tools
- Dual Grit Whetstone: 400/1000 and 3000/8000 grit options
- Durable Corundum Material: High-quality aluminum oxide for sharpening
As an affiliate, we earn on qualifying purchases.
As an affiliate, we earn on qualifying purchases.
Comparison Table: Grit Progression for Different Blade Conditions
| Blade Condition | Recommended Grits | Notes |
|---|---|---|
| Very dull or damaged edge | 200–400, then 800 | Start coarse to reshape and repair chips. Skipping this step risks leaving micro-damage that can cause rapid dulling or even further damage over time. |
| Routine sharpening, no damage | 1000–3000 | Refines edge without heavy material removal. Using a grit too fine too early may not effectively remove micro-imperfections, leading to a less durable edge. |
| Polishing and finishing | 4000–8000+ | Creates razor-sharp, mirror-like finish. Proper polishing minimizes surface imperfections that could trap debris, enhancing cutting performance and edge longevity. |
| High-end, showpiece blades | 8000+ | Achieves a smooth, reflective surface. The mirror finish not only looks elegant but also helps protect the edge from micro-damage, extending its lifespan. |
Choosing the right grit progression depends on your blade’s condition and your goals. For damaged blades, start coarse to reshape; for routine maintenance, skip straight to medium or fine grits to save time, but be aware of the tradeoffs in edge durability.
Intelitopia Complete Knife Sharpening Stone Set – Dual Grit Whetstone 400/1000 3000/8000 Knife Sharpener with Leather Strop, Flattening Stone, Bamboo Base, 3 Non-slip Rubber Bases & Angle Guide
- Complete Knife Sharpening Kit: Includes all essential sharpening tools
- Dual Grit Whetstone: 400/1000 and 3000/8000 grit options
- Durable Corundum Material: High-quality aluminum oxide for sharpening
As an affiliate, we earn on qualifying purchases.
As an affiliate, we earn on qualifying purchases.
How to Know When You’re Done Sharpening at Each Stage
Test the edge frequently. The easiest way is slicing through a piece of paper—if it cuts smoothly without tearing, you’re on the right track. This practical test indicates that the edge has become sufficiently refined at that stage. Another effective method is shaving a tiny strip of hair from your arm; if the hair slides off easily and cleanly, the edge is sharp enough for most tasks. These tests are simple but powerful indicators of progress, helping prevent over-sharpening or under-sharpening.
Look for a burr—a tiny wire edge—that forms on the blade’s side during sharpening. When you feel it, flip the knife and repeat on the other side. The presence of a burr indicates that you’ve removed enough material to create a new edge. When the burrs are gone after the final grit, and the edge feels smooth and refined, your sharpening process is complete. Skipping this step can leave micro-damage or uneven edges, which compromise cutting performance and durability.
Remember, each grit level should leave a progressively finer and more refined edge. Rushing or skipping steps risks micro-damage and micro-imperfections that can dull your knife faster, so patience and careful testing are key.

SHARPAL 202H Precision Knife Sharpening System, Adjustable Angle 10–35°
- Adjustable sharpening angle: 10° to 35° for precision
- Innovative angle setting: Fixed edge-to-clamp distance
- Complete 7-piece abrasive kit: Diamond plates, whetstones, leather strop
As an affiliate, we earn on qualifying purchases.
As an affiliate, we earn on qualifying purchases.
Latest Trends and Tools to Improve Your Grit Progression
New materials and tools are making grit progression easier and more precise. Synthetic stones with diamond or ceramic abrasives last longer and cut faster, reducing the time needed for each grit stage. Hybrid stones that combine multiple grit levels in one unit simplify the process, minimizing the need to switch stones and reducing setup time. These innovations help maintain consistent pressure and angles, which are critical for effective grit progression and achieving optimal sharpness.
Guided sharpening systems with angle guides and pressure controls are increasingly popular because they help maintain a consistent bevel, which is essential for a proper grit progression. Some stones now feature water- or oil-compatible surfaces that resist clogging, ensuring a cleaner cut and more effective material removal. Recent innovations also include double-sided stones with coarse and fine grits, allowing seamless transition between stages without changing tools, saving time, and reducing the risk of inconsistent edges. These tools and techniques are designed to make the sharpening process more accessible, consistent, and effective, especially for beginners or those aiming for professional-quality results.
Quick Tips to Make Your Grit Progression Work Better
- Keep your stones flat—use a flattening stone or lapping plate regularly to prevent uneven surfaces that can cause inconsistent sharpening and micro-damage.
- Maintain consistent angles—use guides or angle jigs to ensure each pass aligns correctly with the edge, which is vital for uniform grit progression and a durable edge.
- Clean your stones often—clogged stones reduce cutting efficiency and can introduce debris that scratches the blade surface, undermining your progress.
- Don’t rush—each grit level requires patience. Rushing can lead to uneven edges, micro-scratches, and micro-damage that diminishes overall sharpness and lifespan.
- Test often—use paper or hair shaving tests after each grit stage. Stopping at the right moment ensures you don’t over-sharpen or leave micro-imperfections that compromise performance.
For example, spend a minute flattening your stone before each session. Regular maintenance of your tools preserves their effectiveness, ensures consistent contact, and ultimately results in a sharper, longer-lasting edge.
Frequently Asked Questions
How do I choose which grit to start with for my knife?
If your knife is very dull or damaged, start with a coarse grit (200–400). For routine maintenance or a slightly dull edge, begin with a medium grit (800–2000). Use finer grits only when your edge is already sharp but needs polishing.
Can I skip intermediate grits if I’m in a hurry?
Skipping grits can leave micro-scratches and a less-polished edge, which dulls faster. For best results, follow the sequence—coarse, medium, then fine—to ensure a clean, durable cut.
How do I tell when I’ve finished each grit stage?
Use a piece of paper to test. A sharp blade slices cleanly without tearing. Also, feel for a smooth, burr-free edge. When the burr disappears after the final grit, your sharpening is complete.
How often should I re-profile my blade using coarse grit?
Only when you notice chips, dents, or severe dullness. Regular maintenance with finer grits keeps your edge sharp longer, so re-profiling is needed less frequently—perhaps once every few months, depending on use.
What’s the best way to keep my whetstone flat?
Use a flattening stone or lapping plate regularly—every few sharpening sessions. This prevents uneven edges and ensures consistent contact, which is vital for an effective grit progression.
Conclusion
Getting a truly sharp knife isn’t about brute force. It’s about patience, proper technique, and following the right grit steps. When you master the progression, your blades will slice effortlessly—and last longer.
Think of sharpening as fine-tuning a musical instrument. Each grit level is a different note, coming together to produce that perfect, razor-sharp sound. Keep practicing, stay consistent, and your knives will reward you with every cut.
Pool season Picks
robotic pool cleaners
As an affiliate, we earn on qualifying purchases.