
TL;DR
Open a free Amazon Business account
Business pricing, bulk buying and tax-exempt orders.
Create a free accountAs an affiliate, we earn on qualifying purchases.
Sharpening a pocket or folding knife is about removing just enough metal to restore a sharp edge. Use the right tools, maintain a consistent angle, and follow a systematic process to get a durable, razor-sharp edge. Proper technique saves steel and extends your knife’s life.
Consistently control your sharpening angle—use marker tricks or guides for accuracy.
Start with coarse grit only when necessary—most routine sharpening needs medium to fine stones.
Form a clean, even apex—this is the foundation of a sharp, durable edge.
Remove the burr thoroughly—light strokes and stropping finish the job.
Regular maintenance with light strokes extends blade life and keeps your knife performing at its best.
How to Sharpen a Pocket or Folding Knife
Sharpening removes just enough metal to restore a sharp edge. With the right tools, a consistent angle, and a systematic process, anyone can achieve a durable, razor-sharp finish—no fancy gadgets, just patience and attention to detail.
The apex is everything
A properly formed apex—where the two bevels meet—is the critical element for a sharp, durable edge. Forming it correctly matters more than polish or grit.
Know your blade before you touch a stone
Steel type, blade shape, and edge condition determine your tools and technique. Match the method to the blade to save steel and avoid ruining the profile.
Soft vs. Super Steels
Softer steels like 1095 or AUS-8 sharpen quickly but dull faster. Hard steels like S30V or D2 resist sharpening but hold an edge longer—and often demand diamond or ceramic abrasives.
Straight, Recurve, Serrated
Straight edges are simple to sharpen. Recurves, hawkbills, and serrations require narrow rods or specialized tools to reach every part of the edge.
Dull, Chipped, or Rolled
A merely dull edge may need only honing. Chips, rolled edges, or a wrong bevel demand coarser grinding and more aggressive material removal.
Sharpening vs. honing vs. stropping
These terms are often confused—each affects the blade differently, and mixing them up wastes steel or delays edge formation.
Sharpening
Grinds steel away to create a brand-new apex. Required when the edge is truly blunt, chipped, or damaged. Performed with abrasive stones or plates.
Honing
Realigns or refines the existing edge with a fine abrasive—like straightening hair instead of cutting it. Ideal when a knife still cuts but feels less crisp.
Stropping
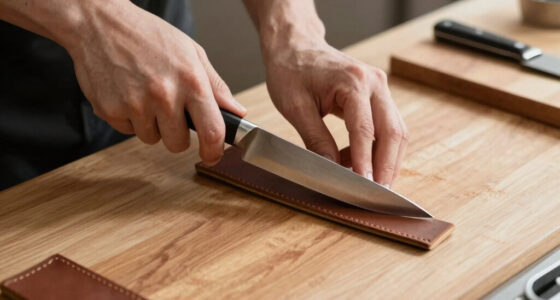
Removes the final burr and polishes the apex on leather. Best after sharpening or for light maintenance—not for repairing a truly dull edge.
Rule of thumb
Slightly dull? Hone or strop first. Genuinely blunt or damaged? Sharpen. Over-honing a blade that needs grinding delays proper edge formation—while unnecessary sharpening removes too much steel.
Choosing your bevel angle
Thin edges slice exceptionally but are less durable; wider angles trade slicing ability for strength. Follow the factory grind when possible.
Pick the right sharpening system
Tradeoffs exist between control, speed, cost, and ease of use. Match the system to your skill level and your blade’s steel.
| System | Best For | Pros | Cons |
|---|---|---|---|
| Bench stones | Precision sharpening, detailed control | ✓ Versatile, adjustable angles | ✗ Requires skill and setup |
| Diamond plates | Fast cutting on hard, wear-resistant steels | ✓ Cuts quickly, stays flat | ✗ More expensive, aggressive |
| Ceramic stones | Refining and polishing edges | ✓ Produces a clean edge | ✗ Less material removal |
| Guided systems | Consistent angles for beginners | ✓ Easy to learn, repeatable | ✗ Limited flexibility |
| Pull-through | Quick convenience | ✓ Fast and portable | ✗ Removes excess steel, limited control |
| Strops | Burr removal and light maintenance | ✓ Polished, clean apex | ✗ Can’t repair a dull edge |
Lubrication matters
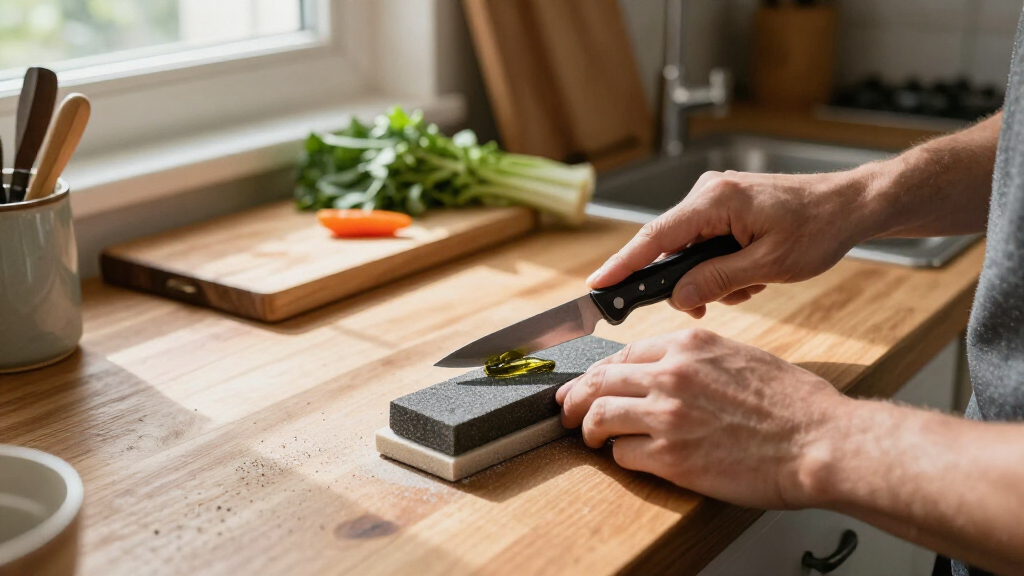
Oil stones use honing oil; traditional water stones use water (some need soaking). Diamond plates run dry or with water per the manufacturer. Never put oil on a water stone.
A reliable 10-step sharpening process
Patience and consistency beat speed. The signs of progress are a continuous burr and consistent scratch patterns—not an arbitrary stroke count.
Clean & inspect
Remove dirt and adhesive; check for chips, bends, and blade play.
Secure the area
Stable, non-slip surface with good lighting.
Protect the pivot
Keep slurry and filings out of the lock, hinge, and bearings.
Mark the bevel
Color with a marker; light strokes reveal if you hit the full bevel.
Choose your grit
Coarse only for damage or reprofiling; finer for routine work.
Sharpen one side
Work heel to tip at a constant angle until a burr forms edge-to-edge.
Switch sides
Repeat until the burr flips to the opposite side along the full edge.
Refine
Lighter alternating strokes; progress to finer grits if desired.
Remove the burr
Very light edge-leading strokes, fine ceramic, or careful stropping.
Clean & test
Wipe blade and pivot before closing; test with a paper cut.
Form and remove the burr—your sign of success
Feel it heel to tip
A burr is a thin flap of metal pushed over the apex during sharpening. Feeling it along the entire opposite edge means you’ve removed enough material to reach the apex.
Light strokes + strop
Reduce pressure, flip the burr back and forth with very light strokes, then strop on leather. A left-over burr makes a knife seem sharp—then dull quickly.
Before you test
Always confirm the burr is gone. If a wire edge persists, continue light strokes until the edge feels clean. A properly removed burr means the apex is sharp, even, and durable.
Five rules for a lasting edge
Consistently control your sharpening angle—use marker tricks or guides for accuracy.
Start with coarse grit only when necessary—most routine sharpening needs medium to fine stones.
Form a clean, even apex—this is the foundation of a sharp, durable edge.
Remove the burr thoroughly—light strokes and stropping finish the job.
Regular maintenance with light strokes extends blade life and keeps your knife performing at its best.
From dull to razor-sharp
Start by knowing your blade: steel, shape, and damage
Before you touch your knife, understand what you’re working with. Steel type influences how easily it sharpens. Softer steels, like 1095 or AUS-8, cut quickly but dull faster. Harder steels—like S30V or D2— resist sharpening but hold an edge longer. Modern super steels often need diamond or ceramic abrasives.
Next, look at your blade’s shape. Straight edges are simple, but recurves or serrations need special tools. Check for chips, bends, or rounded tips, which may require coarser grinding first. Damage impacts your approach: a chipped edge needs more aggressive material removal, while a dull blade might just need a quick honing.
Matching your sharpening method to the blade’s condition and steel ensures you don’t waste steel or ruin your knife. For most pocket knives, a 15–20 degree per side bevel—about 30–40 degrees total—is a good starting point, following the factory grind when possible.
Understanding your blade’s steel and shape is crucial because different steels respond differently to abrasive materials, and the shape determines how easily you can access and sharpen the edge. Recognizing damage—whether chips, bends, or dullness—helps you select the appropriate tools and techniques, saving time and preserving your knife’s integrity. Proper knowledge prevents over-aggressive grinding, which can thin your blade unnecessarily or alter its intended profile.
As an affiliate, we earn on qualifying purchases.
Understand sharpening, honing, and stropping—what’s what?
Don’t confuse sharpening with honing or stropping. Sharpening is the process of removing metal to restore a new edge. Honing realigns the existing edge, making it feel sharper without removing much material—think of it as straightening your hair instead of cutting it. Stropping polishes the edge, removing tiny burrs and giving a clean finish.
If your knife still cuts but feels dull, a quick honing with a ceramic rod or stropping on leather might revive it. But if it’s truly blunt or damaged, you’ll need to sharpen with abrasive stones or plates.
Knowing when to hone versus when to sharpen saves you time and preserves steel. A dull knife needs grinding, but a slightly dull one benefits from gentle realignment first.
Understanding these distinctions is essential because each technique affects the blade differently. Over-honing a blade that needs sharpening can delay proper edge formation, while unnecessary sharpening can remove too much steel. Properly combining these techniques optimizes your maintenance routine, extending the knife’s life and keeping it performing at its best.
As an affiliate, we earn on qualifying purchases.
Pick the right sharpening system for your pocket knife
Choosing a sharpening system depends on your skill level and blade steel. Bench stones are versatile, offering control for expert results. Diamond plates cut quickly and are great for hard steels. Ceramic stones refine and polish, ideal for finishing.
Guided-angle systems hold a consistent bevel and are perfect for beginners. Pull-through sharpeners are convenient but often remove excess steel and have limited control. Portable ceramic or diamond rods are handy for field repairs, though less precise.
Here’s a quick comparison:
| System | Best For | Pros | Cons |
|---|---|---|---|
| Bench stones | Precision sharpening, detailed control | Versatile, adjustable angles | Requires skill and setup |
| Diamond plates | Fast sharpening on hard steels | Cuts quickly, flat surface | More expensive, aggressive |
| Ceramic stones | Refining and polishing | Produces a clean edge | Less material removal |
| Guided systems | Consistent angles for beginners | Easy to learn, repeatable | Limited flexibility |
Tradeoffs exist between control, speed, cost, and ease of use. For example, bench stones offer the most control but require skill and setup, while guided systems simplify the process but limit flexibility. Recognizing these tradeoffs helps you select a system that matches your skill level and the steel’s hardness, ensuring effective and safe sharpening.
As an affiliate, we earn on qualifying purchases.
Follow a reliable sharpening process—step by step
Sharpening your pocket knife is about patience and consistency. Here’s a proven process:
- Clean and inspect the blade. Remove dirt, oil, and check for damage.
- Secure your work area. Use a stable surface with good light.
- Protect the pivot area. Keep abrasive slurry and filings out of the lock and hinge.
- Identify the bevel. Mark it with a permanent marker. Light strokes will show if you hit the full bevel or miss the apex.
- Start with coarse grit. Use only as much as needed—heavy dullness or chips require coarse, light dullness can skip to finer stones.
- Sharpen one side until a burr forms along the entire edge. Keep the angle consistent from heel to tip.
- Switch sides. Repeat until the burr flips to the opposite side, confirming full contact.
- Refine using lighter strokes, progressing to finer grits if desired.
- Remove the burr. Use gentle edge-leading strokes or stropping to clean it up.
- Clean and test. Wipe the blade, then check sharpness with a paper cut or light slicing.
The key signs of progress are a uniform burr and consistent scratch patterns. Don’t rush—patience pays off with a keen edge.
Deep understanding of each step’s purpose helps you avoid common pitfalls, like over-grinding or uneven bevels. Recognizing the formation of a burr as a sign of proper material removal ensures you don’t under- or over-sharpen, which can compromise the edge’s durability and symmetry.
As an affiliate, we earn on qualifying purchases.
Form and remove the burr—your sign of a job well done
A burr is a tiny flap of metal pushed over the edge during sharpening. Feeling it from heel to tip means you’ve cut enough material to reach the apex.
Leaving a burr can make a knife seem sharp initially but dull quickly because it indicates incomplete or uneven sharpening. To finish, reduce pressure and switch to very light strokes, flipping the burr back and forth. Stropping on leather can also effectively remove residual burrs and smooth the edge, ensuring the apex is clean and well-formed. This process helps align the micro-bevels and removes any loose particles that could cause premature dulling.
Always check that the burr is gone before testing. If it persists, continue light strokes until the edge feels clean and sharp without feeling a wire. A properly removed burr signifies that the metal has been evenly cut and the apex is sharp and durable, which directly impacts the knife’s cutting performance and longevity.
Select the right grit for the job—coarse, medium, or fine?
Grit selection impacts how fast and how well you sharpen your knife. Coarse abrasives (around 200–400 grit) are for fixing chips, reshaping bevels, or restoring extremely dull blades. They remove metal quickly but leave deep scratches that can weaken the edge if not refined later.
Medium grits (600–1000 grit) are versatile—good for establishing a clean, functional edge and removing the scratches from coarser stones. They balance material removal with smoothness, making them suitable for routine sharpening.
Fine and polishing abrasives (2000 grit and above) produce a smooth, mirror-like finish. While they enhance the aesthetic appeal and reduce surface friction, they are not strictly necessary for everyday use and can sometimes reduce edge durability if overused. The tradeoff is between an ultra-smooth finish and the edge’s resilience—sharper, polished edges tend to dull faster under heavy use.
Choosing the right grit depends on your goal: for quick repairs or severe dullness, start coarse; for routine maintenance, medium or fine grits suffice. Proper selection ensures efficiency without compromising the edge’s strength and longevity.
Keep your angle consistent—how to do it right
Maintaining a steady angle is the secret to a uniform, durable edge. Use the marker trick: color the bevel with a permanent marker, then sharpen until the ink just disappears along the entire edge. This visual cue helps you develop muscle memory for consistent angle control.
Hold your knife with a firm, controlled wrist. Lock your elbow and shoulder to prevent wobble. Move smoothly from heel to tip, keeping the same angle throughout. Practicing slow, deliberate strokes reinforces muscle memory, reducing the tendency to drift off-angle, which can cause uneven bevels or weak spots.
Guided systems or angle guides can help, especially for beginners. When sharpening curved blades, raise the handle gradually near the tip to match the bevel’s natural shape. Avoid lifting or twisting, which creates uneven bevels or dull spots. Regularly checking the marker’s progress and making micro-adjustments ensures your angle stays true, resulting in a sharper, more reliable edge.
Control and consistency are the foundation of a good edge; developing these through technique and practice ensures your sharpening is effective and safe.
Pressure and stroke direction—getting it just right
Start with moderate pressure to shape the bevel. Heavy pressure can cause uneven bevels, excessive heat, and remove too much steel at once. As the edge develops, lighten your touch to refine and polish without over-thinning the blade or causing micro-chipping.
Both edge-leading strokes (pushing the knife into the stone) and edge-trailing strokes (pulling back) are effective. Use edge-leading strokes for initial material removal and shaping, then switch to edge-trailing strokes for finishing and polishing. This combination ensures a balanced bevel and smooth surface.
Control your strokes—long, even passes with consistent pressure yield the best bevels. Near the tip, lift the handle slightly to follow the blade’s curvature, preventing uneven wear or dull spots. Consistency in pressure and stroke direction prevents micro-waviness and ensures the apex is sharp and durable.
Remember: patience and finesse matter more than brute force. Rushing or applying uneven pressure can ruin the edge or cause damage, so take your time and develop a gentle, controlled technique.
Special tips for sharpening pocket knives safely and effectively
Pocket knives bring unique challenges. Keep your fingers clear of the closing path to avoid accidental cuts. Secure the lock fully before sharpening to prevent the blade from closing unexpectedly. Protect the pivot area from grit and slurry—use masking tape if necessary to shield these sensitive parts.
For thin or hollow-ground blades, clamp gently and avoid over-tightening, which can deform the blade or damage the grind. Use narrow stones or tapered rods for recurve or partially serrated blades—broad stones won’t contact evenly, risking uneven sharpening or damage.
When sharpening serrations, focus on individual scallops with a tapered rod, using light, controlled strokes to avoid widening or damaging the pattern. After, clean burrs with a light pass on the flat side, ensuring the serrations retain their shape and function optimally. Always clean the pivot after sharpening to remove filings, and lubricate lightly to prevent rust or dirt ingress, maintaining smooth operation.
Following these safety and technique tips helps prevent accidents and preserves your knife’s functionality and longevity.
Sharpening serrated and specialty blades—what works best
Serrated blades sharpen differently because their scalloped edges require specialized techniques. Use a tapered diamond or ceramic rod matching the size of the scallops. Light, controlled strokes prevent widening or damaging the serration pattern while effectively removing burrs. Focus on each scallop individually to ensure uniform sharpness, then use a flat stone or fine ceramic for the straight sections.
Deep damage or chips may necessitate professional repair or grinding, especially if the serrations are severely compromised. Small chips can sometimes be ground out with coarse abrasives, but deep or widespread damage often requires expert help to restore the pattern without destroying the blade’s functionality. Proper maintenance of serrated blades ensures they retain their cutting ability and safety, especially in critical tasks where serrations excel.
Avoid common sharpening mistakes that ruin your blade
Many issues stem from inconsistent angles and excessive pressure. Never lift the handle sharply near the tip—this rounds the edge and creates dull spots. Avoid jumping to finer grits before removing deep scratches from coarse stones, as this traps debris and weakens the edge. Don’t rely solely on arbitrary stroke counts; look for burr formation and consistent scratch patterns as signs of proper progress.
Over-polishing can reduce durability, especially on blades intended for tough tasks, by creating a very smooth surface that dulls faster. Never ignore burrs—leave them to the final strokes, as they indicate complete material removal. Using power tools or excessive force can generate heat, which may weaken or warp the steel, compromising the blade’s integrity. Always test sharpness safely—try slicing paper or cardboard, not your fingers—and regularly clean the blade and pivot area to prevent grit buildup that can damage the mechanism or dull the edge.
Understanding these common pitfalls helps you develop better technique, prolongs your knife’s lifespan, and ensures safe, effective sharpening.
Safe tests to confirm your knife is razor-sharp
Always test with safe, practical methods. Slicing printer paper effortlessly from heel to tip is a reliable sign of a sharp edge. Cutting thin slices of cardboard or fibrous material demonstrates the edge’s ability to perform under real-world conditions. A good test is lightly catching the edge on your thumbnail—if it barely catches and then slides smoothly, the knife is sharp. This method provides immediate feedback without risking injury or damaging the blade.
Avoid dangerous tricks like shaving hair or running your finger along the edge, as these can cause cuts or misleading results. Instead, focus on controlled, safe tests that reflect actual cutting performance. Remember, a truly sharp knife feels light, slices cleanly with minimal force, and maintains its edge during use. When in doubt, recheck the burr and scratch pattern to confirm the edge’s condition, ensuring safety and effectiveness in your sharpening routine.
Frequently Asked Questions
What angle should I use for my pocket knife?
Most pocket knives sharpen best around 15–20 degrees per side. Matching the factory bevel is the simplest way to keep your edge effective and durable. Use the marker trick to verify your angle if unsure.How often should I sharpen my pocket knife?
It depends on use. Light tasks like slicing paper or cardboard may only need occasional stropping or honing. Heavier use or tougher materials might require sharpening every few weeks. Pay attention to how it cuts—if it pushes or tears, it’s time.Can I sharpen serrated blades with a regular stone?
No. Serrations need tapered rods or ceramic paddles matching their scallop size. Use light, controlled strokes to sharpen each scallop, then remove burrs with a flat edge. Regular stones can damage or flatten the serration pattern.What’s the biggest mistake beginners make?
Changing the angle during strokes or applying too much pressure. Both cause uneven bevels, dull tips, or excessive steel removal. Practice with marker and go slow—control beats speed every time.Is a mirror-polished bevel better?
Not necessarily. A polished bevel looks nice but isn’t a guarantee of sharpness or durability. The apex—where the bevels meet—is what truly matters. Focus on forming a clean, consistent apex for the best results.Conclusion
Sharpening your pocket or folding knife is a skill grounded in patience, control, and understanding your blade. With a steady hand and the right technique, you can turn a dull, sluggish edge into a razor-sharp tool. It’s not about magic—it’s about practice and respect for your steel. Keep your blades clean, sharp, and ready for anything—your off-grid kitchen depends on it.College move-in / dorm season Picks
dorm essentials
As an affiliate, we earn on qualifying purchases.