TL;DR
Listen free for 30 days with Audible
Thousands of audiobooks and originals — cancel anytime.
Start your free trialAs an affiliate, we earn on qualifying purchases.
Hand-sharpening a full knife set requires understanding each knife’s needs, using the right tools, and applying proper technique. Regular maintenance keeps your knives performing their best and extends their lifespan.
Hand-Sharpening a Full Knife Set
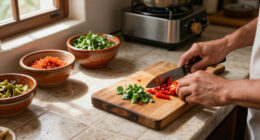
Slicing through tomatoes like butter, each cut clean and effortless—that’s the power of a well-sharpened edge. Keeping a full set sharp by hand takes skill, patience, and the right tools, but rewards you with safety, precision, and longevity.
A consistent sharpening angle and proper technique can extend a high-quality knife’s life by up to 50%.
— Expert sharpening guidesEach Knife Needs Different Care
A full set isn’t one-size-fits-all. Chef’s, paring, bread, utility, and boning knives each have distinct shapes, steels, and angles—so a serrated bread knife is never treated like a chef’s knife, and a fine Japanese edge demands a gentler touch than a forgiving Western blade.
Chef’s Knife
Angle: 15–20° · WhetstoneThe workhorse. Coarse grit for reshaping, fine grits for polishing. Even pressure on both sides is essential for a symmetric edge.
Paring & Utility
Angle: 15–20° · WhetstoneSmall blades are easy to control on a stone. Inspect often—delicate work exposes dullness faster than heavy chopping.
Serrated Bread Knife
Scalloped edge · Special toolsNever sharpened like a chef’s knife. Its scalloped edges require specialized tapered rods or professional attention—neglecting them renders the blade ineffective.
Japanese-Style Knives
Angle: ~15° · Gentle techniqueFiner, more acute edges that over-aggressive sharpening can ruin. Use lighter pressure and finer grits to protect the thin edge.
Boning & Fillet
Angle: 15–20° · Flexible bladeThin, flexible steel demands consistent angles to preserve its working curve and slicing precision.
Western Knives
Angle: ~20° · More forgivingBroader angles tolerate imperfect technique but still need attention to maintain shape and durability over time.
Precision vs. Durability
Consistency in angle is the single most important factor in sharpening. Where your knife sits on this spectrum determines how delicate or robust your technique must be.
The Four-Stage Sharpening Process
Sharpening is iterative: assess, grind, refine, hone. Rushing leads to uneven edges or damage—each step builds toward a keen, durable finish.
Assess
Dull, nicked, or slightly dull? Your evaluation dictates the grit you start with—heavy reshaping calls for coarse stones.
Coarse Grind
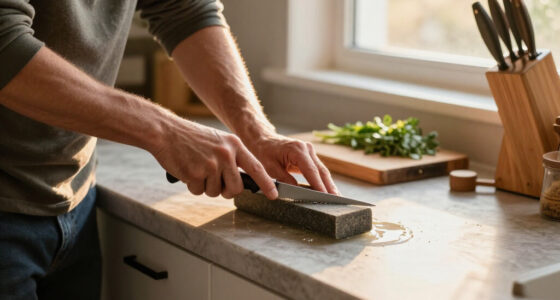
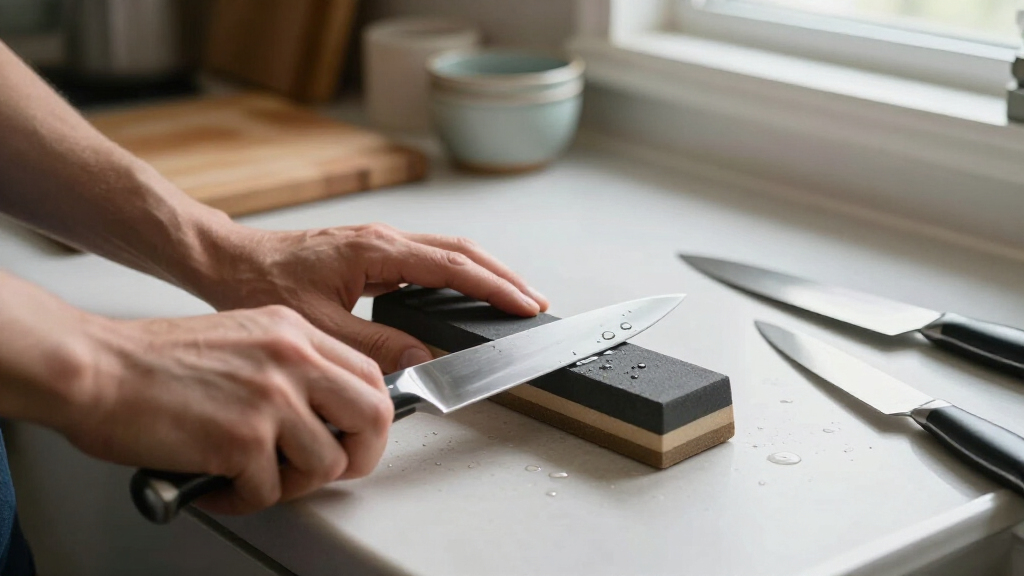
Draw the blade heel-to-tip across a coarse stone at 15–20°, even pressure, both sides. Remove damage and reshape the edge.
Refine & Polish
Progress to medium and fine grits. Feel for a burr along the edge, then test sharpness on paper or a tomato skin.
Hone
Finish on a honing steel with gentle sweeps at the same angle to realign the microscopic teeth of the edge.
The golden rule: patience and consistency. Multiple passes on heavily dulled knives are normal—and each one brings you closer to a razor-sharp finish that cuts effortlessly.
Choosing Your Sharpening Arsenal
Quality tools and proper technique matter more than brand names. Recent innovations—diamond and ceramic stones, guided angle systems, and smart digital guides—have made precision sharpening more accessible than ever.
| Tool | Precision | Blade Safety | Skill Needed | Best For |
|---|---|---|---|---|
| Whetstone | ✓ Highest | ✓ Gentle | ~ High | Full sets, all edge types — the traditional choice |
| Honing Rod | ~ Realigns only | ✓ Very safe | ✓ Low | Daily maintenance between uses |
| Guided System | ✓ High | ✓ Consistent angle | ✓ Low | Beginners seeking repeatable results |
| Manual Pull-Through | ✗ Low | ~ Fixed slots | ✓ Minimal | Quick touch-ups on budget knives |
| Electric Sharpener | ~ Moderate | ✗ Removes excess material | ✓ Minimal | Speed — can damage delicate blades |
Keeping Your Edge Sharp
Sharpening is only part of the routine. How often you intervene depends on the task—hone frequently, sharpen rarely, and your knives stay sharper for longer.
Warning signs of dullness: food sticking to the blade, needing extra pressure, slipping, or uneven slices. Also — store knives in blocks, on magnetic strips, or in sheaths, and never use the dishwasher to prolong edge life.
From Stone to Slice
What Makes Hand-Sharpening Your Full Knife Set Worth It?
Hand-sharpening isn’t just about saving money; it’s about control and understanding your tools. When you sharpen your knives yourself, you gain a deeper insight into how each blade’s edge is formed and maintained. This understanding allows you to adjust your technique based on the specific steel, shape, and purpose of each knife, which can significantly influence performance. For instance, a subtle change in angle or pressure can mean the difference between a blade that cuts smoothly and one that tears or drags. The tradeoff, however, is that it requires time and practice to develop this skill—initially, it might be slower than using a machine, but the long-term benefits include a more precise edge and a greater sense of mastery. Over time, this skill also enables you to troubleshoot issues like chips or dull spots more effectively, preventing minor problems from escalating into costly repairs or replacements. Ultimately, the control you gain through hand-sharpening enhances safety, reduces waste, and ensures your knives perform optimally for every task, from delicate peeling to heavy-duty chopping.
As an affiliate, we earn on qualifying purchases.
Types of Knives in a Set and How They Need Different Care
Your typical full knife set isn’t one-size-fits-all. It usually includes a chef’s knife, paring knife, bread knife, utility, and sometimes a boning or fillet knife. Each has a different shape, steel, and angle that influences how you sharpen it. For example, a serrated bread knife isn’t sharpened like a chef’s knife—its scalloped edges require special tools or professional attention. Japanese-style knives often have a finer, more acute edge at 15°, which demands a gentler, more precise sharpening approach to avoid damaging the delicate edge. Western knives, with their broader angles around 20°, are more forgiving but still require attention to maintain their shape and durability. Recognizing these differences is crucial because improper care or sharpening can lead to loss of functionality or damage that’s costly or impossible to repair. For example, over-aggressive sharpening of a Japanese knife can ruin its thin edge, while neglecting a serrated knife’s scallops can render it ineffective for its intended purpose. Understanding each knife’s personality helps you decide how to sharpen it—whether it needs a gentle honing, a more aggressive grind, or professional attention. This tailored approach ensures each blade maintains its performance and longevity, much like tuning a musical instrument for perfect sound. The tradeoff is time and effort—more specialized care takes longer but results in a sharper, more reliable set that performs consistently across all tasks.
As an affiliate, we earn on qualifying purchases.
Understanding the Sharpening Process: From Dull to Razor Sharp
Before diving into sharpening, it’s important to understand the basic stages of the process. First, assess each knife’s condition: is it dull, nicked, or just slightly dull? This evaluation guides your approach—coarse grits for heavy reshaping, finer grits for polishing, and honing for daily maintenance. The goal is to restore the edge, making it sharp and smooth. Proper technique involves maintaining a consistent angle—usually between 15° to 20°, depending on the knife—and applying even pressure throughout each stroke. It’s a step-by-step process: start with a coarse grit to remove damage or reshape the edge, then progress to finer grits to refine and polish. Finish with honing to realign the microscopic teeth of the edge. The key is patience and consistency—rushing can lead to uneven edges or damage. With practice, you’ll develop a feel for the right pressure and angle, resulting in a keen, durable edge that cuts effortlessly. Remember, the process is iterative: you might need multiple passes, especially on heavily dulled knives, but each step brings you closer to a razor-sharp finish.
manual knife sharpener for full set
As an affiliate, we earn on qualifying purchases.
As an affiliate, we earn on qualifying purchases.
Applying the Techniques: Step-by-Step Guide to Sharpening
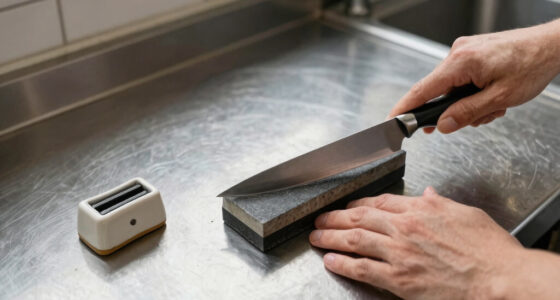
Once you understand the process, applying it becomes straightforward. Start by securing your sharpening stone or guide at a comfortable height. Hold the knife firmly, and position the edge at your chosen angle—commonly 15° to 20°. For each stroke, draw the blade across the stone from heel to tip, maintaining contact and consistent pressure. Repeat this process evenly on both sides of the blade. Use a coarse grit first if the knife is very dull or damaged, then move to medium and fine grits for refinement. For honing, run the steel along the edge with a gentle, sweeping motion, maintaining the same angle. Practice makes perfect—over time, your strokes will become more fluid, and your edges more consistent. Always inspect your progress by feeling for burrs or testing the sharpness on a piece of paper or tomato. With patience, this step-by-step approach ensures each knife is sharpened to a precision that enhances safety and performance.
As an affiliate, we earn on qualifying purchases.
Maintaining Your Sharp Edge: Daily and Periodic Care
Sharpening is just part of the maintenance routine. To keep your knives performing well day-to-day, use honing steels regularly—ideally before or after each use—to realign microscopic teeth and prevent dullness. For most home cooks, a quick swipe on the steel every few uses is sufficient. Periodic full sharpening, using a whetstone or guided system, is necessary to restore the edge when honing alone isn’t enough. Recognize signs of dullness: increased effort needed to cut, slipping, or uneven slices. When these occur, plan a sharpening session. Proper storage also helps—use knife blocks, magnetic strips, or protective sheaths to prevent nicks and damage. Cleaning your knives carefully and avoiding dishwasher use prolongs their lifespan. With consistent care, your knives will stay sharp longer, reducing the frequency of intensive sharpening and ensuring safe, efficient performance every time you cook.
Conclusion: Keeping Your Knives Sharp for a Lifetime of Use
Maintaining a sharp knife set is an ongoing process that combines understanding, technique, and regular care. Hand-sharpening offers unmatched control and customization, allowing you to tailor the edge to each knife’s unique needs. By investing time in proper sharpening and maintenance routines, you ensure your knives remain safe, effective, and long-lasting for years to come. Remember, patience and consistency are key—each sharpened edge is a step toward culinary mastery. Now that you’re equipped with the knowledge and skills, take the next step: practice on your dullest knives, experiment with different tools, and develop your own rhythm. With time, sharpening will become a satisfying part of your culinary routine, empowering you to keep your entire collection in top shape. Happy sharpening!
Fall Picks
fall essentials
As an affiliate, we earn on qualifying purchases.