
TL;DR
Using a mandoline effectively requires setting it up properly, selecting the right blade and thickness, and maintaining steady, controlled pressure. Practice these techniques for uniform, attractive cuts that cook evenly and look professional.
Nothing ruins a beautiful salad or crisp chips faster than uneven slices. You’ve got the right ingredients, the perfect recipe, but your slices come out jagged or inconsistent. That’s where mastering your mandoline can transform your kitchen prep. It’s not just about speed; it’s about precision, safety, and confidence.
In this guide, you’ll learn how to set up your mandoline for perfect, even cuts every time. We’ll cover the best techniques, safety tips, and recent improvements in design that make slicing easier and safer. Whether you’re slicing cucumbers for a summer salad or potatoes for chips, these practical tips will help you cut with control and consistency.
Always secure your mandoline to a stable surface before use.
Adjust the thickness setting carefully for uniform slices, testing on small pieces first.
Use the food holder or hand guard religiously to protect fingers and ensure even pressure.
Practice with softer foods to build control and confidence.
Keep blades sharp and handle with care to prevent accidents and maintain slicing quality.
Mandoline Slicing Techniques for Even Cuts
Uniform slices cook at the same rate, present beautifully, and reduce waste. The formula is simple: stabilize the tool, choose the right blade, set the thickness, and glide with steady pressure.
Build consistency before the first slice
A stable base and a repeatable pressure point eliminate wobble, skewed cuts, and last-minute trimming. Test the setting on a small piece before committing the entire batch.
Stabilize the base
Place the mandoline on a flat, dry surface. Engage its non-slip feet or clamp so the frame cannot shift under pressure.
Fit the food holder
The guard protects fingers while creating a broad, consistent pressure point across the ingredient.
Set and test
Choose a thickness, confirm the dial or slider is locked, then make one test slice and inspect it edge to edge.
Square the ingredient
Trim uneven ends and divide oversized food into manageable pieces that sit securely inside the holder.
Check sharpness
A sharp stainless-steel blade cuts cleanly with less force. Dull blades invite pushing, tearing, and inconsistent thickness.
Long, smooth strokes beat speed
Keep the food aligned with the blade and move through the full stroke without jerking. Gentle consistency lets the blade—not your arm—do the cutting.
Align
Center the food and keep its cut face flat against the runway.
Anchor
Grip the holder securely while the other hand steadies the frame.
Glide
Apply gentle, even pressure through one continuous movement.
Reset
Return smoothly, maintain alignment, and repeat at the same tempo.
What drives uniformity?
Experienced cooks consistently identify setup and pressure as the dominant factors behind even slices.
Thickness spectrum
Match the cut to the dish, then test for structure, cooking time, and browning.
chips
all-purpose
hearty cuts
Basic versus advanced mandolines
More features do not automatically mean better results. Choose the model that supports your slicing frequency, storage space, preferred cuts, and safety needs.
| Feature | Basic model | Advanced model |
|---|---|---|
| Blade types | ~Straight slicing blade | ✓Straight, julienne, waffle, and grating options |
| Thickness control | ~Manual dial with broader increments | ✓Precise slider, dial, or digital readout |
| Safety features | ✗Basic hand guard | ✓Enhanced guard, safety lock, and non-slip base |
| Materials | ~Plastic body with stainless blade | ✓Durable plastics and higher-grade stainless steel |
| Storage | ✓Compact and simple | ~Often foldable, with extra blade storage |
| Best fit | ✓Occasional slicing and limited storage | ✓Frequent prep, varied cuts, and large batches |
A basic model can deliver excellent straight slices. Upgrade when precise adjustment, multiple cuts, sturdier construction, or enhanced safety features will make regular prep easier.
Practice from forgiving to firm
Start slowly with softer, evenly shaped foods. Watch the cut, feel the resistance, and adjust pressure or alignment one variable at a time. Consistency develops through deliberate repetition—not force.
Protect fingers. Preserve the edge.
Modern guards, non-slip bases, safety locks, and foldable designs reduce risk—but careful handling remains essential during slicing, cleaning, and storage.
Use the hand guard from the first slice to the last.
Stop before the ingredient becomes too small to secure.
Disassemble blades carefully and wash in warm, soapy water.
Dry thoroughly to prevent residue, corrosion, and dulling.
Engage the safety lock before cleaning or storing the tool.
Use a sharp knife as a slower alternative when needed.
How to Set Up Your Mandoline for Perfect, Even Slices
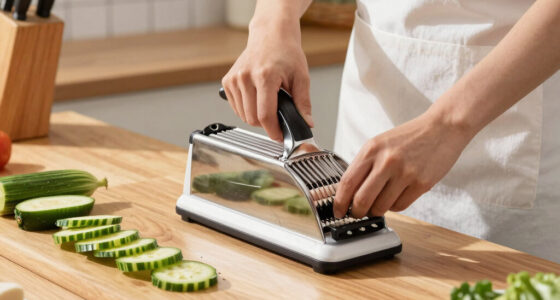
The first step to even slices? Proper setup. Place your mandoline on a stable, flat surface to prevent wobbling which can lead to uneven cuts. Clamping it down ensures it stays put, allowing you to focus on technique rather than stability issues. Using the hand guard or food holder isn’t just about safety—it also provides a consistent pressure point, which is crucial for uniform slices. When pressure varies, slices can become thicker or thinner, affecting cooking times and presentation.
Adjust the thickness dial until it clicks into your desired size. For most vegetables, a slice around 1/8 inch (3mm) works well, but you can go thinner for chips or thicker for hearty salads. Always double-check the setting before slicing because even a small misadjustment can cause uneven results. This precision matters because inconsistent slices can lead to uneven cooking—some pieces might burn while others remain underdone—and a less professional appearance.
When you’re ready to slice, keep the food steady, and apply even, gentle pressure. Don’t push too hard; let the blade do the work. If your mandoline has a safety lock or blade lock, engage it before use to prevent accidents. A stable setup and clear settings are the backbone of consistent, even slices. Proper setup minimizes the need for re-slicing or trimming, saving time and reducing waste, which is especially important when preparing large batches or working with expensive ingredients.

SupMaKin Safe Mandoline Slicer for Kitchen,Adjustable Potato Slicer 1-8 mm
- Safety Design: Built-in blades for safe slicing
- Adjustable Thickness: Slices from 0.1 to 8mm
- Quick and Easy: Fast, uniform slices with handle push
As an affiliate, we earn on qualifying purchases.
As an affiliate, we earn on qualifying purchases.
Choosing the Right Blade and Thickness for Your Cuts
Not all blades are created equal, and understanding their differences is key to achieving the desired results. Mandolines typically come with multiple blades designed for specific cuts—straight, julienne, waffle, and more. Selecting the appropriate blade and setting is not just about aesthetics; it affects cooking time, texture, and presentation. For example, thin slices (around 1/16 inch) are ideal for chips or delicate garnishes, but they can be fragile and more prone to tearing if the blade isn’t sharp or if the food isn’t firm enough. Conversely, thicker slices provide more structural integrity but may cook unevenly if not sliced uniformly.
Adjusting the thickness control—whether a dial, slider, or digital readout—is about precision. The tradeoff involves balancing thinness for presentation and texture against the risk of breakage or uneven slices. A thinner slice increases surface area, which can lead to faster cooking and browning, but also makes slices more delicate and susceptible to tearing if not handled carefully. Thicker slices are sturdier but may require longer cooking times or result in less uniform cooking if slices aren’t consistent in size. Testing on small pieces before committing to a full batch helps you find the optimal setting that balances these factors for your specific recipe and ingredients.

PrepSolutions Adjust-A-Slice Mandoline Slicer, Green – Adjustable Thickness, Perfect for Vegetables, Fruits, and More
- Product Includes: Adjust-A-Slice Mandoline in Green
- Adjustable Thickness: Customize slices from thin to thick
- Safety Features: Hand guard and non-slip base
As an affiliate, we earn on qualifying purchases.
As an affiliate, we earn on qualifying purchases.
Mastering the Technique: How to Push and Glide for Even, Consistent Slices
The key to even slices isn’t just about the blade; it’s about how you push and glide the food. Consistent, controlled movements ensure each slice is uniform. When starting, align the food properly against the blade, making sure it’s steady and positioned correctly to avoid skewed slices. Using your hand guard or food holder is essential—not only for safety but also because it helps you apply even pressure across the entire surface of the food.
Apply gentle, steady pressure as you push the food forward. The goal is to maintain a consistent force—too much pressure can cause uneven slices or damage the food; too little can lead to inconsistent thicknesses. Keep your hand steady and move smoothly in a continuous motion, like painting with long, confident strokes. Jerky or uneven pulls can cause variations in slice thickness, which may affect cooking and presentation. Practicing slow, deliberate pushes on softer vegetables like zucchini or cucumber builds muscle memory, helping you develop a natural feel for the right amount of pressure and speed. Over time, this controlled technique will become second nature, leading to more professional-looking results with less effort.

OXO Good Grips Handheld Mandoline Slicer with Non-Slip Handle for Kitchen
- Adjustable Slice Thickness: Sets to 1mm, 2.5mm, or 4mm
- Secure, Non-Slip Handle: Ensures comfortable, stable slicing
- Versatile Use: Slices directly onto plates, boards, or bowls
As an affiliate, we earn on qualifying purchases.
As an affiliate, we earn on qualifying purchases.
How to Use a Comparison Table to Pick the Best Mandoline for Your Needs
| Feature | Basic Model | Advanced Model |
|---|---|---|
| Blade Types | Straight only | Multiple (straight, julienne, waffle) |
| Thickness Adjustment | Manual dial | Precise slider/dial with digital readout |
| Safety Features | Basic hand guard | Enhanced guard, safety lock, non-slip base |
| Material | Plastic body, stainless blades | Stainless steel, high-durability plastics |
| Size & Storage | Compact, foldable options |
Choosing a mandoline isn’t just about features; it’s about understanding how those features impact your workflow and safety. A basic model might suffice for occasional use, but it can limit your options and increase the risk of uneven slices or accidents if it lacks safety features. Advanced models, with multiple blades and safety enhancements, enable more creative cuts and safer operation, especially when working with tougher foods or larger quantities. The choice depends on your cooking style, frequency of use, and importance of precision. Comparing these features side-by-side helps you identify which model aligns best with your needs, ensuring you invest in a tool that enhances your skills rather than complicates them.

Matfer Bourgeat Reversible Straight Waffle Blade for Mandoline 2000
- Model Number: 215085
- Material: Stainless Steel
- Reversible Blade: Yes
As an affiliate, we earn on qualifying purchases.
As an affiliate, we earn on qualifying purchases.
Practice Makes Perfect: Building Confidence for Even Slices
Consistent practice is essential for mastering mandoline slicing. It’s not just about repetition; it’s about developing a nuanced feel for how much pressure to apply, the right speed, and the optimal angle. Starting with forgiving foods like cucumbers or zucchini allows you to focus on control without the frustration of tearing or uneven slices. As your confidence grows, gradually challenge yourself with tougher or more complex ingredients. Pay attention to your technique: if slices aren’t uniform, adjust your angle slightly, or modify your pressure. Over time, your hand will develop an intuitive sense of how to manipulate the mandoline effectively, turning a potentially hazardous tool into an extension of your culinary skillset. Remember, small, consistent improvements lead to professional-looking results, and patience is key.
Safety First: How to Keep Your Fingers Intact and Your Mandoline Sharp
Prioritizing safety isn’t just about avoiding accidents; it’s about ensuring your mandoline remains a reliable tool. Always use the hand guard or food holder provided—this keeps your fingers away from the sharp blades and provides a stable pressing point, which is crucial for uniform slices. When handling blades, disassemble and clean with a brush or cloth, never run your fingers along the edges, as dull or damaged blades can slip unexpectedly, increasing injury risk. Store blades in a designated, secure container—loose blades can cause cuts if mishandled. Keeping your blades sharp is equally important: dull blades require more force, which increases the chance of slips and accidents. Regularly sharpening or replacing blades ensures cleaner cuts with less effort, reducing the risk of injury and improving slice quality. Remember, a sharp, well-maintained blade is safer because it slices smoothly, decreasing the need for excessive force that can lead to mishaps.
Frequently Asked Questions
How do I ensure all slices are the same thickness?
Set the thickness dial precisely before each batch, test on a small piece, and maintain steady pressure as you push the food forward. Regularly check slices to keep consistency.What should I do if my slices are uneven?
First, verify your blade setting. Then, focus on maintaining a consistent pressure and speed. Practice on softer foods to build control before tackling tougher produce.How often should I sharpen my mandoline blades?
Sharpen blades whenever you notice slices becoming ragged or uneven. Most blades last several months with regular use—sharpening keeps cuts clean and safe.Can I use a mandoline for fruits like apples or pears?
Absolutely. Fruits are often softer and easier to slice evenly. Just ensure they’re firm and stable, and adjust the thickness for your desired presentation.Are there safety tips for cleaning the blades?
Yes. Always disassemble blades carefully, use a brush or cloth, and avoid running fingers along sharp edges. Store blades safely to prevent accidental cuts.Conclusion
Getting perfect, even slices with a mandoline hinges on setup, technique, and practice. Take the time to adjust your tool correctly, use safety features, and develop a steady hand. With these tips, your slices will rival those of professional kitchens—beautiful, uniform, and safe.
Think of your mandoline as an extension of your hand—trust it, control it, and it will elevate your home cooking. Now, go slice with purpose and precision.