
TL;DR
Making fresh pasta without a machine is straightforward and relies on fundamental skills like kneading and rolling. Using simple tools and quality ingredients, you can produce pasta with a rich texture and flavor, perfect for off-grid kitchens. It’s fast, satisfying, and highly adaptable for flavor and shape.
Use the right flour—’00’ or all-purpose—for tender, elastic pasta.
Knead thoroughly by hand to develop gluten and improve texture.
Rest the dough at least 30 minutes to make rolling easier and more even.
Roll gradually, using a rolling pin and turning frequently for thin sheets.
Fresh pasta cooks quickly—1 to 3 minutes—so keep a close eye and taste test.
Why Hand-rolling and Kneading Make Better Pasta
Hand kneading develops gluten more thoroughly than machines, giving your pasta that perfect chewy bite. When you knead by hand, you actively feel the dough’s elasticity and hydration level—this tactile feedback allows you to fine-tune the dough’s consistency, which is crucial for achieving the ideal texture. Over-kneading can make the pasta tough, while under-kneading results in a fragile, crumbly dough. For example, I once made a batch where I didn’t knead enough, and the pasta was too soft and broke easily when cooked. Proper kneading ensures uniform gluten development, which translates into a consistent, resilient pasta that holds sauce well. Relying on your hands also allows you to adjust the dough’s hydration on the fly—adding a little flour if it’s sticky, or a splash of water if it’s too dry—giving you greater control over the final product. This hands-on approach fosters a deeper connection to the process, producing pasta with a better texture and mouthfeel than most machine-made varieties. It’s a skill that emphasizes the importance of feel and intuition in cooking, leading to a more satisfying result.

Italian Hand Made Mattarello Pasta Rolling Pin and Dough Scraper Set by Verve CULTURE
As an affiliate, we earn on qualifying purchases.
As an affiliate, we earn on qualifying purchases.
Step-by-Step: Making Pasta Dough by Hand
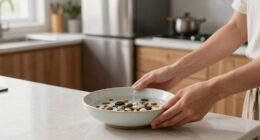
- Place 2 cups (250 grams) of all-purpose flour or ’00’ flour on a clean surface or in a large bowl. Using a well-formed mound helps control the mixing process and prevents flour from spreading uncontrollably, which can lead to uneven hydration. This step isn’t just about organization—it influences how evenly the dough develops. A well-formed mound acts as a buffer, giving you control over the hydration process and reducing the risk of dry patches or overly sticky spots. It’s about creating a controlled environment where you can gradually incorporate moisture, leading to a more cohesive and manageable dough.
- Make a well in the center and crack 2 large eggs into it. Add a pinch of salt and a tablespoon of olive oil if desired. The well acts as a contained environment for mixing, reducing mess and allowing you to incorporate ingredients gradually, which is key for developing a smooth dough. This gradual approach helps prevent the eggs from spilling out and ensures even distribution. It also gives you a chance to observe how the ingredients interact—if the eggs are too runny or thick, you can adjust the amount of flour accordingly. This step’s importance lies in controlling the moisture content, which directly impacts how elastic and workable your dough will be.
- Gradually mix the eggs into the flour with a fork or your fingertips, drawing flour from the edges inward. This slow integration helps distribute moisture evenly, preventing lumps and ensuring a uniform dough. Rushing this step can lead to uneven hydration, resulting in inconsistent texture and difficulty rolling out the dough. Proper mixing at this stage sets the foundation for a smooth, pliable dough. It’s a delicate balance—too much mixing too quickly can develop excess gluten prematurely, making the dough tough, while too little can leave it crumbly. Take your time; patience here ensures the dough’s structure is built correctly from the start.
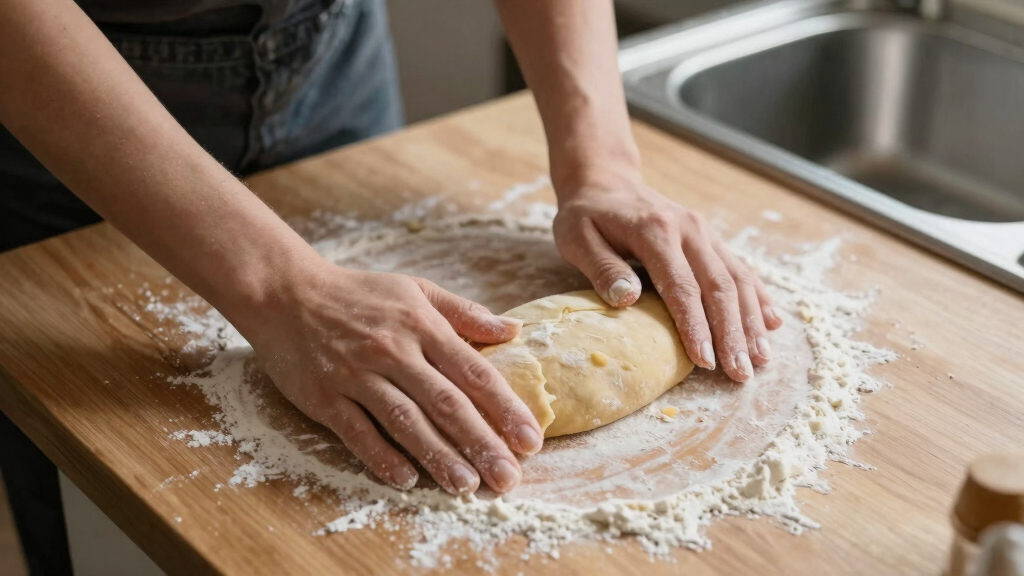
- When the mixture starts to come together, knead it by hand until a cohesive dough forms, about 8-10 minutes. Proper kneading aligns the gluten strands, giving the dough elasticity and strength necessary for shaping and cooking. Under-kneaded dough can be too fragile, tearing easily and resulting in uneven cooking. Over-kneaded dough, while less common, can become tough and chewy. This process is about finding the right balance—feeling the dough’s resistance and elasticity as you work. Feel free to add a little water or flour during kneading if needed to reach the right consistency. Developing gluten thoroughly through kneading is what transforms a simple mixture into a resilient, elastic dough capable of holding its shape during cooking.
- Wrap the dough in plastic and let it rest for at least 30 minutes to relax the gluten. Resting is essential because it allows the gluten strands to loosen, making the dough easier to roll thinly and uniformly. Skipping this step often results in a tough, difficult-to-roll dough that can tear or spring back, compromising the final texture and appearance of your pasta. Resting also allows the flour to fully hydrate, which enhances elasticity and prevents cracking during rolling. It’s a simple step but one that significantly impacts the quality of your final product—patience here pays off in smoother, more delicate sheets of pasta.

OXO Good Grips Stainless Steel Multi-Purpose Scraper & Chopper, Dough Cutter for Pizza, Bread and Cookie Dough, Multi-Purpose Vegetable Chopper, Dishwasher-Safe Kitchen Essential
Versatile kitchen essential: This stainless steel scraper, dough cutter and vegetable chopper makes portioning pizza dough, cutting cookie…
As an affiliate, we earn on qualifying purchases.
As an affiliate, we earn on qualifying purchases.
How to Roll Thin Pasta Without a Machine
Use a sturdy rolling pin and work slowly from the center outward. Keep turning the dough to maintain even thickness, applying gentle, consistent pressure. Starting from the middle and working outward prevents the dough from becoming unevenly thick or thin at the edges. This technique ensures that the dough’s structure is uniform, which is crucial for even cooking and aesthetic appeal. Rushing the process often results in uneven layers that can cause tears or uneven cooking, especially if parts are too thick. Aim for about 1-2 mm thickness, which balances delicate texture with structural integrity. When held up to the light, the sheet should be almost translucent, indicating it’s thin enough for most pasta types. Achieving this thinness by hand requires patience—rushing can lead to uneven, thick spots that are prone to tearing or overcooking, affecting both appearance and mouthfeel. The slow, deliberate process enhances control and results in a more refined, professional-looking sheet.

Wooden Pastry Board, Cutting Board with Counter Edge, Reversible Kneading Board for Rolling Dough Bread, Chopping Board with Lip 24X 15.8 in (bamboo D)
❤️【Large Size】: This wooden pasta board measures 24 x 15.8 x 2.5 INCH and is 2-in-1: One side…
As an affiliate, we earn on qualifying purchases.
As an affiliate, we earn on qualifying purchases.
Shaping and Cutting Pasta by Hand
Once your dough is rolled out, lightly dust it with flour to prevent sticking. Use a sharp knife or pizza cutter to slice into strips—fettucine, tagliatelle, or pappardelle. For wider noodles, fold the sheet over lightly to create layers, then cut with a steady hand. Folding the dough before cutting helps ensure even widths, especially for thicker pasta types, and allows you to make consistent shapes. This technique of folding and cutting isn’t just about convenience; it also influences the pasta’s final texture and how it interacts with sauces. Even widths ensure uniform cooking, preventing some strands from overcooking while others remain underdone. For ridges or textured edges, pressing a fork along the edges or rolling the strips lightly can add rustic charm and better sauce adherence. Manual shaping allows for custom sizes and shapes, which can enhance the pasta’s texture, cooking time, and presentation—adding a personal touch that elevates homemade pasta from ordinary to artisanal.

Etekcity Food Kitchen Scale, Digital Grams and Ounces for Weight Loss, Baking, Cooking, Keto and Meal Prep, LCD Display, Medium, 304 Stainless Steel
𝗘𝗳𝗳𝗼𝗿𝘁𝗹𝗲𝘀𝘀 𝗪𝗲𝗶𝗴𝗵𝗶𝗻𝗴: Supports 5 units (oz/lb:oz/fl'oz/g/mL), tare function, and includes 2 AAA batteries for hassle-free operation
As an affiliate, we earn on qualifying purchases.
As an affiliate, we earn on qualifying purchases.
Cooking and Storing Your Handmade Pasta
Drop your pasta into boiling, salted water. Fresh pasta cooks fast—about 1-3 minutes. Watching for it to float and become tender is a good indicator, but tasting is the best way to judge doneness. Because fresh pasta is so delicate, overcooking can turn it into mush almost instantly, so vigilance is key. To store, lightly dust with flour and keep in a paper bag in the fridge for 1-2 days; this prevents sticking and helps maintain freshness. For longer storage, freeze individual strands on a tray, then transfer to a sealed bag. Freezing prevents the pasta from sticking together and preserves its texture, which is especially important when cooking from frozen—avoiding breakage and ensuring the pasta retains its tender bite. Proper handling during storage, such as gently tossing with flour and stacking carefully, helps prevent breakage and maintains the pasta’s integrity. This way, you can enjoy fresh-tasting noodles even after days or weeks off-grid, with minimal loss of quality.
Tips for Perfect Results Every Time
- Use high-quality flour for better texture and flavor. Different flours absorb water differently, so choosing a good-quality, finely milled flour like ’00’ can make a noticeable difference in the dough’s elasticity and smoothness. High-quality flour provides a better protein structure, which translates into a more resilient and tender pasta. Cheaper flours may contain more impurities or uneven particle sizes, leading to inconsistent dough and a less refined final product. Investing in good flour is like investing in the foundation of your pasta—stronger, more elastic dough results in a better mouthfeel and more reliable shaping.
- Don’t rush kneading—gluten needs time to develop fully, which is critical for a resilient, tender pasta. Proper kneading enhances the dough’s elasticity, making it easier to roll thin and cook evenly. Rushing this step can lead to underdeveloped gluten, resulting in a fragile, crumbly dough that tears easily. Patience during kneading also allows you to feel the dough’s progress, helping you recognize when it’s ready. This tactile feedback is essential—overworking can make the dough tough, while underworking leaves it weak. Developing gluten thoroughly during kneading is a tradeoff between time and quality—taking your time yields a more consistent, satisfying pasta.
- Rest your dough at least 30 minutes, ideally up to an hour. Resting allows the gluten strands to relax and the flour to fully hydrate, which makes rolling easier and results in a more delicate, uniform sheet. Without adequate resting, the dough may be elastic and spring back when rolled, leading to uneven thickness and potential tearing. Resting also enhances the dough’s elasticity, making it more manageable and less prone to cracking. This step is often overlooked, but it’s crucial for achieving a smooth, tender pasta with a refined texture. Patience here is an investment—rested dough produces a more professional-looking and better-tasting final product.
- Roll gradually, increasing thinness in small steps. This technique prevents tearing and uneven thickness, which can cause uneven cooking and texture inconsistencies. Rushing the process by trying to get the dough as thin as possible in one pass increases the risk of tearing, especially at the edges. Incremental thinning allows the gluten to stretch evenly, resulting in a uniform sheet that cooks evenly and looks professional. It also gives you better control, reducing frustration and the likelihood of mistakes. The key is patience—working slowly and methodically ensures the best possible outcome for your homemade pasta.
- Embrace imperfections—authentic, handmade pasta has character and charm. Slight variations in shape and thickness are signs of craftsmanship and add to the rustic appeal. These imperfections aren’t flaws; they’re proof of the personal effort and skill involved. They also contribute to the pasta’s texture—some unevenness can create tender pockets or varied bite, enhancing the eating experience. Embracing these quirks makes each batch unique and more meaningful, turning a simple task into a creative expression. Remember, the beauty of handmade pasta isn’t perfection but the connection to tradition and your own culinary journey.
Compare Making Pasta With and Without a Machine
| Feature | With Machine | Without Machine |
|---|---|---|
| Ease of Rolling | Very easy, even thickness | Requires patience, careful technique |
| Time Needed | Faster, about 10-15 mins | Longer, about 20-30 mins |
| Control Over Thickness | Very precise | Less precise, but customizable |
| Cost | Requires purchase | Only basic tools needed |
Making pasta by hand lets you connect more deeply with each step, feeling the dough’s elasticity and adjusting as you go. It’s slower but deeply satisfying—plus, no extra gadgets needed. This method also fosters a more intuitive understanding of the dough’s behavior, allowing for adjustments based on environmental factors like humidity or flour type, which can significantly impact the final texture and shape of your pasta. The process becomes an act of mindfulness—each stretch and fold connects you more intimately to the food you’re creating, adding emotional value to your meal.
Troubleshooting Common Issues
If your dough is sticky, sprinkle with a little more flour and knead briefly—this prevents tearing and helps achieve a firm, elastic consistency. Too dry? Add a tiny splash of water or a drizzle of olive oil to restore moisture without compromising the dough’s structure. When rolling, uneven thickness is normal at first; practice and patience will improve consistency. Remember, fresh pasta is delicate—handle with care, especially when drying or freezing. Overworking or rushing can cause the gluten network to weaken, leading to tears or a rubbery texture. Recognizing these issues and understanding their causes helps you make informed adjustments. For instance, adding too much water can make the dough sticky, but a small amount of flour can restore balance. Conversely, over-drying the dough can make it brittle; a tiny splash of water during kneading can rehydrate it. Troubleshooting is about balancing these tradeoffs—knowing when to add flour or water ensures your pasta maintains the desired elasticity and texture despite common pitfalls.
Frequently Asked Questions
Can I make pasta without eggs?
Yes, eggless pasta is possible. Replace eggs with water or a little olive oil, but keep in mind it may be less elastic. You might need to add a bit more flour to achieve the right consistency. This tradeoff can affect the final texture, making it slightly denser or more brittle, so adjusting hydration carefully is key to success. Without eggs, the dough may be less resilient and more prone to tearing, especially when rolling thin. However, with proper hydration and patience, you can still produce flavorful, satisfying pasta. The key is to compensate for the lack of eggs by adjusting moisture and handling the dough gently, ensuring it remains workable and elastic.
What’s the best flour to use for homemade pasta?
’00’ flour, traditional in Italy, produces a silky, tender dough with excellent elasticity. All-purpose flour works fine too, especially if you’re after a more rustic or hearty texture. Each flour type influences the dough’s behavior—’00’ flour absorbs water more consistently and develops a finer gluten network, resulting in a smoother, more delicate pasta that’s easier to roll thin and cook evenly. Using high-quality flour also enhances flavor and texture, making your pasta more authentic. Experimenting with different flours can help you find the perfect balance between elasticity, flavor, and ease of handling, allowing you to tailor your pasta to your preferences and the dishes you plan to make.
How thin should I roll my pasta?
Aim for about 1-2 mm thickness—almost translucent when held up to the light. Achieving this thinness is crucial because it affects cooking time, texture, and appearance. Thinner sheets cook faster and tend to be more delicate, ideal for stuffed pasta or light sauces. Thicker pasta retains more bite and can handle heartier sauces, but it also takes longer to cook and may be chewier. The tradeoff involves patience and technique: rolling too quickly or unevenly can cause tears or inconsistent cooking. Using a gradual approach—working from thicker to thinner in small increments—helps develop an even, resilient sheet. The goal is to balance delicate texture with structural integrity, ensuring your homemade pasta looks professional and tastes perfect.
How long can I store fresh pasta?
Use it within 1-2 days for optimal freshness, as moisture loss can affect texture and flavor. If you need to store it longer, freeze individual strands on a tray to prevent sticking, then transfer to a sealed bag. Freezing helps preserve the shape and texture by preventing the pasta from sticking together or drying out. Proper storage—light dusting with flour and keeping in a paper bag or container—minimizes breakage and maintains the tender, al dente quality. When cooking from frozen, don’t thaw—simply drop the frozen strands directly into boiling water. This method ensures minimal damage and helps retain the pasta’s integrity. Proper storage and handling are key to enjoying freshly made pasta days or even weeks later, especially in off-grid settings where fresh ingredients are less accessible.
Any tips for a beginner making pasta by hand?
Start with small batches to build confidence, and don’t rush the kneading process—gluten needs time to develop fully, which is crucial for elasticity. Take your time rolling, working gradually from thicker to thinner sheets, and practice patience—your technique will improve with each attempt. Embrace imperfections—they add character and authenticity. Each batch is a learning experience, and over time, your control and finesse will grow. Feel the dough’s resistance and elasticity—this tactile feedback guides you toward better results. Remember, the process is as much about enjoying the craft as it is about the final product. With patience and practice, making pasta by hand becomes a rewarding ritual, connecting you to a centuries-old tradition of craftsmanship and flavor.