
TL;DR
You can make nut butter at home using simple tools like a mortar and pestle or a manual grinder. It takes about 10-20 minutes of steady effort, producing fresh, customizable spreads without preservatives. Patience and proper prep lead to the best results.
Forget store-bought jars filled with stabilizers and preservatives. Making nut butter by hand is a rewarding process that connects you directly with your food. It’s about patience, technique, and enjoying a fresh, personalized spread that’s healthier and often tastier.
If you’ve ever wanted to craft your own nut butter—be it creamy almond or chunky peanut—this guide will walk you through the practical steps. Plus, you’ll learn how to tweak flavors, manage consistency, and store your homemade creation for maximum freshness.
Choose fresh, quality nuts—roasted or raw depending on flavor preference.
Patience matters—hand-grinding takes 10-20 minutes but rewards with control and freshness.
Use a sturdy mortar and pestle or manual grinder for best results—avoid makeshift tools for smoothness.
Adjust texture with small amounts of oil; flavor with salt, honey, or spices as you go.
Store your nut butter in an airtight container, in a cool, dark place, for maximum shelf life.
Choose the Best Nuts for Your Nut Butter
Start with quality nuts—raw or roasted, your choice. Roasting boosts flavor and oil release, making the process easier. For example, lightly toasted almonds develop a rich aroma and a buttery texture that’s perfect for spreading.
Opt for fresh, unsalted nuts to control the salt and flavor profile. If you prefer sweet, add a pinch of sea salt or a drizzle of honey later in the process. Remember, your nut butter’s flavor hinges on the nuts you pick.

Victoria Manual Cast Iron Grain Mill with High Hopper, Premium Corn-Grinding Mill and Grain Grinder, Made in Colombia
PREMIUM CAST IRON GRINDER: Known as a “molino para moler maiz,” our cast iron mill makes grinding easy…
As an affiliate, we earn on qualifying purchases.
As an affiliate, we earn on qualifying purchases.
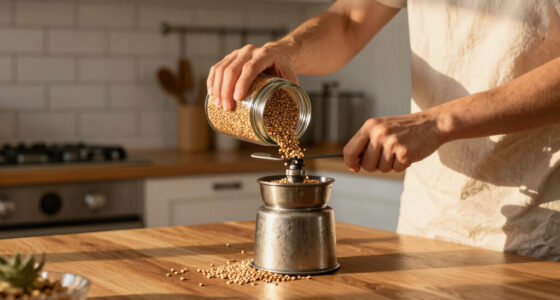
Prep the Nuts for Easy Grinding
Lightly toast your nuts on a baking sheet at 350°F (175°C) for 8-10 minutes. This step releases oils and deepens flavor, which is essential because it helps break down cell walls in the nuts, making the oils more accessible during grinding. Cooling prevents excess oil loss and makes handling easier, ensuring you don’t lose valuable flavor and texture potential. The choice of roasting level and timing impacts not only flavor but also the ease of achieving a smooth or chunky butter—over-roasting can lead to burnt flavors, while under-roasting might leave flavor underdeveloped.

HIC Kitchen Mortar with Pour Spout and Pestle, Fine Porcelain, 4.25-Inch, Spice Herb Grinder, Pill Crusher, Nut Butter Maker
HIC Kitchen Mortar With Pour Spout And Pestle: Grinds spices, herbs, nuts, seeds, and pills into fine paste…
As an affiliate, we earn on qualifying purchases.
As an affiliate, we earn on qualifying purchases.
Pick Your Hand Tool and Get Grinding
The best tools for hand-making nut butter are a sturdy mortar and pestle or a manual grinder. A mortar allows you to control the pressure and knead the nuts, which gradually releases their oils and creates a paste. This method is advantageous because it offers a tactile sense of progress and allows for adjustments in texture, but it requires patience.
Choosing the right tool depends on your batch size and desired texture. A mortar and pestle is ideal for small batches and a more rustic texture, while a manual grinder can handle larger quantities more efficiently. Remember, the process involves physically breaking down the nuts, so expect to spend about 10-20 minutes of steady effort to reach your preferred consistency. This time investment is what makes homemade nut butter so satisfying—you’re actively transforming simple ingredients into a personalized spread.

Stainless Steel Nut Butter Mixer – Multipurpose Peanut, Almond & Jam Stirrer
【Multipurpose Blender】The peanut butter blender is perfect for mixing peanut butter and jam in 1 jar, you can…
As an affiliate, we earn on qualifying purchases.
As an affiliate, we earn on qualifying purchases.
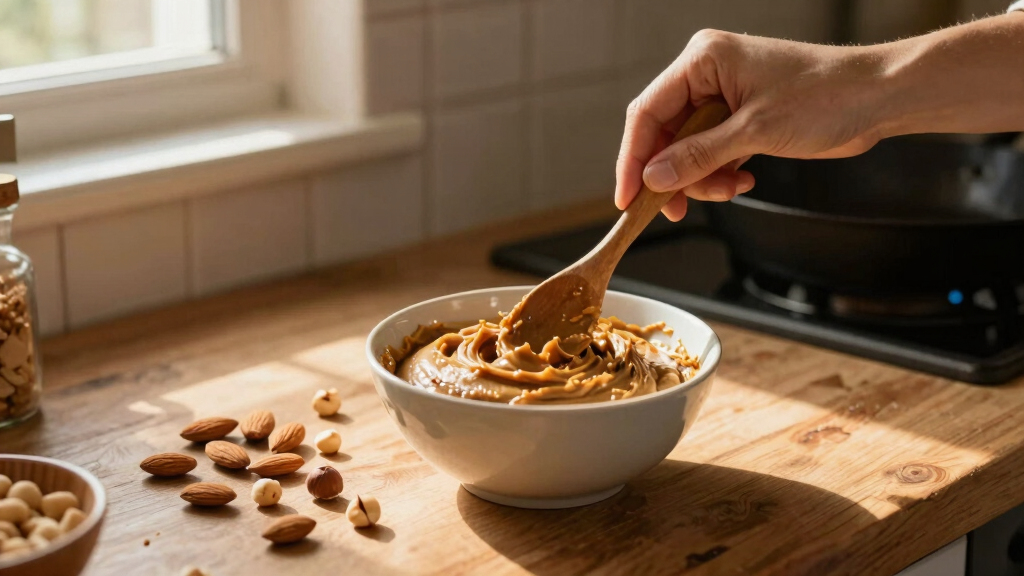
Master the Grinding Technique for Creamy or Chunky Butter
Start by crushing nuts into smaller pieces with your pestle or grinder. Use a back-and-forth or circular motion, applying steady, firm pressure. As the nuts break down, knead and press repeatedly—this releases their natural oils, which is crucial for achieving that smooth, creamy texture. The longer you grind, the more the oils are liberated, resulting in a richer, more cohesive butter.
If you prefer a chunky style, stop grinding sooner or add chopped nuts at the end; this preserves larger nut pieces for added texture. For a creamy butter, continue grinding until the mixture becomes glossy and smooth, scraping down sides regularly. The tradeoff is time—more grinding yields a creamier result but requires patience. Understanding this process helps you tailor your nut butter to your exact preference and ensures you maximize flavor and texture with each batch.

WOODSTOCK FARMS Fresh Grind Almond Butter, 1 LB
It turns out that butter and peanut butter are not the only types of butter that you can…
As an affiliate, we earn on qualifying purchases.
As an affiliate, we earn on qualifying purchases.
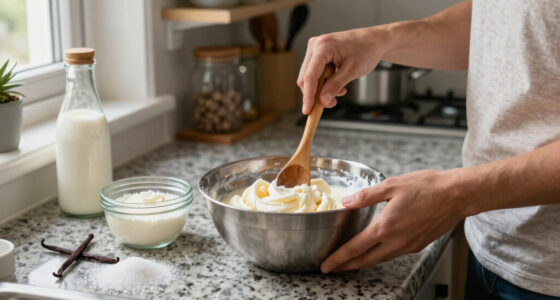
Adjust Texture and Flavor with Simple Additions
Homemade nut butter is highly adaptable. If it’s too thick or stiff, stirring in a teaspoon of coconut or vegetable oil can help loosen it, making it easier to spread and improving mouthfeel. When adding flavor, think beyond just salt—consider adding a teaspoon of honey, cinnamon, or cacao nibs to enhance complexity. Taste as you go to find the perfect balance, understanding that these additions can significantly change the final profile.
For example, incorporating a splash of maple syrup not only sweetens but also adds a subtle depth, transforming basic peanut butter into a more gourmet spread. The key is to add small amounts gradually, tasting frequently, so you don’t overpower the natural nut flavor. This customization allows you to create a spread that aligns perfectly with your taste preferences and intended uses, whether for toast, smoothies, or baking.
Store Your Nut Butter for Freshness and Longevity
Transfer your finished nut butter into a clean, airtight jar or container. Proper storage is vital because it preserves the oils and prevents spoilage. Keep it in a cool, dark place—like a pantry—or refrigerate for longer shelf life, typically up to a month or more. The cool environment slows down oxidation and mold growth, which can deteriorate the quality.
Imagine a thick, homemade peanut butter nestled in your jar, ready to spread on toast or stirred into oatmeal. Proper storage ensures that your nut butter retains its fresh flavor, smooth texture, and nutritional benefits for as long as possible. Remember, homemade nut butters lack preservatives, so mindful storage maximizes their freshness and your enjoyment.
Compare Hand Tools for Making Nut Butter
| Tool | Ease of Use | Control Over Texture | Best For |
|---|---|---|---|
| Mortar and Pestle | Moderate | High | Small batches, chunky or creamy |
| Manual Grinder | Easy | Moderate | Consistent texture, larger batches |
| Rolling Pin & Bag | Challenging | Low | Crushing nuts for small quantities |
Frequently Asked Questions
How long does it take to make nut butter by hand?
Expect about 10-20 minutes of steady work, depending on the nut type and your technique. Patience is key, but the process is straightforward and rewarding.
Can I make nut butter without a grinder or mortar and pestle?
While traditional tools give the best results, you can crush nuts with a sturdy rolling pin inside a plastic bag. However, achieving a smooth, creamy texture is more challenging without proper equipment. The tradeoff is that you may end up with a chunkier, more rustic spread, which can be charming but less uniform.
How do I prevent my nut butter from becoming too oily or dry?
Proper roasting helps develop the oils in nuts, making grinding easier and the final butter richer. Gradually grinding and storing in airtight containers slow oxidation and oil separation. If your butter becomes oily, stir in a little more neutral oil; if it’s dry or crumbly, add a tiny splash of oil to restore creaminess. These adjustments help maintain a balanced texture, ensuring your nut butter stays delicious and spreadable.
What if my nut butter is too thick or crumbly?
Mix in a small amount of coconut or vegetable oil to loosen the texture. Continue kneading or grinding until it reaches your preferred creaminess. This simple addition can transform a stubborn batch into a smooth, spreadable delight, especially if you want a consistency similar to store-bought varieties.
Can I flavor my nut butter with spices or sweeteners?
Absolutely. Incorporate salt, honey, cinnamon, or cacao nibs during the grinding process. Tasting as you go helps you achieve a flavor profile that matches your preferences. These additions can elevate your nut butter from basic to gourmet, making it uniquely suited for your taste and culinary uses.
Conclusion
Making nut butter by hand isn’t quick, but it’s deeply satisfying. It’s a simple skill that reconnects you with your food and lets you craft a spread tailored exactly to your taste.
Next time you crave that rich, nutty flavor—reach for your mortar or grinder, take your time, and enjoy the process. That fresh, homemade jar will be worth every minute of effort.