
TL;DR
Making nut butter by hand is doable with basic tools like a mortar and pestle or rolling pin. It takes 10-30 minutes and lets you control flavor, texture, and ingredients, all without electric gadgets.
High-quality, roasted nuts create richer, smoother butters and are easier to grind by hand.
Patience is key — manual nut butter making can take from 10 to 30 minutes, depending on tools and nuts.
Start with small batches and small tool adjustments to master the process without frustration.
Adding flavors or oils can customize your nut butter, but do so gradually to avoid spoilage or texture issues.
Proper storage in airtight containers keeps homemade nut butters fresh and tasty for weeks.
Pick the Right Nuts to Make Your Perfect Nut Butter
Choosing high-quality nuts makes all the difference. You can use raw or roasted nuts like almonds, peanuts, cashews, or hazelnuts. Roasting enhances flavor by developing complex aromas and breaking down cell walls, which releases more oils—crucial for achieving a creamy texture. Raw nuts, while milder, retain more of their natural nutrients and flavor profiles, but often require more effort to grind into butter. The choice impacts not just taste but also the richness and consistency of your final product—roasted nuts tend to yield a more buttery, smooth butter, whereas raw nuts can result in a coarser, more textured spread. Understanding these tradeoffs helps you tailor your nut butter to your preferences and patience level.
Keep in mind: fresh, high-quality nuts result in better flavor and a smoother butter. If you’re aiming for a more intense flavor, roast nuts yourself at 350°F for about 10 minutes, stirring halfway. Let them cool completely before processing to prevent excess oil release, which can make your butter greasy. The roasting process is a key step that unlocks deeper flavors but also slightly reduces the nutritional content, so balance your priorities accordingly.

Victoria Manual Cast Iron Grain Mill with High Hopper, Premium Corn-Grinding Mill and Grain Grinder, Made in Colombia
PREMIUM CAST IRON GRINDER: Known as a “molino para moler maiz,” our cast iron mill makes grinding easy…
As an affiliate, we earn on qualifying purchases.
As an affiliate, we earn on qualifying purchases.
Prep the Nuts for Easy, Effortless Grinding
Preparation boosts your chances of success. Coarsely chopping nuts with a sharp knife makes manual grinding easier by increasing surface area, which helps the nuts break down faster and more evenly. This step is especially important for larger or denser nuts like hazelnuts or almonds. Roasting nuts beforehand not only heightens flavor but also softens the oils, making them more accessible during grinding—a vital factor when working without electric tools. Let roasted nuts cool completely to avoid excess oil release, which can turn your butter oily or grainy. Proper preparation reduces the effort needed and helps achieve a smoother, more uniform spread, saving you time and frustration.
If you want a smoother butter, consider crushing nuts with a rolling pin inside a plastic bag first. This creates smaller, more manageable pieces that require less effort to grind into a paste. Additionally, working in small batches or with smaller quantities allows for more control over the process, reducing the risk of overexertion or uneven textures. Keep your workspace clean and your tools dry to prevent slipping and ensure consistent results.

HIC Kitchen Mortar with Pour Spout and Pestle, Fine Porcelain, 4.25-Inch, Spice Herb Grinder, Pill Crusher, Nut Butter Maker
HIC Kitchen Mortar With Pour Spout And Pestle: Grinds spices, herbs, nuts, seeds, and pills into fine paste…
As an affiliate, we earn on qualifying purchases.
As an affiliate, we earn on qualifying purchases.
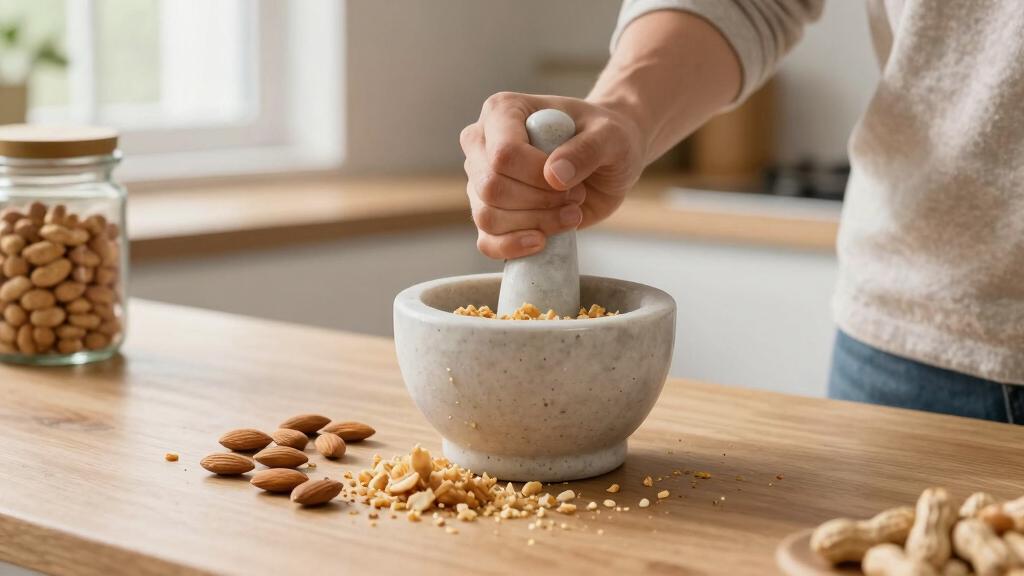
Choose the Right Tool — Mortar, Pestle, or Rolling Pin?
Every tool offers different advantages and tradeoffs. A mortar and pestle provide tactile control, allowing you to feel the consistency and adjust pressure accordingly. They’re ideal for small batches and can produce a rich, textured butter, but require patience—sometimes taking 15-20 minutes to reach a smooth consistency, especially with denser nuts. The manual effort involved encourages a mindful process, where you can gauge when to stop grinding based on texture preferences. This method allows for a nuanced control over the final texture, but the tradeoff is time and physical effort. It’s best suited for small quantities or when you want to engage more directly with your ingredients.
Alternatively, a rolling pin combined with a plastic bag can crush nuts into smaller pieces more quickly, reducing initial effort. If you have a hand-held grinder or a manual food mill, these can significantly speed up the process and produce smoother results with less fatigue. The key is maintaining steady, consistent pressure and frequently scraping down the sides to prevent sticking and uneven grinding. Each tool influences the final texture and flavor development—choosing the right one depends on your patience, quantity, and desired outcome.

Peanut Butter Stirrer, 11.8 Inch Stainless Steel Nut Butter Mixer Peanut Butter Stirring Tool Drill Nut Butter Stirrer Fast Mixing Stirrer Utensil for Mixing Various Peanut Butter Jam
Package Content: You will receive 1 piece of peanut butter stirrer at the size of 30x3x3cm/11.8×1.18×1.18in. The compact…
As an affiliate, we earn on qualifying purchases.
As an affiliate, we earn on qualifying purchases.
Step-by-Step: How to Turn Nuts into Nut Butter by Hand
- Start with roasted, cooled nuts. Coarsely chop or crush them to increase surface area, making grinding easier and more efficient.
- Place nuts into your chosen tool. Use steady, consistent pressure to grind, pausing frequently to scrape down sides and check texture. Patience here is key, as manual grinding can take 10-30 minutes depending on the nuts and tools. This time allows the natural oils to be released gradually, transforming the mixture from coarse pieces into a smooth, cohesive paste. Rushing this process can lead to uneven textures or burnt flavors if overheating occurs. The gradual breakdown is essential for developing a rich, creamy consistency and maximizing flavor extraction.
- Continue grinding and scraping, gradually breaking down the nuts into a paste. Watch for the oils to release, which signals that your butter is developing its rich, creamy texture. If needed, add a pinch of salt, a drizzle of honey, or a splash of oil to enhance flavor and smoothness—these additions can also help improve the texture, but should be added gradually to avoid over-thinning. Recognizing the subtle cues of oil release and texture change is crucial for achieving professional-quality results without electric equipment.
- Store your nut butter in an airtight jar in a cool, dark place. Use within 2-3 weeks for optimal freshness, and always use clean utensils to prevent spoilage. The texture may vary slightly over time as oils can separate; stirring before use helps maintain a uniform spread. This process not only yields a fresh, flavorful product but also deepens your appreciation for the craft of food preparation, emphasizing the importance of patience and attention to detail.

Shea Butter Body Butter Making Kit – DIY Kits for Adults (Raw Shea Butter, Almond Oil, Coconut Oil, 2 Jars) & Recipe Card with Link to Video Tutorial – Natural Whipped Body Lotion Making Kit
USDA ORGANIC CARRIER OIL KIT – Organic Almond Oil & Coconut Oil are perfect carrier oils, easily scented…
As an affiliate, we earn on qualifying purchases.
As an affiliate, we earn on qualifying purchases.
Troubleshooting: How to Fix Common Nut Butter Problems
If your nut butter is too dry or crumbly, try adding a small amount of oil (like peanut or neutral oil) and continue grinding. The oil helps to loosen the mixture, making it easier to achieve a smooth, spreadable consistency. Overly oily results, on the other hand, often indicate that too much oil has been added or that the nuts were excessively roasted, releasing too many oils prematurely. To fix this, reduce added fats and ensure nuts are properly cooled after roasting to prevent excess oil from being released during grinding. If it’s too gritty, keep grinding—time and patience are your best friends here. The natural oils in nuts will gradually help smooth out the texture as you persist. Recognizing these issues early and adjusting gradually prevents wastage and ensures a better end product, reinforcing the importance of understanding how different factors influence texture and flavor.
For instance, I once struggled with a chunky almond butter. After 15 extra minutes of grinding and a splash of olive oil, it became luxuriously smooth. Remember, manual methods require patience, but with persistence, you can overcome common issues and achieve a professional-quality butter that suits your taste and texture preferences. The key is to observe how the mixture responds and to make small, incremental adjustments, which ultimately leads to a more satisfying and successful homemade nut butter.
Flavor Customization — Make It Yours
Adding flavor is a creative way to personalize your nut butter. Incorporate a pinch of sea salt to enhance overall flavor complexity, or stir in a little honey or maple syrup for natural sweetness. Spices like cinnamon, nutmeg, or even cayenne can add warmth or a subtle kick, transforming your spread into a gourmet treat. For example, mixing in a teaspoon of cocoa powder during the last few minutes of grinding creates a rich, chocolate-hazelnut spread that’s perfect for breakfast or dessert. Dried fruits, chia seeds, or even a splash of vanilla extract can further elevate your creation, adding texture and nutritional boost. These additions also allow you to balance flavors—sweet, spicy, or savory—according to your preferences, making each batch uniquely yours. Experimenting with flavor combinations not only enhances taste but also deepens your understanding of how different ingredients interact with nuts and oils, giving you the confidence to craft custom spreads that truly reflect your culinary taste.
Start with small amounts—flavoring is about balance. Taste as you go to ensure your adjustments complement the natural nutty flavor without overpowering it. Remember, subtlety often yields the best results, and the process of customizing allows you to craft a nut butter that truly reflects your palate and culinary imagination.
Frequently Asked Questions
Can I make nut butter without electric tools?
Absolutely. A mortar and pestle or rolling pin can do the job, although it takes longer and requires more effort. The key is steady, patient grinding, which rewards you with fresh, customizable nut butter.
How long does it take to make nut butter by hand?
Expect anywhere from 10 to 30 minutes, depending on your tools, nuts, and desired smoothness. Roasted nuts grind faster and easier than raw, but both work well with patience.
Can I use raw nuts for nut butter?
Yes. Raw nuts are fine, but roasting enhances flavor and oils, making manual grinding easier. It also deepens the nutty aroma—perfect for a richer butter.
What if my nut butter is too oily or crumbly?
If it’s too oily, reduce added fats and ensure nuts are cooled after roasting. If crumbly, keep grinding or add a tiny splash of oil. Patience and small adjustments make all the difference.
How can I flavor my nut butter naturally?
Mix in spices like cinnamon, cocoa powder, or dried fruits during or after grinding. Sweeteners like honey or maple syrup also work well, but add gradually to match your taste.