
TL;DR

Get kitchen gear delivered free — and shop member deals
- Fast, free delivery on millions of items
- Access to Prime Big Deal Days deals on October 6–7
- Prime Video, Amazon Music and more included
Proper seasoning involves cleaning, applying thin oil layers, and baking at high heat to develop a durable, non-stick coating. Regular use and maintenance improve the surface over time, making your skillet last for generations.
Imagine turning a rough, rusty piece of iron into a kitchen workhorse that cooks everything from crispy bacon to cast-iron cornbread. That transformation hinges on one simple skill: seasoning. It’s not magic, but a process rooted in chemistry, patience, and a dash of know-how. If you want your skillet to be naturally non-stick, rust-proof, and flavorful, mastering proper seasoning is the first step.
In this guide, you’ll learn exactly how to season your cast iron skillet — no hype, no shortcuts, just reliable techniques that stand the test of time. Whether you’re starting fresh with a new pan or restoring an old one, these steps will help you build a coating that gets better with every meal.
Start with a thoroughly cleaned and dried skillet before seasoning.
Use high smoke point oils like flaxseed for initial coats and maintenance oils for regular use.
Apply thin, even layers of oil and bake at 450°F for about an hour to build a durable seasoning.
Repeat the seasoning process 3-4 times for a solid base that resists sticking and rust.
Regular use, cleaning with hot water and salt, and light re-seasoning keep your skillet non-stick and rust-free.
Start with a Clean Slate: How to Prep Your Skillet for Seasoning
Before seasoning, your skillet needs a thorough cleaning. Scrub away any rust, old food, or factory coatings with hot water and a stiff brush or steel wool. For stubborn spots, a bit of coarse salt and a scrubber work wonders. Rinsing thoroughly and drying immediately is crucial because water is the enemy of seasoned cast iron—it can cause rust or interfere with the bonding process.
Once dry, heating the skillet on the stove for a few minutes helps evaporate any residual moisture, creating a dry surface ideal for oil adhesion. This step is vital because moisture on the surface can lead to steaming or rusting during the seasoning process, which compromises the integrity of the coating. Think of it as preparing a clean, dry canvas—any residual moisture can create imperfections in your seasoning layer, affecting its durability and non-stick properties.
As an affiliate, we earn on qualifying purchases.
Choose the Right Oil — What Really Builds a Good Seasoning Layer
Not all oils are created equal when it comes to building a durable seasoning layer on cast iron. Oils with high smoke points—like flaxseed, grapeseed, canola, or vegetable oil—are preferred because they can withstand the high temperatures needed to polymerize into a hard, protective coating without breaking down or smoking excessively. Flaxseed oil, in particular, is popular because it polymerizes rapidly, forming a tough, glass-like surface after just a few coats, but it can be more prone to stickiness if not applied carefully.
Choosing the right oil impacts the longevity and quality of your seasoning. Oils with lower smoke points or those that are sticky, like olive oil or butter, tend to form uneven or weak layers that degrade faster. The goal is to create a smooth, hard, and resilient surface—think of it like baking a crust: a proper choice of oil ensures the crust bonds well and resists flaking or gumming up over time. The tradeoff is that some oils may require more careful application or more coats to achieve the desired finish, but investing in the right oil pays off in a longer-lasting, non-stick surface.
“Using a high smoke point oil ensures the seasoning layer bonds properly and resists flaking or gumming up over time, which is essential for a long-lasting skillet.”
high smoke point oils for cast iron
As an affiliate, we earn on qualifying purchases.
As an affiliate, we earn on qualifying purchases.
Step-by-Step: How to Season Your Cast Iron for Long-Lasting Non-Stick
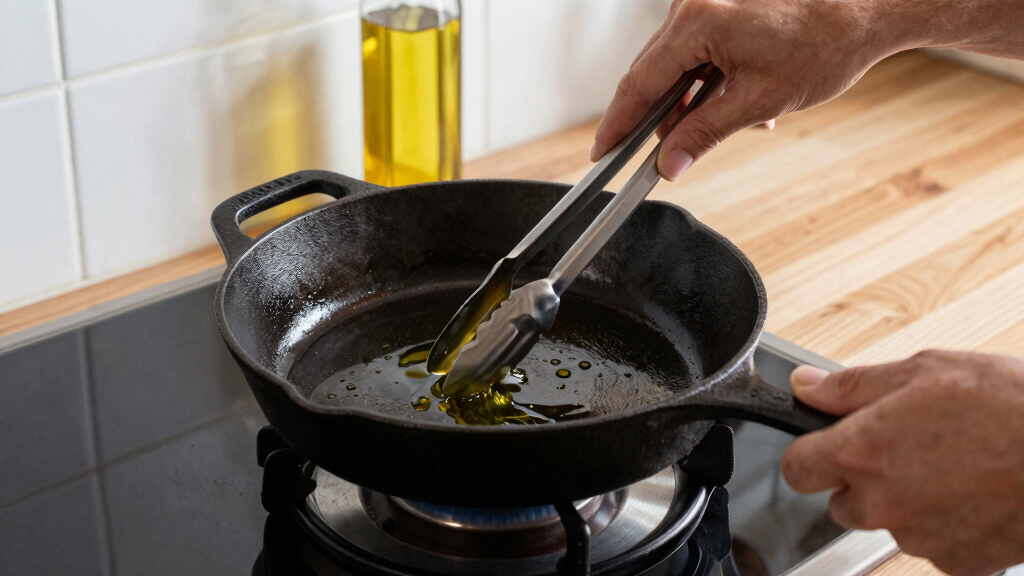
- Apply a thin, even coat of oil all over the skillet—inside, outside, handle, everything. Excess oil creates a sticky, gummy layer that hampers the development of a smooth seasoning surface. Using too much oil can lead to uneven baking and a sticky residue that takes longer to cure, which diminishes the non-stick qualities and can cause the coating to flake off over time.
- Preheat your oven to 450°F (232°C). Place the skillet upside down on the middle rack, with a sheet of foil or a baking sheet underneath to catch any drips. This high temperature is critical because it causes the oil to polymerize—a chemical process that bonds the oil to the metal, forming a hard, durable layer.
- Bake for 1 hour. This process should be repeated multiple times (3-4 coats) to build a resilient, non-stick surface. Each layer should be thin and fully cured before applying the next, as this gradual buildup ensures better adhesion and a smoother finish. Think of it like layering paint or varnish—thinner coats cure more evenly and form a more consistent, durable surface.
- Turn off the oven and let the skillet cool inside. This slow cooling allows the seasoning to set and reduces the risk of cracking or warping. Rushing this step can cause the coating to crack or peel, compromising its non-stick properties and longevity.
- Repeat the process as needed, adding more coats until the surface is dark, smooth, and resistant to sticking. Each additional coat improves the skillet’s non-stick qualities and helps fill in microscopic pores, making the surface more uniform and durable. Think of seasoning as building a protective armor—more layers mean better protection and easier cleanup over time.
This process is akin to baking a crust that gets better with each layer, forming a natural, non-stick shield that improves with use. Patience and consistency are key to achieving a truly effective seasoning.
As an affiliate, we earn on qualifying purchases.
Maintain and Re-Season: How to Keep Your Skillet in Top Shape
Every time you cook, especially with fats and oils, you add to the seasoning layer—this is how your skillet naturally becomes more non-stick over time. After cooking, wipe the skillet clean with a cloth or paper towel—no soap—because soap can strip away the polymerized layer. For stuck-on bits, scrubbing with coarse salt and a brush helps remove debris without damaging the seasoning. Rinsing with hot water completes the cleaning process, but avoid prolonged soaking, which can promote rust.
Dry thoroughly—water is the enemy of a good seasoning. After drying, applying a very light coat of oil and heating the skillet on the stove for a few minutes helps refresh the seasoning layer and prevents rust. This step is crucial because it maintains the integrity of the non-stick coating and keeps the surface protected from moisture and oxidation.
If you notice dullness or increased food sticking, it indicates the seasoning needs reinforcement. In such cases, applying a few thin coats of oil and baking again can restore the surface. Think of it as giving your skillet a regular spa treatment—each session helps rebuild and strengthen the seasoning, ensuring it remains resilient against rust and sticking.
Consistent maintenance—cleaning properly, re-oiling, and occasional re-seasoning—builds a robust, nearly indestructible surface that improves with every use. Over time, this creates a well-developed seasoning that not only enhances non-stick performance but also protects your skillet for decades to come.
As an affiliate, we earn on qualifying purchases.
Cleaning Tips That Protect Your Seasoning
Cleaning cast iron requires a delicate balance. Proper techniques preserve the seasoning layer, which is a polymerized oil film that provides natural non-stick properties and rust resistance. Using hot water and a stiff brush or coarse salt effectively removes debris without stripping this layer. Soap, while sometimes considered taboo, can be used sparingly if you re-season afterward, but frequent use can degrade the seasoning over time, leading to a less effective non-stick surface.
Immediately drying the skillet after washing prevents water from causing rust or weakening the seasoning. Lightly oil the surface before storage to create a protective barrier against moisture and air—this prevents rust and helps maintain a slick, non-stick surface for years. Regular cleaning routines that respect the seasoning layer ensure your skillet remains in optimal condition, with a resilient, non-stick surface that improves with each use.
“Regular use and careful cleaning are what turn a good skillet into a legendary one.”
Understanding how cleaning impacts your seasoning is crucial. Over-cleaning with harsh abrasives or soap can strip away the polymerized oil, forcing you to re-season more often. Conversely, neglecting cleaning allows food residues to stick and rust to develop, compromising the surface. Striking a balance—using gentle cleaning methods while avoiding aggressive abrasives—preserves the seasoning, extending the lifespan and performance of your skillet. This mindful approach ensures your cast iron remains a reliable, nearly indestructible kitchen companion for generations.
Frequently Asked Questions
How often should I re-season my cast iron skillet?
Re-season when the surface looks dull, food starts sticking, or rust appears. For most home cooks, every 3-6 months of regular use is enough, but it depends on how often you cook with it and how well you maintain it.
Can I use soap to clean my cast iron skillet?
Yes, occasional soap use is okay if you re-season afterward. However, frequent soap washes can strip the seasoning, so stick to hot water and salt for routine cleaning to preserve that natural non-stick coating.
What oil is best for seasoning?
High smoke point oils like flaxseed, grapeseed, or vegetable oil are best for initial seasoning. For ongoing maintenance, any cooking oil will do—just avoid sticky or low smoke point oils that won’t polymerize well.
How do I remove rust from my cast iron skillet?
Use steel wool or a rust remover to scrub off rust thoroughly. After removing rust, clean, dry, and re-season the skillet with several thin coats of oil to restore its non-stick surface and protect against future corrosion.
Is it okay to cook acidic foods in a seasoned cast iron?
Short-term cooking of acidic foods like tomatoes is usually fine, but prolonged exposure can degrade your seasoning. For dishes with lots of acid, consider cooking in a well-seasoned skillet or a different pan for long periods.
Conclusion
Seasoning a cast iron skillet isn’t complicated—it’s a skill built on patience and consistency. Think of it as nurturing a piece of cookware that rewards you with perfect searing and easy cleanup for decades.
Every time you cook, you build that natural non-stick layer. Keep it clean, keep it hot, and your skillet will serve you well, generation after generation. Now, go get that cast iron shining and cooking like new!
Fall Picks
fall essentials
As an affiliate, we earn on qualifying purchases.