TL;DR
Listen free for 30 days with Audible
Thousands of audiobooks and originals — cancel anytime.
Start your free trialAs an affiliate, we earn on qualifying purchases.
You can bake delicious bread, cakes, and pastries without a stand mixer using quality hand tools like balloons whisks, dough scrapers, and wooden spoons. Proper technique and patience make manual baking just as satisfying as electric methods, especially for small batches and artisan results.
Good hand tools—like balloons whisks, dough scrapers, and sturdy bowls—are vital for manual baking success.
Proper technique and patience often produce results comparable to electric mixers, especially in bread and delicate batters.
Ergonomic, high-quality tools reduce fatigue, making manual baking more enjoyable and less tiring.
Pre-warming ingredients and resting dough can cut down effort and improve texture.
Manual methods foster a deeper connection with your baking, leading to more satisfying results.
The Essential Hand Tools That Make Baking Easier
Hand tools are your best friends when baking without a stand mixer. High-quality, durable tools help you achieve consistent results and reduce fatigue. Think of each tool as a partner in your kitchen orchestra—each one plays a vital role.
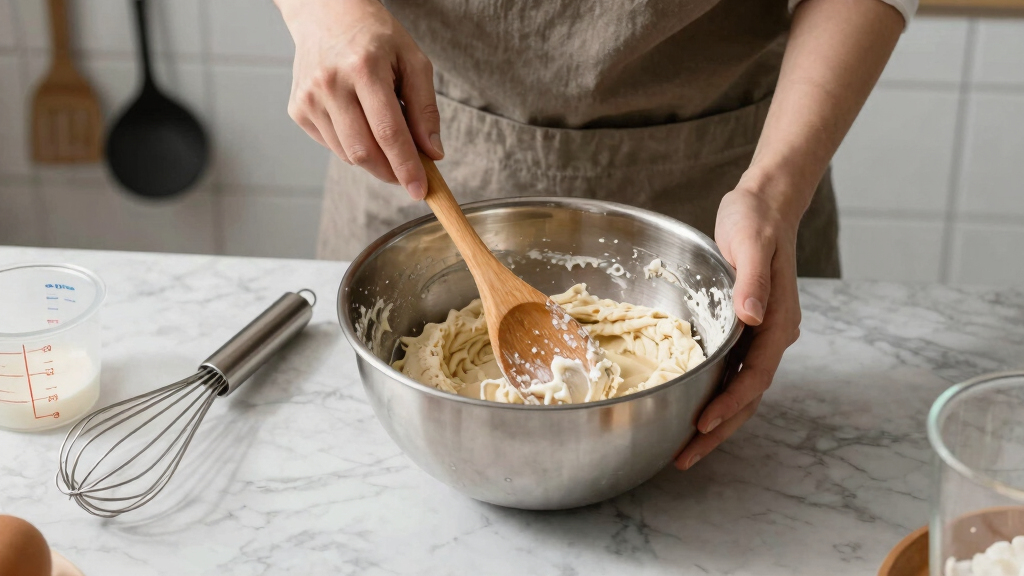
Start with the basics: mixing bowls in various sizes—stainless steel or glass for durability and easy cleaning. Balloon whisks for aerating batters and whipping cream. Wooden spoons or silicone spatulas for gentle mixing and folding. Pastry scrapers help handle dough and clean surfaces. Manual egg beaters are great for whipping eggs or small batches of cream. Rolling pins ensure even dough thickness. Accurate measuring cups and spoons keep your recipes precise.
Choosing the right tools matters because it affects both the quality of your baked goods and your experience. For example, a sturdy stainless-steel mixing bowl with a non-slip base offers stability, preventing slips that can cause uneven mixing or messes, especially when working with sticky doughs. An ergonomic balloon whisk reduces hand fatigue during prolonged whipping, allowing you to maintain control without discomfort. Over time, investing in good tools can make baking more enjoyable and less physically taxing, encouraging you to practice more and refine your skills.
As an affiliate, we earn on qualifying purchases.
How to Mix and Knead Like a Pro Without Electricity
Manual mixing and kneading are about technique as much as tools. Understanding how to manipulate ingredients properly ensures you develop the right textures and gluten structure, which are crucial for the final product’s rise, texture, and flavor. For batters, a good balloon whisk or silicone spatula not only blends ingredients but also introduces air, which can improve the lightness of cakes and mousses. For kneading dough, your hands and a sturdy dough scraper are unbeatable because they give you tactile feedback—letting you feel when the dough reaches the ideal elasticity and smoothness. This sensory engagement helps you avoid over- or under-mixing, leading to more consistent results.
Here’s a detailed step-by-step for kneading bread dough:
- Begin by mixing your ingredients until just combined. This initial phase ensures even distribution of ingredients and prevents overworking the dough early on.
- Turn the dough onto a floured surface, and use your hands to stretch and fold it, pressing down with the heels of your palms. This method develops gluten strands gradually, giving the dough strength and elasticity.
- Continue stretching, folding, and pressing, rotating the dough periodically to ensure even development. This process allows gluten to form a network that traps gas, giving bread its rise and chewy texture.
- Repeat for about 8-10 minutes, observing how the dough becomes smoother, more elastic, and less sticky. Proper kneading time is essential; too little results in dense bread, while over-kneading can toughen the crumb.
- Finally, cover the dough and let it rest for the final rise. Resting allows gluten to relax, making shaping easier and improving the final texture.
This process of manual kneading, while requiring patience, offers a deep understanding of your dough’s behavior. It allows you to adjust your technique based on how the dough feels, leading to artisan-quality bread with excellent flavor and texture. The tradeoff is that it takes more time and physical effort than using a stand mixer, but many bakers find this process more rewarding and controllable, especially for small batches or specialty loaves.
As an affiliate, we earn on qualifying purchases.
Comparison Table: Manual Tools vs. Electric Mixers
| Feature | Manual Hand Tools | Electric Stand Mixers |
|---|---|---|
| Control | High—allows precise adjustment of speed, force, and technique, giving you a tactile connection that can improve results and understanding of the process. | Moderate—limited to preset speeds and settings, which can sometimes lead to over- or under-mixing if not carefully monitored. |
| Effort | Requires physical effort, which can be beneficial for building strength and awareness but may be tiring with large or stiff batches. | Minimal—simply push a button, making it suitable for large quantities or very stiff doughs that would otherwise exhaust your arms. |
| Cost | Lower—initial investment in quality tools lasts for years and can be more economical over time. | Higher—initial purchase price and maintenance costs can be significant, especially for high-end models. |
| Size & Storage | Compact and easy to store, fitting into small kitchens or drawers, which encourages frequent use and flexibility. | |
| Versatility | Excellent for small batches, delicate tasks, and artisan techniques that benefit from tactile control, such as folding or gentle mixing. | Best suited for large batches, heavy doughs, and tasks that require consistent, high-speed mixing, like bread kneading or large cake batter. |
As an affiliate, we earn on qualifying purchases.
Top Tips for Making Manual Baking Feel Easier
- Use warm ingredients—lukewarm water, softened butter—to reduce the resistance your hands have to work against, making mixing and kneading easier and less tiring.
- Pre-measure everything before you start to streamline your workflow, so you’re not constantly stopping to find ingredients, which can break your rhythm and cause fatigue.
- Rest your hands and wrists during long sessions by stretching or switching tasks occasionally. This prevents strain and maintains your strength and dexterity.
- Choose ergonomic tools with comfortable grips and non-slip handles. These reduce the effort needed to grip tightly and help prevent fatigue or discomfort.
- Work on a stable, non-slip surface to give you better control and leverage, especially when kneading stiff doughs or folding batters.
For instance, warming milk slightly before mixing bread dough softens the proteins and makes the dough more pliable, reducing the force needed to knead and helping you achieve a better gluten network without overexertion. Taking short breaks during long mixing or kneading sessions allows your muscles to relax and recover, maintaining your efficiency and enjoyment. Choosing tools that fit your hand comfortably can significantly reduce fatigue, making manual baking a more sustainable and satisfying practice.
As an affiliate, we earn on qualifying purchases.
When to Use These Tools and When to Skip Them
Manual tools excel in specific situations where control, finesse, and connection to the process matter most. For small batches, delicate batters, or artisan-style bread, manual methods allow you to pay close attention to texture and consistency, which can lead to superior flavor and structure. However, when you’re pressed for time or working with large quantities, manual methods can become tiresome and less practical, as they demand more physical effort and time—especially with stiff or large batches.
For very stiff doughs like bagels or pretzels, manual kneading combined with a scraper allows you to develop gluten gradually and carefully, avoiding overworking the dough that can happen with overzealous machine use. Conversely, for recipes requiring rapid aeration—such as meringues or whipped cream—manual tools like a balloon whisk or a hand-held egg beater can be satisfying and effective, providing a workout that also ensures you understand how much air is incorporated. The key is to match your tool choice with the recipe’s demands and your personal preference for control versus convenience, embracing the tradeoffs involved.
Old-School Tricks That Match Modern Convenience
Sometimes, simple, time-honored techniques outperform the need for new gadgets. For example, warming flour before mixing not only makes the dough more pliable but also reduces the effort needed to develop gluten, resulting in a softer, more extensible dough. Resting dough during bulk fermentation allows gluten strands to relax naturally, improving elasticity and making subsequent shaping easier—this reduces the physical effort required during final kneading and shaping. Using a silicone spatula for folding and incorporating ingredients gently can speed up mixing and reduce arm fatigue, especially when handling delicate batters or doughs.
One baker swears by placing her dough in a warm spot or near a heat source during fermentation, which accelerates gluten development and fermentation, cutting down overall preparation time and effort. These techniques not only preserve the authenticity of manual baking but also enhance the quality of the final product. They demonstrate that understanding and leveraging natural processes and simple tools can make manual baking more efficient, satisfying, and aligned with traditional craftsmanship.
Frequently Asked Questions
What are the best hand tools for kneading bread dough?
A sturdy wooden or silicone dough scraper combined with your hands is ideal. The scraper helps fold and turn the dough efficiently, especially in small spaces or with sticky doughs.Can I whip egg whites without a stand mixer?
Absolutely. Use a balloon whisk or a manual egg beater. It takes more effort—about 5-10 minutes of vigorous whisking—but you can achieve stiff peaks just fine.How do I avoid overmixing when using hand tools?
Mix until ingredients are just combined. For batters, fold gently with a spatula; for dough, stop kneading once it’s smooth and elastic. Overmixing can toughen baked goods or deflate aerated mixtures.Any tips to make manual mixing less tiring?
Use warm ingredients to soften dough and reduce resistance. Take short breaks between mixing sessions, and choose ergonomic, non-slip tools that fit comfortably in your hand.Can manual tools match the results of electric mixers?
Yes, with proper technique and patience. For small batches and artisan-style breads, manual methods often produce superior control and flavor—plus, they connect you more deeply to your baking.Conclusion
Baking with hand tools isn’t just about necessity—it’s about reconnecting with your craft. The control, satisfaction, and connection to tradition make it worth every bit of effort. Next time you reach for your mixing spoon, remember: your hands are the best tools you’ve got.Grilling season Picks
grills
As an affiliate, we earn on qualifying purchases.