
TL;DR

Get kitchen gear delivered free — and shop member deals
- Fast, free delivery on millions of items
- Access to Prime Big Deal Days deals on October 6–7
- Prime Video, Amazon Music and more included
You can bake bread in a solar oven by understanding its heat limits, preparing your dough properly, and positioning your oven for maximum sunlight. Longer baking times are normal, but the eco-friendly process yields unique, flavorful loaves.
Imagine a crusty loaf of bread, warm from the sun, in the middle of a remote camp or your backyard. No electricity, no gas, just sunlight and your know-how. Solar ovens harness the sun’s energy to cook, drying, roasting, and baking—if you know how to use them right.
In this guide, you’ll learn how to turn sunlight into your baking partner, with practical tips on setup, timing, and materials. Whether you’re off-grid, camping, or just curious about sustainable cooking, baking bread in a solar oven can be surprisingly straightforward—and deeply satisfying.
Preheat your solar oven for at least 15 minutes before baking.
Use dark-colored or reflective bakeware for better heat absorption.
Bake during peak sunlight hours, typically between 10 a.m. and 4 p.m.
Longer baking times (up to 3 hours) are normal—patience is part of the process.
Position and adjust your oven regularly to keep it facing the sun for even baking.
What Makes a Solar Oven Good for Baking Bread?
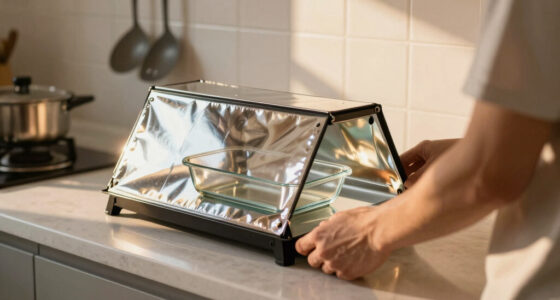
Solar ovens work by concentrating sunlight into a sealed chamber where the heat can build up steadily. Look for models with reflective surfaces, good insulation, and clear glass or plastic lids. These features keep the heat inside, turning sunlight into baking warmth.
For bread, a box or panel cooker with a secure lid and reflective panels works well. My favorite setup? A sturdy cardboard box lined with aluminum foil, topped with a glass lid—simple, effective, and easy to adapt.
Example: I once baked bread in a basic panel cooker on a sunny afternoon. The oven reached about 300°F after an hour, enough to give my loaf a crusty exterior and soft interior.
As an affiliate, we earn on qualifying purchases.
How to Prepare Your Dough for Solar Baking
Start with a standard bread recipe, but be ready for longer baking times. Use ingredients that aren’t too dense, as slow heat can struggle with heavy dough. Proper kneading and proofing remain critical—don’t skip these steps.
For example, a simple sourdough or white bread dough works great. Let it rise until it doubles—this might take longer outdoors. The dough should be soft but not sticky, with a mild elasticity that holds shape.
Pro tip: Make your dough slightly wetter than usual. The lower, steadier heat of a solar oven means extra moisture helps the bread bake evenly without drying out.
Why does this matter? Because a denser, under-proofed dough can lead to uneven baking, resulting in a loaf that’s either doughy inside or overly crusted on the outside. Conversely, a wetter dough retains moisture longer, allowing heat to penetrate more evenly, which is essential when working with the slower, gentler heat of a solar oven. This balance ensures you get a well-baked loaf with a good crumb and crust, despite the longer baking process.
reflective bakeware for solar oven
As an affiliate, we earn on qualifying purchases.
As an affiliate, we earn on qualifying purchases.
Step-by-Step: Baking Bread in a Solar Oven
- Preheat your solar oven by placing it in direct sunlight for 15-20 minutes. This gets the interior warm and ready, which can significantly reduce overall baking time and promote a more even crust formation.
- Shape your dough into a loaf or round, then place it in a dark or reflective baking dish—such as a cast iron skillet or black ceramicware. Darker materials absorb and retain heat better, creating a more consistent baking environment, which is crucial for achieving a good rise and crust.
- Position the oven so it faces the sun directly, adjusting throughout the day to maintain maximum exposure. This consistent alignment maximizes heat absorption, which directly impacts baking efficiency and loaf quality.
- Cover the bread with a lid or reflective shield to trap heat. Use a thermometer to monitor internal temperature; aim for around 250°F to 300°F. Maintaining this temperature range ensures thorough baking without over-drying or burning the crust.
- Bake for 1 to 3 hours. Check periodically—your bread is done when it sounds hollow when tapped and has a deep, golden crust. Longer baking times are a tradeoff for the eco-friendly process, but patience yields rich flavors and textures that are hard to replicate with conventional ovens.
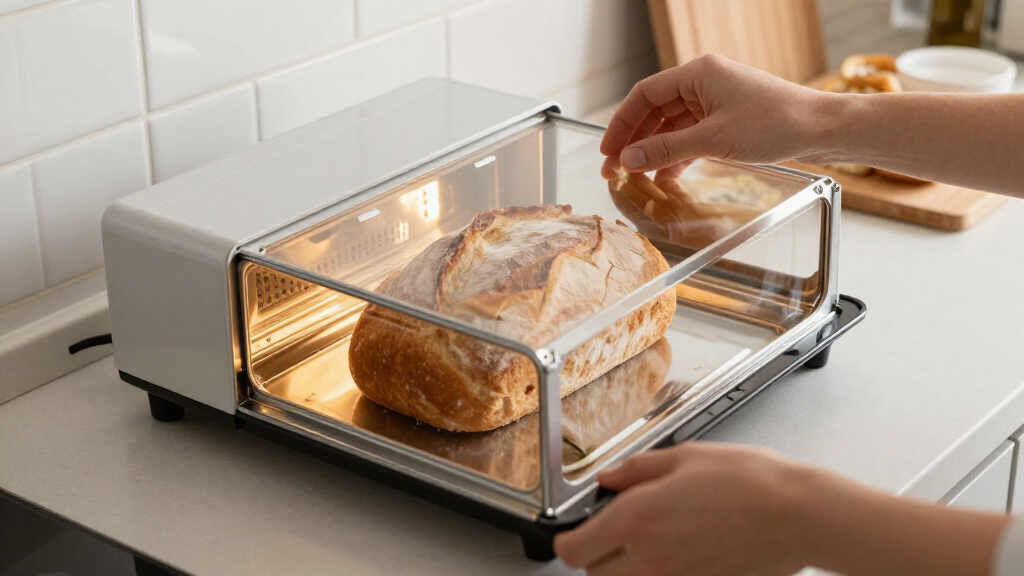
Example: I baked a boule in my parabolic solar oven in late morning. It took just over two hours, and the crust was crackly, with a warm aroma filling the air. The longer baking time allowed the bread to develop a complex flavor and a perfect crust, demonstrating how patience and proper setup are key to solar baking success.
As an affiliate, we earn on qualifying purchases.
What Materials Help Your Solar Bread Turn Out Better?
| Material | Why It Helps |
|---|---|
| Dark-colored cookware | Absorbs heat more effectively, promoting even baking and crust formation. This is especially important because lighter colors reflect sunlight, reducing heat absorption and risking uneven baking or underdeveloped crusts. |
| Enamel or ceramic dishes | Retain heat well, helping bread cook uniformly. Their thermal mass ensures consistent heat transfer to the dough, which is vital given the slower, less intense heat of solar ovens. |
| Reflective surfaces (foil, mirrors) | Increase sunlight concentration and oven temperature. Proper reflection can significantly boost the internal temperature, reducing baking time and improving loaf quality. |
| Glass or clear plastic lids | Trap heat inside, similar to a traditional oven. They create a micro-environment that maintains consistent heat and humidity, essential for a good rise and crust development. |
Example: Using a cast iron skillet with a dark, matte finish helped me get a crisp crust on my bread, even when the sun was slightly behind clouds. The material’s ability to absorb and retain heat made a noticeable difference in the final loaf’s texture and color.
As an affiliate, we earn on qualifying purchases.
Tips for Getting Perfect Bread in a Solar Oven
- Preheat the oven fully before placing your dough inside. Patience is key because the initial warm-up phase impacts overall baking time and crust quality.
- Use a thermometer to keep track of the internal temperature—aim for 250°F to 300°F. This helps prevent underbaking or burning, especially since temperature regulation in solar ovens can be less precise than conventional ovens.
- Position the oven to face the sun directly, adjusting every 15-20 minutes. This dynamic positioning maximizes heat intake and ensures even baking as the sun moves.
- Wrap your baking dish with aluminum foil if you notice uneven browning or hotspots. This reflective layer can help distribute heat more evenly across the loaf’s surface.
- Check your bread after about 1 hour, then every 20 minutes thereafter to prevent overbaking. Patience is crucial—rushing can lead to underdeveloped crusts or uneven texture.
- Remember: longer baking times are normal. Expect 1.5 to 3 hours, depending on sunlight and loaf size. This slower process is part of the eco-friendly charm of solar baking, and it often results in richer flavors and better crust development.
Scenario: On a bright summer day, I baked a loaf that took 2.5 hours. It had a rich, amber crust, and the crumb was light and airy. The extended baking time allowed flavors to deepen and the crust to achieve perfect crunch, demonstrating the importance of patience and proper setup in solar baking.
Troubleshooting Common Solar Baking Problems
If your bread isn’t baking evenly or is taking too long, start here:
- Ensure your solar oven is positioned to get the most direct sunlight. Use a mirror or reflective panel to boost heat if needed. Proper positioning is critical because even slight misalignments can drastically reduce oven temperature, affecting baking time and loaf quality.
- Check your thermometer. Sometimes, the oven isn’t reaching the desired temperature due to shading or inadequate sunlight. Accurate temperature readings help you adjust positioning or baking time accordingly.
- Verify dough proofing. Under-proofed dough can collapse or dry out during baking, leading to dense or flat loaves. Proper proofing ensures the dough develops enough gluten structure to rise well in the slower heat environment.
- Use darker bakeware—light-colored dishes reflect more sunlight, decreasing heat absorption. This tradeoff can lead to longer baking times or uneven crusts, so selecting the right cookware is vital for consistent results.
- Be patient. Weather fluctuations can extend baking time, especially on partly cloudy days. Understanding that longer baking is normal helps manage expectations and reduces frustration.
Example: My first attempt failed because I left the oven in the shade. Once I kept it in direct sun and used darker bakeware, the bread baked beautifully, showing how critical setup and materials are for successful solar baking.
Frequently Asked Questions
Can I bake all types of bread in a solar oven?
Most breads, from sourdough to simple white loaves, work well. Denser breads may need longer baking or slightly higher temperatures, but with patience, you can bake a variety of styles.How long does it usually take to bake bread in a solar oven?
Expect between 1 to 3 hours, depending on the sunlight intensity, oven design, and loaf size. Always monitor your bread and be prepared for longer baking times on cloudy days.What materials should I use for baking in a solar oven?
Dark, reflective, or enameled cookware helps absorb heat better. Cast iron, ceramic, or black enamel dishes are excellent choices for even baking and crust formation.Can I bake bread indoors with a solar oven?
Solar ovens are designed for outdoor use, relying on direct sunlight. Indoor baking isn’t practical unless you have a very sunny space with reflective surfaces and large windows.What if my bread isn’t baking evenly?
Check your oven’s positioning—face it directly toward the sun and adjust periodically. Use darker bakeware, and ensure your oven reaches adequate temperatures for consistent baking.Conclusion
Baking bread with a solar oven isn’t just an eco-friendly experiment; it’s a chance to craft crusty, flavorful loaves with simple tools. With a little patience, you turn sunlight into your oven, enjoying the aroma of fresh bread in the great outdoors.
Next time the sun is shining bright, set up your solar oven, get your dough ready, and watch your outdoor kitchen come alive with warmth and flavor. It’s a slow process, but the reward? A perfect, sun-kissed loaf every time.
Fall Picks
fall essentials
As an affiliate, we earn on qualifying purchases.