TL;DR
Grinding your own flour at home is straightforward with the right hand-powered or electric mill. It preserves nutrients, saves money over time, and adds flavor and freshness to baked goods. This guide shows you how to choose, use, and store homemade flour efficiently.
Imagine the rich, nutty aroma of freshly ground wheat filling your kitchen—an experience that commercial flours rarely offer. When you grind your own flour, you’re not just baking; you’re reconnecting with the process, controlling quality, and maximizing nutrition. Whether you’re off-grid or just looking for a more self-reliant kitchen, learning how to mill your own flour can transform your baking routine.
In this guide, you’ll discover how to pick the right tools, the best grains for different recipes, and straightforward steps to get started. No hype, just practical advice to help you craft wholesome, delicious flour from scratch.
Manual and electric mills each have pros and cons—choose based on your volume and effort preference.
Select grains that suit your baking goals; fresh, clean, and properly stored grains make all the difference.
Adjust your grind for different recipes—coarse for tortillas, fine for bread—test and tweak as you go.
Store freshly ground flour in airtight containers in a cool, dark place or freeze for longer shelf life.
Using home-ground flour boosts flavor, nutrition, and satisfaction—your baking will never be the same.
Pick the Right Grain Mill for Your Needs and Budget
The first step is choosing between manual and electric grain mills. Manual mills, like a sturdy hand-cranked mill, are perfect if you want simplicity, affordability, and a traditional approach. Electric mills, on the other hand, are faster and can handle larger batches, making them ideal if you bake often or in bigger quantities.
For example, a basic manual mill costs around $50 and can grind about a pound of flour in 5-10 minutes. An electric mill might set you back $200 but can produce 2-3 pounds in just a few minutes. Consider your volume, space, and how much effort you’re willing to put in. Both types often feature adjustable settings for fine or coarse flour, giving you flexibility for bread, tortillas, or pastry flour.
Choosing the right mill impacts your baking experience—manual mills offer control and quiet operation, but require physical effort and time. Electric mills save time and effort but can be more expensive and require electrical access. Think about your typical baking load, space constraints, and how much you value convenience versus tradition.

Victoria Manual Cast Iron Grain Mill with High Hopper, Premium Corn-Grinding Mill and Grain Grinder, Made in Colombia
PREMIUM CAST IRON GRINDER: Known as a “molino para moler maiz,” our cast iron mill makes grinding easy…
As an affiliate, we earn on qualifying purchases.
As an affiliate, we earn on qualifying purchases.
How to Choose Grains That Make Your Flour Shine
Not all grains are created equal—your choice impacts flavor, nutrition, and baking results. Wheat is the classic choice for bread, with hard varieties providing the gluten needed for structure. Oats, rye, and spelt offer different textures and flavors, while corn and millet give you gluten-free options.
Choosing the right grains means understanding their properties and how they behave during milling and baking. For instance, hard wheat varieties contain high gluten levels, which develop structure and elasticity in bread. Soft wheat has less gluten, making it suitable for pastries. Organic, heirloom, or locally sourced grains often retain more nutrients and develop richer flavors because they are fresher and less processed.
Before milling, ensure grains are clean, dry, and free from debris—moisture or impurities can clog your mill or affect flour quality. Freshness matters because stale grains lose oils and nutrients, leading to less flavorful flour. When selecting grains, consider your baking goals—whether you want a chewy loaf, delicate pastry, or gluten-free bread—and choose grains accordingly to maximize flavor and nutritional content.

NutriMill Impact Compact High Speed Electric Grain Mill for Fresh Flour Wheat Grinder with Stainless Steel Milling Heads
1200-Watt Motor: Provides the power necessary to mill hard grains like wheat, delivering the perfect texture for bread…
As an affiliate, we earn on qualifying purchases.
As an affiliate, we earn on qualifying purchases.
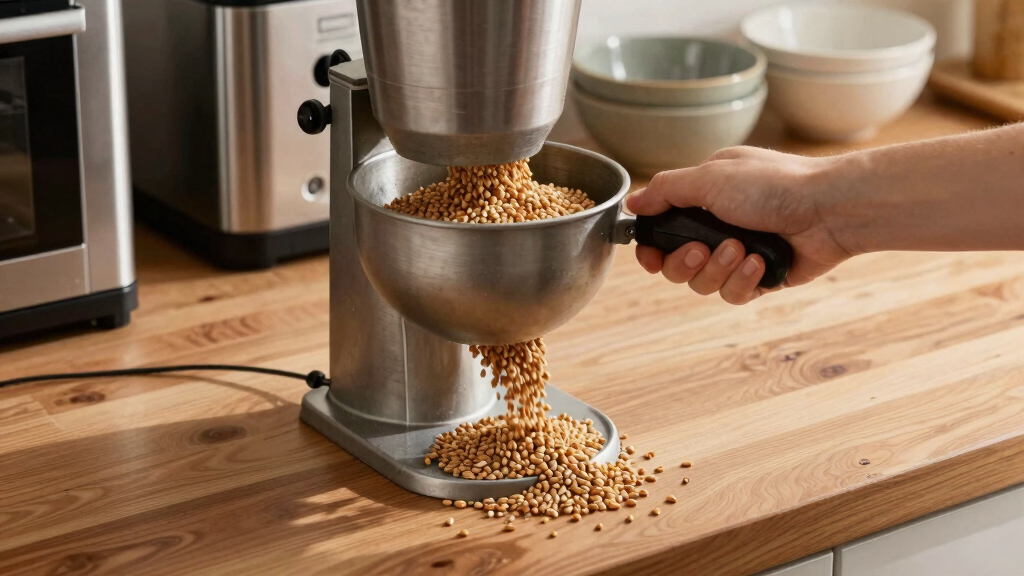
Step-by-Step: How to Grind Your Own Flour at Home
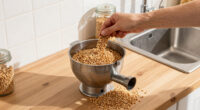
- Measure your grains—about 1 cup at a time for manual mills, or enough for your mill’s capacity. Proper measurement ensures consistent results and prevents overloading your mill, which could damage the mechanism or reduce efficiency.
- Clean and dry grains if needed. Remove any stones, chaff, or debris. Clean grains not only protect your equipment but also ensure the purity and safety of your flour. Properly dried grains prevent clumping and spoilage during storage.
- Set your mill to the desired texture—fine for bread, coarser for tortillas or baking mixes. Adjusting the grind size influences the flour’s behavior in recipes—finer flour produces lighter baked goods, while coarser flour adds texture and bite.
- Feed grains into the mill steadily. For manual mills, turn the handle at a comfortable pace—rushing can cause uneven grinding or strain. For electric mills, press the start button and let it run smoothly. Consistent feeding ensures uniform particle size and prevents clogging or jamming.
- Collect the freshly ground flour in a bowl or container. Use immediately for maximum freshness or store properly. Freshly ground flour retains more oils and nutrients, but it can also spoil faster—plan your baking accordingly.
For example, grinding 2 cups of wheat might take about 5 minutes in an electric mill, while a manual mill could take 10-15 minutes, depending on your strength and consistency. The key is patience and steady effort, which pays off with flavorful, nutritious flour.

Corona Manual Grain Mill, Cast Iron Corn Grinder with Hand Crank for Corn, Wheat, Rice, Coffee & Spices, Adjustable Flour Mill for Home Kitchen Use
AUTHENTIC CORONA GRAIN MILL: Heavy-duty cast iron manual grain mill crafted in Colombia. Large 0.8-qt hopper grinds corn,…
As an affiliate, we earn on qualifying purchases.
As an affiliate, we earn on qualifying purchases.
How to Store and Use Your Home-Ground Flour for Best Results
Freshly ground flour is vibrant and full of life, but it also contains oils that can spoil quickly. Store it in an airtight container in a cool, dark place—like a pantry or cellar. Proper storage slows oxidation and prevents spoilage, preserving flavor and nutrients. For longer shelf life, refrigerate or freeze small batches to prevent rancidity and maintain freshness, especially in warm or humid climates.
Use your flour within 2-3 weeks if kept at room temperature, or up to 6 months frozen—longer storage can lead to nutrient loss and flavor deterioration. Incorporate it into your recipes as soon as possible for the best flavor and nutritional benefits. Be aware that home-ground flour may behave differently—adding a touch more liquid or adjusting kneading times can help achieve optimal results.
For example, a batch of bread made with freshly ground flour often has a denser crumb and richer aroma than one baked with store-bought flour. Experimenting with small batches allows you to understand how your specific flour behaves and to refine your recipes accordingly.

VEVOR Electric Grain Mill Grinder, 3000W Spice Grinders, Commercial Corn Mill with Funnel, Thickness Adjustable Powder Machine, Heavy Duty Feed Flour Cereal Mill Wheat Grinders, Dry Grinder
Outstanding Dry Grinding: The VEVOR Electric Grain Mill Grinder features high-quality cast iron grinding plates that are strong,…
As an affiliate, we earn on qualifying purchases.
As an affiliate, we earn on qualifying purchases.
Why Freshly Ground Flour Changes Everything in Baking
Fresh flour is like tasting the difference between a garden tomato and one shipped across the country. It’s vibrant, flavorful, and packed with nutrients. You’ll notice a richer aroma and a more complex taste in your bread, pancakes, or muffins.
Plus, you control the ingredients—no additives or preservatives, just pure grains. This simple shift can elevate your baking, making each loaf or batch a personal achievement. It’s especially satisfying when you grind grains from your own local harvest or heirloom varieties.
The reason fresh flour makes such a difference lies in its preserved oils, germ, and bran—all of which contain flavor compounds and nutrients that deteriorate over time in processed flour. When you grind your own, you retain these elements, resulting in baked goods that are richer, more aromatic, and more nutritious. This can also influence the baking process—fresh flour often absorbs liquids differently and may require slight recipe adjustments, but the end result is well worth it.
Frequently Asked Questions
Can I grind all grains in the same mill?
Most grains can be ground with the same mill, but some, like popcorn or very hard grains, may require specific settings or mills designed for tougher kernels. Always check your mill’s capacity and recommended grains to avoid damage.
How do I know when my flour is fine enough?
Run a small test batch—sift a spoonful through your fingers or a mesh sieve. For bread, a fine, powdery texture is ideal. Coarser flour is better for tortillas or rustic bread. Adjust your mill until you achieve the desired consistency.
How long can I store home-ground flour?
Use it within 2-3 weeks if kept at room temperature to avoid rancidity. For longer storage, keep it in airtight containers in the fridge or freezer—up to 6 months in the freezer without losing nutrition.
Is home-ground flour better for gluten-free baking?
Yes, grinding your own gluten-free grains like oats, millet, or corn allows you to control the freshness and avoid additives. Just be sure your mill is suitable for the grains you choose.
How much effort does grinding a batch of flour take?
Manual mills typically take 5-15 minutes per batch, depending on quantity and grain hardness. Electric mills are faster, producing several pounds in just a few minutes. It’s a small effort for big flavor and nutrition.
Conclusion
Grinding your own flour isn’t just about freshness—it’s about reclaiming control over your food. With simple tools and a handful of grains, you turn humble ingredients into something vibrant and nourishing. Your off-grid kitchen deserves that touch of self-reliance.
Next time you bake, remember: the real magic begins with a handful of grains and a good mill. Your taste buds—and your body—will thank you for it.