
TL;DR
Grinding your own flour retains more nutrients and flavor than store-bought options. Manual and electric mills both work, but choosing the right tool depends on your needs. Freshly milled flour is a game-changer for homemade bread and pastries.
Choose the right grain for your baking goals — wheat for bread, oats for hearty muffins.
Manual and electric mills both work; pick based on your volume, effort, and portability needs.
Grind in small batches to keep flour fresh and nutrient-rich, and store properly in cool, dark places.
Regular cleaning and maintenance boost the longevity and safety of your mill.
Home milling preserves more nutrients and flavor compared to store-bought flour, making your baked goods tastier and healthier.
Pick the Perfect Grain for Your Milling Needs
Not all grains are created equal when it comes to milling. The most common choices are wheat — both hard and soft — but you can also use spelt, rye, oats, corn, barley, millet, and even amaranth. Your selection hinges on what you want to bake. For bread, hard wheat produces strong gluten; for pancakes, softer grains work well. Imagine grinding a handful of rye for hearty bread, or millet for gluten-free flatbreads.
Choosing the right grain shapes your entire baking experience. Hard wheat, for example, produces a fine, resilient flour perfect for sourdough, while oats give a coarser texture for hearty muffins. Think about your kitchen’s purpose and your taste preferences — and pick grains accordingly.
Understanding the properties of different grains helps you anticipate the texture and flavor of your final product. For instance, milling rye yields a denser, more aromatic flour suited for rustic loaves, but it may require adjustments in hydration or fermentation times. Conversely, softer grains like wheat produce a lighter, more elastic dough, making them ideal for delicate pastries. Recognizing these tradeoffs allows you to tailor your milling choices to your baking goals and experiment with new recipes confidently.

Victoria Manual Cast Iron Grain Mill with High Hopper, Premium Corn-Grinding Mill and Grain Grinder, Made in Colombia
PREMIUM CAST IRON GRINDER: Known as a “molino para moler maiz,” our cast iron mill makes grinding easy…
As an affiliate, we earn on qualifying purchases.
As an affiliate, we earn on qualifying purchases.
Manual vs. Electric Grain Mills — Which One Fits You?
Manual mills are like old-world tools — they require your arm strength but are affordable, portable, and zero-emission. Electric mills, on the other hand, speed things up and handle larger batches with ease. If you’re off-grid or want simplicity, a hand-crank mill does the job. For regular baking or bigger projects, an electric mill saves your energy and time.
Choosing between them involves considering your priorities. Manual mills offer a satisfying, meditative experience and are excellent for small batches or occasional use, but they demand physical effort and longer milling times. Electric mills, while more costly and less portable, dramatically reduce labor and can process larger quantities quickly, making them ideal for frequent bakers or those with busy schedules. The tradeoff is convenience versus effort — so your decision should align with your baking volume, physical ability, and preferred workflow. Both types have their merits, but understanding these implications helps you select the best fit for your lifestyle and goals.
Furthermore, consider maintenance and durability. Manual mills often have fewer moving parts and are easier to repair, while electric models might require more upkeep but offer consistent performance over time. Think about how often you’ll use your mill and what features matter most to you, like grind size adjustability or capacity.

Grain Mill Grinder 750g High Speed Electric Stainless Steel Grinder Cereals Corn Flour Pulverizer Powder Machine for Dry Spice Herbs Grains Coffee Rice Pepper
✅ MIXER GRINDER : Power:2000W ; Capacity:750g; Interval Time:5-10 min;Rotating Speed: 25000R/Min,Triples blade: grinding blade, rotary blade, and…
As an affiliate, we earn on qualifying purchases.
As an affiliate, we earn on qualifying purchases.
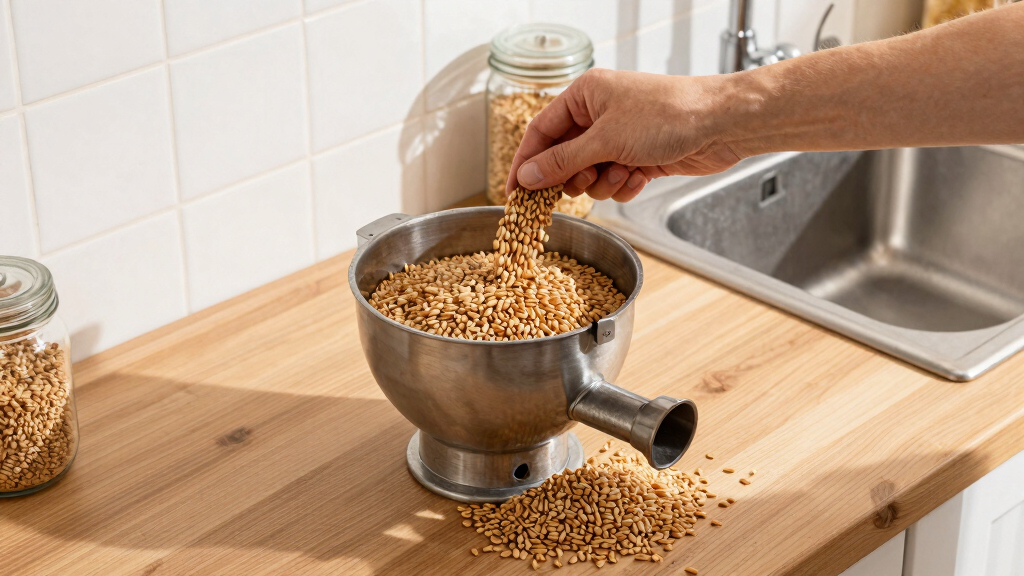
How to Grind Flour at Home — Step-by-Step
- Choose your grain and measure. For a standard loaf, a cup of wheat berries is enough.
- Set your mill to the desired coarseness. Coarse for pancakes, fine for bread.
- Pour the grain into the mill’s hopper. If using a manual mill, grip the handle firmly.
- Crank steadily — about 2-3 minutes for a cup of flour. Listen for the grinding sound, and watch the flour emerge.
- Collect your fresh flour in a clean bowl or container. Sift if necessary for an even texture.
- Store in an airtight container, kept cool and dark for maximum freshness.
Imagine the rhythmic turning of a hand-crank, the gritty sound of grain turning into powder — that satisfying transformation in your own kitchen. This process not only yields fresh flour but also deepens your understanding of the milling process, allowing you to adjust coarseness and batch sizes to suit different recipes. Developing this skill means you can experiment with various grains and textures, gaining flexibility in your baking and culinary endeavors.
Victoria Manual Cast Iron Grain Mill with High Hopper, Premium Corn-Grinding Mill and Grain Grinder, Made in Colombia
PREMIUM CAST IRON GRINDER: Known as a “molino para moler maiz,” our cast iron mill makes grinding easy…
As an affiliate, we earn on qualifying purchases.
As an affiliate, we earn on qualifying purchases.
Keep Your Flour Fresh and Nutritious
Freshly ground flour begins to lose nutrients after about 24 hours due to oxidation. To preserve its vitality, store your flour in airtight containers in a cool, dark place. For longer storage, keep it in the fridge or freezer. When you pull out a fresh batch, you’ll notice the vibrant aroma — a sweet, nutty scent that’s missing from store-bought flour.
Batch size matters too. Grinding in small amounts prevents spoilage, keeps your flour lively, and avoids waste. Think about your weekly baking schedule and adjust your grinding volume accordingly. Smaller batches reduce exposure to air and light, which can degrade nutrients over time. This careful approach ensures your flour retains its nutritional integrity and rich flavor, allowing you to enjoy the full benefits of freshly milled grains whenever you bake. It also minimizes waste and spoilage, making your baking more economical and sustainable.
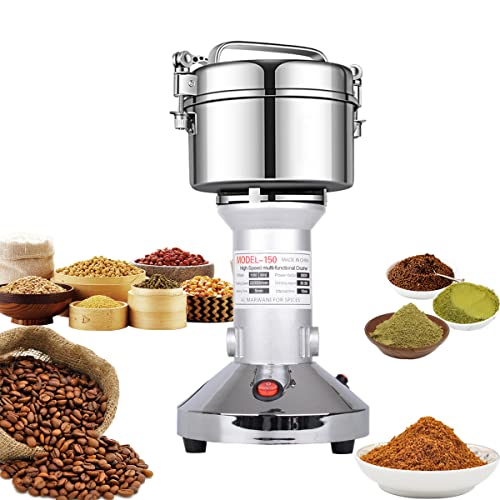
Grain Mill 150g High Speed Food Electric Stainless Steel Grinder Mill Seeds Flour Nut Pill Wheat Corn Herbs Spices & Seasonings Grinder Dry Grain Powder Machine
🌾SMIALL GRAIN GRINDER : Power:900W ; Capacity:150g; Interval Time:5-10 min;Rotating Speed: 22000R/Min,Triples blade: grinding blade, rotary blade, and…
As an affiliate, we earn on qualifying purchases.
As an affiliate, we earn on qualifying purchases.
Why Home Milling Is Better Than Store-Bought
Store-bought flour often loses up to 70% of its nutrients during processing and storage, according to research. Milling at home keeps the germ, bran, and endosperm intact, preserving vital enzymes and minerals. Plus, it’s free from preservatives, additives, and bleaching agents.
Understanding these differences highlights why home milling results in more wholesome, flavorful flour. The germ and bran contain essential oils, vitamins, and minerals that degrade over time or are removed during commercial processing. When you mill at home, you retain these components, which contribute to better digestion, richer flavor, and higher nutritional value. Moreover, controlling the freshness and grind size allows you to tailor your flour to specific recipes, ensuring optimal results. Recognizing these tradeoffs and benefits underscores the importance of milling your own flour for a healthier, more flavorful, and versatile baking experience.
Safety Tips and Maintenance for Your Mill
Always clean your mill after each use. Grain residues can harbor mold or pests. Use a dry brush or cloth to wipe down burrs and blades. If your mill has removable parts, wash them with warm water and mild soap, then dry thoroughly.
Be cautious when handling grains, especially if you’re milling gluten-free or specialty grains, which may contain small debris. Regular maintenance keeps your mill working smoothly and extends its lifespan.
And remember, if you’re dealing with electrical components, disconnect power before cleaning or servicing.
Proper maintenance not only ensures safety but also preserves the quality of your mill’s performance. Neglecting cleaning can lead to contamination, mechanical issues, or inconsistent flour texture. Regularly inspecting and servicing your mill, including lubrication if applicable, guarantees reliable operation and extends its lifespan, ultimately saving you time and money while ensuring safe, high-quality flour each time you mill.