TL;DR
Listen free for 30 days with Audible
Thousands of audiobooks and originals — cancel anytime.
Start your free trialAs an affiliate, we earn on qualifying purchases.
Most chipped knives can be restored at home by grinding away the damage with coarse stones and refining the edge. Larger or deeper chips may need professional help. Proper technique preserves blade profile and performance.
Nothing ruins the moment in your off-grid kitchen like a chipped knife—suddenly, slicing carrots or chopping herbs feels uneven, frustrating. But that jagged edge isn’t necessarily a sign to toss the knife. With the right approach, you can fix it yourself, saving money and extending your tool’s life.
In this guide, you’ll learn how to assess damage, choose the right tools, and carefully reshape your blade. Whether it’s a tiny nick or a noticeable chip, you’ll discover practical steps to bring your knife back to life—no fancy equipment required, just patience and a sharp eye.
Always assess the damage carefully before attempting a repair to avoid making problems worse.
Removing a chip involves grinding back the surrounding steel to rebuild a smooth, continuous bevel—don’t just grind at the damage.
Use coarse stones (120–400 grit) for significant chips, then refine with finer grits for a sharp, polished edge.
Matching the correct sharpening angle for your knife type balances cutting performance and durability.
Avoid common mistakes like uneven grinding, over-removing steel, or ignoring the cause of chipping to ensure a lasting fix.
Fixing a Chipped Knife Edge
A jagged edge is rarely the end of a good knife. Most minor chips can be removed with controlled grinding, a sensible grit progression, and careful attention to the blade’s original profile.
Is the knife repairable?
Clean and dry the blade, then inspect it under strong light. Gently touch a fingernail across the edge to locate roughness—never slide a finger lengthwise along the blade.
Microchips
Tiny rough spots often disappear during routine sharpening without major reshaping.
Home repair / easySmall visible chip
A coarse whetstone can usually remove a shallow, localized notch with controlled work.
Home repair / controlledLarge or deep chip
Substantial steel removal may alter blade height, bevel thickness, and cutting profile.
Specialist may be wiserCrack or split
Damage extending into the blade can compromise safety. Stop using the knife.
Stop / seek professional helpPause before repairing an expensive, collectible, laminated, ceramic, single-bevel, serrated, or traditionally forged knife. Warranty terms and specialized geometry may make professional service the safer choice.
The five-stage repair sequence
Work broadly along the edge instead of grinding only at the damaged point. Frequent checks preserve the original curve and prevent a low spot.
Set the angle
Match the maker’s bevel when known. Keep the spine height consistent through every stroke.
Remove the chip
Use a coarse stone and broad, controlled strokes until the notch disappears.
Rebuild the bevel
Even both sides and blend the repaired area into a continuous edge profile.
Refine and deburr
Move to finer stones, reduce pressure, and remove the weakened wire edge.
Test safely
Slice paper or a tomato. A finished edge should cut cleanly without tearing.
Removes significant damage. Check often because steel disappears quickly.
Smooths coarse scratches and restores an even, consistent bevel.
Sharpens, polishes, and prepares the edge for careful deburring.
Choose sharpness versus durability
More acute angles slice with less resistance but leave less steel supporting the edge. Wider angles tolerate impact better. Figures below are approximate per-side guidelines.
Tool and technique comparison
The best repair method balances cutting speed with control. Faster metal removal also increases the risk of profile damage, scratching, and overheating.
| Method | Best use | Control | Metal removal | DIY verdict |
|---|---|---|---|---|
| Coarse whetstone | Small to moderate chips | ✓ High | Moderate | ✓ Recommended |
| Medium stone | Microchips and refinement | ✓ High | Slow | ✓ Beginner-friendly |
| Diamond plate | Abrasion-resistant steels | ~ Medium | Fast | ~ Use light pressure |
| Powered belt grinder | Severe professional reshaping | ✗ Low without skill | Very fast | ✗ Professional only |
| Rotary tool | Not ideal for edge repair | ✗ Localized | Very fast | ✗ Avoid |
Blend the repair
Grinding only around the chip creates a low spot that can rock on the cutting board and leave ingredients partially connected.
Check behind the edge
Removing blade height can expose thicker steel. Light thinning may be needed to restore easy slicing performance.
Finish the job
A retained burr may feel sharp at first, then fold over and dull almost immediately. Reduce pressure progressively.
From damage to a durable edge
Every stage affects the next. A lasting repair begins with diagnosis and ends by correcting the behavior that caused the chip.
Common causes and better habits
A restored knife will chip again if the original stress remains. Hard impacts, lateral force, unsuitable cutting surfaces, and overly thin geometry are common culprits.
Avoid these edge killers
- Cutting bones or frozen food with a fine kitchen edge.
- Twisting or prying while the blade is embedded in food.
- Striking pits, hard shells, or hidden staples with concentrated force.
- Using glass, stone, or ceramic boards that punish the apex.
- Loose drawer storage where edges collide with metal utensils.
Protect the restored edge
- Use wood or quality synthetic boards for gentler edge contact.
- Cut straight down or slice cleanly instead of applying lateral torque.
- Choose a heavier tool for bones, frozen foods, and hard shells.
- Dry and store the knife safely in a sheath, block, or protected rack.
- Sharpen before severe dullness encourages excessive force during cutting.
The practical rule
Remove the minimum steel necessary while preserving the blade’s continuous profile. Work slowly, inspect often, and stop when cracks, complex geometry, valuable construction, or severe damage makes professional repair the safer decision.
How to Tell if Your Knife Is Repairable or Needs a Pro
Start by inspecting the damage under strong light. Run your fingernail gently along the edge—if it catches or feels rough, you’ve got a chip or a deep nick. Small, micro-sized chips often disappear during normal sharpening, but larger ones—several millimeters wide or deep—require more effort.
If you see cracks, deep splits, or if the damage extends into the blade’s core, stop. These issues can compromise safety and might need professional grinding or even replacement. For high-end or collectible knives, consult a specialist before attempting repairs at home.
For typical kitchen knives with a conventional steel, double-bevel edge, minor chips near the edge or just behind it are usually manageable at home. But if the damage reaches the tip or the heel or involves the bolster, expect a more complex fix.
As an affiliate, we earn on qualifying purchases.
What Repair Changes Happen When You Fix a Chip
Fixing a chipped knife isn’t just about grinding away the damage. When you remove steel to eliminate the chip, you change the blade’s profile. The edge may become slightly shorter, and the bevel’s thickness can increase behind the edge, affecting cutting precision.
This process can also create a slight low spot if the removal isn’t blended smoothly, leading to uneven cuts. The goal is to rebuild a seamless, continuous bevel that maintains the blade’s original shape and cutting angle.
Understanding these changes is crucial because they can influence how your knife performs after repair. Removing too much steel can weaken the edge or alter its angle, making it less effective or more prone to future chips. Conversely, careful, minimal material removal preserves the original geometry, ensuring the knife retains its cutting ability and lifespan.
Think of it like repairing a small dent in a car’s body—what’s underneath must be smoothed out to restore the original look and function. The tradeoff is that more aggressive grinding might make the repair easier but can compromise the blade’s integrity and longevity.
knife sharpening stone coarse grit
As an affiliate, we earn on qualifying purchases.
As an affiliate, we earn on qualifying purchases.
Step-by-Step: How to Repair a Chipped Knife Edge with a Whetstone
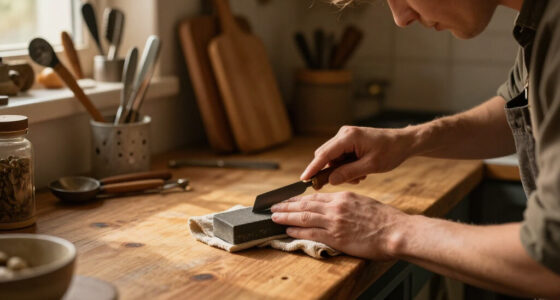
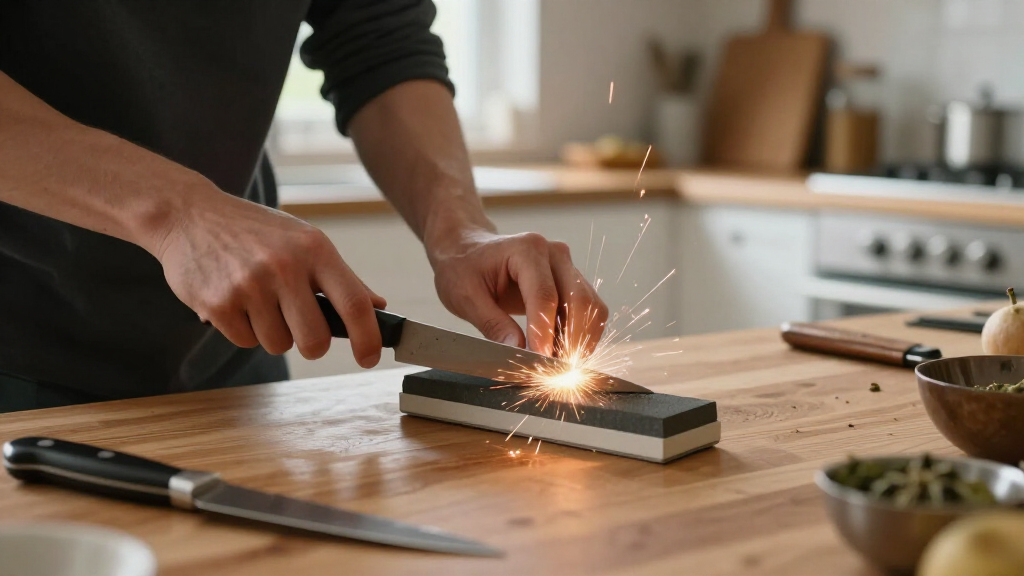
- Start with a coarse stone, around 120–400 grit, to grind away the chip. Position your knife at the correct sharpening angle (see next section), and make broad, controlled strokes along the entire edge, not just on the damaged spot. This ensures even removal of material and avoids creating weak spots.
- Check frequently by feeling the edge with your fingernail—carefully. Stop when the chip is gone, and the edge is smooth without any notches. Be aware that rushing this step can result in uneven removal, leading to a compromised edge or further damage.
- Progress to a medium grit (600–800) to refine the bevel and remove any burrs or unevenness left from coarse grinding. This step is essential for restoring a consistent edge profile and preparing for fine sharpening.
- Finish with a fine stone (1000 grit or higher) to sharpen and polish the edge. Use light, controlled strokes, alternating sides to keep the bevel even. This enhances cutting performance and smoothness.
- Deburr by gently feathering the burr off both sides. A strop or light honing can help remove any remaining wire edge. Proper deburring prevents a weak, fragile edge that can chip or dull quickly.
- Test the edge on a tomato or paper. It should cut cleanly without tearing. If it doesn’t, repeat the refining steps until the desired sharpness and smoothness are achieved.
Patience is key. Work slowly and check your progress often. Rushing or removing too much steel can weaken the blade or ruin its profile. Each step builds upon the last, ensuring a durable, sharp edge that can withstand use.
professional knife edge repair kit
As an affiliate, we earn on qualifying purchases.
As an affiliate, we earn on qualifying purchases.
Matching Your Edge Angle for Durability and Sharpness
Your knife’s edge angle influences both how sharp and how durable it is. A very acute angle—like 10–15 degrees—cuts like a scalpel but chips easily because the edge is thin and fragile. A more obtuse angle—around 20 degrees—stands up better to impact but may not be as finely slicing, which can compromise cutting efficiency.
For most kitchen knives, a 15–20 degree per side angle balances sharpness and toughness. Heavy-duty or impact-prone blades might benefit from a 20–25 degree angle, providing extra resilience against chips and dents. Choosing the correct angle is a tradeoff: sharper angles improve slicing but risk chipping, while wider angles enhance durability but may reduce precision.
Adjusting the angle slightly after a chip can help prevent future damage. For example, adding a micro-bevel of 22–25 degrees can protect a thin, sharp edge from microchipping during heavy use. The key is to understand your typical cutting tasks and select an angle that offers the best compromise between sharpness and strength.
Remember: always follow the original bevel if known. Changing it unexpectedly can impair performance or cause uneven wear, making future repairs more difficult and less effective.
manual knife sharpener for chipped blades
As an affiliate, we earn on qualifying purchases.
As an affiliate, we earn on qualifying purchases.
How to Properly Deburr and Finish the Edge
After fixing the chip and reshaping the edge, a burr often forms—a thin, weak flap of metal that must be carefully removed. If left, it can dull the edge quickly or cause rough cuts, compromising the blade’s performance.
Reduce pressure gradually, alternating sides, until you feel the burr disappear. Proper deburring not only restores the edge’s sharpness but also ensures uniform contact during cutting, which affects precision and safety. Use a strop or a very fine stone to gently polish the edge and remove any remaining wire. This step refines the edge, smooths out microscopic irregularities, and enhances cutting smoothness and durability.
Proper deburring is essential because it prevents micro-damage and maintains the integrity of the sharpened edge. A well-finished edge will cut more cleanly, last longer, and resist future chips or dulling.
Why Bad Technique or Usage Causes Chips—And How to Stop It
Fixing a chip won’t last if you don’t address the root causes. Common culprits include cutting bones, frozen foods, or hard shells like nuts or pits, which exert sudden, concentrated force on the edge, causing microfractures or chips. Twisting or prying with the edge also stresses the steel, leading to structural weaknesses that result in chipping over time.
Impact with glass, ceramic, or metal surfaces—like hitting a cutting board or dropping the knife—can cause immediate damage, especially if the blade is already weakened. Using an overly acute angle or applying heavy sharpening pressure can weaken the edge over time by thinning it too much or creating microcracks.
Protect your repaired knife by switching to wooden or plastic cutting boards, avoiding frozen or hard ingredients, and storing safely in a knife block or sheath. Regular maintenance and mindful use are critical to prevent future damage, as even the best repair can be undone by improper handling.
Think of it like driving: even the best repair won’t hold if you keep hitting potholes or neglecting regular maintenance.
When to Call in a Professional or Replace the Knife
Minor chips on a standard steel, double-bevel kitchen knife are often DIY fixable. But if the chip is large, deep, or causes a noticeable profile change—like a recurve—or if cracks are visible, it’s best to seek professional help. Attempting to fix severe damage yourself can lead to further complications or safety risks.
Valuable or specialty knives—like laminated, Damascus, or single-bevel blades—should be handled by pros to avoid damaging the pattern or structure. Professionals have specialized equipment and expertise to restore these blades without compromising their integrity.
If the blade is bent, cracked, or if the damage reaches the tip or heel, replacing it might be safer and more cost-effective than risking further harm. Remember, ceramic blades are especially brittle—home repairs often cause more harm than good. When in doubt, consult a professional or opt for replacement to ensure safety and performance.
Common Mistakes to Avoid When Fixing a Chip
- Grinding only at the chip without blending into the rest of the edge, creating a recurve or weak spot. This can cause uneven cuts and make future chips more likely.
- Using a fine stone on a large or deep chip—slow and inefficient, but also risking uneven removal if not careful.
- Removing too much metal—shortening the blade or weakening the edge, which can compromise its cutting ability and durability.
- Failing to flatten the sharpening stone regularly, causing uneven grinding and inconsistent results.
- Raising the sharpening angle accidentally, which can leave the edge too weak or uneven, leading to faster dulling and increased chipping risk.
- Leaving a wire burr—dull and prone to breaking off or tearing food, reducing cutting efficiency and potentially causing injury.
- Using improper tools like a pull-through sharpener or powered grinder without experience—these can easily damage the blade if misused.
- Continuing to use a cracked or compromised blade—risking injury and further damage. It’s better to repair or replace before use.
Patience and control are your best tools. Rushing can make small repairs worse, so take your time and check your progress often. Proper technique ensures a safe, durable, and effective repair that extends your knife’s lifespan.
Latest Tips and Trends in Knife Repair
Recent advice stresses maintaining consistent geometry—preserving the original bevel and profile—rather than just grinding out damage. This approach ensures the knife performs as designed, with minimal loss of material and maximum longevity. Micro-bevels add strength to thin, hard edges, reducing the chance of future chips, especially on high-hardness steels.
Guided sharpening systems and magnification tools help ensure angles stay true during repair, reducing human error. Diamond stones, especially for wear-resistant steels, cut faster and more precisely, enabling cleaner, more controlled removal of material.
Professional repairs now incorporate cooling methods and low-speed grinding to prevent heat damage, which can weaken the steel or cause warping. Recognizing that high hardness steels can be more chip-prone has led to more tailored sharpening approaches, making repairs more effective and longer-lasting.
In essence, the focus has shifted from “sharpen out the chip” to “restore the geometry,” ensuring repairs are durable and performance is preserved. This trend emphasizes quality, precision, and understanding of material behavior for better long-term results.
Frequently Asked Questions
Can a chipped knife be sharpened normally?
Small chips often disappear during regular sharpening, but larger chips need coarse grinding to reshape the edge first. Don’t expect a simple pass to fix significant damage.
How large is too large for a DIY repair?
If the chip is deep, wide, or causes a noticeable profile change—like a recurve—or if cracks are visible, it’s best to seek professional help. Safety and blade integrity come first.
Do I need to grind the whole edge?
Not necessarily the entire length, but blending the repair into the surrounding bevel prevents uneven cuts. Focusing only on the notch can create weak spots or low points.
What grit should I use?
Use 120–400 grit for large chips, 600–1000 grit for small defects, and finer stones for polishing and sharpening. The choice depends on damage severity.
Can a honing rod fix a chip?
No. A honing rod realigns or lightly abrades the edge but cannot reshape or repair a chip. Use proper sharpening stones for that purpose.
Conclusion
Fixing a chipped knife isn’t magic—it’s a skill and a careful process. With patience, the right tools, and a steady hand, you can restore your favorite blades to their sharp, efficient glory.
Think of it as a small act of craftsmanship that keeps your kitchen off-grid and self-reliant. A sharpened, smooth edge turns your knife into a reliable partner for years to come—don’t let a chip stop you.
College move-in / dorm season Picks
dorm essentials
As an affiliate, we earn on qualifying purchases.