
TL;DR

Get kitchen gear delivered free with Prime
- Fast, free delivery on millions of items
- Prime Video, Amazon Music and more included
- Member-only deals all year
A traditional smooth honing steel helps realign a knife’s edge between sharpenings; it does not restore a worn, chipped, or truly dull edge. Secure the rod, match the blade’s existing angle, make a few light alternating passes, and stop when cutting improves. If the knife still struggles, sharpen it with an abrasive stone or another suitable sharpening method.
A knife can go from slicing a ripe tomato cleanly to crushing its skin in a handful of meals. That change does not always mean the blade needs a full sharpening. A honing steel can help maintain an edge that has started to fold slightly during ordinary cutting, but it cannot rebuild an edge that has worn away.
That distinction saves you time and helps protect the knife you rely on for chopping onions, trimming meat, or cutting a loaf for supper. Despite its name, a traditional smooth steel is a maintenance tool for keeping a knife’s edge aligned; sharpening removes metal to form a new edge. Ceramic and diamond rods work differently because their surfaces are abrasive.
Here you’ll learn how to tell those tools apart, set up a steady stroke, choose a sensible angle, and decide when to stop honing and sharpen instead. Think of honing as nudging a crooked fence picket back into line—not replacing a broken one.
A traditional smooth steel realigns a slightly bent edge; sharpening removes metal to create a new edge.
Ceramic and diamond-coated rods are abrasive, so they can remove more metal than a smooth steel.
Choose a rod at least as long as the knife blade and follow the maker’s guidance on rod material and angle.
Secure the rod, use light alternating passes, and start with about five per side before testing the cut.
Sharpen or seek help when honing does not restore performance or the blade has chips, flat spots, or a rounded edge.
Knife care · Field guide 01
The Right Way to Use a Honing Steel
Bring a slightly bent edge back into line with steady, light passes. Know when honing helps—and when the knife needs sharpening instead.
The key distinction
Honing maintains.
Sharpening rebuilds.
A traditional smooth steel realigns tiny bends in the edge. It cannot replace metal that has worn away or repair chips.
01 / Understand the edge
Know what a honing steel can—and cannot—fix
A knife can lose its bite after ordinary use as its very thin edge bends slightly. A smooth steel can nudge that edge back into alignment between sharpenings.
Realigns a slightly folded edge
Use it when a recently sharpened knife starts slipping on food but has no chips or flattened spots. A few controlled passes may restore its feel.
Removes metal to form a new edge
A worn, rounded, chipped, or truly dull blade needs an abrasive stone, guided sharpener, or professional service. Honing cannot replace missing metal.
Think of honing as nudging a crooked fence picket back into line—not replacing a broken one. If the knife still presses into food instead of slicing, sharpen it.
02 / Choose your rod
Different surfaces do different work
“Steel” does not describe every honing rod. Match the rod’s length and surface to the knife, and check the maker’s guidance—especially for a hard, thin Japanese edge.
Smooth steel
Traditional maintenance surface. It mainly realigns the edge and removes little metal.
Ridged steel
Grooves change the contact with the edge. It may be too aggressive for some thin or hard knives.
Ceramic or diamond
These rods abrade metal and can sharpen to some degree. Use light pressure and maker-approved guidance.
Check length. Choose a rod at least as long as the knife blade.
Identify the surface. Smooth, ridged, ceramic, and diamond rods do different work.
Check knife guidance. Hardness and edge geometry affect which rod is suitable.
03 / Set a steady angle
Control starts before the first pass
Use the knife’s existing bevel angle. Follow the maker’s instructions whenever available; changing angles repeatedly can undermine the edge.
A useful reference
Many Western kitchen knives use roughly 15–20 degrees per side. Some Japanese knives use a narrower angle.
Clear the work area. Put away food, wipe spills, and use a stable, nonslip board.
Secure the rod. Plant the tip firmly on the board for the vertical method.
Keep clear. Keep fingers away from the blade path and move slowly.
04 / The honing sequence
Make a few light passes, then test the cut
The vertical setup is often easier to control. A horizontal hold can also work if the tip points away from you and the rod stays steady.
Set the heel
Place the blade heel near the upper part of the rod.
Draw down
Move down and across so the edge travels toward the tip.
Alternate sides
Switch sides each pass. Keep the angle consistent and pressure light.
Pause and test
Try a familiar cut on a stable board. Stop when performance improves.
The edge should glide along the rod, not strike it with a sharp click. Wipe residue from the blade and rod before preparing food.
05 / Quick answers
When to hone—and when to stop
How often should I hone?
There is no universal schedule. Hone when the knife starts to feel less keen during ordinary cutting; more frequent honing is not automatically better.
Can I use a rod on a Japanese knife?
It depends on the knife and rod. Check the maker’s advice; some hard, thin edges can be damaged by a ridged steel or careless technique.
Why is it still dull?
The edge may be worn, rounded, or chipped. Stop repeating strokes and use an appropriate abrasive sharpening method.
How many strokes are enough?
Start with about five gentle alternating passes per side, then test the cut. Stop once the knife performs better.
Align, test, and know when to sharpen.
Secure the rod, follow the blade’s existing angle, and use light alternating passes. If the edge still struggles—or shows chips or flat spots—choose sharpening instead.
Better control
Know what a honing steel can—and cannot—fix
A traditional smooth honing steel helps realign tiny bends in a knife edge between sharpenings; it does not remove enough metal to restore an edge that has become worn, rounded, or chipped. Use it when a recently sharpened knife has lost some bite during normal work, then check whether the blade cuts better. If it still presses into food instead of slicing, it likely needs an abrasive sharpening method.
During cutting, the extremely thin edge can bend or fold slightly. A smooth steel acts like a small straightening rail: light contact can nudge that edge back into better alignment. That is why a knife may feel livelier after a few passes even though you have not ground a new bevel.
Consider a cook preparing carrots and potatoes for a stew. The knife that cut cleanly yesterday now slips on a tomato skin, but it has no visible chips and recently had a proper sharpening. A few careful strokes may restore its feel. If the same knife has a flattened spot that scrapes along the board, honing cannot replace the missing sharp point.
There is a useful distinction between a smooth steel and a rod that looks similar but has a ridged or abrasive surface. Smooth steel focuses on alignment; abrasive rods remove metal and can sharpen to some degree. Neither technique makes a damaged edge disappear without material being removed.
Honing maintains an edge; sharpening creates a new one. If the blade still struggles after light honing, stop repeating strokes and sharpen it.
Products Worth Considering

Cuisinart Stand Mixer, 12 Speed, 5.5 Quart Stainless Steel Bowl, Chef’s Whisk, Mixing Paddle, Dough Hook, Splash Guard w/ Pour Spout, Ruby R

Ninja Luxe Café Mini Plus Espresso and Drip Coffee Machine with AutoFroth, Stainless Steel (ES351)

Ninja Crispi Glass Air Fryer (Stone) – 4‑in‑1
As an affiliate, we earn on qualifying purchases.
Choose a rod that suits your knife
A suitable honing rod is long enough to cover the blade, has a surface appropriate for the knife’s edge, and lets you keep a steady angle. A rod should be at least as long as the blade, so the knife can travel along it without crowding the tip. Match the rod’s material to the knife maker’s guidance, especially if you own a thin or hard-edged Japanese knife.
Despite its name, “steel” does not describe every honing rod. A traditional smooth steel is a maintenance tool for keeping an edge aligned. A ridged steel has grooves, while ceramic and diamond-coated rods are abrasive; those surfaces can remove more metal. That changes the job from gentle alignment toward sharpening, and makes pressure and frequency matter even more.
Picture a 20-centimeter chef’s knife paired with a short rod intended for small paring knives. You may run out of room before the heel-to-tip stroke feels natural. A longer rod gives the blade a clear path, while a nonslip grip and stable rod help you focus on the angle rather than juggling the tools.
For a harder Japanese knife, a ridged steel may be too aggressive or may catch the edge if your angle wanders. Some makers recommend a smooth ceramic rod for maintenance; others advise against honing rods altogether. Check the maker’s instructions, and if you cannot find them, favor a conservative approach over assuming all rods suit all knives.
- Check the length: choose a rod at least as long as the blade.
- Identify the surface: smooth steel, ridged steel, ceramic, and diamond-coated rods do different work.
- Check the knife guidance: edge hardness and geometry affect which rod is appropriate.
Set up a safe stroke before you move the blade
To use a honing steel safely, secure the rod first, hold the knife at its existing edge angle, and make slow, light strokes with the blade traveling away from your hands and body. A stable setup gives you room to control the edge; speed adds no benefit. For many Western kitchen knives, the bevel is roughly 15–20 degrees per side, though some Japanese knives use a narrower angle.
- Clear the work area. Put away food, wipe up spills, and choose a stable cutting board or another nonslip surface.
- Secure the steel. For the vertical method, plant its tip firmly on the board and grip the handle. Keep the tip from sliding.
- Find the knife’s angle. Hold the blade at its existing bevel rather than forcing it flat against the rod. Follow the maker’s guidance when available.
- Keep your body clear. Keep fingers away from the blade path and work slowly enough to stop if your grip slips.
The vertical method is often easier to control because the tip stays planted on the board. You can also hold the rod horizontally, with the tip pointed away from you, if that position feels steadier. Neither setup is safe if the rod wobbles or your hands cross the knife’s path.
For example, if you are standing at a cramped kitchen counter, shift the cutting board to a clear spot before starting. A few inches of space can give your wrist a straighter path and keep the blade away from a dish rack or a waiting hand. Good control starts before the first pass.
Make a few light passes, then test the cut
Start with about five gentle passes per side, alternating sides, then test how the knife cuts. Place the blade heel near the top of the rod and draw it down and across so the edge travels along the rod toward the tip. Use light pressure and a consistent angle; forceful, fast strokes usually add risk without improving the result.
Imagine you are preparing a pile of apples for a pie. Set the rod tip on a steady board, bring the knife heel to the rod’s upper section, and draw the blade down and across in one controlled motion. The edge should glide along the rod, rather than strike it with a sharp click. Switch sides for the next pass, then repeat without rushing.
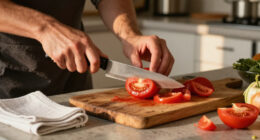
After several alternating passes, put the rod down and try a familiar cut on a stable cutting board. A keen knife should enter food with less pushing. A tomato is a helpful check because its skin tends to expose a reluctant edge, but use steady technique and keep your fingers clear. If the blade now cuts cleanly, stop.
More strokes are not a badge of care. Repeated passes can wear an edge, especially with an abrasive ceramic or diamond rod, and a changing angle can leave the bevel uneven. If five gentle passes per side make no clear difference, further passes on the same setup are unlikely to solve the underlying problem.
Let the knife’s performance set the stopping point. The goal is a controlled improvement, not a particular number of strokes.
Know when sharpening is the better next step
Sharpen a knife when honing no longer restores its cutting performance, or when you see chips, flat spots, or a rounded edge. Honing can align a slightly bent edge, but it cannot replace steel that has worn away. A suitable abrasive stone, guided sharpener, or professional sharpening service can remove material and create a fresh edge.
In a busy kitchen, dullness often arrives gradually. You may find yourself pressing harder through squash or sawing at a crusty loaf, even after a few careful honing passes. Those extra efforts put your hand closer to the board and can make cuts less predictable. Treat poor cutting performance as a signal to pause and assess the edge rather than keep pushing.
Visible damage gives another clue. A chip can snag on food, while a flat spot may drag across the board. Look at the blade under good light, but do not run a finger along the edge to check it. A smooth appearance does not prove that a knife is sharp, either; cutting performance matters.
If you maintain your own knife with a whetstone, sharpening takes practice: you must use an abrasive and control the bevel through repeated strokes. If you are unsure how to repair a chipped or valuable knife, a professional service can assess the damage. A knife with a sound edge benefits from modest maintenance; a worn edge needs a different job.
- Hone: the recently sharpened blade feels less keen, with no obvious damage.
- Sharpen: light honing does not improve the cut, or the edge has chips or flat spots.
- Ask for help: the knife is valuable, badly damaged, or outside your sharpening experience.
Adjust your technique for hard or thin Japanese edges
A harder, thinner Japanese knife may need a smoother, gentler maintenance method than a sturdy Western chef’s knife. Rod choice and angle depend on the blade’s construction, so check the maker’s recommendations before using a ridged steel or an abrasive rod. If the maker advises against rods, follow that guidance and use the maintenance method they specify.
Edge angles are not universal. Many Western knives use roughly 15–20 degrees per side, while some Japanese knives have narrower bevels. Changing the angle by guesswork can contact the wrong part of the bevel or put unnecessary wear on the edge. A moderate, consistent angle is safer than repeatedly switching between guesses, but the knife’s own guidance should lead.
Suppose you have a thin slicer used to portion fish. It may feel very sharp yet require a delicate touch and a compatible maintenance tool. A ridged rod pressed hard against its edge can cause damage, while a smooth ceramic rod may suit some knives when the maker permits it. The right choice varies from knife to knife.
Honing is also not a chore you must perform after every use. If your knife still slices cleanly, leave it alone. A dependable cutting board, careful storage, and a sound sharpening routine all help preserve the edge; a rod is only one tool in that wider set of habits.
When you cannot identify the knife’s bevel or the rod’s surface, slow down and look up the maker’s care instructions. That small pause can prevent unnecessary metal removal from an edge you may have kept for years.
Clean the blade and store your knife with care
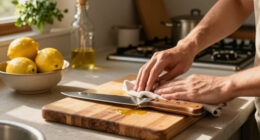
After honing, wipe the blade and rod to remove residue before preparing food. Honing can leave fine particles or debris on the surfaces, so a clean cloth and a quick look at the edge are practical finishing steps. Keep the knife dry and store it so the edge cannot knock against other tools.
For example, after slicing crusty bread, you may see a faint streak on the steel. Wipe the rod and blade before moving on to cut fruit or vegetables, then return the knife to a sheath, block, or secure magnetic strip suited to your kitchen. A loose knife rattling in a drawer can bump against spoons and other blades, blunting its edge and putting your fingers at risk.
A honing rod does not compensate for poor storage or a wobbly board. If your cutting board slides while you work, place a damp towel beneath it to steady the surface. Put the rod away where it will not roll off a counter or get knocked against a hard edge.
These habits matter in an off-grid kitchen as much as in a conventional one. A knife that stays clean, dry, and protected needs less corrective work, and fewer wasted strokes mean less wear over time. Maintenance is a small routine with a practical payoff: a blade ready when the next meal needs chopping.
Frequently Asked Questions
Does a honing steel sharpen a knife?
A traditional smooth steel mainly realigns tiny bends in the edge and removes little metal. Ceramic and diamond-coated rods are abrasive, so they can sharpen to some degree, though they may not replace a proper sharpening system.
How often should I use a honing steel?
There is no single schedule for every knife. Hone when the knife begins to lose its clean cutting feel, and leave it alone while it still works well; frequent strokes are not automatically better.
What angle should I use?
Use the existing bevel angle or the knife maker’s instructions. Many Western kitchen knives use roughly 15–20 degrees per side, while some Japanese knives have narrower angles.
How many strokes are enough?
Start with about five light, alternating passes per side, then test the knife on food or a stable cutting board. Stop when cutting improves; if it does not, repeated strokes may not solve the problem.
Can I use a honing steel on a Japanese knife?
It depends on the knife and the rod. Some Japanese edges are hard and thin, so check the maker’s advice before using a ridged steel; some knives suit a smooth ceramic rod, while others should not be honed on a rod.
Why is my knife still dull after honing?
The edge may be worn, rounded, chipped, or flattened instead of slightly bent out of alignment. It likely needs sharpening with an abrasive stone, a suitable guided sharpener, or professional service.
Is it safe to hold the steel vertically?
Yes, if the tip is planted firmly on a stable, nonslip board and you use slow, controlled strokes. Keep fingers out of the blade’s path and stop if the rod or board shifts.
Conclusion
Use a honing steel when a sound knife needs a small return to form: secure the rod, match the blade’s angle, make a few gentle alternating passes, and test the cut. If the edge stays stubborn or shows damage, stop honing and sharpen it with an appropriate abrasive method.
A good knife should move through supper ingredients with a clean, quiet slice. Care for the edge with patience, and let the board hear the difference.