
TL;DR
Open a free Amazon Business account
Business pricing, bulk buying and tax-exempt orders.
Create a free accountAs an affiliate, we earn on qualifying purchases.
A rotary egg beater is a reliable, eco-friendly tool perfect for whipping eggs, cream, and light batters. With steady technique and proper cleaning, it offers control and durability without electricity, ideal for off-grid kitchens.
Ever feel like your electric mixer is overkill — or just not there? A rotary egg beater might seem old-fashioned, but it’s a workhorse for small batches and off-grid kitchens. It’s simple, quiet, and gives you a tactile feel for your ingredients that electric tools just can’t match.
In this guide, you’ll learn how to wield a rotary egg beater like a pro, with concrete tips, common pitfalls to avoid, and ways to keep it running smooth for years to come. Whether you’re whipping eggs for breakfast or making a delicate whipped cream, mastering this tool will boost your self-reliant kitchen skills.
Use a deep, wide bowl to prevent splashing when whipping with a rotary egg beater.
Start slow and increase speed gradually to get smooth, consistent results.
Disassemble, wash thoroughly, and dry your beaters right after use to prevent rust.
Reserve your rotary egg beater for lighter tasks like eggs, cream, and light batters.
Regular maintenance extends the lifespan of your hand-powered tool and keeps it performing like new.
How to Use a Rotary Egg Beater
A rotary egg beater is a quiet, durable workhorse for eggs, cream, sauces, and light batters. The winning technique is simple: choose a deep bowl, submerge the beaters, begin slowly, and build a smooth rhythm.
Know the Tool
The classic mechanism turns a simple crank into fast, coordinated beater rotation. Stainless steel and durable plastic designs can remain useful for decades when kept clean, dry, and properly aligned.
Handle
Hold the fixed handle firmly with your non-cranking hand. A stable grip keeps the tool upright and reduces bowl movement.
Crank
Turn smoothly in the direction supported by your model. Consistent pressure matters more than frantic speed.
Wire Beaters
Keep both beaters submerged enough to catch the mixture and incorporate air without throwing ingredients outward.
Where a rotary beater shines
Choose it for light, responsive ingredients where control, portability, and quick cleanup matter more than raw power.
Six Steps, Less Mess
Preparation prevents most splashing and uneven mixing. Room-temperature ingredients can whip efficiently, while a deep, wide bowl gives the beaters space without sacrificing control.
Choose the bowl
Use a sturdy, deep, wide bowl with enough empty space above the ingredients.
Prevent splatterInspect the tool
Confirm the beaters are clean, dry, straight, and firmly attached.
Stop wobbleSubmerge
Place both beaters well into the mixture before turning the crank.
Catch ingredientsStart slowly
Use gentle rotations to combine ingredients without sending them over the rim.
Build controlIncrease speed
Settle into a steady motion—smooth and cyclical, like pedaling a bicycle.
Add air evenlyStop at texture
Watch the mixture, test consistency, and stop as soon as the result is right.
Avoid overmixingSlow → steady → vigorous
Let the resistance guide you. The mixture becomes easier to move as ingredients combine, then thickens again as cream or egg whites approach their final structure.
Time & Task Fit
Manual beating is highly effective at small scale. The chart uses a five-minute reference window; actual time varies with ingredient temperature, bowl shape, batch size, and desired texture.
Typical Whipping Time
A smooth rhythm is more useful than short bursts of maximum effort.
Whole Eggs
Fast, controlled blending for omelets, scrambled eggs, custards, and breakfast dishes.
Whipped Cream
Tactile feedback helps you notice thickening and stop before the cream is overworked.
Light Batters
Useful for pancakes, thin batters, dressings, and sauces that do not strongly resist the beaters.
Heavy Dough
Dense bread dough and large batches demand more torque. Use an electric mixer or knead by hand.
Manual vs. Electric
Neither tool wins every task. The rotary beater prioritizes control, silence, portability, and simplicity; an electric mixer prioritizes volume, speed, and power.
| Feature | Rotary Egg Beater | Electric Mixer |
|---|---|---|
| Power source | ✓Manual; no electricity | ~Outlet or battery required |
| Noise | ✓Quiet operation | ~Motor can be loud |
| Mixing control | ✓High tactile feedback | ~Preset speeds; less feel |
| Cleaning | ✓Simple, quick wash | ~More parts to clean |
| Best workload | ✓Small, light batches | ✓Large or heavy batches |
| Portability | ✓Compact and off-grid ready | ~Limited by power access |
Choose rotary when…
You are whipping a few eggs, cream, sauce, or light batter and value control, quiet operation, portability, and easy cleanup.
Choose electric when…
You are handling heavy dough, a large quantity, or a long mixing task where extra speed and torque will save substantial effort.
Care for Decades
Moisture, trapped residue, and loose hardware are the main enemies. A short post-use routine keeps the mechanism hygienic, smooth, and ready for the next batch.
Disassemble
Remove detachable beaters immediately after use so residue cannot dry around joints.
Wash
Clean with warm, soapy water and rinse thoroughly, paying attention to wire crossings.
Dry Fully
Remove all moisture before reassembly or storage to reduce rust and corrosion.
Inspect
Check the handle, crank, gears, and attachments for looseness, wobble, or damage.
Store Dry
Keep the beater in an accessible, low-humidity location away from damp cabinets.
A well-maintained rotary beater from the 1950s can still perform beautifully. If surface rust begins to appear, clean it promptly and apply only a very light coat of food-safe oil to appropriate metal parts.
Four Mistakes to Avoid
Most problems come from rushing, using the wrong vessel, or asking the tool to handle ingredients beyond its design. Small adjustments produce cleaner, more consistent results.
Starting too fast
Problem: Ingredients splash before they combine. Fix: Begin with slow rotations and increase speed gradually.
Overfilling the bowl
Problem: There is no room for movement or aeration. Fix: Use a deeper bowl with generous headspace.
Using uneven pressure
Problem: Wobbling produces inconsistent mixing. Fix: Stabilize the handle and maintain a circular rhythm.
Putting it away damp
Problem: Moisture encourages corrosion. Fix: Dry every wire, joint, and attachment before storage.
The Reliable Whipping Chain
Good preparation creates control; control creates consistent aeration; proper care makes the result repeatable for years.
Patience beats brute force.
For eggs, cream, sauces, and light batters, the rotary egg beater rewards a stable bowl, gradual acceleration, and a smooth hand. Use it within its limits, clean it immediately, and it can remain a dependable kitchen companion for generations.
What Is a Rotary Egg Beater and Why It Still Matters
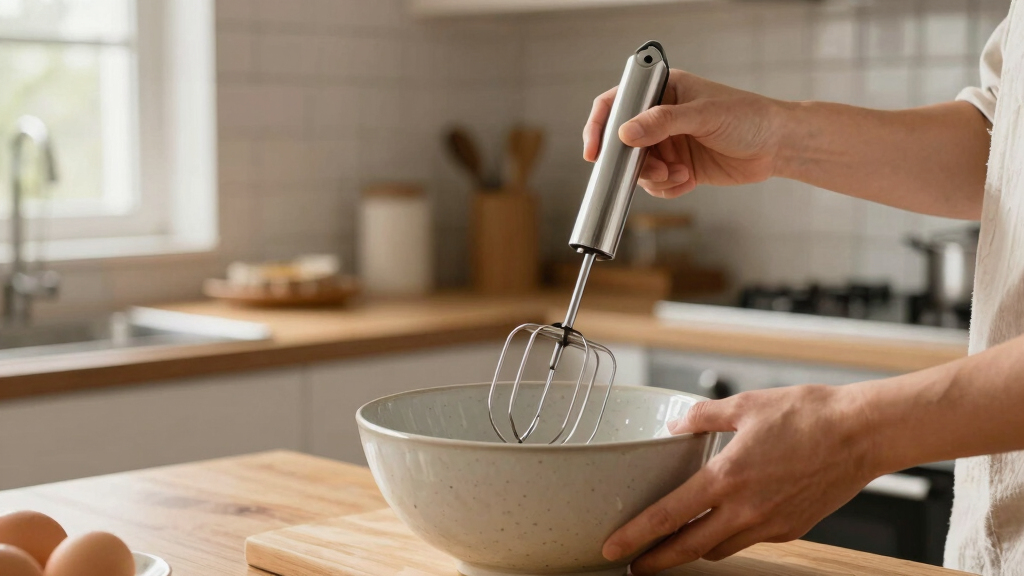
A rotary egg beater is a hand-powered tool with a handle, a crank, and wire beaters that spin when you turn the handle. Made mostly of stainless steel or durable plastic, it’s built to last for decades, even when used daily.
Despite the surge of electric mixers, these beaters excel in small tasks, offering unmatched control without noise or cords. Plus, they’re a quiet, eco-friendly option that fits perfectly in off-grid kitchens or when power’s limited. For example, whipping a dozen eggs takes about 3-5 minutes, but the precision and feel you get are worth every turn of the crank.
Their enduring relevance lies in their simplicity and reliability. Unlike electric mixers, which can break down or require maintenance, rotary beaters are straightforward, easy to repair, and don’t rely on electricity. This makes them especially valuable in situations where power is unavailable or unreliable, such as camping, remote cabins, or emergency preparedness. Their durability means that with minimal care, they can serve generations, making them a sustainable choice in a world increasingly dependent on disposable appliances.
As an affiliate, we earn on qualifying purchases.
Step-by-Step: How to Use a Rotary Egg Beater Without Making a Mess
- Choose a deep, wide bowl, like a sturdy glass mixing bowl. This prevents splatters when you crank vigorously. Using the right size bowl ensures stability and minimizes mess, which is especially important when working manually. It also helps you control the speed and prevent ingredients from flying out, making the process cleaner and less frustrating.
- Ensure the beaters are clean and firmly attached. Wipe off any dust or residue before starting. Proper attachment prevents wobbling or slipping, which can lead to uneven mixing or splatters. Clean beaters improve hygiene and ensure optimal performance, reducing the risk of contamination or rust.
- Hold the handle with one hand. Insert the beaters into your ingredients—eggs, cream, or batter—making sure they are submerged enough to whip effectively. Positioning the beaters properly allows for even mixing and reduces splatter. Submerging the beaters completely helps incorporate air efficiently, leading to fluffier results.
- Start turning the crank slowly at first, then gradually increase speed. Keep a steady rhythm—like pedaling a bike—until your ingredients reach the desired consistency. Starting slow minimizes splatter and allows you to develop a feel for the resistance. Gradually increasing speed ensures smooth, consistent whipping without overexertion or uneven mixing.
- For stiff peaks, beat longer with vigorous, consistent motion, usually 3-5 minutes depending on the batch size. Consistency in motion prevents uneven peaks and overmixing, which can deflate your whipped ingredients. Patience and steady effort are key, as manual whipping benefits from controlled, deliberate movements that develop the desired texture.
- When finished, disassemble the beaters and wash with warm, soapy water. Dry thoroughly to prevent rust. Proper cleaning and drying preserve the integrity of the metal parts and prevent corrosion. Regular maintenance also ensures the beaters remain smooth and efficient for years to come.
For example, whipping 4 eggs for an omelet takes about 2 minutes with steady effort. The key is patience and a smooth, rhythmic motion. Rushing or applying uneven pressure can lead to splatters or underwhipped eggs. Developing a consistent rhythm transforms this simple task into a satisfying, controlled process that yields perfect results every time.
As an affiliate, we earn on qualifying purchases.
Compare: Manual Rotary Egg Beater vs. Electric Mixer
| Feature | Rotary Egg Beater | Electric Mixer |
|---|---|---|
| Power | Manual (no electricity) | Electric-powered |
| Noise | Quiet | Can be loud |
| Control | High, tactile control | Pre-set speeds, less feel |
| Ease of cleaning | Simple, quick wash | More parts, more cleaning |
| Efficiency | Best for small batches | Great for large or heavy doughs |
| Portability | Very portable | Requires power outlet |
If you only need to whip a few eggs or cream, a rotary egg beater offers control and simplicity. For bigger jobs like bread dough, an electric mixer is faster and less tiring.
Understanding these differences helps you choose based on your specific needs. Manual beaters excel in precision and quiet operation, making them ideal for small, delicate tasks or situations where power is unavailable. Electric mixers, on the other hand, are designed for efficiency with larger quantities or tougher doughs, saving time and effort but sacrificing some tactile control. Recognizing these tradeoffs allows you to select the right tool for each task, ensuring both quality and convenience in your kitchen workflow.
As an affiliate, we earn on qualifying purchases.
Tips to Keep Your Rotary Egg Beater Running Smooth for Years
- Disassemble and wash the beaters immediately after use with warm, soapy water. Rinse thoroughly. This prevents buildup of residue that can cause rust or degrade the metal over time, ensuring consistent performance.
- Dry all parts completely to prevent rust and corrosion. Moisture is a primary cause of deterioration in metal tools; thorough drying extends the life of your beater.
- Apply a light coat of food-safe oil to metal parts if you notice rust forming over time. This creates a protective barrier, especially in humid environments, and keeps the metal moving smoothly.
- Store in a dry, accessible place, avoiding damp areas that can cause corrosion. Proper storage prevents accidental damage and reduces exposure to moisture, which is critical for maintaining longevity.
- Check the handle and crank for looseness regularly. Tighten or replace parts if needed. Ensuring all components are secure prevents wobbling or breakage during use, maintaining safety and efficiency.
For example, a vintage beater from the 1950s can still whip eggs perfectly, provided it’s cleaned and stored properly. Regular maintenance is the key to longevity. Taking these simple steps preserves the tool’s functionality and can even improve its performance over time, making it a trusted kitchen companion for generations.
As an affiliate, we earn on qualifying purchases.
Common Mistakes and How to Avoid Them
Many beginners overfill the bowl or start too fast, causing splatters and mess. To avoid this, always use a deep bowl and start slow. Rushing leads to uneven mixing and a messier process, which can discourage manual whipping and damage the mechanism. Slow starts build control and reduce splatter, making the task more manageable and less frustrating.
Another mistake is not cleaning the beaters immediately, which can lead to rust or buildup. Wash and dry right after use for best results. Neglecting cleaning allows residues to harden, making future cleaning more difficult and potentially causing corrosion that shortens the tool’s lifespan.
Finally, trying to whip heavy doughs or large quantities can tire you out and damage the mechanism. Use your hand-powered tool for lighter tasks — leave the heavy lifting to electric gear. Overexertion can cause the handle or crank to loosen or break, and using the appropriate tool ensures both safety and longevity.
For example, I once tried whipping a large batch of pancake batter with a small beater. It wore me out fast and didn’t mix evenly. Recognizing the limits of manual tools and choosing tasks accordingly preserves both your energy and the tool’s lifespan. Being mindful of these common pitfalls allows you to enjoy manual whipping without frustration or damage, ensuring your beater remains a reliable kitchen helper.
Frequently Asked Questions
Can I use a rotary egg beater for heavy doughs like bread or pizza crust?
No, rotary egg beaters are best suited for lighter tasks such as eggs, whipped cream, or light batters. Heavy doughs can damage the mechanism or tire you out quickly. Save heavy mixing for an electric stand mixer.How long does it typically take to whip eggs with a rotary egg beater?
Whipping a dozen eggs until fluffy takes about 3-5 minutes with steady, rhythmic turns. The exact time depends on the number of eggs and your effort level, but patience is key for best results.What’s the best way to clean and store my rotary egg beater?
Disassemble the beaters and wash all parts with warm, soapy water immediately after use. Dry thoroughly to prevent rust, then store in a dry place. Regular cleaning keeps it functioning smoothly for years.Can I use my rotary egg beater for other tasks besides eggs?
Absolutely. It works well for whipping cream, light batters, and even mixing sauces. Just avoid heavy doughs or dense mixtures that can strain the mechanism.Are rotary egg beaters better than electric mixers?
It depends. Manual beaters offer better control, quiet operation, and no power needed, making them ideal for small tasks or off-grid kitchens. Electric mixers are faster and better for large or tough jobs.Conclusion
Mastering a rotary egg beater is about control, patience, and a little elbow grease. It’s a simple, durable tool that rewards your effort with precision and satisfaction. Keep it clean, use it wisely, and it will serve you well for decades.
Next time you crack a dozen eggs or whip up fresh cream, reach for your hand-powered beater. It’s a quiet, reliable partner that keeps you connected to your ingredients and your skills. After all, in a self-reliant kitchen, nothing beats the feel of manual work and the taste of your handiwork.
Fall Picks
fall essentials
As an affiliate, we earn on qualifying purchases.