
TL;DR
Play games included with Prime
Start a Prime free trial and play with Amazon Luna on your devices.
Start playingAs an affiliate, we earn on qualifying purchases.
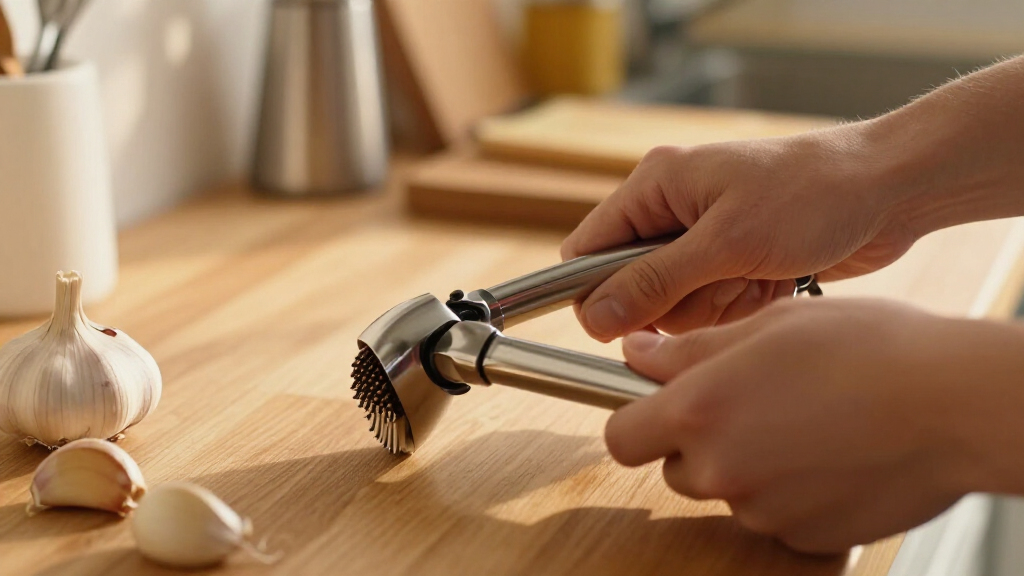
Pressing garlic creates a stronger, sharper flavor by rupturing more cells than chopping. Let pressed garlic rest for 10 minutes before cooking to maximize health benefits. Clean your press right after use to prevent residue buildup.
Ever wondered if you’re pressing garlic the right way? It’s not just about smashing cloves; it’s about unlocking peak flavor and health benefits. The right technique can turn a humble ingredient into a flavor bomb. Whether you’re off-grid or just want that perfect garlic punch, knowing how to press it properly makes all the difference.
In this guide, you’ll learn the science behind pressing garlic, the best steps to maximize flavor, and how to clean your tools without hassle. Get ready to turn simple garlic into a culinary powerhouse with just a few smart moves.
Press garlic to release more allicin, boosting flavor and health benefits.
Let pressed garlic sit for 10 minutes before cooking to maximize allicin formation.
Clean your garlic press immediately after use to prevent residue buildup and corrosion.
Use a garlic rocker or stainless steel press for durability and easy cleaning.
Add pressed garlic late in the cooking process to prevent burning and bitterness.
How to Press Garlic the Right Way
Press. Pause. Then cook. Rupturing the clove creates an intense, emulsifying paste—but the smartest move happens after the squeeze. Give garlic ten quiet minutes to develop its flavor before heat enters the picture.
Four moves to a better press
The aim is not brute force. It is efficient cell rupture, a short chemical-development window, and careful heat management.
Prep the clove
Peel only if your press requires it. If a green germ is present, split the clove and remove it for a milder result.
Place it whole
Set the clove in the hopper. There is no need to pre-chop unless you intentionally want a coarser texture.
Squeeze smoothly
Apply firm, even pressure until a moist paste emerges. Scrape the underside directly into your dish or bowl.
Rest 10 minutes
Let the paste sit before heating. Then add it late, use lower heat, and stir continuously to prevent scorching.
Why the pause matters
Alliin and alliinase are separated inside intact garlic. Crushing breaks their barriers, allowing the reaction that creates allicin—the source of garlic’s signature pungency.
Rupture unlocks the reaction
Pressing ruptures more cells than chopping or slicing. That is why the same clove tastes stronger, sharper, and more pungent when pressed.
Press, mince, or slice?
Match the cut to the experience you want. Smaller particles mean more ruptured cells, faster cooking, and a more integrated garlic flavor.
From gentle to forceful
Choose by dish
Smaller pieces create more intensity—and less margin for heat error.
Which tool wins?
Stainless steel is the dependable long-term choice. A rocker favors simplicity, while a fine grater is the closest multi-use substitute for a dedicated press.
| Feature | Stainless press | Plastic press | Garlic rocker | Microplane |
|---|---|---|---|---|
| Texture | ✓ Fine paste | ✓ Fine paste | ~ Slightly coarse | ✓ Silky paste |
| Durability | ✓ High | ✗ May crack | ✓ High | ✓ High |
| Cleaning | ~ Easy if immediate | ~ Small holes | ✓ Rinse and wipe | ✓ Quick rinse |
| Unpeeled cloves | ✓ Often | ~ Model dependent | ✗ Peel first | ✗ Peel first |
| Best advantage | Leverage and consistency | Low entry cost | No moving parts | Multi-use versatility |
Clean fast. Cook gently. Store safely.
Pressed garlic’s wet, fine texture is both its strength and its weakness: it dries stubbornly in press holes, scorches quickly in a pan, and requires careful storage.
Beat residue before it sets
- 1Rinse immediately after pressing.
- 2Open or disassemble the chamber.
- 3Clear holes with a brush, cleaner, or toothpick.
- 4Soak stubborn residue in warm water with a splash of vinegar.
- 5Dry fully before storing to protect the tool.
Three kitchen safeguards
The oxygen-poor environment can favor Clostridium botulinum. Refrigerate and use within a few days—up to one week—or freeze in portions.
Press or knife?
Traditionalists prize knife control and distinct texture. Press advocates value speed, maximum rupture, and a paste that disappears evenly into a dish.
Control every cut
Hand-chopping lets the cook choose exact particle size, moderates pungency, and keeps small pieces visible. It is especially useful when garlic must survive a hot sauté without scorching.
Intensity on demand
A press is fast, efficient, and creates a paste that emulsifies beautifully into dressings, marinades, aioli, and sauces. For integrated flavor, it is hard to beat.
Neither tool is universally superior. Press when you want a bold, seamless garlic presence; mince for balance; slice for a gentler, sweeter expression.
Why Pressing Garlic Matters More Than You Think
Pressing garlic isn’t just about speed; it’s about science. When you press, you rupture more cell walls, releasing a burst of flavor and releasing allicin—the compound responsible for garlic’s signature aroma and health effects. Compared to chopping, pressing creates a finer paste, emulsifying oils and flavors into your dish.
Imagine making a garlic-infused vinaigrette. Using pressed garlic, you get an even, intense flavor that dissolves seamlessly. But press too early, and the aroma can fade if you cook immediately. That’s why timing matters.
According to food science, pressing garlic produces a more pungent, sharper flavor than slicing or mincing. It’s like turning a gentle whisper into a shout. Plus, pressing helps incorporate garlic into sauces and dressings more uniformly, giving your dish a professional finish.
Understanding why pressing yields a more potent flavor helps you make smarter culinary choices. The increased cell rupture releases more allicin, which not only enhances taste but also boosts garlic’s health benefits. However, this also means pressed garlic can become overpowering if overused, so knowing the right amount and timing is crucial. The tradeoff is that while pressing intensifies flavor and health benefits, it requires careful timing to preserve aroma and avoid bitterness from overcooking.
As an affiliate, we earn on qualifying purchases.
Step-by-Step: Press Garlic the Right Way in 4 Easy Moves
- Peel or leave the skin on? Most modern presses handle unpeeled cloves, saving you time. If the clove is sprouted or bitter, split it and remove the germ before pressing.
- Place the garlic in the press—no need to chop first unless you prefer a coarser texture.
- Press firmly and smoothly—apply even pressure until the garlic is fully mashed into a paste.
- Rest for 10 minutes before cooking. This allows allicin to fully develop, maximizing flavor and health benefits.
For example, pressing garlic for a quick salad dressing? Follow these steps, then add the pressed garlic at the end of your mixing to preserve its sharpness.
Understanding each step’s purpose helps you avoid common mistakes, like pressing too early or too hard, which can diminish flavor or cause bitterness. The tradeoff is that proper technique ensures you get the most health benefits and flavor intensity from each clove.
As an affiliate, we earn on qualifying purchases.
Best Tools for Pressing Garlic — Which One Wins?
| Feature | Stainless Steel Press | Plastic Press | Garlic Rocker |
|---|---|---|---|
| Durability | High — won’t react or corrode | Moderate — may crack over time | High — sturdy, long-lasting |
| Ease of cleaning | Easy — dishwasher safe, use cleaner | Moderate — clean small holes | Very easy — rinse and wipe |
| Speed | Fast — one press, minimal effort | Fast — similar, no force needed | Very fast — rock back and forth |
| Cost | Moderate to high | Affordable | Affordable |
Choosing the right tool depends on your priorities. A stainless steel press offers durability and consistent performance, making it ideal for frequent use and easier cleaning, which helps prevent residue buildup that can harbor bacteria or cause corrosion over time. The garlic rocker, while simple and inexpensive, provides quick, effortless pressing and easy cleanup, making it perfect for casual cooks or off-grid setups. The tradeoff here is between longevity and convenience, so consider how often you’ll press garlic and your cleaning preferences when selecting your tool.
As an affiliate, we earn on qualifying purchases.
How to Clean Your Garlic Press Without Fights
Cleaning garlic residue from your press can be a hassle, but a few tricks make it easier. Right after use, disassemble if possible, and scrub with a small brush or toothpick. For stubborn bits, soak in warm water with a splash of vinegar before scrubbing.
Most steel presses are dishwasher safe, but avoid letting garlic dry in the holes. An extra step? Use a toothbrush or the included cleaner to reach into tiny crevices. Regular cleaning prevents buildup and keeps your press working smoothly for years.
Proper cleaning isn’t just about aesthetics; it’s crucial for maintaining the functionality and longevity of your tool. Residue buildup can lead to corrosion or mold growth, especially in off-grid environments where drying routines might be inconsistent. Using vinegar or baking soda solutions can help break down oils and mineral deposits, ensuring your press stays in top shape. The tradeoff is that neglecting thorough cleaning may shorten the lifespan of your tool and compromise hygiene, which is especially important if you frequently press garlic or share your tools.
For example, after pressing a dozen cloves for a large batch of garlic butter, a quick rinse and scrub keep your tool in top shape, saving time later and preventing potential bacterial growth.
As an affiliate, we earn on qualifying purchases.
Alternatives When You Don’t Have a Garlic Press
If you don’t own a garlic press, don’t worry. There are simple, effective substitutes that give you similar results. A microplane grater produces a fine garlic paste, perfect for dressings and sauces. Using a microplane allows you to quickly turn a clove into a silky, aromatic paste, which can be more effective than chopping when you want uniform flavor distribution.
Other options include mashing garlic with a fork, using a mortar and pestle, or smashing roasted garlic with the side of a knife. These methods can preserve more of the garlic’s natural oils, but they may require more effort or produce a coarser texture. For larger quantities, a sharp chef’s knife can finely mince garlic quickly, but it may not release as much allicin as pressing or grating, impacting flavor potency. The tradeoff is convenience versus maximum flavor extraction—choose based on your needs and tools available.
For example, a microplane can turn a clove into a silky paste in seconds, making it a versatile tool for your off-grid kitchen, especially when quick, potent garlic is needed.
The Science of Resting Garlic — Why 10 Minutes Matters
Pressing garlic starts a chemical reaction. When you crush the clove, alliinase contacts alliin, creating allicin—the compound responsible for garlic’s aroma and health perks. But this takes about 10 minutes to fully develop.
According to research, letting pressed garlic sit before cooking maximizes allicin formation. Cooking immediately can deactivate the enzyme, reducing the health benefits. This timing is crucial because allicin is unstable; it can degrade quickly with heat or prolonged exposure. Resting allows the enzymatic reactions to complete, ensuring you get the most potent flavor and maximum health benefits from each clove. If you rush to cook immediately, you risk losing much of the allicin, diminishing both flavor intensity and medicinal properties. This demonstrates the importance of patience in garlic preparation, balancing immediate flavor with optimal health effects. The tradeoff is that resting adds a short delay but significantly enhances the garlic’s impact on your dish and wellness.
So, if you want that punchy flavor and the cardiovascular perks, press, rest, then add to your dish at the last moment or in the final minutes of cooking.
Avoiding Burnt or Bitter Garlic—Keep It Sweet and Sharp
Pressed garlic’s tiny particles and released juices mean it cooks fast and can scorch easily. Burnt garlic turns bitter and acrid, ruining your dish. To prevent this, add pressed garlic toward the end of sautéing, lower your heat, and stir constantly.
Imagine cooking garlic for a quick pasta sauce. Add the pressed garlic after the oil heats up, then turn the heat down. Keep stirring, and remove from heat as soon as it turns golden—less than a minute.
This careful timing prevents the Maillard reaction from going too far, which causes bitterness. It’s about controlling heat and timing to preserve garlic’s natural sweetness and sharpness, ensuring it enhances rather than overwhelms your dish. The tradeoff is that rushing or overheating can quickly turn your garlic bitter, so attentive cooking is essential for optimal flavor. Properly managing heat and timing helps you achieve a balance where garlic remains fragrant, sweet, and pungent, rather than burnt or bitter.
Frequently Asked Questions
Should I peel garlic before pressing?
Most modern garlic presses handle unpeeled cloves, as the skin stays behind in the chamber. Peeling is optional, especially if you want quick prep. Just split sprouted cloves and remove the bitter germ beforehand.
How long should pressed garlic sit before cooking?
About 10 minutes. This rest period allows allicin to fully develop, maximizing flavor and health benefits. Cooking immediately can deactivate the enzyme and reduce allicin formation.
What’s the best way to clean my garlic press?
Clean immediately after use. Disassemble if possible, scrub with a small brush or toothpick, and rinse thoroughly. Most steel presses are dishwasher safe but avoid letting residue dry in the holes to prevent buildup.
Can I substitute pressed garlic with minced garlic?
Yes, but pressed garlic is more potent and sharper. Use about 25% less when substituting, or expect a slightly different flavor profile. Pressed garlic dissolves into dishes more easily than minced.
Why does my garlic turn blue or green?
This is a harmless pigment reaction caused by contact with acids or certain minerals. It’s safe to eat. The color change doesn’t affect flavor or safety.
Conclusion
Mastering the right way to press garlic turns a simple step into a flavor advantage. By pressing, resting, and timing it right, you unlock its full potential — sharp, pungent, and packed with health perks.
Next time you cook, remember: pressing isn’t just quick; it’s powerful. With a good tool and a few smart habits, garlic will become your secret weapon — lively, fragrant, and perfectly integrated into every dish.
Evergreen bestsellers Picks
bestsellers
As an affiliate, we earn on qualifying purchases.