
TL;DR
Listen free for 30 days with Audible
Thousands of audiobooks and originals — cancel anytime.
Start your free trialAs an affiliate, we earn on qualifying purchases.
Whipping cream by hand is simple if you control the temperature, use the right tools, and recognize peak stages. Expect about 3–8 minutes of effort for a fluffy batch. A cold bowl and whisk make all the difference.
Keep all your tools and cream well chilled to promote stable foaming.
Watch for visual cues — soft, medium, and stiff peaks — instead of relying solely on time.
Avoid over-whipping; stop just before the cream turns grainy and separates.
Use simple, low-tech tools like a balloon whisk and a cold bowl for best results.
Flavor and stabilize whipped cream with natural ingredients to make it last longer.
How to Make Whipped Cream by Hand
A cold bowl, a balloon whisk, and a few focused minutes are all you need. The secret is not brute force—it is keeping the cream cold enough to hold air and stopping at exactly the right peak.
From cold cream to perfect peaks
Set yourself up before whisking. Cold equipment buys time, a roomy bowl prevents splashes, and a balloon whisk incorporates air faster than a fork or flat whisk.
One fluffy batch
- 240 mlCold heavy cream
- 1–2 tbspConfectioners’ sugar
- ½–1 tspVanilla extract
- YieldAbout 2 cups whipped
Choose 36–40% milk fat. Products below about 30% will not form a stable whip.
Chill everything
Place a metal or glass bowl and balloon whisk in the freezer for 10–15 minutes. Keep the cream refrigerated until the last moment.
Start the foam
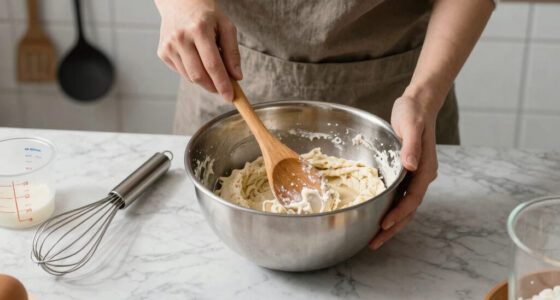
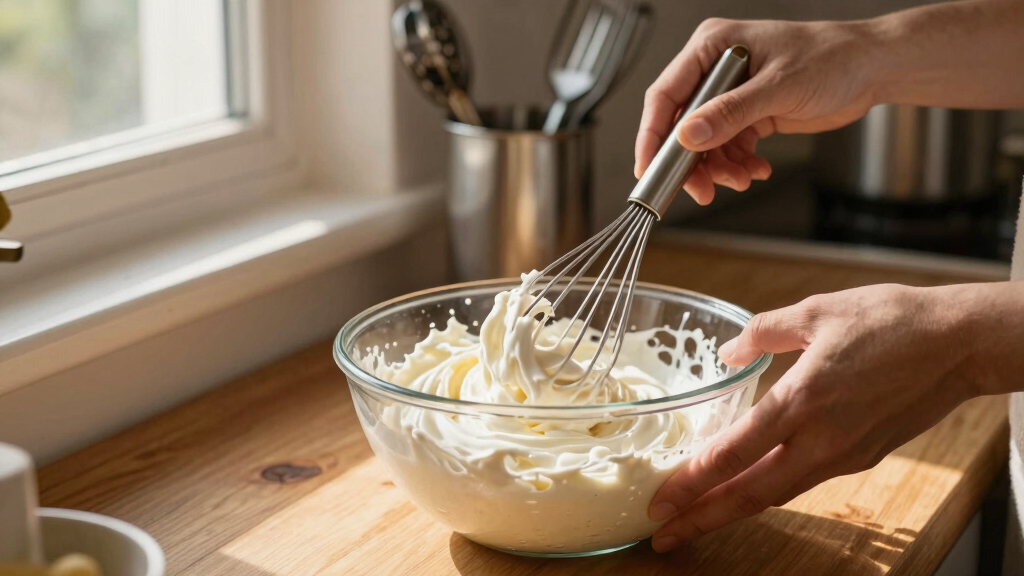
Pour in one cup of cream. Whisk vigorously with broad circular, side-to-side, or figure-eight motions, using your whole arm.
Season as it thickens
When whisk trails begin to remain visible, add sugar and vanilla. Fine sugar dissolves quickly and confectioners’ sugar adds slight stability.
Lift, look, stop
Raise the whisk and observe the tip. Stop at the peak stage your dessert needs—before the surface becomes dull or grainy.
Three peaks, three purposes
Peak shape is more dependable than elapsed time. Cream temperature, bowl width, whisk size, and arm speed can all change how long the process takes.
Soft peaks
The peak forms, then flops gently over. The cream is airy, flowing, and easy to fold without deflating other ingredients.
Best for mousseMedium peaks
The tip curls but holds. This is the versatile sweet spot for spooning over berries, pies, pancakes, and shortcake.
Best for toppingStiff peaks
The peak stands straight and the whisk leaves sharp tracks. Stop immediately: more agitation begins the path to butter.
Best for pipingIdeal stopping zone: glossy, defined, and still smooth.
Grainy texture means the emulsion is breaking.
The tiny structure behind the fluff
Whisking traps air while partially coalesced fat globules form a supporting network around those bubbles. Cold fat stays firm enough to maintain that structure.
Temperature controls stability
Warm fat softens and cannot support the bubble network, so the foam stays loose or collapses. Chilling the cream, bowl, and whisk keeps the fat firm while you incorporate air.
is the practical target for reliable hand whipping.
More fat, firmer peaks
Low-tech methods compared
A whisk offers the best visual control, but a sealed jar or French press can reduce splashing and work well in off-grid kitchens.
| Method | Typical time | Control | Effort | Best use |
|---|---|---|---|---|
| Balloon whisk | 3–8 minutes | Excellent | Moderate arm work | Precise peak stages |
| Mason jar | 3–5 minutes | Limited visibility | Vigorous shaking | Camping and small batches |
| French press | Several minutes | Good | Repeated pumping | Low-splash alternative |
| Fork | Slow | Poor aeration | High | Not recommended |
When the cream misbehaves
Most failures lead back to temperature, fat content, or going beyond stiff peaks. Diagnose the texture before adding more effort.
It stays liquid
Likely cause: warm cream or tools. Refrigerate the cream and rechill the bowl and whisk before trying again.
It never firms up
Likely cause: fat content below 30%. Switch to heavy cream labeled 36–40% milk fat.
It looks grainy
Likely cause: slight over-whipping. Stop immediately and gently fold in a tablespoon of fresh liquid cream.
It separates
Likely cause: the emulsion has fully broken into butter and buttermilk. Use it as butter or begin a fresh batch.
Slightly over-whipped? Fold in one tablespoon of cold unwhipped cream at a time. Stop as soon as the texture becomes smooth again.
Every good batch follows the same logic
Why Your Cream Won’t Whip and How to Fix It
Whipping cream by hand hinges on one key factor: temperature. Warm cream simply won’t hold air, no matter how vigorous your whisking. The fat globules need to stay solid enough to trap and stabilize air bubbles, which is why chilling everything makes all the difference.
If your cream refuses to thicken, check these common issues: the cream isn’t cold enough, the fat content is too low, or you’re using a product like half-and-half instead of heavy cream. To fix this, chill your cream at least 30 minutes before whipping, and opt for cream with at least 36% milk fat. This isn’t just about achieving volume; it affects the texture and stability of your whipped cream. Warm cream produces loose, unstable foam that quickly deflates, leading to disappointment. The tradeoff is patience—chilling takes extra time but guarantees a better, more resilient whip. Recognizing these nuances ensures consistent results and prevents frustration during your manual whipping process.
As an affiliate, we earn on qualifying purchases.
The Essential Tools for Hand Whipping Cream
Start with a large, chilled metal or glass bowl. The cold surface helps keep the fat globules firm, giving you more time before over-whipping. Pair it with a balloon whisk — its shape traps air efficiently and covers more surface area than a small or flat whisk.
Chill your bowl and whisk for 10–15 minutes in the freezer to boost whipping speed. For a fun twist, try a mason jar or French press — just pour in the cold cream, seal, and shake or pump. These low-tech options are surprisingly effective and perfect for off-grid kitchens. The choice of tools impacts your control over the process. A larger, airy whisk creates more surface disturbance, introducing air faster and making the process more efficient, especially when your arm fatigue sets in. Alternative methods like shaking in a jar or using a French press leverage simple physics—agitation and surface area—to achieve similar results without electricity. These options trade off some speed for versatility and convenience, especially in remote settings where traditional tools might be limited. Understanding why these tools work helps you choose the best method for your environment and comfort level.
cold mixing bowl for whipped cream
As an affiliate, we earn on qualifying purchases.
As an affiliate, we earn on qualifying purchases.
Step-by-Step: How to Hand Whip Cream to Perfect Peaks
- Chill your bowl, whisk, and cream for at least 10 minutes. This initial cooling is crucial for controlling the whipping process and preventing the cream from collapsing prematurely. Temperature control is vital because warm ingredients cause the fat globules to soften and release their ability to stabilize air bubbles, leading to a less stable foam. Cold ingredients ensure the fat remains solid enough to trap air effectively, resulting in a fluffier, more stable whipped cream.
- Pour 1 cup of cold heavy cream into the bowl. Add 1-2 tablespoons of powdered sugar and a half teaspoon of vanilla if desired. The sugar not only sweetens but also helps stabilize the foam by slightly increasing the viscosity of the liquid phase, making the structure more resistant to collapse. Vanilla adds flavor, but its impact on stability is minimal—its main role is taste enhancement.
- Start whisking vigorously in small, circular or side-to-side motions. Use your whole arm, not just your wrist. This generates the necessary shear force to incorporate air into the cream, which is essential for forming stable bubbles. Consistent, vigorous motion ensures even air incorporation and prevents uneven whipping, which can cause inconsistent texture or over-whipping in parts.
- Expect to see the cream thicken after about 3–4 minutes. It doubles in volume and starts to look glossy. This visual cue indicates you’re on the right track, but patience is key. Rushing can deflate your foam or cause over-whipping. Recognizing these visual signs helps prevent over-processing, which can turn your fluffy cream into butter.
- Recognize the peak stages: soft peaks (tip flops over), medium peaks (tip curls), and stiff peaks (stands straight). Understanding these stages helps you control the texture for different uses, from toppings to piping. Achieving the right peak depends on your intended presentation—soft for light toppings, stiff for decorative piping—and over-whipping past stiff peaks leads to graininess and separation.
- Stop whisking at your desired stage. For toppings, aim for medium to stiff peaks. Over-whipping beyond stiff peaks causes the cream to turn grainy and start to separate, which is difficult to reverse. Timing and visual cues are your best guides here, not just the clock. This conscious stopping point preserves the delicate balance between volume and stability, especially important when working manually without electric mixers.
Remember: over-whipping leads to grainy, separated butter. Stop just before that point. This tradeoff between volume and texture hinges on your attentiveness and understanding of the process, especially when working manually without electric mixers.
As an affiliate, we earn on qualifying purchases.
How to Spot and Achieve Perfect Peaks
Perfect peaks are about texture and hold. Soft peaks gently tip over when you lift the whisk, like a soft cloud. Medium peaks curl at the tip, holding shape but still soft enough to fold or spread. Stiff peaks stand tall and straight, like a firm sculpture, indicating maximum aeration and stability.
To test, lift your whisk and observe. If the peaks droop quickly, keep whisking. If they hold their shape and stand firm, you’re done. Recognizing these cues prevents over- or under-whipping, which can compromise the final texture. The timing, usually between 3–8 minutes depending on your arm strength and cream temperature, is less important than observing the texture change. Think of it as learning to read the cream’s signals rather than strictly timing it. For example, when topping a berry shortcake, medium peaks provide a smooth, stable layer, while stiff peaks are ideal for piping decorative dollops, adding both visual appeal and structural integrity.
As an affiliate, we earn on qualifying purchases.
Troubleshooting Common Whipping Problems
If your cream turns grainy or separates, you’ve over-whipped past stiff peaks. The fat globules have broken apart, creating butter and buttermilk. This separation is irreversible and results in a greasy, lumpy texture that’s unsuitable for most purposes. To rescue slightly over-whipped cream, gently fold in a tablespoon of liquid cream or fresh unwhipped cream, which can rehydrate the foam and restore some smoothness. However, if the cream is too far gone, starting over may be necessary. Increasing whisking speed, using a larger bowl, or ensuring everything remains cold can prevent this issue. If your cream won’t whip at all, double-check the fat content and temperature — it should be cold and at least 36% fat. For vegan or dairy-free options, chilled coconut cream or aquafaba (the chickpea brine) can be whipped into a fluffy substitute, though they require different techniques and tips. These alternatives demand patience and specific handling to achieve a similar airy texture, but they expand your options when traditional cream isn’t available or suitable.
Flavor Variations and Make-Ahead Tips
Enhance your whipped cream with flavor variations like a splash of bourbon, a teaspoon of cocoa powder, or citrus zest. These additions can complement desserts and elevate simple toppings into memorable treats. For dairy-free versions, chilled coconut cream whipped with a pinch of salt and a little sugar offers a rich, tropical alternative that holds up well in various recipes.
To make whipped cream ahead of time, stabilize it with a spoonful of mascarpone or a pinch of gelatin dissolved in water. These stabilizers help maintain structure and prevent weeping during storage. Keep it refrigerated for up to 24 hours, covered tightly — it may deflate slightly but will still be delicious. For best results, whip just before serving to ensure maximum fluffiness and volume. If it starts to weep or deflate, a quick re-whisk can often revive the texture, especially if stabilization agents were used. These techniques allow you to prepare in advance without sacrificing quality, making your off-grid or busy kitchen workflow more flexible.
Quick Tips for Easier Hand-Whipping
- Ensure everything is well chilled — bowl, whisk, and cream.
- Use a larger, airy whisk for faster incorporation of air.
- Alternate hands or take short breaks to avoid fatigue.
- Whisk in a figure-eight pattern for efficiency.
- Don’t rush — patience yields better texture.
Frequently Asked Questions
How long does it take to whip cream by hand?
Expect about 3 to 8 minutes of vigorous whisking, depending on your speed, the temperature of your cream, and the size of your bowl. It’s a workout, but well worth the effort.Why won’t my cream whip?
Most often, it’s because the cream isn’t cold enough or the fat content is too low. Using heavy cream with at least 36% milk fat and chilling everything beforehand makes a big difference.Can I whip cream with a fork?
It’s possible but highly impractical. A balloon whisk is much more efficient because it traps and incorporates air faster. For small batches or quick demos, a fork can work in a pinch, but it’s slow and tiring.What are the peak stages and how do I recognize them?
Soft peaks tip over easily, medium peaks curl at the tip, and stiff peaks stand straight and firm. Recognize these by gently lifting your whisk and observing the shape of the cream.How do I fix over-whipped, grainy cream?
Gently fold in a tablespoon of liquid cream or fresh unwhipped cream to smooth it out. If it’s too far gone, you may need to start over, but this trick can salvage slightly over-whipped batches.Conclusion
Mastering how to whip cream by hand turns a simple ingredient into a versatile topping and ingredient. It’s a skill that rewards patience and attention to detail, especially when off-grid or using manual tools. Next time you want fresh, fluffy cream, remember: keep everything cold, whisk vigorously, and watch for those perfect peaks to appear—your taste buds will thank you.Flea & tick season Picks
flea and tick prevention
As an affiliate, we earn on qualifying purchases.