
TL;DR
Prime for Young Adults — start your free trial
Fast free delivery, streaming and member deals for eligible 18–24 year olds.
Try it freeAs an affiliate, we earn on qualifying purchases.
Making almond flour at home is easy and cost-effective. Use raw, blanched almonds, process carefully with hand tools or blenders, then store properly. It’s a practical skill for any off-grid or self-reliant kitchen.
Skipping the store-bought aisle and making your own almond flour might sound intimidating, but it’s surprisingly straightforward. You get a fresher product, more control over texture, and a chance to experiment with flavors. Plus, it’s a smart way to stretch your almonds further.
Whether you’re off-grid, want to avoid additives, or just love DIY projects, mastering almond flour at home adds another tool to your self-reliant kitchen. Let’s walk through exactly how you can do it, step by step, using simple, hand-powered methods.
Start with raw, blanched almonds for the best consistency and color.
Process almonds in short bursts to avoid turning them into almond butter.
Sift the ground almonds to achieve a uniform, fine flour.
Store your almond flour in the fridge or freezer, using it within a month for best freshness.
Homemade almond flour offers control over flavor, texture, and cost, making it a smart addition to any off-grid kitchen.
Choose the Right Almonds for Perfect Flour Every Time
The foundation of good almond flour starts with your almonds. Use raw, blanched almonds for the lightest, finest flour. They’re free of skins, yielding a smooth, pale powder. If you prefer a darker, more textured flour, unblanched almonds work too, but they’ll add a hint of skin and a richer color.
For example, when making a delicate gluten-free cake, I always start with blanched almonds. The result is a fluffy, uniform crumb without specks of skin.
Tip: Buying almonds in bulk reduces cost and lets you process larger batches. Just ensure they’re fresh—almonds can turn rancid quickly once exposed to air.
high-speed blender for almond flour
As an affiliate, we earn on qualifying purchases.
As an affiliate, we earn on qualifying purchases.
Prep Your Almonds — The Secret Step for Consistent Texture
Before processing, make sure your almonds are completely dry. Moisture leads to clumping or uneven grinding. You can dry them in a low oven (around 200°F / 93°C) for 10–15 minutes or spread them out in a dry, sunny spot for a day.
To boost flavor, lightly toast almonds until they turn golden and smell nutty—just 8–10 minutes in a skillet over medium heat while stirring constantly. This step adds depth but can affect moisture content, so plan accordingly.
For instance, I toast my almonds before grinding for a richer, more aromatic flour that elevates baked muffins and cookies.
As an affiliate, we earn on qualifying purchases.
Step-by-Step: How to Turn Almonds into Flour Without a Fancy Machine
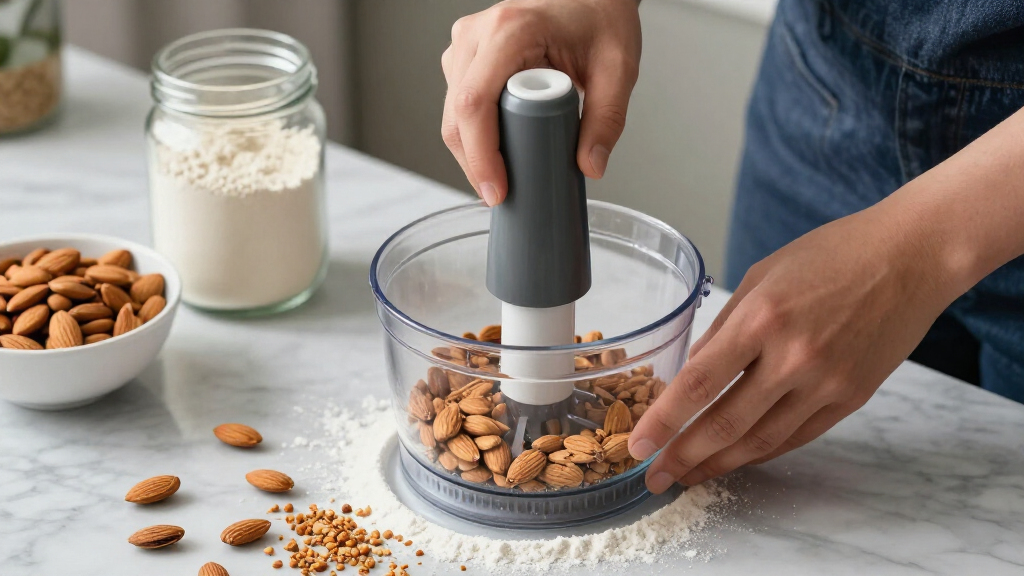
- Place a handful of almonds into your high-speed blender, food processor, or manual grain grinder.
- Pulse in short bursts—about 5 seconds each—avoiding over-processing. Keep the machine cool, and shake or stir the almonds between pulses.
- Check the texture after every few pulses. Aim for a fine, powdery consistency, with some small bits if you prefer a coarser flour.
- Sift the ground almonds through a fine sieve to remove larger pieces. Re-blend any coarse bits until fine.
- Store your freshly ground almond flour in an airtight container in the fridge or freezer to keep it fresh.
Processing almonds in short, controlled bursts is crucial because it allows you to control the texture and prevent overheating, which can cause the oils to release and turn the flour into almond butter. Repeated, gentle pulses give you a more consistent, fine flour that’s ideal for baking. Sifting helps separate the fine flour from coarser particles, ensuring a uniform texture that improves the final baked product. Proper storage in cool conditions slows down the oxidation process, preserving the flavor and preventing rancidity, which is essential for maintaining the quality of your homemade flour.
As an affiliate, we earn on qualifying purchases.
Compare Homemade vs. Store-Bought Almond Flour
| Feature | Homemade Almond Flour | Store-Bought Almond Flour |
|---|---|---|
| Freshness | Very fresh, no preservatives | Often weeks or months old, sometimes with additives |
| Cost | Cheaper when bought in bulk | More expensive per pound, especially for specialty brands |
| Texture | Can be very fine, but varies based on processing | Usually very uniform and finely ground |
| Customization | Adjust flavor and coarseness easily | Limited options |
In real-world terms, making your own almond flour gives you control—if you take care to process and sift thoroughly, it can match store-bought in fineness and freshness. Plus, the cost savings add up fast if you buy almonds in bulk. The key implication is that you can tailor the texture and flavor to suit specific recipes or preferences, which is often limited with commercial options. However, achieving the same uniform fineness requires patience and careful sifting, and inconsistent processing can lead to a flour that’s either too coarse or slightly oily. The tradeoff is that homemade flour demands more attention but rewards you with freshness and customization that commercial brands can’t always offer.
As an affiliate, we earn on qualifying purchases.
Store It Right to Keep Your Almond Flour Fresh and Nutty
Homemade almond flour is best stored in an airtight container—preferably glass—kept in the fridge or freezer. Rancidity sneaks in quickly if exposed to heat or air. You’ll want to use it within 1–2 weeks at room temperature or up to a month refrigerated.
For longer storage, freeze the flour in small, labeled portions. When baking, bring it to room temperature first to avoid clumping.
For example, I keep my almond flour in a small jar in the fridge, pulling out only what I need for a week’s worth of recipes.
Understanding how to store almond flour properly is essential because oils in almonds can oxidize and turn rancid if exposed to heat or prolonged air contact. This not only affects flavor but can also impact health. Freezing slows down oxidation significantly, extending shelf life while preserving flavor and nutrition. Using small, labeled portions makes it easier to thaw only what you need without exposing the entire batch to temperature fluctuations that could accelerate spoilage. Proper storage ensures your homemade flour remains fresh, flavorful, and safe to use over time.
Your Quick Guide to Perfect Almond Flour Every Time
- Start with raw, blanched almonds for a light, fine flour.
- Dry or toast them to add flavor and prevent moisture issues.
- Pulse carefully in short bursts—avoid over-processing.
- Use a fine sieve to sift out coarse bits and re-blend if needed.
- Store in a cool, airtight container in the fridge or freezer.
Follow these steps, and you’ll have homemade almond flour that’s just as good—if not better—than store-bought.
Frequently Asked Questions
Can I make almond flour from roasted almonds?
Yes, you can, but roasted almonds will produce a darker, more aromatic flour with a richer flavor. Keep in mind, roasting can slightly reduce moisture content, so monitor your process for best results.
How fine should homemade almond flour be?
Ideally, aim for a very fine, powdery texture similar to commercial flour. Use a sieve to remove larger bits, and re-process coarse parts. The finer the flour, the better it works in baked goods like cakes and cookies.
How long does homemade almond flour last?
Stored properly in an airtight container in the fridge, it stays fresh for 1–2 weeks. In the freezer, it can last up to 3–4 months. Always smell and check for rancidity before use.
Can I turn almond meal into almond flour?
Yes, but almond meal is usually coarser and may contain skins, which can affect the texture. Sifting and re-blending will help, but for the best results, start with blanched almonds if possible.
What’s the best way to prevent almond flour from turning into almond butter?
Use short, controlled pulses, keep your equipment cool, and avoid processing for too long. If the almonds start to clump or feel oily, stop immediately to prevent turning the batch into almond butter.
Conclusion
Making almond flour at home turns a simple ingredient into a versatile kitchen staple. With just a handful of almonds, a manual grinder or high-speed blender, and a little patience, you get fresh, customizable flour ready for baking or cooking.
Next time you crack open a bag of almonds, remember—your best flour is just a few pulses away. It’s a small step toward greater self-reliance and better flavor in every bite.
Fall Picks
fall essentials
As an affiliate, we earn on qualifying purchases.