
TL;DR
Cooking rice in a Dutch oven is simple and forgiving. Use the right water-to-rice ratio, keep the lid on, and let it rest for fluffy, evenly cooked grains. It’s a versatile, off-grid alternative to a rice cooker.
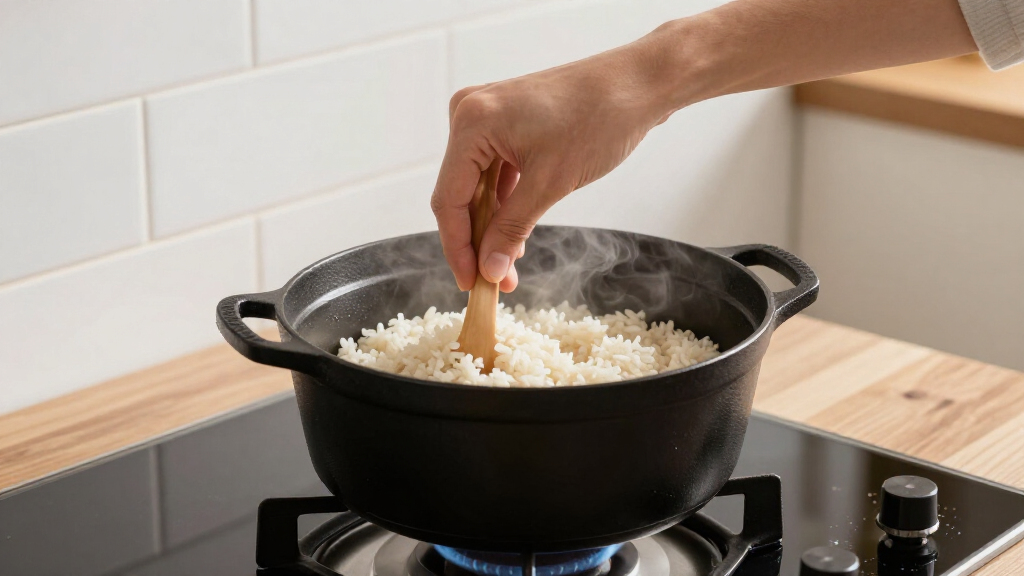
Ever tried to cook rice in a cast iron Dutch oven? It’s a game-changer. This heavy, lid-sealed pot turns your stovetop into a mini rice cooker, with steam and heat working together for perfect grains. No more sticking or burnt bottoms—just fluffy, separate rice, every time.
If you’re off-grid, or just love the simplicity of manual tools, mastering rice in a Dutch oven makes sense. It’s reliable, durable, and surprisingly versatile. Here’s everything you need to know to get that rice just right, no matter your setup.
Use the right water-to-rice ratio: 1.5:1 for white rice, 2:1 for brown rice.
Keep the lid on during cooking—lifting it releases steam and ruins texture.
Pre-rinse the rice thoroughly to avoid gumminess and sticking.
Let the rice rest for 10 minutes after cooking to finish the steam process.
A Dutch oven’s heat retention makes your rice more forgiving and results more even.
How to Cook Rice in a Dutch Oven
A heavy, lid-sealed pot turns your stovetop into a mini rice cooker — steam and heat working together for fluffy, separate grains every time. No sticking, no burnt bottoms, no special equipment. Reliable, durable, and completely off-grid friendly.
white rice
lid on
still covered
Why a Dutch Oven Is Perfect for Rice
Think of it as a miniature, self-contained oven and rice cooker rolled into one. Three physical properties do all the work for you.
The Tight Lid Traps Steam
A heavy, tight-fitting lid seals moisture inside — recreating a rice cooker environment. Rice cooked this way often comes out fluffier and more evenly textured than in thin pots.
Thick Walls Kill Hot Spots
Cast iron walls distribute heat evenly across the base, preventing the scorched patches and burnt bottoms that plague thin-bottomed saucepans.
It Keeps Cooking Off-Heat
The pot’s slow heat release makes the 10-minute rest especially effective — and keeps rice warm at the table long after cooking, without scorching.
Rice Type Reference Chart
Dutch ovens retain steam exceptionally well, so they need less water than the classic 2:1 saucepan rule. Highlighted column = the numbers to memorize.
| Rice Type | Water : Rice | Simmer (Lid On) | Rest | Notes |
|---|---|---|---|---|
| Long-Grain WhiteMost Popular | 1.5 : 1 | 15–18 min | 10 min | The standard. Rinse until water runs clear for separate grains. |
| Jasmine | 1.5 : 1 | 15–18 min | 10 min | Slightly softer grain; watch the first boil for foam. |
| Basmati | 1.5 : 1 | 15–18 min | 10 min | Toasting 1–2 min in butter first adds a nutty pilaf character. |
| Brown Rice | 2 : 1 | 40–45 min | 10 min | Denser bran layer needs more water and a much longer simmer. |
| Wild Blend | 2 : 1 | 40–45 min | 10 min | Treat like brown rice; check tenderness at 40 minutes. |
Step by Step: Perfect Dutch Oven Rice
Eight moves, one pot, zero guesswork. The whole process is hands-off after the lid goes on.
Measure & Rinse
Rinse rice in a fine-mesh strainer until water runs clear — removes surface starch that causes gumminess.
~2 minOptional: Toast
Toast rice in 1 tsp butter or oil for 1–2 minutes. Adds nutty flavor and a barrier against sticking.
1–2 minAdd Water & Salt
Pour in measured water (1.5 cups per cup white rice), a pinch of salt, and oil if desired.
Ratio 1.5:1Boil Uncovered
Over low heat, bring to a gentle boil with the lid off. Watch closely — starchy foam climbs fast.
Gentle boilCover & Go Low
The moment it boils, seal the lid and drop to the lowest heat setting. Cast iron holds heat — low is enough.
Lowest flameDo Not Peek
Lifting the lid releases steam and throws off the ratio. Trust the process and the timer.
15–18 min white · 40–45 brownRest, Covered
Remove from heat — lid still on — and let residual steam finish the grains evenly.
10 minFluff & Serve
Fluff gently with a fork. Grains should be tender, fluffy, and completely separate.
Serve warmNever lift the lid during cooking. Every peek releases the trapped steam that does the cooking — disrupting texture and turning an even cook into a gamble.
How Each Step Builds the Perfect Grain
Every action maps to a result. Skip a link in the chain and you’ll taste it in the bowl.
Oven Method: Zero-Scorch Insurance
Bring water to a boil on the stove, then transfer the covered Dutch oven to a preheated 375°F (190°C) oven for 18–25 minutes. Surround heat cooks grains with no hot spots and no burnt bottom — ideal for large batches, uneven stovetops, or off-grid setups. Rest covered 10 minutes after baking, exactly as with the stovetop method.
Small batch · best fit
Family & batch cooking
and dries it out
Fix the Four Classic Failures
Every Dutch oven behaves a little differently depending on material, heat source, and batch size. Small adjustments solve everything.
Mushy or Sticky Rice
Excess surface starch or too much water prevents grains from separating.
Fix: Rinse thoroughly, use exactly 1.5:1 for white rice, and never lift the lid mid-cook.
Burnt Bottom
Heat too high or uneven — cast iron holds heat and chars rice on direct contact.
Fix: Use the lowest setting, or turn the burner off a few minutes early and let residual heat finish. The oven method eliminates this entirely.
Undercooked Grains
Insufficient heat or time — especially common with dense brown rice.
Fix: Ensure a full boil before covering, keep heat very low, and extend time — brown rice needs 40–45 minutes.
Boil-Over & Sticking
Starchy foam climbs fast in a heavy pot; dry spots cause sticking to lid and sides.
Fix: Watch the first boil, reduce heat sooner, rinse well, and add 1 tsp oil or butter at the start.
Frequently Asked Questions
Can a Dutch oven replace a rice cooker?
Yes. Same time, more forgiving, more even — and it works off-grid with zero electricity.
Does rice cook faster in a Dutch oven?
Roughly the same time — but heat retention makes results far more consistent.
Enameled or bare cast iron?
Enameled preferred — resists sticking and metallic flavors. Bare cast iron works, but avoid acidic additions like tomatoes.
Do I really need to rinse the rice?
Recommended. Rinsing until the water runs clear is the single biggest lever for fluffy, separate grains.
Can the pot go in the oven with rice?
Yes, lid included — just confirm the knob/handle is oven-safe to 375°F.
Can I cook one-pot meals this way?
Absolutely. Jambalaya, biryani, and chicken-and-rice all thrive in the same steam-chamber environment.
Why a Dutch Oven Is Perfect for Cooking Rice
Think of a Dutch oven as a miniature, self-contained oven and rice cooker rolled into one. Its thick cast iron walls distribute heat evenly, preventing hot spots that burn rice. The tight-fitting lid traps moisture, turning the Dutch oven into a steam chamber—ideal for fluffy grains.
Picture this: you bring water and rice to a boil, then seal the lid tight. The heat and trapped steam cook the rice uniformly, while the cast iron’s slow heat release keeps it warm for a long time without scorching. It’s like having a slow cooker built right in.
This method works well with enameled versions, which resist sticking and metallic flavors, but seasoned bare cast iron can do the job too—just be mindful of acidity if adding tomatoes or vinegar later.
As an affiliate, we earn on qualifying purchases.
How to Measure and Prepare Your Rice for Best Results
Good rice starts with good measurements and prep. Rinse your rice until the water runs clear—this removes excess surface starch that can make your grains sticky or gummy. Use a fine-mesh strainer for a thorough rinse.
For long-grain white rice, the standard water-to-rice ratio is **1.5:1**—that’s 1.5 cups water per 1 cup rice. Brown rice needs more water, about **2:1**, and a longer simmer. For a small batch, a 3-quart Dutch oven works perfectly; larger batches need a 5-6 quart.
Optional: toast the rinsed rice in a teaspoon of butter or oil for 1-2 minutes before adding water. This adds flavor and helps prevent sticking.
Why it matters: Proper rinsing removes surface starches that can cause gumminess, leading to a more distinct and fluffy grain. Choosing the correct water ratio is crucial because too much water results in mushy rice, while too little can cause undercooked grains. Toasting adds a nutty flavor and creates a slight barrier on the rice surface, which can reduce sticking and burning during cooking. These prep steps set the foundation for evenly cooked, tender rice with optimal texture.
As an affiliate, we earn on qualifying purchases.
Step-by-Step: How to Cook Rice in Your Dutch Oven
- Measure your rice and rinse thoroughly. If you like, toast it briefly in a little oil or butter.
- Add the measured water (1.5 cups for white rice). Add a pinch of salt and a teaspoon of oil if desired.
- Place the Dutch oven on the stove over low heat. Bring the water to a gentle boil, uncovered.
- Once boiling, quickly cover the Dutch oven with the lid. Turn the heat down to the lowest setting. Do not lift the lid during cooking.
- Cook for 15–18 minutes for white rice. For brown rice, extend to 40–45 minutes. Keep the heat very low to prevent scorching.
- Remove from heat, keep covered, and let it rest for 10 minutes. This step allows the steam to finish cooking the rice evenly.
- Fluff with a fork and serve. The grains should be tender, fluffy, and separate.
Why it matters: Controlling heat is essential because excessive heat can cause the rice to burn or stick, especially in cast iron. Lifting the lid releases steam, disrupting the cooking process and leading to uneven results. Resting allows residual steam to penetrate the grains, ensuring they are fully cooked and fluffy. Following these steps carefully ensures consistent, high-quality rice every time.
As an affiliate, we earn on qualifying purchases.
Oven Method: Evenly Cook Rice Without Scorching
Cooking rice in the oven is a great way to get perfectly even results, especially if your stovetop runs hot or uneven. Bring water to a boil on the stove, then transfer the Dutch oven to a preheated oven at 375°F (190°C). Bake uncovered for 18–25 minutes, depending on rice type.
This method uses the oven’s surround heat to gently and evenly cook the grains. No hot spots, no burnt bottoms—just consistent results. It’s perfect for large batches or when you want to free up stove space for other tasks.
Remember, you still need to let the rice rest, covered, for 10 minutes after baking. The oven method works well with both white and brown rice, just adjust the water and time accordingly. The key advantage here is uniform heat distribution, which minimizes the risk of scorching or uneven cooking—especially useful in outdoor or off-grid setups where stove heat may be inconsistent. This method also allows you to cook rice unattended, freeing your attention for other preparations.
Why it matters: The oven’s even heat prevents hot spots that cause burning or uneven doneness. Resting the rice after baking ensures moisture redistributes evenly through the grains, resulting in a tender, fluffy texture that’s hard to achieve with stovetop methods alone.
As an affiliate, we earn on qualifying purchases.
Troubleshooting Common Rice Problems in a Dutch Oven
| Issue | Solution |
|---|---|
| Mushy or sticky rice | Use less water, rinse rice thoroughly, and don’t lift the lid during cooking. Also, check your ratio—1.5:1 for white rice is best. Overly sticky rice often results from excess surface starch or too much water, which prevents grains from separating properly. Adjusting ratios and rinsing reduces surface starch, leading to fluffier results. |
| Burnt bottom | Lower the heat further, especially with cast iron. Turn off the burner a few minutes early to let residual heat finish the job. Burnt bottoms happen when heat is too high or uneven, causing direct contact that chars the rice. Using very low heat or oven baking helps prevent this, and turning off the heat early allows residual warmth to finish cooking without burning. |
| Undercooked grains | Extend cooking time, especially for brown rice. Make sure the water is boiling before covering, and keep the heat very low. Undercooking indicates insufficient heat or time; ensuring a rolling boil before covering and maintaining low heat allows the grains to absorb moisture fully. Patience with longer cooking improves texture, especially with denser rice varieties. |
| Rice sticking to the lid or sides | Rinse well, add a bit of oil or butter, and avoid lifting the lid during the process. Sticking can be due to surface starches or dry spots. Rinsing removes excess starch, and adding a small amount of fat creates a barrier, reducing sticking and scorching. Keeping the lid on maintains steam, preventing moisture loss that causes sticking. |
Every Dutch oven reacts differently depending on material, heat source, and batch size. Observing your results and making small adjustments—like lowering heat, adjusting water, or extending cooking time—are key to perfecting your rice. Patience and experience help you understand how your specific setup influences results, leading to consistently excellent rice every time.
Cooking Different Types of Rice in a Dutch Oven
Not all rice is created equal. Jasmine, basmati, brown, wild—each needs a slightly different approach. Here’s a quick chart to help:
| Type of Rice | Water Ratio | Cook Time | Notes |
|---|---|---|---|
| White Jasmine | 1.5:1 | 15–18 mins | Fragrant, fluffy grains |
| Basmati | 1.5:1 | 15–18 mins | Long, slender grains; aromatic |
| Brown rice | 2:1 | 40–45 mins | Chewier, nuttier flavor |
| Wild rice | 3:1 | 45–50 mins | Chewy, earthy flavor; needs extended cooking |
Adjust water and cooking times based on your specific rice brand and personal texture preference. Experimentation helps perfect your technique. Different rice varieties have unique structures and moisture absorption rates, which influence how they cook. For instance, brown rice has a tougher outer bran layer, requiring more water and longer cooking to become tender, while jasmine rice’s delicate grains cook quickly and absorb less water. Recognizing these differences ensures you don’t overcook or undercook, preserving desired textures and flavors. The tradeoff often involves balancing cooking time against moisture content, so understanding your rice type helps you fine-tune your method for consistent results.
One-Pot Meals: Make It a Complete Dinner in Your Dutch Oven
Once you master plain rice, you can turn your Dutch oven into a flavor-packed one-pot meal. Think jambalaya, biryani, or chicken and rice. Layer ingredients, add broth instead of water, and cook as usual. The Dutch oven’s even heat ensures everything cooks uniformly.
For example, make a simple chicken and rice dish: brown chicken pieces, add rice, spices, and broth, then cook covered. The result? Rich, tender pieces with fluffy rice—no extra pots needed.
This approach saves time, minimizes cleanup, and adds depth of flavor. Just adjust cooking times to accommodate other ingredients, and keep the lid tight. The key is understanding how different ingredients cook—protein, vegetables, grains—and timing them so everything reaches perfect doneness together. This versatility allows you to create complete, satisfying meals in a single vessel, making off-grid cooking more efficient and flavorful.
Why it matters: Combining rice with other ingredients transforms a simple side into a hearty main dish, maximizing your Dutch oven’s potential and simplifying your cooking process—especially in off-grid or limited-resource settings.
Frequently Asked Questions
What water-to-rice ratio should I use in a Dutch oven?
For white long-grain rice, stick to about 1.5 cups water per 1 cup rice. Brown rice needs more—around 2:1. These ratios ensure fluffy grains without excess moisture.
Why did my rice turn mushy or sticky?
This usually happens if you use too much water, lift the lid during cooking, or skip rinsing. Reducing water slightly, maintaining a tight lid, and rinsing well can fix this. Recognizing the cause helps you adjust your method—using less water or cooking time, or ensuring a proper seal—to achieve the desired fluffy, separate grains.
Can I cook brown rice in a Dutch oven?
Absolutely. Brown rice requires about 2:1 water ratio and a longer cook time—around 40–45 minutes. Keep the heat very low, and let it rest afterward for even tenderness. Understanding the tougher outer layer of brown rice guides you to extend cooking and adjust water, ensuring a tender, non-mushy result.
Is it better to bake or stovetop cook rice in a Dutch oven?
Both work well. Baking at 375°F for 18–25 minutes gives even results without scorching. Stovetop is quicker but requires close attention to heat and timing. The choice depends on your setup and how much control you prefer—baking offers more uniform heat, especially in outdoor or off-grid contexts, reducing the risk of burning.
How do I prevent rice from scorching at the bottom?
Use the lowest possible heat, especially with cast iron, and consider turning off the burner a few minutes early. Adding a teaspoon of oil or butter can also help create a barrier, reducing direct contact and scorching. Recognizing that cast iron retains heat longer, adjusting your heat accordingly prevents burning and ensures even cooking.
Conclusion
Cooking rice in a Dutch oven isn’t just a workaround; it’s a skill worth mastering. It turns a simple grain into a perfectly fluffy, separate delight—without fancy gadgets or constant stirring.
Next time you fire up your cast iron, try this method. You’ll be surprised how much better rice can taste when cooked with patience, heat, and a good lid. It’s a small step toward off-grid cooking mastery that pays off in every bite.