TL;DR

Get kitchen gear delivered free with Prime
- Fast, free delivery on millions of items
- Prime Video, Amazon Music and more included
- Member-only deals all year
Baking in a Dutch oven traps steam and heat, mimicking professional ovens. This results in a crusty crust and airy crumb. Proper preheating and dough handling make all the difference.
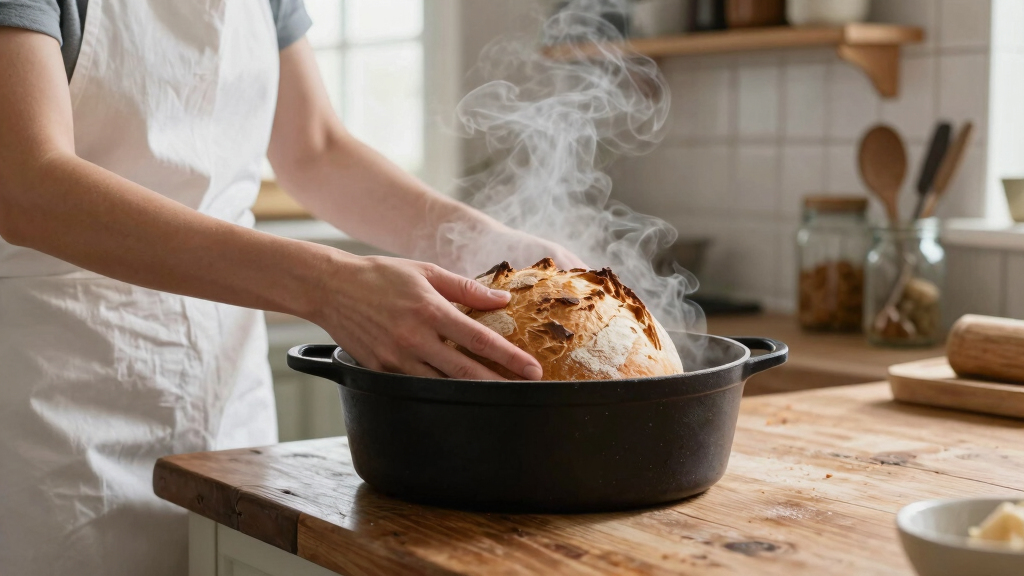
If you’ve ever pulled a loaf from your oven and been stunned by its crusty exterior and open crumb, you’ve experienced what a Dutch oven can do. This humble piece of cast iron transforms a simple dough into a bakery-quality masterpiece. The secret lies in how it traps moisture and heat, mimicking professional bread ovens but with minimal fuss.
In this guide, you’ll learn exactly how and why baking bread in a Dutch oven works. We’ll explore the science, share practical tips, and look at recent trends that make this method even more accessible today. Whether you’re new to bread baking or looking to refine your technique, this insight will help you craft loaves that turn heads.
Preheat your Dutch oven thoroughly for at least 30 minutes at 450°F to maximize oven spring.
Use parchment paper to transfer dough safely into the hot Dutch oven and prevent sticking.
The trapped steam inside the Dutch oven is what creates that irresistible crust and airy crumb.
Choosing high-hydration, no-knead dough makes baking easier and results in more open, chewy loaves.
Recent innovations like enameled cast iron and baking liners help produce consistent, beautiful bread with less fuss.
Why a Dutch Oven Turns Ordinary Dough Into Artisan Bread
Using a Dutch oven creates a micro-environment that’s perfect for bread. The heavy lid traps steam, which is essential for a glossy, thick crust and a springy interior. This environment allows the dough to expand fully during baking, much like a professional oven offers a controlled atmosphere for optimal crust development and rise. The trapped moisture not only develops the crust’s shine but also prevents it from drying out too quickly, giving the bread a tender interior with a satisfying chew. The ability to recreate this environment at home means bakers can consistently produce bakery-quality loaves without specialized commercial equipment. However, this setup also involves tradeoffs: preheating takes time, and handling hot cast iron requires care, but the payoff is a crust and crumb that rivals artisan bakeries.
Furthermore, the environment inside the Dutch oven influences the bread’s final texture and appearance. The even heat distribution ensures uniform crust formation, while the steam’s presence allows the bread to expand more before the crust hardens, resulting in a more open crumb structure. Recognizing these factors underscores why this simple tool is so effective and why neglecting them can lead to flatter, duller loaves.
As an affiliate, we earn on qualifying purchases.
How to Get That Perfect Crust Every Time
- Preheat your Dutch oven for at least 30 minutes at 450°F. This extended preheat ensures that the cast iron reaches a stable, uniform temperature, which is crucial for achieving a strong oven spring and crust. A hot Dutch oven mimics the intense heat of professional ovens, which is necessary for rapid dough expansion and crust formation. If the oven isn’t thoroughly preheated, the bread’s rise will be sluggish, and the crust may not develop the desired caramelization and crunch.
- Shape your dough into a tight, smooth ball. Proper shaping develops surface tension, which helps the bread hold its shape during baking. Using plenty of flour or rice flour prevents sticking, but also creates a barrier that promotes even browning and crust formation. The shaping process influences how the bread expands and how the crust develops, so attention here impacts both appearance and texture.
- Transfer the dough onto parchment paper, then lift and place it into the hot Dutch oven carefully. Using parchment facilitates safe handling and prevents sticking, especially since the dough is often wet and sticky. This step ensures minimal disturbance to the dough’s surface tension, which is vital for a good oven spring and crust.
- Cover with the lid and bake for 20-30 minutes. The lid traps moisture and heat, creating a steam-rich environment that promotes oven spring and crust development. Removing the lid afterward allows the crust to deepen and become crisp, which enhances both flavor and appearance. This balance between covered and uncovered baking is key to achieving a bakery-quality loaf.
- Remove the loaf and let it cool on a wire rack for at least 20 minutes. Cooling allows the crust to set fully and prevents the bread from becoming gummy. Cutting into the loaf too early can deflate the structure and compromise the crumb’s openness, so patience here ensures the best texture and flavor.
For example, I once baked a sourdough loaf, and following these steps turned a dull, flat dough into a towering, crusty masterpiece. The key is the initial high heat and maintaining steam environment. Recognizing how each step influences the final result helps bakers troubleshoot and refine their process, leading to consistently better loaves.
Remember: handling hot Dutch ovens requires oven mitts, and using parchment paper makes transferring the dough safer and easier, reducing the risk of burns or deformation of the dough shape.
As an affiliate, we earn on qualifying purchases.
What Makes Steam in a Dutch Oven So Critical?
Steam plays a pivotal role in creating that signature crust because it affects how the crust forms and how the bread expands. When the dough encounters the hot environment inside the Dutch oven, moisture from the dough and the initial baking phase turns into steam. This steam envelops the dough, delaying crust formation and allowing the bread to expand more—a process known as oven spring. The importance of this is that a well-developed oven spring results in a lighter, more open crumb, which is highly desirable in artisan bread.
Think of it like blowing up a balloon: without enough air (steam), the balloon (bread) can’t stretch fully, resulting in a denser loaf. With sufficient steam, the dough stretches to its full potential, producing a loaf with a lofty interior and a glossy, crisp crust. This contrast in texture is what makes bread baked with steam so appealing, as it combines a crunchy exterior with a tender, airy crumb.
Many bakers use a spray bottle or pour hot water into a tray at the start of baking to generate steam, but the Dutch oven’s sealed environment naturally traps the moisture released from the dough itself. This self-sustaining steam environment is more consistent and less labor-intensive, leading to more reliable results. Recognizing why steam is so critical helps bakers appreciate the importance of maintaining a sealed environment during the initial baking phase and why neglecting this step can result in a duller crust and less oven spring.
As an affiliate, we earn on qualifying purchases.
Recent Trends That Make Dutch Oven Baking Easier and Better
Today’s bakers are experimenting with new tools and techniques. Enameled cast iron Dutch ovens are popular—they’re easier to clean and maintain, and heat distributes more evenly, reducing hot spots that can scorch bread. Some bakers use silicone liners or specially designed baking stones to enhance results, providing an even surface and helping control moisture loss. These innovations allow for more consistent results and less cleanup, removing some of the traditional hurdles of Dutch oven baking.
Long fermentation and high-hydration doughs are also trending. These techniques develop complex flavors and produce more open, airy crumbs. High-hydration doughs, while more challenging to handle, yield bread with a better crust and texture because the moisture content promotes better oven spring and crust caramelization. Devices like infrared thermometers help bakers monitor oven temperature precisely, ensuring the environment inside the Dutch oven remains optimal for consistent baking. This precision minimizes guesswork and enhances reproducibility, especially for those baking at home with limited experience.
Eco-friendly practices, like reclaiming old Dutch ovens or reducing energy use by preheating less, are gaining traction among off-grid and sustainability-conscious bakers. These practices reflect a broader understanding that effective bread baking is as much about environmental impact as it is about technique. All these innovations stem from a fundamental truth: the environment inside your Dutch oven—its heat, moisture, and how you control them—directly influences the quality of your bread. Embracing these trends means you can produce bakery-quality loaves more consistently and with less effort over time.
As an affiliate, we earn on qualifying purchases.
Quick Facts You Need to Nail Your Next Loaf
| Fact | Details |
|---|---|
| Preheat Time | 30-60 minutes for even heat distribution; this ensures the Dutch oven reaches a stable temperature, which is crucial for oven spring and crust development. Insufficient preheating can lead to uneven baking and flatter loaves, so patience here is essential. |
| Crust Type | Thick, crunchy exterior with glossy shine; the combination of high heat and trapped steam promotes caramelization and crust formation, which is key to a flavorful, bakery-style crust. The crust’s texture and appearance are direct indicators of baking technique and environment control. |
| Ideal Dough | No-knead, sourdough, rustic loaves with high hydration; these doughs respond well to the environment inside the Dutch oven, expanding fully and developing complex flavors. Using high-hydration doughs may require adjustments in handling but reward with an open crumb and rich flavor. |
| Temperature | 450°F during initial bake, then adjust as needed; maintaining this temperature ensures proper oven spring and crust development. Lower temperatures may result in a denser loaf, while higher temperatures might burn the crust before the interior is done. |
| Handling Tips | Use parchment paper, proper flouring, and oven mitts; these prevent sticking, protect your hands, and facilitate safe transfer of hot dough. Proper handling preserves the dough’s surface tension and shape, directly impacting oven spring and final appearance. |
Remember, the better your Dutch oven is preheated, the easier it is to get that perfect oven spring and crust. Patience and attention to these details pay off in the final loaf’s texture, appearance, and flavor.
Common Questions About Baking Bread in a Dutch Oven
Why does bread baked in a Dutch oven have a better crust? The enclosed environment traps moisture and heat, allowing the crust to develop a glossy, thick surface while the interior expands fully. This environment mimics professional ovens’ controlled atmosphere, enabling proper crust caramelization and oven spring, which are essential for both flavor and texture.
Can I use any pot instead of a Dutch oven? Not quite. Look for a heavy, lidded pot that can withstand high temperatures—ideally cast iron or enameled cast iron. Thin-walled or glass pots won’t trap steam effectively or distribute heat evenly, which can lead to uneven baking or burnt spots, compromising your loaf’s quality.
How long should I preheat? At least 30 minutes ensures the Dutch oven reaches the right temperature for a good oven spring and crust development. Skipping or shortening this step risks uneven heat and less rise, resulting in flatter loaves with dull crusts.
What bread types work best? Sourdough, no-knead, and rustic boules respond well due to their high hydration and structure, but many other doughs—like enriched or sweet breads—can also be baked successfully with proper adjustments in hydration and baking time. Understanding the properties of your dough helps tailor the baking process for optimal results.
How do I prevent sticking? Flour the dough generously, use parchment paper, and avoid handling wet dough directly on the hot surface. These steps create a barrier that prevents sticking and preserves the dough’s shape, which is crucial for a good oven spring and crust formation.
What mistakes ruin the loaf? Not preheating enough, opening the lid too early, or rough handling can cause deflation, uneven baking, or a dull crust. Recognizing these pitfalls and adjusting your technique ensures consistent, high-quality results. Patience and careful handling are key to baking success.
Conclusion
Mastering bread baking in a Dutch oven boils down to understanding how heat and steam transform simple dough into bakery-level loaves. It’s about patience, proper prep, and respecting the environment inside that cast iron vessel. When you get it right, every loaf becomes a small celebration of craftsmanship.
Next time you bake, think of your Dutch oven as a tiny bakery oven—reliable, durable, and ready to turn your baking efforts into crusty, flavorful bread that makes your kitchen smell like a Parisian boulangerie.
Halloween Picks
halloween
As an affiliate, we earn on qualifying purchases.