
TL;DR
Listen free for 30 days with Audible
Thousands of audiobooks and originals — cancel anytime.
Start your free trialAs an affiliate, we earn on qualifying purchases.
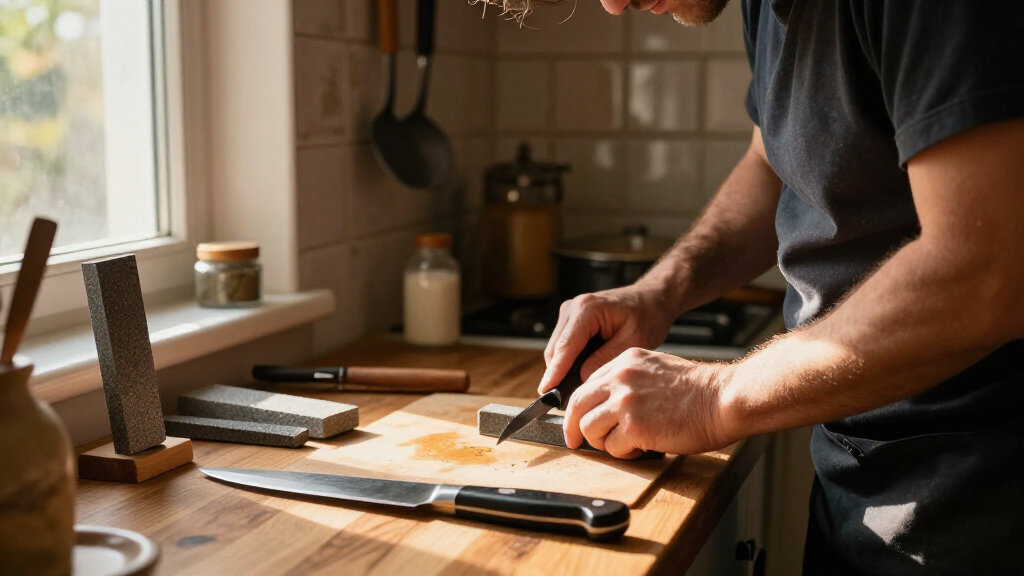
Whetstone grits range from coarse to extra fine, each serving a specific purpose. Coarse grits reshape blades, medium smooths scratches, and fine polishes for a razor edge. Using the right grit in sequence ensures sharp, durable knives.
Imagine slicing through a ripe tomato with a dull, jagged edge. It’s frustrating and messy. Now picture that same knife, razor-sharp and gliding effortlessly through the skin, thanks to the right whetstone. But not all stones are created equal. Knowing what each grit does turns you from a novice into a confident sharpener.
This guide breaks down the gritty world of whetstones. You’ll learn how to match grit levels to your needs, avoid common pitfalls, and sharpen like a pro—even off-grid or with hand-powered tools. Mastering grit levels isn’t just about better knives; it’s about controlling your tools, reducing waste, and sharpening with purpose.
Always match your grit to the condition of your blade—coarse for damage, fine for polishing.
Progression from coarse to ultra-fine grit results in better, longer-lasting edges.
Regular maintenance of your whetstone, like flattening, keeps sharpening predictable and effective.
Higher grit numbers are not just finer—they are tailored for polishing and finishing, not reshaping.
Practicing patience and testing frequently prevents over-sharpening and damage.
Whetstone Grits: What Each One Does
Coarse grits reshape blades, medium smooths scratches, and fine polishes for a razor edge. Using the right grit in sequence ensures sharp, durable knives — turning you from novice to confident sharpener, one stone at a time.
Coarse stones remove material fast — the bulldozers that repair chips, nicks, and rounded edges in minutes.
Fine grits polish a good edge into a mirror-like, razor-sharp finish that glides effortlessly.
Extra fine stones deliver the ultra-mirror finish demanded by straight razors and precision tools.
Why Grit Levels Matter
Every whetstone has a grit number indicating how coarse or fine its abrasive particles are — think of sandpaper: 80 grit strips paint; 2000 grit polishes. For knives, this determines how quickly material is removed and how smooth the final edge feels. Match the grit to your blade’s condition and progress gradually for the best results.
Coarse
The edge reshaper. Cuts through chips, nicks, and rounded edges quickly. Expect a gritty sound and a dusty trail of steel. Reserve for damage repair — never for polishing.
Medium
The workhorse. Smooths scratches left by coarse stones, making the edge uniform and pushing the blade from “cutting okay” to “cutting like new.”
Fine
The razor’s edge. Creates a mirror-like polish that reduces friction and makes slicing smoother. For fine-tuning already-sharp edges, not fixing damage.
Extra Fine
The finish line. High-end polishing for straight razors and precision tools — an edge almost too fine to see. Requires skill and patience; over-polishing can soften the edge.
Match Grits to Your Knife’s Condition
This step-by-step approach saves time and extends your blade’s life. Patience and consistency are key — always finish by testing sharpness on a tomato, paper, or a feather, then adjust your sequence based on the results.
Inspect the Blade
Is it dull, chipped, or just a little dull? Condition determines your starting grit.
Coarse Start
For damaged or very dull blades. Reshape the edge and remove chips quickly.
Medium Refine
For dull-but-intact blades. Smooth scratches and create a uniform edge.
Fine Polish
Progress to fine and extra fine grits for a mirror-shine, razor finish.
Verify Sharpness
Slice a tomato, paper, or a feather. Adjust your grit sequence as needed.
Coarse to Extra Fine at a Glance
Each grit tier is tailored to a specific stage of sharpening — knowing where each one excels prevents damage and wasted effort.
| Grit Level | Typical Use | Finish Quality | Best For | Repair? |
|---|---|---|---|---|
| 200–400 | Repair, reshaping | Rough, aggressive | Damaged blades, reshaping edges | ✓ Yes |
| 800–2000 | Refining, smoothing | Smooth, semi-polished | Dull blades, general sharpening | ~ Partial |
| 3000–8000 | Polishing, refining | Mirror-like, razor-sharp | High-end kitchen knives, razors | ✗ No |
| Above 8000 | Finishing, polishing | Ultra-mirror, almost too fine | High-precision tools, straight razors | ✗ No |
Keep Your Whetstone Effective
Proper maintenance makes sharpening easier and results more consistent. A worn or clogged stone loses its predictable grit behavior.
Flatten Regularly
Every 3–5 uses, flatten your stone with a flattening plate or abrasive pad. This prevents uneven sharpening and keeps grit exposed evenly.
Clean After Each Use
Rinse with water and a soft brush. Dry thoroughly before storing to prevent mold and damage.
Store Smart
Keep stones in a dry, stable place, separated from one another to avoid unnecessary wear.
Recognize Wear
Learn to spot a clogged or worn-down stone. Replacing or reconditioning it keeps your grit levels true and predictable.
Sharpen Like a Pro
Sharpening is a journey from rough to refined — each stage builds on the last. A chef might start at 400 to fix a chip, refine at 1000, and finish at 6000 for a mirror shine.
Match grit to blade condition. Coarse for damage, fine for polishing — starting a damaged blade on a fine stone does more harm than good.
Progress from coarse to ultra-fine. Layered grit progression produces better, longer-lasting edges than skipping stages.
Maintain your stone. Regular flattening keeps sharpening predictable — a flat stone is a consistent stone.
Patience prevents damage. Test frequently on tomato or paper, and switch grits only when scratches from the previous stage are no longer visible.
Higher grit numbers don’t just mean finer abrasives — each grit level is tailored to a specific stage in sharpening, making your process more effective and less damaging to your blades.
Why Grit Levels Matter: Your Shortcut to Better Edges
Every whetstone has a grit number, a simple way to tell how coarse or fine the abrasive particles are. Think of it like sandpaper—coarse is like 80 grit, perfect for stripping paint; fine is like 2000 grit, ideal for polishing surfaces. For knives, this translates into how quickly you remove material and how smooth the final edge feels.
Using the right grit at the right time prevents unnecessary wear and tear. For example, starting with a very dull or damaged blade on a fine stone can do more harm than good. Instead, you need to match your grit to the condition of your edge, progressing gradually for the best results.
According to an anonymous researcher in sharpening techniques, understanding grit progression can extend your blade’s life and save you time in the long run.
As an affiliate, we earn on qualifying purchases.
Coarse Grits (200-400): The Edge Reshaper
Coarse grits are the bulldozers of whetstones. When your knife has chips, nicks, or a rounded edge, these stones cut through the damage quickly. They’re your first step to restoring a dull or damaged blade.
For example, if you’ve used a knife for years and it’s lost its original sharpness, a 200 grit stone can bring back a rough, functional edge in minutes. Expect a gritty, abrasive sound and a dusty trail of steel as you work.
But beware—using coarse grit on a fine, polished blade can ruin the finish. Always reserve coarse stones for reshaping, not polishing.
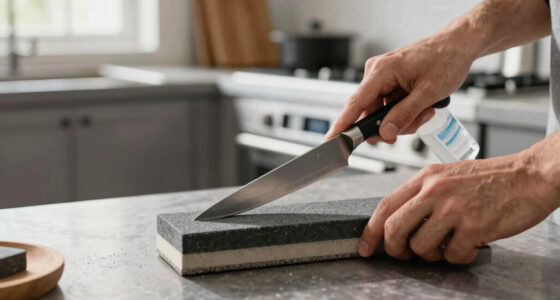
knife sharpening stone coarse fine
As an affiliate, we earn on qualifying purchases.
As an affiliate, we earn on qualifying purchases.
Medium Grits (800-2000): The Refinement Stage
Medium grits are the workhorses that refine your edge after the initial reshape. They smooth out the scratches from coarse stones, making the edge more uniform and ready for polishing.
If you’ve just finished with a 400 grit and want a sharper, more consistent edge, move to an 800 or 1000 grit stone. It’s like sanding a rough piece of wood—getting rid of the big scratches first, then moving to finer sandpaper.
In practice, you’ll notice the steel becoming smoother, and the edge starts feeling more refined. This stage is crucial for pushing the blade from ‘cutting okay’ to ‘cutting like new.’
As an affiliate, we earn on qualifying purchases.
Fine Grits (3000-8000): The Razor’s Edge
Fine grits are the polishing agents, turning a good edge into a razor-sharp finish. Think of this as the fine paintbrush of sharpening—creating a mirror-like polish that cuts effortlessly.
For instance, a chef’s knife used for delicate slicing benefits from a 6000 or 8000 grit stone, giving it that near-mirrored shine. This isn’t just about looks—this polish reduces friction and makes slicing smoother.
Using fine grit on a dull or damaged blade won’t fix the damage; it’s for fine-tuning and polishing an already sharp edge.
As an affiliate, we earn on qualifying purchases.
Extra Fine Grits (above 8000): The Finish Line
Extra fine grits take polishing to the next level. They’re used in high-end applications like straight razors, where a mirror finish and the absolute sharpest edge matter.
Imagine a barber stropping a straight razor on a 10,000 grit stone—every stroke enhances the smoothness and precision of the shave. These stones are often used for final polishing, making the edge almost too fine to see but incredibly effective.
However, they require skill and patience. Over-polishing can soften the edge, so use them carefully.
Matching Grits to Your Knife’s Condition: A Simple Roadmap
- Assess the sharpness and condition of your blade. Is it dull, chipped, or just a little dull?
- Start with coarse grit (200-400) if the blade is damaged or very dull. Use medium grit (800-2000) if it’s just dull but intact.
- Progress to fine grit (3000-8000) for polishing. Finish with extra fine (above 8000) for a mirror shine, if needed.
- Always finish by testing the sharpness on a tomato, paper, or a feather. Adjust your grit sequence based on the results.
This step-by-step approach saves time and extends your blade’s life. Remember, patience and consistency are key.
A Comparison Table: Coarse to Extra Fine Grits
| Grit Level | Typical Use | Finish Quality | Best For |
|---|---|---|---|
| 200-400 | Repair, reshaping | Rough, aggressive | Damaged blades, reshaping edges |
| 800-2000 | Refining, smoothing | Smooth, semi-polished | Dull blades, general sharpening |
| 3000-8000 | Polishing, refining | Mirror-like, razor-sharp | High-end kitchen knives, razors |
| above 8000 | Finishing, polishing | Ultra-mirror, almost too fine | High-precision tools, straight razors |
How to Keep Your Whetstone Effective: Tips for Longevity
Proper maintenance of your whetstone makes sharpening easier and results more consistent. Flatten your stone regularly—every few uses—using a flattening stone or abrasive pad. This prevents uneven sharpening and keeps the grit exposed evenly.
Clean your stone after each use with water and a soft brush. Dry it thoroughly before storing to prevent mold or damage.
Store your stones in a dry, stable place. If you have multiple stones, keep them separated to avoid unnecessary wear.
Finally, learn to recognize when your stone is worn down or clogged. Replacing or reconditioning it ensures your grit levels stay true and predictable.
Mastering the Grit Progression: Sharpen Like a Pro
Sharpening is a journey from rough to refined. Start with a coarse grit to reshape, then move to medium for smoothing, and finish with fine or ultra-fine for polishing. Each stage builds on the last, creating a sharp, durable edge.
For example, a chef might start with a 400 grit to fix a chipped edge, then move to 1000 grit to refine it, and finish with 6000 grit for a mirror shine. This layered approach saves time and protects your blades.
Practice patience. Rushing through grit levels can cause uneven edges or damage. Take your time, test frequently, and adjust as needed.
Frequently Asked Questions
How do I know when it’s time to switch from one grit to another?
When the scratches from the previous grit are no longer visible and the edge feels smooth and sharp, it’s time to move to the next finer grit. Testing on a tomato or paper can also help gauge progress.Can I use a fine grit stone to repair chips or damage?
Fine grit stones are not meant for repair. Use coarse grit (200-400) to reshape and repair the edge. Fine and ultra-fine stones are for polishing and finishing only.How often should I re-flatten my whetstone?
Depending on use, flatten your stone every few sessions—roughly after 3-5 uses—to maintain flatness and consistent results.Is synthetic better than natural whetstones?
Synthetic stones are consistent, affordable, and easier to maintain. Natural stones can offer unique finishes but may require more skill and care.What grit should I use for my straight razor?
Most barbers sharpen straight razors with 8000 grit or higher for a mirror finish, but always follow specific manufacturer recommendations for best results.Conclusion
Understanding what each whetstone grit does transforms sharpening from guesswork into a precise craft. It’s about choosing the right tool for the right job—whether repairing a battered edge or polishing a razor-sharp knife.
Keep your stones flat, practice patience, and always match grit to your blade’s needs. With that, every cut becomes a pleasure, and your tools last longer. Sharp tools, sharp mind — that’s the real secret.
Flea & tick season Picks
flea and tick prevention
As an affiliate, we earn on qualifying purchases.