TL;DR

Get kitchen gear delivered free with Prime
- Fast, free delivery on millions of items
- Prime Video, Amazon Music and more included
- Member-only deals all year
A practical campfire kitchen needs a stable cooking surface, a pot or skillet suited to your menu, long-handled utensils, heat-resistant protection, and a plan for food storage and cleanup. Coals usually cook more evenly than tall flames, while a camp stove gives you more predictable heat when fire rules or conditions call for it.
A campfire can turn dinner into a smoky, satisfying ritual—or leave you holding a scorched pan with no safe way to move it. The difference often comes down to a handful of sturdy, well-chosen tools, not a box full of specialty gadgets.
This guide helps you match cookware, handling tools, and cleanup supplies to the meals you plan to make and the way you travel. You’ll learn why coals beat tall flames for many dishes, when cast iron earns its weight, and how to keep food and hands safe outdoors.
Whether your kitchen is small because you’re backpacking or because your car is already packed to the roof, a useful campfire kit starts with a simple question: what will you actually cook? A kettle for oatmeal and coffee calls for a different load than a Dutch oven supper for six.
Choose cookware by listing the meals you plan to make, then match each tool to a real cooking job.
Use coals for steadier cooking heat and move cookware toward the edge when a dish browns too quickly.
Bring long-handled tongs, a sturdy utensil, and heat-resistant gloves; add a lid lifter if you’ll use a Dutch oven.
Keep raw and cooked foods separate, chill perishables, and use a thermometer for meat and poultry.
Pack out scraps, follow local wash-water rules, and let cookware and ash cool fully before packing.
Field kitchen • Practical gear guide
Campfire Cooking Tools You’ll Actually Use
A useful camp kitchen starts with the meals you plan to make. Build a small, sturdy kit around stable cookware, safe handling, and a simple cleanup plan—then let the coals do the work.
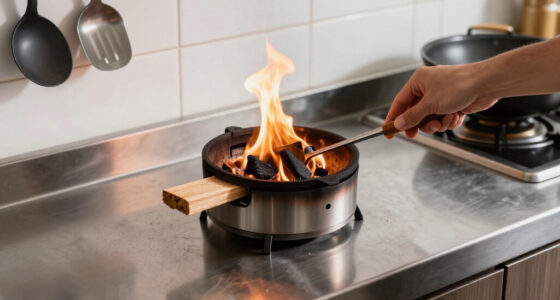
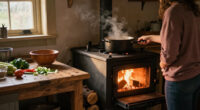
A bed of coals usually gives steadier heat than tall flames.
01 / Build the kit
Start with your menu, then match the tools
Think through each meal from prep to serving. Choose the smallest set that covers real jobs, and leave duplicate gadgets at home. A kettle breakfast needs less gear than a Dutch oven supper for a group.
Pot or kettle
Oatmeal, coffee, soup, and pasta. A lidded pot adds room for stews and helps retain moisture.
Skillet
Eggs, vegetables, and fast dinners. Pair it with a sturdy spatula or spoon for turning and serving.
Dutch oven
Useful for stews and breads. Bring a lid lifter and a safe place to set the hot lid when your menu calls for it.
02 / Choose your cookware
Match the material to your trip
Cast iron holds heat well but adds considerable weight. Stainless steel is durable and easier to maintain. Thin cookware saves space and weight, but can develop hot spots over an intense fire.
| Tool | Best for | Trade-off |
|---|---|---|
| Cast-iron skillet | Eggs, vegetables, searing | Heavy; dry and care for it to prevent rust |
| Stainless-steel pot | Water, soup, pasta | May heat unevenly over a rough fire |
| Dutch oven | Stews, breads, one-pot meals | Bulky and heavy |
| Kettle | Hot drinks and water | Limited use beyond liquids |
03 / Work with the heat
Cook over coals for more control
An open fire changes as it burns. Coals often provide more even heat than tall flames, and moving a pan between the center and the cooler edge gives you a simple way to adjust.
Secure the surface
Set a grate, tripod, or cooking surface firmly. Test it while empty before adding a hot, filled pot.
Find the coal bed
Use the steadier center for cooking; keep space at the edge for gentler heat.
Shift as needed
If food browns too fast, move it toward the edge. If a simmer is weak, bring it closer to the center.
Check fire rules
When conditions or local rules restrict fires, a camp stove offers more predictable heat and may be required.
04 / Handle heat safely
Reach farther. Keep food safe.
Useful handling gear keeps hands farther from flames and hot metal. Add preparation and cleanup basics so the whole meal—from raw ingredients to cooled cookware—is covered.
Turn food and make small adjustments while keeping knuckles away from heat.
Choose a durable tool suited to your menu; avoid plastic parts near the fire.
Keep them dry and check their condition. Damp gloves can transfer heat quickly.
Use a sheathed knife and keep raw ingredients separate from ready-to-eat food.
Keep perishables cold and use a food thermometer for meat and poultry; appearance alone cannot confirm safe doneness.
Pack water, a sponge or scraper, and a way to carry out scraps. Follow site rules for wash water; biodegradable soap does not belong directly in lakes or streams.
Start with the meals you plan to cook
Campfire cooking tools are the utensils and cookware that let you prepare your planned meals safely over coals or an open fire. Start with your menu, then pack the smallest set that can handle it: a pot for boiling, a skillet for quick meals, or a Dutch oven for slow one-pot cooking. Your food list is the best test of whether a tool belongs.
For a breakfast of oatmeal and coffee, one pot and a spoon may do most of the work. Add eggs and fried potatoes, and a skillet plus a spatula become useful. If you plan to make chili after a long hike, a lidded pot gives you more room and keeps the stew from drying out while you tend the fire.
Think through each meal from preparation to serving. A sharp knife with a sheath, a cutting board, and a serving spoon often cover jobs that several specialty gadgets claim to solve. If your group eats from bowls, pack bowls; if you’re cooking foil dinners, you may need less cookware and more fire-safe tongs.
A compact kit works because each item earns its space. Write down the meals, pair each one with the tool it needs, and remove anything that has no clear job. That keeps a small camp kitchen from becoming a tangle of duplicate utensils.
Products Worth Considering

Le Creuset Signature 6.5-Quart Deep Round Dutch Oven with Light Gold Crucible Knob, Enameled Cast Iron, Bleu Riviera

Le Creuset Signature Enameled Cast Iron Round Dutch Oven, 5.5 qt, Deep Teal

Le Creuset Enameled Cast Iron Round Bread Oven, 9.5-Inch, Cerise
As an affiliate, we earn on qualifying purchases.
Choose a pot or skillet that fits your fire and your back
Campfire Cooking Tools You’ll Actually Use usually begin with one pot or skillet that matches your menu and transport limits. Cast iron holds heat well and suits skillets, griddles, and Dutch ovens, but it adds considerable weight. Stainless steel is durable and easier to care for, while thin cookware packs lightly but can develop hot spots under an intense fire.
A car camper cooking cornbread and beans might appreciate a cast-iron Dutch oven that can sit among coals with more coals on its lid. A backpacker carrying food uphill may prefer a light pot for boiling water and a simple pan, accepting that thinner metal needs closer attention over uneven heat. Neither choice fits every trip.
Use this quick comparison to connect common cookware with the work it does:
| Tool | Good for | Tradeoff |
|---|---|---|
| Cast-iron skillet | Eggs, vegetables, searing | Heavy; needs drying and care to prevent rust |
| Stainless-steel pot | Water, soup, pasta | May heat unevenly over a rough fire |
| Dutch oven | Stews, breads, one-pot meals | Bulky and heavy |
| Kettle | Hot drinks and water | Limited cooking use beyond liquids |
Choose cookware made for fire, with no plastic parts near the heat. Check handles and lids before you leave home, and make sure your cooking surface can safely support the filled vessel. A stable pot is more useful than a clever pan that wobbles on the grate.
Cook over coals for steadier heat
Campfire Cooking Tools You’ll Actually Use work best when you pair them with coals instead of relying on tall flames. Coals give steadier heat for many meals, while flames can flare, lick around a pan, and scorch one side before the middle cooks. An open fire is a changing heat source, so a little patience and room to move cookware matter.
For example, if onions in your skillet start browning too fast, slide the pan toward the edge of the coal bed. If soup simmers too gently, move it closer to the hotter center or add a few coals underneath. That simple change gives you a rough version of the burner adjustments you make at home.
A grate, tripod, or other cooking surface must sit firmly before you place a hot pot on it. Test its stability while it is empty, keep children and loose gear away from the cooking area, and avoid reaching across flames. A long-handled utensil helps, but it does not make an unstable setup safe.
Before packing for a trip, check fire bans, campground rules, and local conditions. A camp stove can provide more predictable heat and may be required where open fires are restricted. When a fire is allowed, prepare a safe fire area and follow the site’s directions for tending and extinguishing it.
Pack long-handled tools before specialty gadgets
Campfire Cooking Tools You’ll Actually Use include long-handled tongs, a sturdy spatula or spoon, and heat-resistant gloves because safe handling is part of cooking. Those basics let you turn food, move cookware, and lift a lid while keeping your hands farther from flames and hot metal. Tools should be built for high heat; plastic handles can soften or fail near a fire.
Imagine turning sausages on a grate while the fire snaps and sends sparks upward. Short kitchen tongs put your knuckles close to the heat, while longer tongs give you reach and control. A sturdy spatula helps flip potatoes without scraping against a weak, bendable edge.
If you plan to cook with a Dutch oven, add a lid lifter or a safe lid-handling tool, plus a place to set the hot lid. Do not improvise a lift with a fork or an ordinary towel that can catch sparks. Keep gloves dry and check their condition before cooking; a damp glove can transfer heat quickly.
A useful starting set looks like this:
- Long-handled tongs for food and small adjustments to the fire.
- A sturdy spatula or serving spoon that suits your planned meals.
- Heat-resistant gloves for handling hot cookware.
- A lid lifter or stable lid stand if your menu calls for a Dutch oven.
Each tool has a clear task. If a gadget only duplicates one of these jobs, leave it behind unless your menu gives it a specific purpose.
Keep your prep area clean and your food safe
Campfire Cooking Tools You’ll Actually Use should include a knife with a sheath, a cutting board, clean serving gear, and a way to keep raw food away from ready-to-eat food. Outdoor cooking still calls for safe food handling: keep perishables cold in a well-managed cooler, wash hands and surfaces, and use a food thermometer for meat and poultry. Color and smell alone cannot confirm that meat has reached a safe internal temperature.
Suppose you’re grilling chicken beside a bag of rolls and sliced tomatoes. Keep raw chicken on its own surface, wash your hands and the board before the rolls or tomatoes touch them, and use clean tongs for cooked food. A small container for raw ingredients can prevent drips from reaching other supplies in the cooler.
Pack a thermometer that you know how to read and follow current food-safety guidance for the food you’re cooking. The fire can brown the outside quickly while the center remains undercooked. That is one reason a thermometer earns space even when the rest of your kitchen stays minimal.
Wash and dry cookware after use according to its material. Dry cast iron well to help prevent rust, and keep clean utensils separate from tools that have touched raw meat. A couple of labeled bags or containers can make that separation easier when the campsite table is crowded.
Clean up without leaving scraps at camp
Campfire Cooking Tools You’ll Actually Use include a scraper or sponge, a small amount of soap where allowed, water, and a way to pack out food scraps. Scraping a pan before washing saves water and keeps greasy leftovers out of the campsite. Follow local rules for wash water and waste, since campground systems and backcountry guidance can differ.
After a skillet breakfast, scrape the browned bits into your food-waste bag before adding water. Wash dishes well away from lakes and streams when site rules permit, and dispose of strained wash water according to local guidance. “Biodegradable” on a soap label does not make it appropriate to wash directly in a waterway.
Cast iron often needs little more than scraping, a small amount of water, and prompt drying, though your care routine should suit the cookware. Stainless steel can take a sponge and soap. In either case, let hot equipment cool fully before packing it: ash and cookware can stay hot long after flames die down.
That cooling time matters on a busy departure morning. A pan that looks dark and quiet may still burn a bag or hand. Set a clear spot for cooling cookware, keep it away from tent fabric and dry gear, and check for heat before you stow it.
Pick a campfire or stove based on the day
Campfire Cooking Tools You’ll Actually Use depend on whether you have permission and conditions to build a fire. A campfire can support a grate, coals, and several cookware positions, but its heat changes as wood burns. A camp stove usually gives more predictable heat and may be the safer or required option during fire restrictions.
If rain has soaked the wood or wind keeps pushing smoke across your cooking area, a stove may make dinner simpler. If the site allows fires and you have time to tend coals, a fire can handle a skillet breakfast and a pot of beans side by side. Your choice should follow the site rules, weather, and meal—not just the mood you pictured on the drive in.
Portable grills and compact stoves reflect a broader interest in lighter, more flexible outdoor cooking equipment. Backpackers often favor nesting pots and folding handles to save space; car campers can carry heavier cast iron and larger Dutch ovens. Designs and restrictions change, so check current product details and local rules before a trip.
Keep a flexible menu in mind. A useful campfire plan can become a stove meal if conditions change, provided you packed cookware compatible with that heat source. That small bit of flexibility can spare you from forcing a fire when the safest choice is a burner.
Frequently Asked Questions
What are the essential tools for campfire cooking?
Start with a pot or skillet, a stable cooking surface, long-handled tongs, a sturdy spoon or spatula, and heat-resistant gloves. Add a knife, cutting board, thermometer, and cleanup supplies to match your menu and food-storage plan.
Is cast iron worth bringing camping?
Cast iron holds heat well and works for dishes from eggs to Dutch oven bread, so it can suit car camping. It is heavy and needs care to help prevent rust, which can make it a poor fit when you’re carrying all your gear on foot.
Can I cook directly over an open flame?
Some foods can cook over flames, but coals usually provide steadier heat for cookware. Use a fire-safe pan and secure cooking surface, keep your hands clear of flames, and follow current fire rules at the site.
Do I need a Dutch oven?
No. A Dutch oven is useful for stews, breads, and slow one-pot meals, but it can be bulky and heavy. A pot or skillet may cover your needs if you’re making simpler meals or packing light.
How do I clean cookware without harming waterways?
Scrape food scraps into a bag, then wash dishes well away from lakes and streams when allowed. Dispose of strained wash water according to local guidance; biodegradable soap still does not belong directly in a waterway.
How can I keep camp food safe?
Keep perishables cold in a well-managed cooler, separate raw meat from ready-to-eat foods, and wash hands and surfaces between tasks. Use a food thermometer for meat and poultry instead of judging doneness by appearance.
Conclusion
Build your camp kitchen around the meals you’ll cook, the fire rules at your site, and the weight you can carry. A stable surface, one suitable pot or skillet, long-handled tools, and a cleanup plan will handle more dinners than a bag of gadgets.
Let coals do the steady work, keep your hands clear of the heat, and pack only what has a job. When the last pan cools beside the fire ring, the best kit is the one that leaves you ready to cook again tomorrow.