
TL;DR

Get kitchen gear delivered free — and shop member deals
- Fast, free delivery on millions of items
- Access to Prime Big Deal Days deals on October 6–7
- Prime Video, Amazon Music and more included
Pre-infusion introduces a small amount of water before full extraction, allowing the coffee to bloom evenly. It reduces channeling and enhances flavor, making your manual espresso shots more balanced and repeatable. Modern machines and traditional techniques both benefit from this simple step.
Pre-infusion saturates grounds evenly, reducing channeling and uneven extraction.
A 8–15 second gentle soak at low pressure greatly improves flavor clarity and consistency.
Adjust pre-infusion duration based on roast level and bean freshness for best results.
Even simple manual machines can benefit from a pre-infusion-like step with patience.
Practice and note-taking are key to mastering pre-infusion for your setup.
What is Pre-Infusion and Why Should You Care?
Pre-infusion is a technique where you introduce a small amount of water to the coffee grounds at low pressure before the main extraction. Think of it as giving the coffee a gentle wake-up call. This step helps saturate the grounds evenly, reducing channeling—when water finds the path of least resistance—and leading to a more uniform extraction. If you’ve ever had a shot that was over-strong in one part and weak in another, pre-infusion can fix that problem. For manual espresso makers, it’s a way to gain more control and produce a shot that’s smoother, richer, and more consistent.
Why does this matter? Because uneven extraction is one of the biggest enemies of a good espresso. When water bypasses some grounds or flows unevenly, it can cause over-extraction (bitter, harsh flavors) in some areas and under-extraction (sour, weak flavors) in others. Pre-infusion allows the water to slowly and evenly penetrate the coffee, ensuring all grounds are equally saturated. This not only improves flavor but also reduces waste and the need for repeated attempts. The tradeoff is that pre-infusion adds a little complexity and time to your process, but the benefits often outweigh these minor inconveniences for serious enthusiasts.
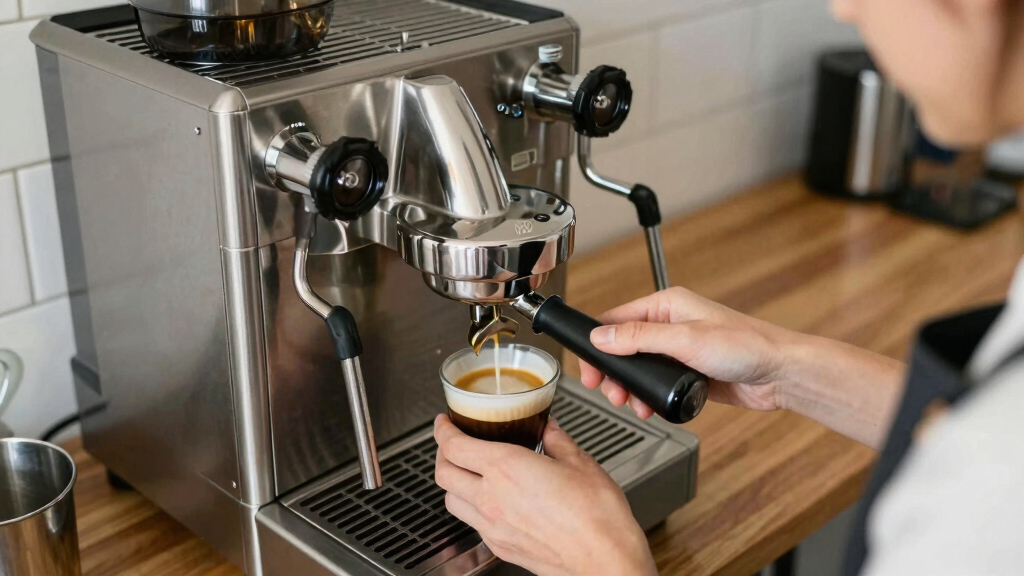
manual espresso machine with pre-infusion
As an affiliate, we earn on qualifying purchases.
As an affiliate, we earn on qualifying purchases.
How Pre-Infusion Makes Your Espresso Better in Real Life
Picture this: you’re brewing a shot with freshly roasted, medium-dark beans. You dose 18 grams, grind to a medium-fine, and start pulling. When you add pre-infusion—say, 10 seconds at 2 bars of pressure—the water gently soaks the coffee, letting trapped gases escape and the grounds swell. This process is crucial because freshly roasted beans often contain more CO2, which can cause uneven extraction if not properly degassed. By pre-infunding, you allow these gases to escape gradually, preventing channeling that might occur if the water pushes through gas pockets or unevenly distributed particles. As a result, the shot flows more smoothly, producing a deep, balanced flavor and a velvety crema. Conversely, without pre-infusion, the water might find weak spots or gas pockets, leading to channeled flow and uneven extraction, which can dull flavors and create a less cohesive shot. This small step, therefore, becomes especially critical when working with variable conditions—such as different bean batches, ambient humidity, or grinder inconsistencies—since it helps normalize the extraction process, ensuring you get a consistently better cup each time.
espresso shot timer and pressure gauge
As an affiliate, we earn on qualifying purchases.
As an affiliate, we earn on qualifying purchases.
Pre-Infusion in Action: The Step-by-Step Guide
- Start with fresh, evenly roasted beans. Grind to a consistent medium-fine.
- Distribute coffee evenly in your basket to avoid uneven channels. Tap or use a distribution tool if needed.
- Set your machine or manual lever to apply low pressure—around 2 bars.
- Introduce water slowly for 8–15 seconds, enough to wet all grounds evenly. Watch for bubbling or gas release—these are signs that pre-infusion is working effectively.
- Increase pressure to full extraction and finish pulling your shot.
As an affiliate, we earn on qualifying purchases.
Pre-Infusion vs. No Pre-Infusion: Which One Wins?
| Feature | With Pre-Infusion | Without Pre-Infusion |
|---|---|---|
| Flavor Clarity | Enhanced, brighter, more complex | Often dull or uneven |
| Consistency | More repeatable, less channeling | Variable, prone to uneven extraction |
| Control | Greater control over extraction stages | Less control, more guesswork |
Choosing pre-infusion means investing in more control over your shot. It allows you to fine-tune the timing and pressure, which is especially useful when working with different beans or adjusting for ambient conditions. Without it, you’re relying more on trial and error, risking inconsistent results. Think of pre-infusion as a way to set a more predictable baseline—like pre-heating your oven before baking—so you can focus on perfecting other variables. The tradeoff is that it requires a little more attention and patience, but the payoff is a significant improvement in shot quality and repeatability.
As an affiliate, we earn on qualifying purchases.
Adjusting Your Pre-Infusion for Different Coffees
Not all coffees respond the same way to pre-infusion. Lighter roasts, with their delicate oils and gases, often benefit from a longer, gentler bloom—around 12–15 seconds. This extended pre-infusion allows more time for the beans to release trapped gases and fully saturate, leading to a brighter, more nuanced flavor profile. Darker roasts, which tend to release gases quickly and have more robust oils, usually respond well to shorter pre-infusion times—around 8–10 seconds—since over-extracting delicate flavors can lead to bitterness. For example, a lightly roasted Ethiopian Yirgacheffe might require 15 seconds to fully bloom, revealing floral and citrus notes, while a dark French Roast might only need 8 seconds to avoid overpowering the shot with bitterness. Experimentation is key—observe how the beans respond in terms of bubbling, gas release, and flavor. Adjust the timing and pressure gradually, noting that longer pre-infusion can sometimes lead to over-saturation and over-extraction, especially with delicate or fresh beans. The goal is to find a balance that maximizes flavor without introducing bitterness or loss of brightness.
Can You Add Pre-Infusion to Your Old or Cheap Espresso Machine?
Yes, but it depends. Many manual or semi-automatic machines lack dedicated pre-infusion controls, but you can still approximate the process. For example, with a lever machine, you can manually apply gentle pressure for a brief period at the start—say, 5–10 seconds—before increasing to full pressure. This mimics pre-infusion by allowing the grounds to soak and gases to escape gradually. For low-end or older machines, the key is patience—by slowly applying pressure or pouring water at the start, you can enhance extraction. For instance, if you’re using a stovetop moka pot or a basic espresso machine, you might pre-wet the grounds with a small amount of hot water, then proceed with your normal process. However, be cautious—forcing pressure or attempting to modify machine settings beyond their design can cause damage or inconsistent results. The main idea is to introduce a gentle, controlled wetting phase that improves saturation and reduces channeling, even if your gear isn’t designed specifically for pre-infusion.
The Real Benefits: Why Pre-Infusion Is Worth Your Time
Pre-infusion reduces the risk of under- or over-extraction by promoting even saturation of the coffee grounds. This leads to richer flavor, better aroma, and a smoother mouthfeel—traits highly valued in high-quality espresso. It also makes your shots more predictable, which is especially important if you’re working with variable conditions or inconsistent equipment. For the off-grid or busy home barista, this predictability saves time and effort, reducing waste and the frustration of inconsistent results. Moreover, because pre-infusion can be achieved with simple adjustments or manual techniques, it democratizes high-quality espresso—no need for expensive, high-end machines to get good results. The tradeoff, however, is that it requires some experimentation and patience to master, but once dialed in, it can elevate your espresso game significantly.
Your Pre-Infusion Checklist: Get It Right Every Time
- Use fresh, evenly roasted beans and grind consistently.
- Distribute grounds evenly in your basket to prevent uneven channels.
- Apply gentle pressure—about 2 bars—for 8–15 seconds. Watch for bubbling and gas release, which indicate effective pre-infusion.
- Observe the bloom—look for bubbling, gas release, and uniform saturation.
- Increase pressure smoothly for the rest of the shot, ensuring even flow and extraction.
Frequently Asked Questions
What exactly is pre-infusion in espresso making?
Pre-infusion is when you introduce a small amount of water at low pressure to wet the coffee grounds evenly before full extraction. It helps gases escape and grounds swell, leading to a better, more balanced shot.
How long should I pre-infuse for the best results?
Most baristas recommend 8 to 15 seconds, depending on the coffee roast and grind. Lighter roasts often need a longer bloom, while darker roasts respond well to shorter pre-infusion.
Can I add pre-infusion to my existing manual espresso machine?
Yes, even if your machine doesn’t have a dedicated pre-infusion feature. You can manually apply gentle pressure or slowly pour water at the start of your shot to mimic the process. Just be cautious not to damage your equipment.
Does pre-infusion really improve flavor that much?
Absolutely. Proper pre-infusion reduces channeling, leading to more even extraction. Coffee tastes more vibrant, with better aroma and a smoother mouthfeel, especially with variable or delicate beans.
Is pre-infusion necessary for all beans?
Not necessarily. It’s most beneficial with lighter roasts, fresh beans, or coffees prone to channeling. Darker roasts often need less pre-infusion or shorter timings, but experimenting can always lead to better results.
Conclusion
Pre-infusion isn’t just a fancy step—it’s a practical way to make your manual espresso taste better and stay consistent. It’s a small tweak that rewards patience and attention to detail. Next time you pull a shot, give pre-infusion a try—your taste buds will thank you.Fall Picks
fall essentials
As an affiliate, we earn on qualifying purchases.