
TL;DR
You can make cold brew coffee easily with a Mason jar—no fancy equipment needed. Steep coarsely ground coffee in cold water for 12-24 hours, strain, and enjoy. It’s cost-effective, customizable, and perfect for off-grid kitchens.
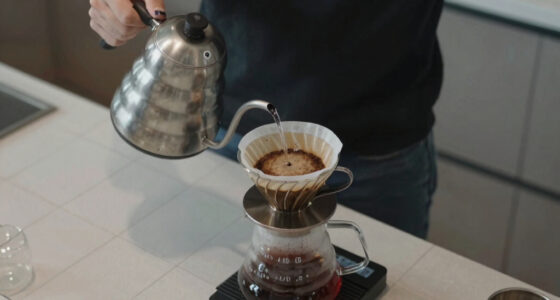
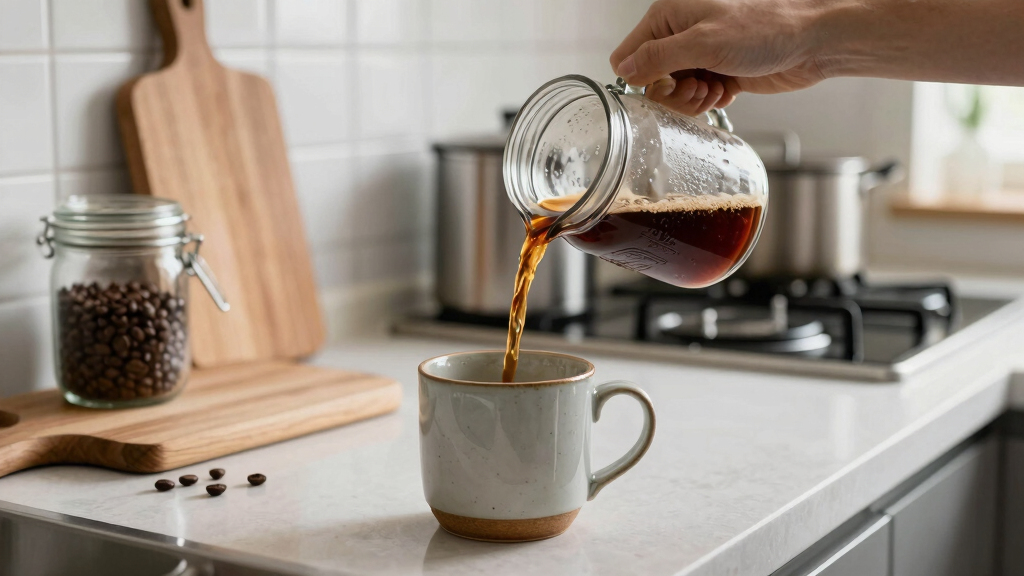
Imagine waking up, pouring a simple jar of coffee grounds and cold water, then going about your day. When you return, you’ve got rich, smooth cold brew ready to enjoy—no fancy machines, no fuss. This is the beauty of the Mason jar method. It’s a straightforward way to craft flavorful coffee with just a few basic tools, perfect for off-grid kitchens or anyone looking to cut costs and complexity.
In this guide, you’ll learn how to make cold brew with a Mason jar step-by-step, explore recent trends, and get practical tips for customizing your brew. Whether you’re a beginner or a seasoned DIYer, this method puts control back into your hands—no electricity, no waste, just honest, good coffee.
The Mason jar method requires just a jar, coffee, water, and a strainer—no special equipment needed.
Steeping for 12-24 hours in the fridge develops a rich, smooth flavor that’s less acidic than hot brewed coffee.
Adjust the coffee-to-water ratio to customize strength and flavor profile.
Use coarse, fresh coffee grounds to avoid sediment and bitterness.
Cold brew stored in the fridge lasts up to two weeks, making it perfect for batch brewing.
Cold Brew Without Any Equipment: The Mason Jar Method
TL;DR: Combine coarsely ground coffee and cold filtered water in a Mason jar, steep for 12-24 hours, strain, and serve. It is low-cost, off-grid friendly, reusable, and easy to scale from one jar to a full fridge shelf.
A jar, patience, and coarse grounds can deliver smooth cold brew without machines, electricity, or specialty gear.
Why the jar method works
The Mason jar removes most variables from cold brew. Thick glass, a tight lid, cold storage, and slow extraction protect aromatics while producing a smooth cup with less bitterness than rushed hot brewing.
No specialty setup
Use common kitchen tools: a jar, water, coffee, and something fine enough to strain the finished brew.
Strength by ratio
Dial the brew from concentrated to refreshing by changing only the coffee-to-water ratio and final dilution.
Reusable by design
A washable jar and reusable filter reduce waste while keeping batch brewing inexpensive and repeatable.

Cold Brew Coffee Maker,64 oz Mason Jar Pitcher with Stainless Steel Filter, Pour Spout Handle Lid, Heavy Duty Glass Airtight & Leak-Proof for Iced Coffee,Tea & Lemonade
【⚠️ Important Usage Warning】: Do not pour boiling water directly into the container; the maximum safe operating temperature…
As an affiliate, we earn on qualifying purchases.
As an affiliate, we earn on qualifying purchases.
The 5-step Mason jar flow
Cold brew is a slow, forgiving process. Start with 12 hours, taste, then extend toward 24 hours when you want deeper body and more intense extraction.
Measure
Use 1 cup of fresh, coarsely ground coffee for a standard jar batch.
Add water
Pour in 4-8 cups of cold filtered water based on your target strength.
Seal & shake
Close the lid tightly and gently mix until every ground is saturated.
Steep
Refrigerate for 12-24 hours in a stable, cold, dark environment.
Strain
Filter into a clean container, then serve over ice, milk, or water.

Bizzy Organic Cold Brew Coffee | Smooth & Sweet Blend | Coarse Ground Coffee | Micro Sifted | Specialty Grade | 100% Arabica | 1 LB
Coarse ground coffee optimized for cold brew
As an affiliate, we earn on qualifying purchases.
As an affiliate, we earn on qualifying purchases.
Ratio comparison
The same method can make a bold concentrate, a ready-to-drink glass, or a lighter base for hot or iced coffee. The ratio is the main control lever.
| Ratio | Flavor Intensity | Best For | Beginner Friendly | Needs Dilution |
|---|---|---|---|---|
| 1:4 coffee:water | Strong, concentrated, heavy body | Espresso-style drinks, mixing, milk drinks | ~ Taste carefully | ✓ Usually |
| 1:6 coffee:water | Balanced, smooth, rounded | Drinking straight or with milk | ✓ Best starting point | ~ Optional |
| 1:8 coffee:water | Light, refreshing, mellow | Diluted iced coffee or gentle hot coffee base | ✓ Very forgiving | ✗ Rarely |
Strength spectrum

Fermus Cold Brew Coffee Filter for 64oz / 2Quart Wide Mouth Mason Jar Infuser 304 Stainless Steel Strainer with Seal Ring Design for Grounds Tea Fruit Coffee Filter
Fit 64 oz Wide Mouth Mason Jar for convenient brewing.! Enjoy smooth, rich coffee with our fine mesh…
As an affiliate, we earn on qualifying purchases.
As an affiliate, we earn on qualifying purchases.
What changes the flavor
Small decisions create big differences: grind size controls clarity, time controls depth, temperature controls consistency, and filtration controls texture.
Fermus Cold Brew Coffee Filter for 64oz / 2Quart Wide Mouth Mason Jar Infuser 304 Stainless Steel Strainer with Seal Ring Design for Grounds Tea Fruit Coffee Filter
Fit 64 oz Wide Mouth Mason Jar for convenient brewing.! Enjoy smooth, rich coffee with our fine mesh…
As an affiliate, we earn on qualifying purchases.
As an affiliate, we earn on qualifying purchases.
Perfecting the batch
The method is simple, but the quality comes from reducing bitterness, sediment, and oxidation while preserving aromatic oils from freshly ground beans.
Use coarse, fresh coffee
Fine grounds slip through filters and over-extract. Coarse grounds give water time to pull sweetness and body without turning gritty or bitter.
Keep the jar cold and covered
A stable fridge temperature below 40°F supports even extraction and helps protect the brew from spoilage during the steep.
Start at 12 hours
Taste early, then extend in small increments. Longer steeping adds complexity, but too much time can bring astringency.
Strain with care
Use cheesecloth, a fine mesh strainer, or a reusable coffee filter. A second pass creates a clearer, smoother glass.
Traceability: from jar to glass
Every good batch follows the same chain: simple inputs, patient extraction, clean filtration, and flexible serving.
Why the Mason jar method makes cold brew simple and reliable
The Mason jar method is a game-changer because it uses tools you already own—no need for special equipment. It’s as simple as coarsely grinding your favorite beans, mixing with cold water, and letting nature do the work. The jar’s thick glass keeps your brew chilled and protected from light, which is crucial because light and heat can degrade coffee’s delicate aromatic compounds, leading to a flatter flavor profile. Proper storage in a dark, cool environment preserves these aromatics, resulting in a more vibrant, nuanced brew. Additionally, the simplicity of this method minimizes variables—such as temperature fluctuations or equipment inconsistencies—that can affect flavor, making it more predictable and reliable for home brewers. The reusability of the jar reduces waste and cost, aligning with sustainable practices. The main tradeoff is that it requires patience and some understanding of steeping times; rushing or oversteeping can compromise flavor, so attention to detail is key. Overall, this approach democratizes high-quality coffee by removing barriers like expensive equipment or electricity dependency, allowing anyone to craft a professional-tasting cold brew at home.
Step-by-step: How to make cold brew in a Mason jar
- Measure out 1 cup of coarsely ground coffee. Using high-quality, freshly ground beans ensures maximum flavor extraction because volatile oils and aromatics are at their peak immediately after grinding. These compounds are sensitive to oxidation and degrade over time, so fresh grounds lead to a more vibrant, complex brew. Coarse grounds are essential because they allow water to extract flavors evenly without slipping through filters or creating excessive sediment, which can lead to a gritty mouthfeel. The tradeoff is that coarse grounds require longer steeping times to fully develop flavor, but this slow extraction often results in smoother, less bitter coffee.
- Pour the coffee into your Mason jar, spreading it evenly to promote uniform extraction. An uneven layer can cause inconsistent flavor, with some grounds over-extracting and others under-extracting, leading to a less balanced taste. Ensuring even distribution helps the water interact uniformly with all grounds, producing a more consistent profile.
- Add 4 cups of cold, filtered water. Adjust this ratio based on your preferred strength: more water results in a lighter brew, while less creates a concentrated base for diluting later. This flexibility allows customization—if you enjoy a strong, espresso-like drink, use a 1:4 ratio; for a milder, more drinkable brew, lean toward 1:6 or 1:8. The key is understanding that the ratio directly influences the flavor intensity and mouthfeel, and balancing it according to your taste preferences and intended use (such as mixing with milk or serving straight) ensures a satisfying experience.
- Secure the lid tightly. Shake gently to mix the coffee and water thoroughly without causing spillage. Proper sealing prevents contamination and evaporation, maintaining the integrity of your brew during steeping. Gentle agitation during initial mixing helps ensure all grounds are saturated, leading to even extraction. Over-shaking isn’t necessary and can introduce unnecessary oxygen, which might slightly oxidize the brew, but gentle mixing is sufficient for a uniform steep.
- Place the jar in the fridge for 12-24 hours. Longer steeping times extract more complex flavors, but also increase the risk of over-extraction, which can lead to bitterness and astringency. Starting with 12 hours allows you to gauge the flavor; if you prefer a richer profile, extend the steeping time incrementally. Tasting at different intervals helps you determine your personal optimal steep time, balancing strength and smoothness. The tradeoff is that longer steeping ties up your fridge space and requires planning ahead, but it yields a more nuanced and satisfying brew.
- Strain the mixture through a fine mesh strainer or cheesecloth into a clean container. Proper filtration is crucial to remove fine coffee particles that can cloud the brew and affect mouthfeel. Using multiple layers of cheesecloth or a reusable coffee filter ensures a clear, grit-free liquid, which improves the drinking experience. This step also prevents clogging your glassware or diluting your brew with sediment, making it more enjoyable and visually appealing.
- Serve over ice, dilute with water or milk, or use as a base for other drinks. Your flavor profile can be fine-tuned by adjusting steeping time and dilution—think of it as customizing your coffee experience. For example, a stronger brew can be diluted for a milder taste, or flavored with milk or sweeteners to suit your mood. This flexibility allows you to craft beverages tailored to your preferences, whether you want a refreshing summer drink or a rich, concentrated shot for cocktails.
Compare: Cold brew strength options with Mason jars
| Ratio | Flavor Intensity | Best For |
|---|---|---|
| 1:4 (coffee:water) | Strong, concentrated | Espresso-style drinks, mixing |
| 1:6 | Balanced, smooth | Drinking straight or with milk |
| 1:8 | Light, refreshing | Diluted for hot or iced coffee |
Tips for perfecting your Mason jar cold brew
- Use coarsely ground coffee—finer grounds can slip through filters and over-extract, making the brew bitter. Coarse grounds allow for better extraction control, resulting in a smoother flavor and less sediment. Experimenting with grind size can help you optimize clarity and taste, especially if you notice gritty texture or bitterness. The right grind size balances extraction speed and flavor richness—too fine, and you risk over-extraction and bitterness; too coarse, and the brew may lack depth. Adjusting grind size based on your steeping time and filtration method can help you refine your brew’s clarity and flavor profile.
- Keep your jar in the fridge at a consistent temperature, ideally below 40°F, for even steeping. Temperature stability ensures uniform extraction because fluctuating temperatures can cause inconsistent flavor development and increase the risk of spoilage or mold growth. A stable, cold environment also slows microbial activity, preserving freshness over the steeping period. If your fridge is warmer or inconsistent, consider using a cooler spot or a temperature-controlled environment to optimize extraction and safety.
- Experiment with steeping times—start with 12 hours, then taste and extend if needed. Record your preferred timings and ratios to develop a personalized brewing schedule that balances flavor and strength. Longer steeping can unlock more complex, nuanced flavors but may also introduce bitterness if overdone. Shorter times yield lighter, more delicate profiles. Keeping track of your experiments helps you understand how variables interact, enabling you to fine-tune your process for consistently satisfying results.
- Use a double layer of cheesecloth or a reusable coffee filter for cleaner strainings. Proper filtration not only improves clarity but also prevents fine particles from affecting mouthfeel or clogging your glassware. Double filtering can remove more sediment, resulting in a smoother, more refined brew. This step is especially important if you prefer a clear, professional-looking cold brew or plan to store it for an extended period. Investing in good filtration tools pays off by ensuring each batch is as clean and enjoyable as possible.
- Label your jars with date and ratio for easy tracking and consistency. Keeping a small log helps refine your process over time, ensuring each batch meets your taste preferences and saving you trial-and-error effort. Documenting variables like steep time, ratio, grind size, and flavor notes allows you to identify patterns and optimize your method. Over time, this practice can turn brewing into a precise craft, yielding consistently satisfying results and preventing repeated mistakes or over- or under-extraction.
Fresh flavor ideas for your Mason jar cold brew
Boost your brew with add-ins like a vanilla bean, cinnamon stick, or a few cardamom pods during steeping. For a seasonal twist, infuse with a hint of orange peel or a splash of maple syrup. These small touches turn your basic cold brew into a personalized treat, perfect for mornings or lazy afternoons.
For example, adding a cinnamon stick during steeping creates a warm, spicy aroma that fills your kitchen as it sits. When poured over ice, it’s like a cozy hug in a glass—without any equipment needed. Infusing with these spices not only enhances the aroma but also alters the flavor profile—adding depth, warmth, or brightness—making each batch uniquely suited to your mood or occasion. Experimenting with different combinations lets you tailor your cold brew to match seasonal themes or personal preferences, elevating a simple drink into a moment of sensory delight.
Making cold brew in a Mason jar: Pros and cons
| Pros | Cons |
|---|---|
| Inexpensive and accessible | Requires planning ahead for steeping time |
| Very customizable | Filtration can be messy without proper tools |
| Perfect for small batches or large quantities | Long steeping can tie up your fridge space |
How to store and serve your Mason jar cold brew
Keep your cold brew in the fridge in the same jar or transfer it to a clean bottle or pitcher. It stays good for up to two weeks, but best enjoyed within the first week for maximum freshness. Serving it properly can make a significant difference in taste and experience. Using airtight containers prevents oxidation and flavor degradation, maintaining freshness longer. Proper storage minimizes exposure to light, heat, and air—all factors that can accelerate flavor deterioration. Additionally, the way you serve your cold brew influences its final impression: over ice for a refreshing summer treat, diluted with milk for creaminess, or gently warmed if you prefer a hot version. Gentle warming can release some aromatic compounds, but it may also alter the brew’s profile, so taste-testing is recommended. These small adjustments help you enjoy your cold brew at its peak, turning a simple routine into a mindful ritual.
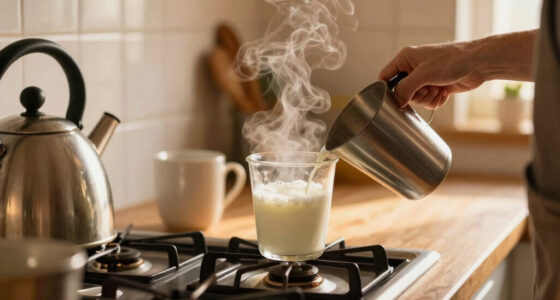
For a refreshing summer drink, pour your brew over a handful of ice cubes and add a splash of cream or plant-based milk. It’s a simple, satisfying ritual that’s easy to scale up for gatherings or daily use.
Frequently Asked Questions
How long should I steep the coffee in the Mason jar?
Aim for 12-24 hours in the fridge. Start with 12 hours to test strength, then extend if you want a richer flavor. Longer steeping yields a more concentrated brew.Can I use any type of coffee grounds?
Coarse, fresh coffee grounds work best. Fine grounds can slip through filters and create sediment, making your cold brew gritty and over-extracted. Avoid pre-ground coffee that’s been sitting on the shelf too long.Do I need special filters?
A fine mesh strainer, cheesecloth, or a reusable coffee filter will do. Multiple layers help catch smaller particles and make for a cleaner pour. If you prefer a clearer brew, double filtering is worth the effort.How do I prevent the coffee from becoming too bitter?
Use fresh beans, avoid over-steeping, and stick to the recommended ratios. Tasting your brew after 12 hours helps you decide if you want to extend or reduce steeping time.Can I make hot coffee with this method?
No, this Mason jar method is designed for cold steeping. For hot coffee, use traditional brewing methods like pour-over or French press.Conclusion
This simple Mason jar approach turns a basic kitchen tool into a powerful coffee maker. It’s a natural choice for off-grid living, a budget-friendly hack, or anyone craving control over their brew. All it takes is patience, fresh coffee, and a jar—then you’re savoring fresh cold brew whenever you like.
Next time you want a cool, flavorful drink, think of that humble Mason jar. It’s more than just storage; it’s your gateway to a better coffee routine—no fuss, just pure, manual pleasure.