
TL;DR
Making espresso manually at home requires good equipment, fresh beans, and consistent technique. With patience, you can craft rich, flavorful shots comparable to professional cafes, even without automation.
Start with fresh beans and a good burr grinder for best flavor and consistency.
Practice tamping and extraction timing regularly to develop muscle memory.
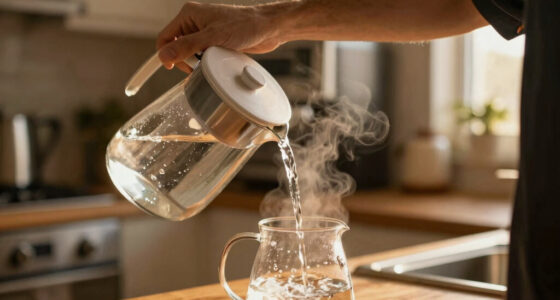
Use a scale to measure coffee and water precisely — don’t guess.
Be patient — mastering manual espresso takes time, but the results are worth it.
Leverage online tutorials and communities to accelerate your learning curve.
A Beginner’s Guide to Manual Espresso at Home
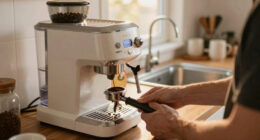
Manual espresso is tactile coffee craft: fresh beans, a precise grind, a level tamp, and steady pressure. With a few weeks of consistent practice, home brewers can produce rich, balanced shots that feel remarkably close to a cafe pull.
TL;DR: start with a burr grinder, measure everything, keep notes, and treat each shot as feedback.
Classic double-shot starting range for dialing in grind, flow, and flavor.
A steady caramel stream in this range usually signals balanced extraction.
Manual brewing can match commercial quality when your routine becomes consistent.
The four tools that make manual espresso repeatable
Manual machines reward control, but control only matters when the inputs stay steady. These pieces turn guesswork into a brew routine you can refine.
Burr Grinder
Uniform fine grounds help water move evenly through the puck, reducing sour under-extraction and bitter over-extraction.
Tamper
A level, firm tamp creates consistent resistance so the water does not channel through weak spots.
Scale
Measuring dose and yield lets you repeat great shots instead of chasing flavor by memory.
Fresh Beans
Beans roasted within the last few weeks keep the aromatic oils that give espresso depth, sweetness, and crema.

Primula Classic Stovetop Espresso and Coffee Maker, Moka Pot for Italian and Cuban Café Brewing, Greca Coffee Maker, Cafeteras, 6 Espresso Cups, Silver
CRAFT COFFEE AT HOME: Produces six demitasse/espresso servings of rich, smooth espresso coffee in minutes. Craft your own…
As an affiliate, we earn on qualifying purchases.
As an affiliate, we earn on qualifying purchases.
How a good shot comes together
Think of the process as a chain. If one link changes, the taste changes. Keep the routine calm, measured, and repeatable.
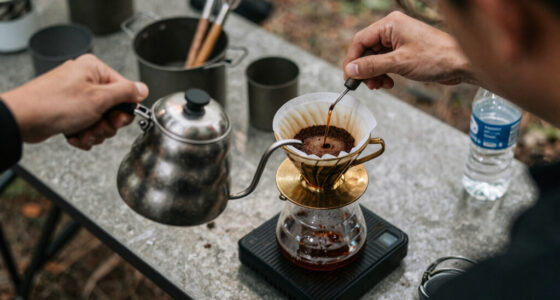
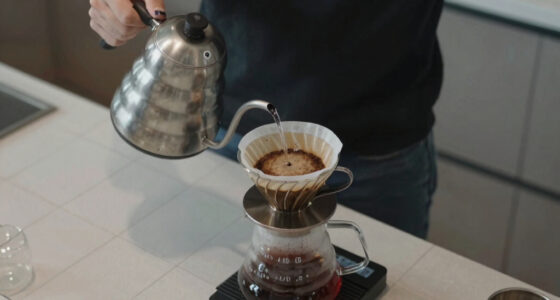
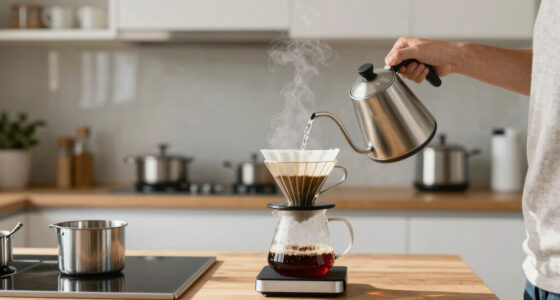
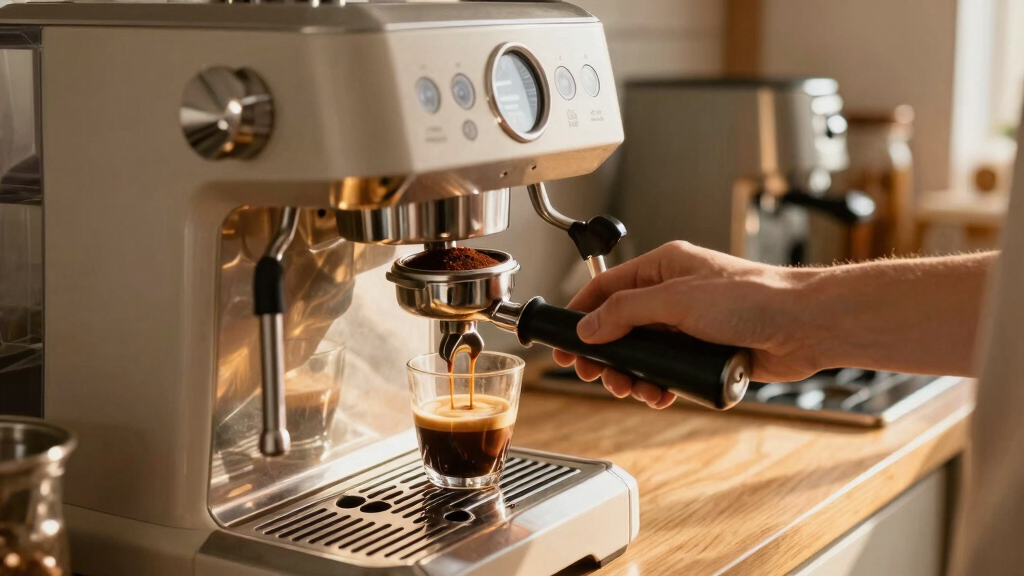
Measure & Grind
Dose 18-20 grams and grind fine, close to powdered sugar texture.
Pre-Wet
Dampen the bed briefly to release gas and prepare an even extraction.
Tamp Level
Press evenly until the coffee is compact, flat, and ready to resist water.
Heat Water
Keep water between 90-96°C to avoid weak or scorched flavors.
Extract
Pull steadily for 25-30 seconds, watching for a thin caramel stream.
burr coffee grinder for espresso
As an affiliate, we earn on qualifying purchases.
As an affiliate, we earn on qualifying purchases.
Where beginners should put their attention
The biggest gains usually come from stabilizing grind, dose, tamp, and timing before chasing advanced accessories.
Impact on Shot Consistency
Manual vs Automatic
| Factor | Automatic | Manual | Beginner Note |
|---|---|---|---|
| Hands-on control | ~ Limited | ✓ Full | Manual gives direct feedback on pressure and flow. |
| Ease on day one | ✓ Easier | ~ Practice | Expect trial and error during the first weeks. |
| Customization | ~ Moderate | ✓ High | Grind, tamp, pressure, and timing are yours to tune. |
| Skill building | ✗ Lower | ✓ Strong | Every shot teaches cause and effect. |
| Repeatability | ✓ Built in | ~ Earned | A scale and notebook close the gap quickly. |

Reoszeank 51mm Espresso Accessories Kit, Espresso Distribution Tool, Spring Loaded Calibrated Tamper and Dosing Funnel Set, Coffee Distributor Leveler Fits Delonghi CASABREWS and atatix 51 mm Machines
Fits 51mm Delonghi and CASABREWS Portafilters: Designed to fit Delonghi, CASABREWS CM5418 / 3700, atatix and other 51mm…
As an affiliate, we earn on qualifying purchases.
As an affiliate, we earn on qualifying purchases.
Common problems and the first fix to try
Small changes can swing the cup from sour to bitter. Change one variable at a time and record what happens.
Water moved too fast
Try a finer grind, check your dose, and aim for a longer pull inside the 25-30 second window.
Extraction ran too hard
Try a slightly coarser grind, reduce excessive pressure, or stop the shot sooner.
Freshness or channeling
Use fresher beans, tamp level, and watch whether flow breaks into uneven streams.
The flavor target is a narrow middle

Maestri House S2 Espresso Coffee Scale with Timer, USB-C Rechargeable 2kg/0.1g Precision Shot Scale, Digital Scale for Espresso Brewing(Black & Silver)
【Ultra Small, Yet Professional】The Espresso Scale is small enough to fit in your palm. It measures 4.13*4.13*0.78 inches…
As an affiliate, we earn on qualifying purchases.
As an affiliate, we earn on qualifying purchases.
From bean to better shot
What Makes a Manual Espresso Machine Different — And Why It’s Worth It
Manual espresso machines rely entirely on your control — no automated pressure or timing. They come in lever, piston, or hand-pump styles, each demanding more involvement but offering greater customization. Think of it like tuning a vintage guitar — it’s a bit more work, but the sound is richer and more personal.
For example, a lever machine requires you to manually apply pressure, giving you direct feedback on the process. This might mean a slightly steeper learning curve, but it also means you understand every step — from grind to shot. If you enjoy craftsmanship and want to fine-tune every detail, a manual machine offers unmatched control.
Choosing a manual machine means accepting that you’ll need to invest time in learning each phase of extraction. While this might seem daunting initially, it allows for a deep understanding of how variables like pressure, grind size, and timing affect flavor. The tradeoff is that you get to develop a personalized technique that can produce superior results once mastered.
The Essential Gear You Need to Brew Perfect Espresso by Hand
- Burr Grinder: For consistent, fine grounds that mimic powdered sugar texture. The importance of a burr grinder lies in its ability to produce uniform particles, which is crucial for even extraction. Uneven grounds can lead to over-extraction (bitterness) or under-extraction (sourness), so investing in quality grounds directly impacts flavor.
- Tamper: To press grounds evenly with about 30 pounds of force. Proper tamping ensures uniform resistance, leading to a consistent flow of water through the coffee bed. Inconsistent tamping introduces channeling, where water bypasses parts of the coffee, resulting in uneven extraction and weak flavor.
- Scale: To measure coffee and water precisely, avoiding guesswork. Accurate measurements help replicate successful shots and understand how variables influence taste. Using a scale minimizes variability, making your process more predictable and your results more reliable.
- Fresh Coffee Beans: Roasted within the past 2-4 weeks, ground just before brewing. Freshness preserves aromatic oils essential for flavor; stale beans lead to dull, flat espresso. Grinding immediately before brewing maximizes aroma and complexity, which are vital for a rich, satisfying shot.
Imagine grinding beans that crackle softly as they break apart, smelling rich and earthy. Tamping feels like pressing down a soft, textured mat. Using a scale helps you hit that magic 18-20 grams for a double shot every time. Recognizing why each tool matters allows you to troubleshoot and refine your process, ultimately elevating your espresso quality.
How to Pull a Great Shot: Step-by-Step for Beginners
- Measure and grind: Dose 18-20 grams of beans to a fine, powdery consistency. Precision here is critical; too coarse and water flows too quickly, resulting in weak flavor, too fine and it clogs the filter, causing over-extraction and bitterness.
- Pre-wet (bloom): Dampen grounds with a splash of hot water, let sit for 30 seconds. This step releases trapped gases, allowing for better extraction and a more even coffee bed. Skipping this can lead to uneven flavors and a less vibrant shot.
- Tamp: Apply even, firm pressure until the coffee is compact and level. Consistent tamping creates uniform resistance, which is key for an even flow. Variations in tamp pressure can cause channeling, where water bypasses coffee, undermining flavor.
- Set up your machine: Ensure water is heated to 90-96°C (194-205°F). Proper temperature ensures optimal extraction; too hot can scald the coffee, too cold results in under-extraction.
- Begin extraction: Pull steadily, watching for a thin, caramel-colored stream that lasts 25-30 seconds for a double shot. Timing and flow rate directly influence the strength and richness of the espresso; rushing or slow extraction can both compromise flavor.
Picture the coffee as a dark velvet curtain being pulled back slowly, revealing rich, aromatic layers. Practice makes perfect — don’t rush, and keep notes of what works best. Over time, understanding these steps helps you develop a nuanced touch that yields consistently better shots.
Why Your Manual Espresso Might Need More Practice (And How to Fix It)
Manual brewing requires finesse and consistency because small variations can significantly impact flavor and extraction quality. For instance, uneven tamping can cause water to channel through parts of the coffee bed, leading to under-extracted, sour shots or over-extracted, bitter ones. Recognizing these subtle issues helps you understand how each step influences the final taste.
Stale beans, for example, contain fewer aromatic oils, resulting in flat, dull espresso. Rushing the shot by applying too much pressure or pulling it too quickly can also compromise flavor, making it weak or overly bitter. Developing a steady, mindful routine is essential to minimize these errors.
To improve, focus on maintaining grind consistency, which is vital because even slight variations can alter extraction. Use fresh beans to ensure vibrant flavor and develop a consistent tamping rhythm, applying even pressure each time. Recording your process—such as timing, grind size, and tamping force—creates a feedback loop that helps you identify what tweaks lead to better flavor, gradually refining your technique and confidence.
Latest Trends Making Manual Espresso Easier for Beginners
Today’s manual machines feature smarter designs, like ergonomic handles and better pressure control, making it easier to learn. Some models incorporate built-in pressure gauges, so you know when you’ve hit the sweet spot. Meanwhile, digital scales with timers help you dial in shot timing precisely.
The explosion of online tutorials, forums, and YouTube channels also makes it simpler to learn from others. The shift toward specialty coffee emphasizes freshness and grind precision, pushing home brewers toward café-quality results.
These innovations mean that beginners no longer need to struggle with guesswork. Improved ergonomics reduce fatigue, and real-time feedback from pressure gauges or timers enables more precise control. This convergence of technology and community support accelerates skill development, making the journey into manual espresso more accessible and enjoyable.
The Surprising Truth About Manual Espresso Results (And What It Takes)
Manual espresso can truly rival commercial quality — but it demands dedication, consistent effort, and a willingness to learn from mistakes. The key is understanding that variables like grind size, tamping pressure, and extraction time are interconnected; mastering them leads to superior shots. For example, a home enthusiast who commits to a daily routine of adjusting and recording results can produce shots with a thick, golden crema that rivals a café’s.
Research shows that maintaining consistent grind size and tamping pressure can improve shot quality by up to 60% within just a few weeks of disciplined practice. It’s not about luck or innate skill; it’s about developing muscle memory and understanding your equipment’s nuances. Over time, this leads to a sense of mastery and a deeper appreciation for the craft of espresso making.
Your Most Common Questions About Manual Espresso (And Clear Answers)
- Do I need special skills to make espresso at home? No, but patience and consistency matter. Anyone can learn with practice and the right guidance.
- What’s the biggest difference between manual and automatic machines? Manual machines give you total control over each step, while automatic models handle some processes for speed and convenience. This means you can customize every shot but also need to develop your technique.
- Can I get good espresso without fancy equipment? Yes. A quality manual machine, fresh beans, and attention to detail make all the difference. While high-end gear can help, consistency and technique are more important than brand names.
- How long before I see improvement? Most beginners notice progress within a few weeks with regular practice. Tracking your results and adjusting accordingly speeds up this learning curve.
- What should I avoid doing? Over- or under-tamping, using stale beans, rushing the shot, or ignoring grind consistency. These common mistakes hinder flavor and consistency, so focus on developing a steady routine.