
Knife Maintenance for Off-Grid Living
AIThis post was created with the assistance of artificial intelligence (AI).

TL;DR

Before you orderOffer from Amazon

Get kitchen gear delivered free with Prime

  • Fast, free delivery on millions of items
  • Prime Video, Amazon Music and more included
  • Member-only deals all year
Start your free Prime trial Free trial for eligible customers · Cancel anytime
As an affiliate, we earn on qualifying purchases.

Knife maintenance for off-grid living means keeping the blade clean, fully dry, lightly protected, and sharp enough to cut without excess force. Inspect the whole knife, touch up the edge with controlled strokes, and store it dry; a small stone, cloth, brush, and food-safe mineral oil can cover much routine care.

A knife left wet beside the wash basin can develop rust before the morning’s kindling is split. When you rely on hand tools, a clean, sharp blade is more than a kitchen convenience: it helps you cut with control and keeps small jobs from turning into wrestling matches. Knife maintenance for off-grid living does not require a powered grinder or a drawer full of specialty products. You can build a dependable routine around a cloth, a small sharpening stone, careful drying, and a few minutes of attention after use. This guide shows you how to choose care that fits your steel, keep the edge working, spot damage early, and store the knife so it is ready for the next meal or chore.
At a glance
Knife Maintenance for Off-Grid Living: A Practical Guide
Key insight
A dark patina on carbon steel can slow some corrosion, but it does not make the blade rustproof; prompt drying and a thin protective film still matter.
Key takeaways
1

Inspect the blade, handle, pivot, lock, fasteners, and sheath, not just the edge.

2

Wash or wipe after food, sap, soil, salt, or acid; dry the whole knife before storage.

3

Touch up when cutting takes more force or stops feeling clean, using light, consistent strokes.

4

Use a food-safe protective oil sparingly on food knives, and match handle and sheath care to their materials.

5

Do not pry, twist, or strike with a knife that was not designed for those jobs; stop using damaged tools.

Step by step
1
Clean and dry the blade before moisture settles in
Cleaning and drying promptly is the simplest way to reduce corrosion and keep a knife hygienic.
Knife Care · Briefing

Keep your knife ready for off-grid work

A clean, dry, well-maintained knife cuts with better control. A simple routine and a few compact tools can keep it dependable without powered equipment.

Build a simple care routine

Follow the same sequence after each job, adapting it to what the knife touched.

1
Inspect the whole knife

Check the edge, tip, handle, fasteners, pivot, lock, and sheath for damage or looseness.

2
Clean and dry

Remove food, sap, soil, salt, or acid, then dry the blade and joints fully.

3
Touch up the edge

Use light, consistent strokes when cutting takes more force or stops feeling clean.

4
Protect and store

Apply a thin food-safe oil film when appropriate and store the knife dry and secured.

Choose steel for your setting

Corrosion resistance buys time, but every knife still needs suitable care.

Knife or steelUseful strengthCare tradeoff
Stainless steelBetter corrosion resistanceClean and dry after salt, acid, or moisture
Carbon steelOften easy to sharpen to a keen edgeNeeds prompt drying and more frequent protection
Folding knifeCompact for carry and small choresPivot and lock need inspection and cleaning
Fixed bladeSimple construction for kitchen or camp useHandle and sheath materials shape care

Keep the edge working

Routine touch-ups usually take less work and remove less steel than correcting a badly dull edge.

Compact kit

Start with the basics

A small stone, cloth, brush, and food-safe mineral oil cover much routine care.

Sharpening

Use controlled strokes

Match the existing bevel, work steadily, and finish by removing the burr.

Safe use

Respect the knife’s limits

Do not pry, twist, or strike with a knife not designed for those jobs.

WatchA dark patina on carbon steel can slow some corrosion, but it does not make the blade rustproof. Dry it promptly and apply a thin protective film when appropriate.
The takeaway
Clean, dry, inspect, and lightly maintain your knife so it stays controlled and ready for the next meal or chore.

Build a six-step routine that keeps your knife ready

Knife maintenance for off-grid living works best as a short routine: inspect, clean, dry, touch up, protect, and store. The order matters. Inspection catches a loose handle or damaged lock before you put force on the knife; cleaning removes substances that can corrode steel or contaminate food; drying prevents leftover moisture from lingering in joints and sheaths. Touching up and protecting the blade preserve useful performance, while dry storage keeps the care you just took from being undone. After you slice onions for supper or trim twine by the woodpile, a minute spent on care can prevent a small problem from becoming a repair or a risky cut later.
  1. Inspect the edge, tip, handle, fasteners, pivot, and sheath for damage or looseness. A blade can be sharp and still be unsafe if its handle or lock is failing.
  2. Clean away food, sap, soil, and other residue with a cloth or brush and suitable washing. Grit can scratch a blade or jam a folding pivot, while food residue can dry onto the edge.
  3. Dry the entire knife, including around a folding knife’s pivot and handle joints. Water trapped out of sight can cause corrosion even when the blade faces look clean.
  4. Touch up the edge with light, controlled strokes when it starts to cut poorly. Restoring an edge early usually takes less work and removes less steel than correcting a badly dulled one.
  5. Protect the blade with a thin food-safe mineral oil film when appropriate. A light coat helps during storage without transferring a greasy layer to food or a cutting board.
  6. Store it somewhere dry, secured, and accessible to responsible users. Storage is part of maintenance: a damp drawer or sheath can undo careful drying.
The routine can shrink or expand with the job. After cutting dry bread, you may only need to wipe the blade and check the edge. After cleaning a fish or cutting acidic fruit, wash and dry it promptly because salt, acids, and moisture can attack steel while you are busy with other tasks. Treat the sequence like closing down a small kitchen: leave the knife clean and ready for the next person, not hidden under a damp towel.

Products Worth Considering

Vitamix 5200 Professional-Grade Blender, 64 oz. Container, Black

Vitamix 5200 Professional-Grade Blender, 64 oz. Container, Black

KitchenAid Artisan 5-Quart Tilt-Head Stand Mixer, Almond Cream

KitchenAid Artisan 5-Quart Tilt-Head Stand Mixer, Almond Cream

As an affiliate, we earn on qualifying purchases.

Choose steel and a knife that suit your daily work

The right knife is the one whose shape, steel, and construction fit your work and the care you can provide. Stainless steels usually resist corrosion better, which can be useful when a knife is shared or the kitchen is damp. Carbon steels are often straightforward to sharpen and can take a keen edge, but they ask for more attention after wet or acidic work. Neither label tells the whole story: heat treatment, blade geometry, and intended use affect how an edge performs and how easily it can be maintained. Judge the complete knife rather than buying on a steel name alone.
ChoiceUseful strengthCare tradeoff
Stainless steelBetter resistance to corrosion in damp or busy kitchensCan still stain or rust after salt, acid, or prolonged moisture
Carbon steelOften easy to sharpen and maintain a keen working edgeNeeds prompt drying and more frequent protection
Folding knifeCompact for carry and small choresPivot and lock need inspection and cleaning
Fixed bladeSimple construction for steady kitchen or camp useHandle and sheath materials affect cleaning and storage
Say you prepare vegetables in a cabin where the sink area stays humid. A stainless kitchen knife may forgive a missed wipe better than carbon steel, though it still needs to be dried; corrosion resistance buys time, not immunity. If you prefer carbon steel for easy field touch-ups, prompt drying becomes part of using it, not an optional extra. A folding knife saves space for small chores, but its pivot adds a place for grit and moisture to collect. Check it before it moves from opening feed sacks to food preparation, or keep a separate kitchen knife so cleanup is simpler.

Clean and dry the blade before moisture settles in

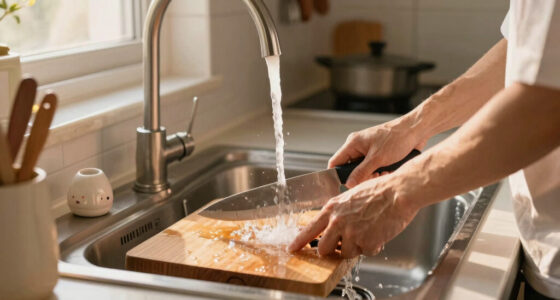
Cleaning and drying promptly is the simplest way to reduce corrosion and keep a knife hygienic. Residue matters because it can hold moisture against the steel, and salt or acidic juices can make corrosion more likely. Remove food, sap, soil, and damp residue after the task, then dry the blade completely, including around the handle and any folding pivot. Stainless steel resists rust better than many carbon steels, but that resistance is a buffer against neglect, not a substitute for cleaning. If you cut tomatoes at lunch, rinse or wipe the blade soon after rather than leaving red juice to dry near the edge. Acidic residue left in place can mark steel and make later cleaning harder. After a muddy garden chore, brush off grit before washing so you do not drag particles across the blade. Use a cloth for the broad faces and take care around the edge; a brush can help clear a folding knife’s pivot without putting fingers near the cutting edge. For a folding knife, clean only as its maker recommends: forcing water or cleaner into an assembly that does not drain well can leave moisture trapped inside. Dry the knife before it goes into its sheath. Leather can hold moisture against steel, so a wet sheath and blade make poor storage partners. Wooden handles also need sensible care: avoid soaking them, since swelling and repeated drying can loosen or damage the finish. Use products suited to each material rather than treating the whole knife as bare steel. If your knife has manufacturer care instructions, follow them, especially for special coatings, handle materials, or locking mechanisms.

Sharpen with light strokes before the edge gets badly dull

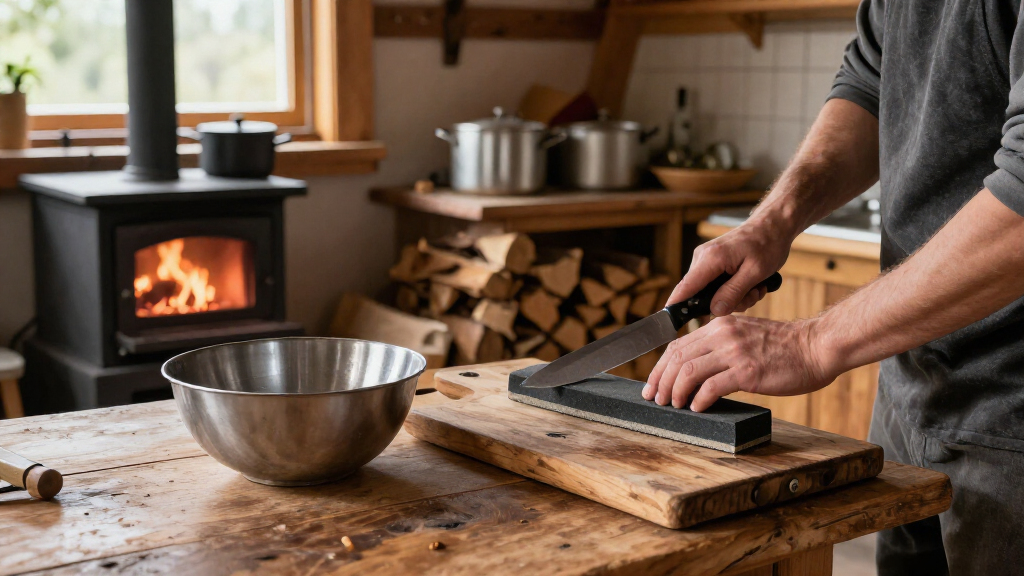
A knife is ready for a touch-up when it needs more pressure or stops cutting cleanly; you do not need to wait for a fixed calendar date. Cutting poorly often tempts you to push harder, which reduces control and can make a slip more likely. Routine sharpening removes metal, so light, controlled maintenance preserves more blade than aggressive grinding. A small whetstone, ceramic rod, or suitable field sharpener can handle many ordinary edge corrections when you use it steadily; the tradeoff is that stones offer more control but require practice, while some quick tools are easier to use but remove steel less gently.
  • Set up securely: place a stone on a stable surface where it cannot slide. If the sharpener shifts, your attention goes to controlling it instead of controlling the edge.
  • Match the bevel: follow the angle already on the knife as closely as you can. Changing the angle unnecessarily can make the edge harder to maintain and may remove more material than needed.
  • Use light strokes: work both sides as appropriate for the edge and the sharpener. Pressure can feel productive, but it makes it easier to round the bevel or create an uneven edge.
  • Remove the burr: finish with gentle alternating strokes or a suitable strop. A small burr is raised metal from sharpening; leaving it can make an edge feel sharp briefly but perform inconsistently.
  • Check safely: make a controlled cut in paper or a small piece of food; never run a finger along the edge.

For example, if a paring knife crushes a pepper skin instead of slicing it, a few careful passes may restore a clean cut. A whetstone lets you follow the existing bevel and work across many blade shapes, but it takes time to learn. A pull-through tool may be convenient for simple touch-ups, though some remove metal aggressively and offer less control over the edge shape. Stop if you cannot hold the knife or sharpener securely; a stable setup and calm strokes matter more than finishing quickly.

Protect steel and handle materials without making a mess

A thin protective film can help guard steel during storage, especially when you use carbon steel or live in a damp place. Oil works by limiting contact between the steel and moisture, but it cannot clean away salt or acidic residue; wash and dry first. For a knife that touches food, choose a food-safe product such as food-safe mineral oil and use only a small amount. The goal is a barely visible film, not a greasy blade that transfers oil to a cutting board or bread. A carbon-steel blade may darken into a patina as you use it, particularly after acidic foods. That gray or blue-black color can offer some protection because it changes the steel’s surface, but it is not a sealed coating and does not make the blade rustproof. If you cut citrus, wash and dry the blade soon afterward; do not rely on patina to take the place of care. Stainless steel also benefits from prompt cleaning when salt or acidic juice gets on it, even though it generally tolerates damp conditions better. Match handle and sheath care to their materials. A wooden handle should not be left soaking in a wash basin, and leather should dry fully before it sits against a blade. These materials can retain moisture or react poorly to products intended for steel, so treating every surface the same way can cause damage. Imagine putting away a camp knife after a rainy day: dry the blade and sheath separately, then store them once both are dry. A small cloth and brush help keep this routine simple.

Use the knife within its limits and inspect the whole tool

A knife stays dependable when you use its edge for cutting rather than forcing it to act as a pry bar, wedge, or chisel. A blade is shaped to slice and resist the loads it was designed for; prying or twisting puts sideways force on the edge and can chip it, loosen the handle, or break the blade. Chopping with a knife not designed for impact or striking its spine can also cause failure. A sharp edge helps you work with less force, but it cannot make an unsuitable task safe. Picture opening a stubborn crate near the pantry. Prying with a kitchen knife can chip the edge or loosen the handle, and a damaged knife may fail later during an ordinary cut. A proper pry tool is the better choice because it is built for that load. For food preparation, cutting, slicing, and careful trimming fit the knife’s job. For heavy splitting, use a tool designed for impact rather than risking a thin blade. Inspect more than sharpness. Check the tip, handle, fasteners, folding pivot, lock, and sheath; each carries part of the load or protects the blade. A loose handle, cracked blade, or damaged lock calls for stopping use until the fault is assessed and repaired safely. Sharpening only changes the edge and cannot restore structural strength. If you keep one knife for food and woodwork, clean it thoroughly between tasks and consider separate knives for convenience and hygiene. A blade used on dirty or treated material should not go straight back to the cutting board because residue can transfer to food.

Pack a small care kit and store knives dry

A compact maintenance kit can keep a working knife in service without a powered tool or a crowded drawer. Start with a small sharpening stone, a cloth, a brush, and food-safe mineral oil; together, they cover edge touch-ups, routine cleaning, drying, and storage protection. Add a ceramic rod or strop if they suit your knife and routine. Include only tools needed for your knife’s hardware, and check that each product fits the handle and blade materials. A smaller kit is easier to keep dry and ready, while extra tools add weight and maintenance without helping if you do not know when or how to use them. Consider a cabin cook who cleans a fish at the outdoor table, then moves inside to prepare potatoes. A brush clears residue from a folding pivot, and a cloth dries the blade before it reaches the kitchen. A light oil film can protect the clean knife during storage, but oil would not replace washing off fish residue. Keeping a separate food-prep knife can make that sequence simpler, especially when the outdoor work involves soil, treated materials, or heavy grime. Store the knife clean, dry, secured, and accessible to responsible users. A sheath protects an edge during carry, but long-term storage often works better with the blade outside a damp leather sheath because leather can hold moisture close to the steel. If you use a sheath, make sure it is fully dry and compatible with the blade’s finish. In a small off-grid kitchen, a dry, fixed storage spot also means you can find the knife quickly without reaching through a cluttered drawer. That consistency matters: a knife that is put away safely is less likely to be damaged, misplaced, or handled unexpectedly.

Adjust the routine to the weather and the task

Your maintenance schedule should follow the work and the conditions, not an arbitrary number of days. A knife used daily for cooking may need frequent washing and drying but only occasional edge touch-ups; a camp knife exposed to rain, sap, and soil may need a thorough check after each outing. The difference comes from what reaches the blade and how it is used: moisture and residue affect corrosion, while hard or abrasive cutting surfaces wear the edge. Watch performance as well as appearance: more force, crushed food, or a snagging cut tells you the edge needs attention. A useful field rhythm is to inspect after each demanding job, clean and dry after any wet or food task, then touch up when the cut quality changes. That is a practical trigger rather than a claim that every knife needs sharpening after a set number of uses. Steel, heat treatment, blade shape, and cutting surface all affect how quickly an edge wears. A knife used on a wooden board will behave differently from one dragged across ceramic, which is much harder on an edge. If you sharpen by calendar alone, you may remove steel when the knife is still cutting well or overlook a dull edge that needs attention sooner. For example, a cook who slices soft bread on wood may wipe the blade and put it away, while the same knife used on acidic fruit deserves a prompt wash. After a rainy day outdoors, inspect for moisture around the handle and sheath even if the blade looks clean. These small checks make care responsive to reality: the knife’s materials, condition, and performance show what it needs.

Frequently Asked Questions

How often should you sharpen an off-grid knife?

There is no fixed schedule. Touch up the edge when it starts needing more force or stops cutting cleanly; frequent light maintenance is usually easier than restoring a badly dull blade.

How can you check whether a knife is sharp safely?

Make a controlled cut on a suitable material, such as paper or a small piece of food. Do not run a finger along the edge to test it.

Can stainless steel rust?

Yes. Stainless steel resists corrosion, but salt, acidic foods, prolonged moisture, and neglect can still stain or rust it. Clean and dry it after exposure.

Should you oil a knife used for food?

A very thin coat of food-safe mineral oil can help protect the blade during storage. Use only a small amount and wipe away excess so the blade does not feel greasy.

How should you store a knife long term?

Clean and dry the knife, protect the edge, and keep it somewhere dry and secure. If you use a sheath, let it dry fully and check that its material suits the blade’s finish.

What should you do if a knife handle or lock is loose?

Stop using the knife until the problem has been assessed and repaired safely. Sharpening cannot fix a loose handle, cracked blade, or failed lock.

Conclusion

Keep the routine simple: inspect, clean, dry, touch up, protect, and store. A knife that gets a minute of care after the muddy chore or supper prep will be easier to trust when the next task arrives. Remember that sharpness depends on controlled maintenance, while safety also depends on using the right tool and noticing damage early. Put the clean, dry blade in its proper place, and let tomorrow’s first cut begin with a tool ready to work.
You May Also Like

How to Sharpen a Knife Without a Whetstone

Learn which whetstone alternatives can restore an edge, how to use them safely, and when a dull or damaged knife needs professional help.

How to Care for a Japanese Kitchen Knife

Learn practical, step-by-step tips to keep your Japanese kitchen knife sharp, rust-free, and durable. Essential care advice for off-grid and manual kitchens.

How to Store Knives Safely

Discover practical, durable ways to store knives safely. Prevent accidents, protect blades, and keep your kitchen organized with proven storage tips.

Soaking vs Splash-and-Go Whetstones

Discover the key differences between soaking and splash-and-go whetstones. Learn how to choose the right one for your sharpening needs and how to use them effectively.