
TL;DR

Get kitchen gear delivered free with Prime
- Fast, free delivery on millions of items
- Prime Video, Amazon Music and more included
- Member-only deals all year
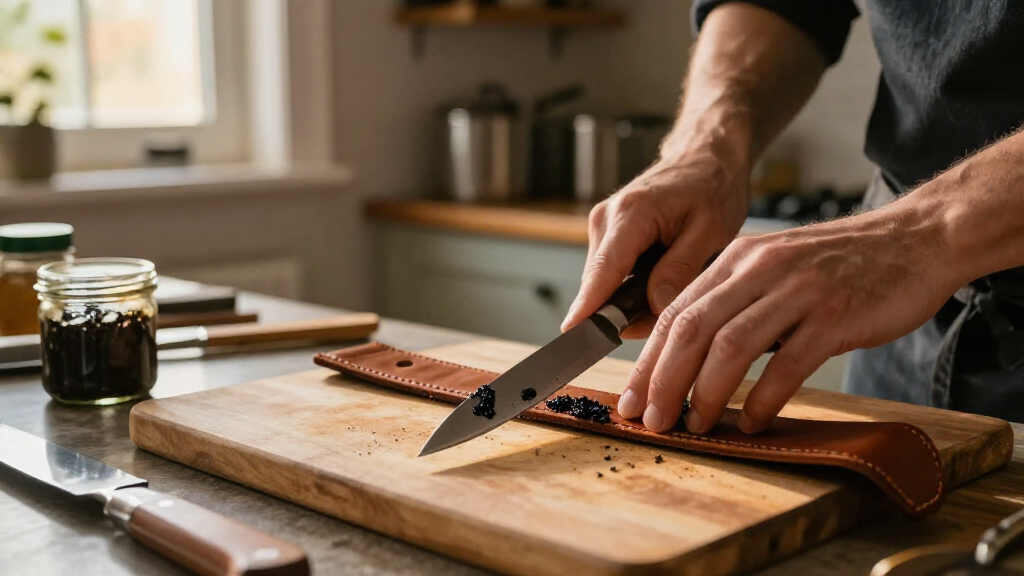
A leather strop with honing compound is used after sharpening to refine an edge and remove a small burr; it does not repair chips or restore a badly dull knife. Apply a thin layer of compound, keep the bevel angle steady, and draw the blade spine-first with light pressure. Make a few alternating passes, check the edge, and return to a sharpening stone if the knife still cuts poorly.
Use a leather strop with compound after sharpening to refine an edge and remove a small burr; it cannot repair chips or a badly dull knife.
Apply a thin, even coat of compound and follow the maker’s instructions because products and grit descriptions vary.
Draw the blade spine-first so the edge trails, keeping pressure light and the bevel angle steady.
Start with a few alternating passes, test the knife safely, and return to a stone if it still cuts poorly.
Keep the strop dry and clean, and avoid mixing compounds on one surface.
Use a leather strop with compound
Stropping refines an edge that is already close. A sharpening stone does the heavier work of restoring a dull or damaged edge.
What the strop can do
Use it after sharpening to tidy an edge and remove a small burr.
- Refines a nearly sharp edge
- Can remove a small burr
- Restores a badly dull knife
- Repairs substantial edge damage
Prepare the leather
A clean, steady surface helps keep bevel contact consistent.
Set a paddle on a stable surface or keep hanging leather gently taut.
Spread a thin, even coat and follow the maker’s instructions.
Use one compound per surface, or clean it before switching.
Use a controlled stroke
Keep the bevel angle steady and let the edge trail behind the spine.
Spine first
Draw the blade so the spine leads. Never push the cutting edge into the leather.
Light touch
Heavy pressure can flex the leather and round the edge.
Hold it steady
Match the sharpening angle, or go just slightly lower.
Check before continuing
Start with a few alternating passes, then test the knife safely.
- Check whether the cut has improved.
- If the knife still cuts poorly, return to a sharpening stone.
- Stop when the edge feels clean; more passes may add little benefit.
- Keep the strop dry and clean.
What a leather strop with compound can—and cannot—do
A leather strop with compound is an abrasive finishing surface used after sharpening to refine an edge and remove a small burr. It removes very little metal compared with a sharpening stone, so it does not repair chips or restore a badly dull knife. Its job is to tidy an edge that is already close, not rebuild it. That difference matters because stropping can improve the feel of a nearly sharp knife while leaving a blunt knife essentially blunt; choosing the strop when the edge needs substantial metal removed can turn a quick touch-up into a frustrating session. The compound supplies fine abrasive particles, while the leather gives the bevel a backing surface. Think of the combination as polishing a wooden tabletop: a fine polish can smooth the finish, but it cannot fill a gouge. For instance, after you sharpen a chef’s knife and it still catches slightly on a paper test, a few light passes may clean up the edge. If the knife slides off an onion skin and crushes the onion instead, go back to your stone. The practical implication is to diagnose the edge before stropping: a small roughness can respond to finishing, but a broad failure to cut points to a bevel that needs more work. A polished edge is not automatically the best edge for every task. A very fine finish may suit delicate slicing, while a slightly toothier edge can bite into tomato skin or crusty bread more readily. The tradeoff is between a smoother feel through soft material and more grip when starting a cut on a slippery surface. The right result depends on what you cut and how you work. Use stropping to refine the edge you want, rather than chasing a mirror shine for its own sake.Products Worth Considering

Ninja Flip Toaster Oven & Air Fryer, 8-in-1, Stainless Steel, SP151

Ninja Mega Kitchen System Blender and Food Processor, 1500W, 72-oz Pitcher, 8-Cup Bowl, Black (BL770)

De'Longhi Rivelia Fully Automatic Espresso Machine with Milk Frother, White
As an affiliate, we earn on qualifying purchases.
Get the strop and compound ready without overloading the leather
A suitable strop gives you a flat, clean surface and enough control to keep the bevel steady. A paddle strop is straightforward to hold on a bench; a hanging strop can work too, but it needs gentle tension so the leather does not sag beneath the blade. That setup affects the edge: leather that shifts or flexes can change the contact angle from stroke to stroke, making a consistent finish harder to achieve. Pick one surface for one compound, or clean it thoroughly before switching abrasives. Apply a thin, even coat of compound, following the maker’s instructions for that product. Too much can cake up, smear, and make the blade travel unevenly. Start with less than you think you need. An even layer makes contact more predictable; a thick ridge can make the blade rock or catch, which works against steady bevel contact. If your bar leaves a waxy lump, rub it lightly across the leather instead of pressing hard in one spot. Compound types and grit descriptions vary, so a micron figure or color from one maker may not match another maker’s product. The smooth side is often chosen for a more controlled surface; the rough side can hold more compound but may feel less consistent. Either can work when the strop and compound are suited to it. The choice is a balance between a more uniform feel and a surface that carries more abrasive; neither side guarantees a better edge by itself. Imagine setting up at the kitchen table after sharpening a paring knife: wipe away loose grit first, put the strop on a stable surface, and keep the compound container closed so dust or crumbs do not contaminate it.How to strop a knife with compound, step by step
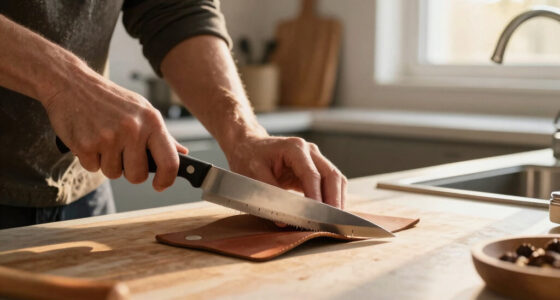
To strop a knife with compound, hold the bevel at a steady angle and draw the blade spine-first so the edge trails across the leather. Use light pressure, alternate sides evenly, and check the edge after a few passes. This keeps the leather from being cut and helps prevent the bevel from rounding. Each part of the motion serves a purpose: spine-first travel protects the leather, light pressure limits how much the leather flexes, and alternating sides helps keep the finishing work balanced rather than favoring one bevel.- Set the strop securely. Place a paddle on a stable bench or hold it firmly; keep hanging leather gently taut. A moving or sagging surface makes the angle harder to repeat.
- Coat it lightly. Spread a thin layer of compound rather than building a thick, waxy ridge. A uniform surface helps the bevel meet the abrasive evenly.
- Lay the bevel flat. Match the sharpening angle, or go just slightly lower. Keep your wrist steady so you refine the bevel instead of rounding its apex.
- Draw spine-first. Pull the blade so the spine leads and the cutting edge trails. Never push the edge into the leather; the edge can cut the strop if it leads the motion.
- Alternate sides. Make a few light passes on each side, keeping the count similar. Balanced passes help avoid favoring one side of the edge.
- Check the edge. Use a safe test suited to the knife. If it remains dull, return to an abrasive stone. Testing tells you whether the small amount of refinement helped before you add more passes.
Keep pressure and angle steady to avoid rounding the edge
Light pressure and a consistent angle let the compound refine the bevel without flexing the leather around the edge. Press too hard and the leather can cup around the blade, rounding the apex—the very sharp tip where the two sides of the bevel meet. Raise the blade too far and you can round it from above; lower it too far and the strop may miss the bevel. In either case, the edge can lose the geometry that makes it cut cleanly, even though the blade may look more polished. Imagine drawing a chef’s knife over a belt: a smooth pull keeps the edge in contact, while a wobble changes which part touches. Keep your wrist relaxed and let the knife’s weight do most of the work. If you hear a rough scrape, feel the leather bunching, or see a groove, pause and reset. The edge should trail, never lead, because an edge-first push can slice or gouge the strop and may damage the blade. These cues are useful because they signal that the stroke or surface is no longer giving controlled contact; more pressure will usually magnify the problem rather than correct it. Stropping is tool-specific. A broad kitchen knife, a chisel, and a razor have different bevel shapes and handling risks. If you’re working with a narrow chisel, keep its bevel flat and control the tip so it does not dig into the leather. With a very thin or delicate edge, ease off further. The tradeoff is speed versus control: heavier pressure may feel faster, but it increases the chance of flexing the leather and changing the edge angle. Better to make fewer careful passes than to press hard and blur the edge geometry.Use only as many passes as the edge needs
There is no fixed stroke count that suits every knife; a few alternating passes followed by a check is a better starting point than stropping by the clock. Stropping can help an edge that is nearly sharp, but continued passes will not substitute for sharpening when the bevel needs more work. The count is only a way to control your first attempt, not a measure of sharpness: leather, compound, blade condition, and technique all change how much each pass does.| What you notice | What to do | Why |
|---|---|---|
| The knife cuts well but feels slightly rough | Try a few light, alternating passes | A fine finish may refine the edge or remove a small burr |
| The edge slips on a tomato skin | Return to a sharpening stone or system | The knife likely needs more metal removed to restore its edge |
| You see a chip or damaged spot | Sharpen the damaged area with an appropriate abrasive | A strop removes too little metal to repair a chip |