TL;DR

Get kitchen gear delivered free — and shop member deals
- Fast, free delivery on millions of items
- Access to Prime Big Deal Days deals on October 6–7
- Prime Video, Amazon Music and more included
Manual can openers cut through the rolled seam joining a can’s lid to its body, using a crank, cutting wheel, or lever. Choose a comfortable grip and a blade that tracks cleanly; side-cutting models leave a smoother can edge, while conventional top-cutting models are widely available and straightforward. Clean and dry the cutting area, keep fingers clear of the lid, and replace an opener that repeatedly slips or has damaged parts.
A stubborn can can turn a quick supper into a wrestling match: the opener slips, the rim buckles, and the knob squeaks while beans sit stubbornly sealed. A well-chosen manual can opener avoids most of that drama without needing a plug, batteries, or much storage space.
The basic mechanism has changed little: a cutting part works around the rolled seam that joins the lid to the can body. But the cutting style, handle shape, and gear quality affect how comfortably and cleanly you get the job done. If you cook by hand, keep an emergency pantry, or simply want a tool that still works during an outage, those details matter.
Here’s how the main opener styles compare, what to look for before you buy, how to use one without forcing it, and how to keep food residue and rust at bay. You’ll also learn when a slipping opener needs cleaning—and when it’s time to replace it.
Top-cutting openers are widely available, while side-cutting models are designed to leave a smoother edge on the can.
Choose wide, comfortable handles if you have reduced grip strength or often open several cans at once.
Attach the opener securely and turn steadily; reposition it if it slips instead of forcing the knob.
Clean food residue around the cutting wheel and dry the opener thoroughly after washing.
Replace an opener that repeatedly slips, has bent parts, or has loose gears; home sharpening can damage the wheel.
How a manual can opener cuts a lid cleanly
A manual can opener cuts around the rolled seam that joins a can’s lid to its body. Most models clamp onto the rim, then use a turning knob to move a cutting wheel around the can. That simple hand-powered action lets you open pantry staples without electricity, batteries, or a dedicated drawer full of equipment.
Think of the wheel as a tiny traveler following a circular track: the better it grips and stays aligned, the less effort you need to keep it moving. On a can of tomatoes, you should feel steady resistance and hear a soft, regular snick-snick, not repeated slips or sharp crunches. If the rim starts to crush, stop and reattach the opener rather than cranking harder.
Designs vary in their handles, gears, and attachment points. Some models sit upright; others grip the can’s side. Those differences often affect comfort and control more than the basic cutting action. For example, a compact opener may suit a cabin utensil kit, while broad handles can feel much better when you open several cans for a big pot of soup.
A manual can is no substitute for inspecting the food before use: bulging lids, leaks, or unusual odors are reasons to discard a can, not to open and taste it. The opener handles the seam; it cannot tell you whether the contents are safe.
manual can opener with comfortable grip
As an affiliate, we earn on qualifying purchases.
As an affiliate, we earn on qualifying purchases.
Compare the three opener styles before you buy
Manual can openers come in three common styles: top-cutting, side-cutting, and lever-style. Top-cutting models are widespread and familiar, side-cutting models are designed to leave a smoother edge on the can, and lever-style tools use a puncturing-and-lifting motion. Your best match depends on your grip, how you handle lids, and where you’ll store the tool.
| Style | How it works | Best fit | Tradeoff |
|---|---|---|---|
| Top-cutting | Pierces the lid near the rim and cuts across the top | Everyday use; easy to find | Can leave a sharp can edge |
| Side-cutting | Cuts just below the rim | People who prefer a smoother can edge | The lid may still have sharp areas |
| Lever-style | Punctures and lifts rather than turning a wheel | Compact storage and simple tool kits | Can take more hand strength and practice |
Say you’re choosing an opener for a small off-grid kitchen. A side-cutter may make lid handling feel less awkward when you drain canned peaches into a bowl, while a basic top-cutter may be easier to replace at a local shop. A lever opener packs neatly in a camping kit, but may not be your friend if your hands tire easily.
“Smooth edge” describes the can’s edge, not every part of the lid. Treat the detached lid as sharp, whatever the package promises. A smoother rim can make handling and cleaning easier, but it does not remove the need for care.
side-cutting can opener for smooth edges
As an affiliate, we earn on qualifying purchases.
As an affiliate, we earn on qualifying purchases.
Choose handles and gears that suit your hands
Choose a manual can opener with handles you can hold securely and a cutting wheel that stays aligned on the rim. Broad, padded grips can make turning easier for people with arthritis or reduced grip strength, while sturdy gears help the opener travel smoothly instead of slipping or crushing the edge.
Before buying, check how the handles open and close, how firmly the jaws meet, and whether the knob turns without wobbling. When shopping in person, you can test the movement without a can; online, look for clear product details about handle size and cutting-part material rather than relying on sweeping claims. Stainless-steel cutting parts resist rust better than ordinary steel, though the whole tool’s durability still depends on its construction.
Imagine opening three cans of chickpeas for a big batch of stew. A tiny, narrow knob can dig into your fingers as you crank; a larger knob gives you more room to turn. If you have limited hand strength, a comfortable grip may matter more than extra features such as bottle-opening notches or wall mounting.
Simple construction can be a practical advantage. Fewer moving parts can mean fewer places for sticky tomato sauce to hide and fewer things to loosen. Claims like “opens every can effortlessly” or “never needs sharpening” are marketing, not guarantees: dented rims, dirty wheels, and worn gears can still stop a tool in its tracks.
As an affiliate, we earn on qualifying purchases.
Use a manual opener without slipping or crushing the rim
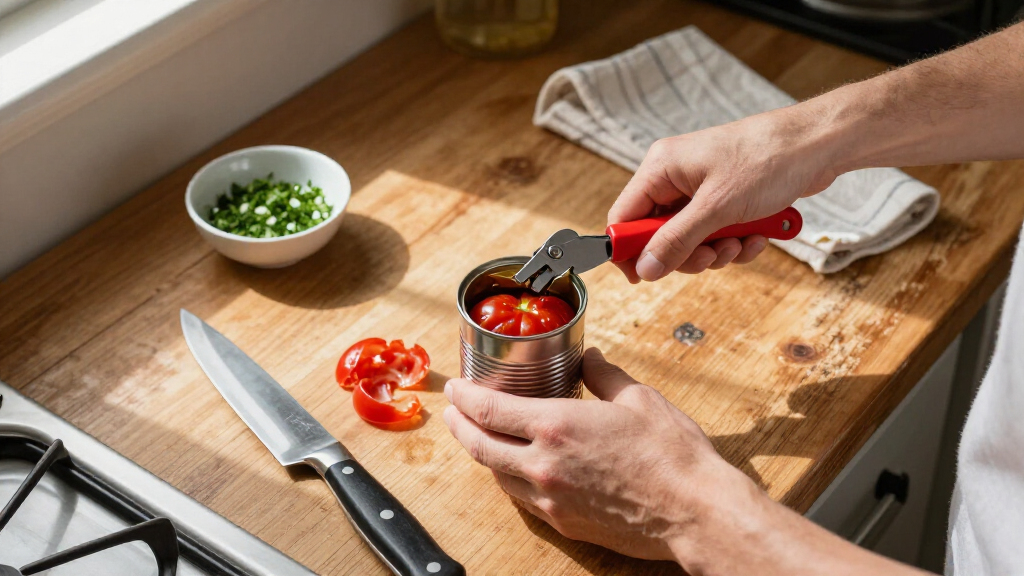
To use a manual can opener, attach it securely to the rim, close the handles, and turn the knob steadily around the can. A firm grip and an even pace help the cutting wheel follow the seam; if the tool slips or stops cutting, reposition it instead of forcing the mechanism.
- Set the can on a stable surface. A dry counter keeps the can from skidding while you work.
- Align the opener with the rim. Seat the cutting parts firmly where the lid meets the can’s edge.
- Close the handles and check the grip. The opener should hold the rim without visibly crushing it.
- Turn the knob steadily. Let the wheel travel around the lid rather than pushing down hard.
- Lift the lid carefully. Keep your fingers away from cut edges and set the detached lid aside safely.
For example, if you’re opening a can of soup and the knob suddenly spins without cutting, pause. The opener may have lost its hold on the rim, or the wheel may have reached a dent. Reattach it a little farther along the edge; if the can itself is badly damaged, don’t try to force it open.
Keep fingers away from the blade and the newly cut lid. A top-cutting opener can leave a sharp can edge, and a side-cutter’s detached lid can still cut you. If the can is bulging, leaking, or gives off an unusual odor when opened, discard its contents without tasting them.
ergonomic can opener for reduced grip strength
As an affiliate, we earn on qualifying purchases.
As an affiliate, we earn on qualifying purchases.
Clean the cutting wheel before it starts to stick
Clean food residue from the cutting area after use, then dry the opener thoroughly to limit rust and sticking. Follow the maker’s cleaning instructions, because a tool that looks solid may still have parts that are not dishwasher-safe.
Tomato paste, syrup, and brine can cling to the wheel and gears in a thin, easy-to-miss film. Later, that sticky buildup may make a wheel turn roughly or pick up crumbs from the drawer. Wipe the cutting area after opening a can, and wash it as directed if food has collected around the blade.
If the head is fixed in place, use care when cleaning around the wheel: the same edge that cuts a lid can nick a fingertip. A soft brush can reach residue in tight spaces; avoid grabbing or dragging a bare finger across the blade. Dry the opener fully before storing it, especially if the cutting parts are ordinary steel.
Consider a weeknight kitchen where the opener sits near the sink after opening a can of tomato sauce. Leaving it wet under a pile of dishes invites corrosion; a quick rinse or wipe, followed by a thorough dry, takes little time. If your model has removable parts, only take them apart as the manufacturer directs.
Fix slipping first, then replace a worn opener
A manual can opener that slips often has a dirty or dull wheel, poor alignment, a loose grip, or a damaged can edge. Clean the cutting area and reattach the tool before assuming it is worn out; if it continues to slip or has bent parts and loose gears, replace it rather than forcing it.
Start with the simplest check: look for dried food around the wheel and clean it according to the maker’s instructions. Next, try the opener on an undamaged can, making sure the cutting parts sit properly on the rim. If the mechanism still jumps or crushes the edge, worn gears or a damaged blade may be the cause.
Some people try to sharpen a can opener wheel with household tools, but that can damage the wheel or leave it cutting unevenly. Cleaning may restore a wheel that only feels rough because of residue; it will not repair bent metal or worn gears. Replacing a failing opener is usually the safer choice.
There’s no fixed lifespan for every opener. A household that opens one can a week may keep a sturdy tool much longer than a busy kitchen that uses it several times a day. Rust, bent parts, loose gears, or repeated slipping are practical signs that yours may be ready for retirement.
Frequently Asked Questions
Which manual can opener leaves the safest edge?
A side-cutting opener is designed to leave a smoother edge on the can than a conventional top-cutter. The detached lid can still have sharp areas, so lift it carefully and keep fingers away from the cut.
How do I use a manual can opener?
Attach the opener firmly to the rim, close the handles, and turn the knob steadily around the can. If it slips or stops cutting, reposition it rather than forcing it; lift the lid carefully once the cut is complete.
Why does my opener keep slipping?
Common causes include food buildup, a dull or misaligned wheel, a loose grip, or a damaged can edge. Clean the cutting area and reattach the opener; if it keeps slipping or its gears are loose, replace it.
Can a manual opener open a pull-tab can?
You usually don’t need one for a pull-tab can, but a conventional opener can generally cut the lid if the tab is damaged. Take care with the rim and lid, which may be sharp.
How should I clean and store a manual can opener?
Follow the maker’s cleaning directions, remove food residue from the cutting area, and dry the opener thoroughly before storage. Don’t assume it is dishwasher-safe; trapped moisture can encourage rust, especially on ordinary steel parts.
Conclusion
Buy for the hand you have, not the promise on the package: a comfortable grip, a steady wheel, and a tool you’ll actually clean matter more than a long list of features. Keep fingers clear of the lid, and stop if the opener slips or the can looks damaged.
Choose one dependable opener, give it a quick clean after supper, and put it back dry. When the lights go out, that small hand-powered tool can still turn a quiet pantry can into a warm meal.
Halloween Picks
halloween
As an affiliate, we earn on qualifying purchases.