
TL;DR

Get kitchen gear delivered free with Prime
- Fast, free delivery on millions of items
- Prime Video, Amazon Music and more included
- Member-only deals all year
Dehydrating food at home is a simple way to preserve produce, extend shelf life, and reduce storage space. Using the right methods and storage, you can keep flavors and nutrients intact for months or even a year.
Imagine biting into a slice of sun-ripened apple months after harvest—still sweet, still flavorful. That’s the magic of dehydration. It’s not just about saving food; it’s about transforming fresh, seasonal bounty into long-lasting snacks and cooking ingredients that pack flavor and nutrients.
Dehydrating food at home isn’t complicated, but it does require understanding a few key principles. Whether you’re drying herbs, fruits, or vegetables, mastering the basics makes all the difference. This guide walks you through the essentials—methods, tips, safety, and recent tech updates—so you can confidently dry food with your own hands and store it for months to come.
Use uniform slices to ensure even drying and avoid mold or over-drying.
Choose the right method—dehydrator for consistency, sun drying for simplicity, or oven drying for convenience.
Store dried foods in airtight, dark containers in a cool place to maximize shelf life.
Dry foods to a leathery or brittle texture—test by bending or snapping for best results.
Modern dehydrators with digital controls and app connectivity make home drying easier and more reliable.
Dehydrating Food: The Basics of Drying at Home
Drying food removes moisture, concentrates flavor, reduces storage space, and turns seasonal produce into shelf-stable snacks and cooking ingredients. The essentials are simple: even slices, controlled heat, steady airflow, and airtight storage.
Think of dehydration as slowing spoilage by taking away what bacteria, yeast, and mold need most: water.
Less moisture means slower spoilage and smaller storage.
Dehydration is not complicated, but it rewards precision. Good preparation and airflow help food dry evenly, reducing the risk of hidden damp spots that can invite mold later.
Preserve the harvest
Apples, berries, tomatoes, peppers, mushrooms, and herbs can be dried for cooking, snacking, camping, and emergency storage.
Keep flavor concentrated
Removing water intensifies sweetness, acidity, aroma, and spice while preserving many nutrients when heat stays controlled.
Use less space
With up to 90% weight reduction, dried food is easier to store, transport, pack for trips, or share in lightweight portions.
Choose the drying method that fits your climate, budget, and batch size.
A dehydrator gives the most consistent results, while oven, air, and sun drying can work well when conditions are right and food safety is monitored closely.
| Method | Best For | Control | Pros | Watchouts |
|---|---|---|---|---|
| Air Drying | Herbs, chili peppers | ~ Low | ✓ No equipment, low cost | ✗ Slow, mold risk, uneven results |
| Sun Drying | Tomatoes, some fruits | ~ Weather-led | ✓ Energy-free and simple | ✗ Contamination and humidity concerns |
| Dehydrator | Fruits, vegetables, jerky | ✓ High | ✓ Consistent heat and airflow | ~ Costs money and counter space |
| Oven Drying | Small batches | ~ Medium | ✓ Accessible, no special tool needed | ✗ Energy-heavy, harder temperature control |
From fresh produce to shelf-stable ingredients.
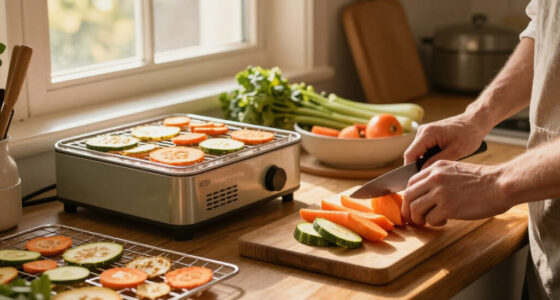
Uniform preparation is the quiet hero of home drying. Slices that match in thickness dry at the same pace, which helps avoid damp centers and over-dried edges.
Wash
Remove dirt, residue, and surface contaminants before slicing.
Trim
Peel, core, stem, or pit foods when skins or tough parts slow drying.
Slice
Cut evenly; thin apple rings around 1/8 inch dry quickly and evenly.
Blanch
Use briefly for many vegetables to protect color and slow enzymes.
Dry
Keep pieces separated so warm air can circulate across every surface.
Store
Cool, condition, then seal in dark airtight containers.
The best test is tactile: bend, break, snap, and inspect.
Visual cues can mislead, especially when pieces vary in thickness. Properly dried food should show no visible moisture, stickiness, or damp interior.
Storage Payoff
Moisture Safety Track
Cool food before sealing, then condition it for a day so remaining moisture redistributes evenly. Condensation inside a jar means it needs more drying.
Modern dehydrators make consistency easier.
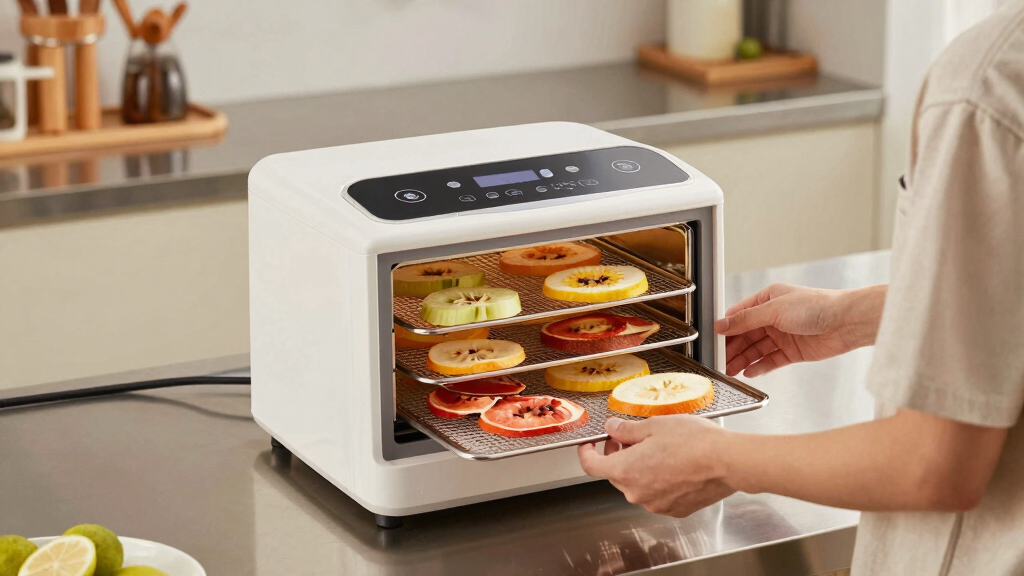
Recent home dehydrators add digital controls, adjustable temperature settings, improved airflow, BPA-free materials, energy-efficient components, and app-connected monitoring.
Digital heat
Precise temperature control helps protect delicate nutrients and reduces the chance of under-drying.
Better airflow
Smarter circulation lowers the risk of uneven drying, damp pockets, and tray-to-tray variation.
Remote checks
App-enabled models can monitor timing and settings, useful for longer batches that run for many hours.
- Use uniform slices: even thickness protects texture and prevents mold-prone wet centers.
- Store airtight: glass jars, vacuum bags, or Mylar pouches help block air, light, pests, and moisture.
- Inspect regularly: watch for condensation, off smells, discoloration, or visible mold.
- Rehydrate when useful: many dried fruits and vegetables return well in water, broth, soups, and stews.
Every safe batch follows the same preservation logic.
Start clean, manage moisture, protect the dried food from air and light, then check quality over time.
What Does Dehydrating Food Really Do? Why It Matters
Dehydrating food is about removing moisture to slow spoilage and extend shelf life. When you dry fruit or herbs, you concentrate flavors and make storage easier. This process effectively halts the growth of bacteria, yeasts, and molds that need water to thrive, thus preserving the food longer. Imagine your garden’s bounty—apples, berries, chilis—transforming into chewy snacks or flavorful ingredients that last through winter, reducing waste and ensuring you can enjoy seasonal flavors year-round.
Proper dehydration preserves most nutrients, especially vitamins A and C, if done right. However, the process can also lead to nutrient loss if temperatures are too high or drying is uneven, which is why controlled methods matter. For example, high heat can degrade sensitive vitamins, while uneven drying can leave pockets of residual moisture that promote spoilage. Additionally, reducing moisture weight by up to 90% not only makes storage more manageable but also lessens transportation costs if you’re sharing or selling your dried goods. It’s not just about storage; it’s about control—knowing exactly what’s in your food, free from preservatives or additives, and capable of retaining much of its original flavor and nutritional profile.
home food dehydrator with digital controls
As an affiliate, we earn on qualifying purchases.
As an affiliate, we earn on qualifying purchases.
Which Dehydration Method Fits Your Life? Pros & Cons of Each
| Method | Best For | Pros | Cons |
|---|---|---|---|
| Air Drying | Herbs, chili peppers | Low cost, simple, no equipment needed | Slow, weather-dependent, risk of mold, uneven drying |
| Sun Drying | Tomatoes, certain fruits | Energy-free, natural process, minimal equipment | Weather dependent, potential for contamination, longer drying times |
| Dehydrator Machines | Fruits, vegetables, jerky | Consistent results, faster drying, adjustable temperatures | Initial investment, electricity consumption, space |
| Oven Drying | Small batches, convenience | Accessible, no special equipment needed | Energy-intensive, harder to control temperature, uneven drying possible |
Choosing the right method depends on your climate, budget, and the foods you want to dry. For example, a dedicated dehydrator offers consistent, predictable results ideal for frequent drying. Sun or air drying may be suitable if you have a hot, dry climate but require patience and careful monitoring to prevent spoilage. Each method involves tradeoffs—speed versus convenience, control versus simplicity—that influence your final product’s quality and safety.
fruit and vegetable dehydration drying racks
As an affiliate, we earn on qualifying purchases.
As an affiliate, we earn on qualifying purchases.
How to Prepare Food for Dehydration — Step-by-Step
- Wash produce thoroughly to remove dirt and pesticides, as residual chemicals can interfere with drying and spoilage prevention.
- Peel or core fruits and vegetables if necessary—peeling can help achieve more uniform drying and improve texture, especially for fruits with thick skins.
- Slice items uniformly—thicker slices take longer to dry, risking uneven moisture removal; thinner slices dry faster but can become brittle if overdone.
- Optional: Blanch vegetables briefly—this inactivates enzymes that cause spoilage and softening, leading to better color retention and longer shelf life.
- Arrange slices on trays or racks without overlapping—this ensures even exposure to air or heat, which is critical for uniform drying and preventing mold or uneven texture.
- Set your dehydrator or oven to the right temperature (125°F to 135°F)—too high can degrade nutrients; too low prolongs drying time and risk microbial growth.
- Dry until foods are leathery or brittle—testing is key. Properly dried food should feel firm but not moist, and brittle items should snap cleanly without residual moisture.
For example, slicing apples into 1/8-inch rings allows quick, even drying, resulting in chewy snacks or crispy chips. Uniform slices prevent over- or under-drying parts of the food, which can lead to spoilage or texture issues. Proper prep not only shortens drying time but also ensures your final product has the right texture and flavor, making storage and use more enjoyable.
airtight food storage containers for dried foods
As an affiliate, we earn on qualifying purchases.
As an affiliate, we earn on qualifying purchases.
How to Know When Your Food Is Fully Dried
The best sign your dehydrated food is ready? It should feel leathery yet firm, with no visible moisture. For crunchy items like jerky or chips, it should snap easily. Test by bending or breaking a piece—if it crumbles or feels flexible with no dampness, it’s done. This tactile feedback is crucial because visual cues alone can be misleading, especially for foods with variable moisture content.
For example, dried apple rings should bend slightly but not feel wet or sticky—if they still feel tacky, they need more drying. Conversely, over-dried foods can become excessively brittle or tough, making them less enjoyable to eat and potentially damaging their nutritional value. The key is to find a balance—dried foods should be shelf-stable, flavorful, and retain some flexibility without moisture, which requires careful observation and experience.
solar food dehydrator for outdoor drying
As an affiliate, we earn on qualifying purchases.
As an affiliate, we earn on qualifying purchases.
Storing Dehydrated Food Safely — Keep It Fresh & Long-Lasting
Once food is dried, it needs to be cooled and conditioned—spread out on trays for a day to even moisture distribution. This step prevents condensation and mold during storage. Then, store in airtight containers like vacuum-sealed bags, glass jars, or Mylar pouches with oxygen absorbers. These packaging options limit exposure to air, light, and pests, which are primary factors in spoilage and nutrient degradation.
Proper storage techniques are crucial because even dried foods are vulnerable to moisture, light, and pests, which can rapidly compromise quality. For example, herbs stored in airtight, dark containers can retain potency for over a year if moisture is kept out. Understanding the implications—such as how light accelerates oxidation, leading to nutrient loss, or how moisture invites mold—is essential. Effective storage extends shelf life significantly and preserves flavor, color, and nutritional value. Regular inspection, including checking for signs of moisture or pests, helps catch problems early and ensures your dried foods remain safe and tasty over time.
New Tech & Tips That Make Home Drying Smarter
Recent upgrades in dehydrator tech include digital controls, precise temperature settings, and smarter airflow systems. Some models connect to apps, letting you monitor drying progress remotely, set timers, or receive alerts when drying is complete. These features help optimize drying conditions, prevent over-drying, and save energy by avoiding unnecessary running times.
Energy-efficient materials and BPA-free plastics mean safer, greener drying options. Additionally, online tutorials, community forums, and recipe sharing platforms provide a wealth of knowledge, troubleshooting tips, and creative ideas—making home dehydration more accessible and enjoyable for beginners and seasoned preservers alike. For instance, a modern dehydrator with app connectivity can notify you when your apple slices reach perfect dryness, saving you time and ensuring consistent results.
Frequently Asked Questions
How do I tell if my dried food is ready to store?
Look for a leathery or brittle texture, with no visible moisture. For example, dried apple slices should bend slightly but not feel wet or sticky. Testing by bending or snapping helps confirm dryness, preventing mold or spoilage during storage.
What’s the best way to store dehydrated foods?
Use airtight containers like vacuum-sealed bags, glass jars, or Mylar pouches with oxygen absorbers. Keep your dried foods in a cool, dark place—basements or pantry shelves work well—to extend shelf life and prevent pests or moisture from re-entering.
Can I dehydrate all foods the same way?
Most fruits, vegetables, and herbs dry well, but high-fat foods or foods with high moisture content (like melons or high-fat meats) may need special techniques or are not suitable. For example, meat jerky needs careful temperature control to prevent spoilage. Additionally, high-fat foods can turn rancid if dehydrated improperly, so understanding each food’s properties helps determine the best method and conditions for drying.
How long does the drying process usually take?
It varies—thin apple slices might dry in 6-8 hours, while thicker or denser items like tomatoes or berries can take 12-24 hours. Factors like humidity, thickness of slices, and the drying method influence timing. Using a dehydrator with adjustable settings allows you to fine-tune the process and achieve consistent results, reducing guesswork and ensuring quality.
Are there safety concerns I should watch out for?
Yes. Insufficiently dried foods can harbor mold or bacteria, risking spoilage or illness. Always dry foods thoroughly—aim for a moisture content below 20%—and store properly in airtight conditions. Regularly inspect stored dried foods for signs of moisture, mold, or pests. If you notice any off-odor, discoloration, or mold, discard the product to prevent health risks. Proper drying, storage, and vigilance are essential for safe, long-lasting dried foods.
Conclusion
Dehydrating food at home turns fresh harvests into long-lasting treasures. It’s a skill that saves money, reduces waste, and boosts your off-grid kitchen’s resilience. With simple tools and a bit of patience, you can keep flavors alive all year—no preservatives needed.
Next time you pick ripe fruit or harvest herbs, remember: drying isn’t just preservation. It’s about capturing the taste and vitality of the season, then savoring it long after the growing days are gone.
Halloween Picks
halloween
As an affiliate, we earn on qualifying purchases.