
TL;DR

Get kitchen gear delivered free — and shop member deals
- Fast, free delivery on millions of items
- Access to Prime Big Deal Days deals on October 6–7
- Prime Video, Amazon Music and more included
Seasoning a carbon steel pan involves cleaning, applying thin oil layers, and heating to create a durable non-stick surface. Regular use and maintenance improve it over time, ensuring longevity and rust resistance.
Imagine cooking bacon in a pan that feels like it’s been part of your kitchen forever—smooth, slick, and naturally non-stick. That’s the magic of proper seasoning. It’s not about quick fixes or fancy coatings; it’s about building a resilient, polymerized layer of oil that bonds with the metal—turning rough steel into a trusted workhorse.
If you’re new to carbon steel or want to refine your technique, this guide will walk you through every step. From choosing the right oil to heating methods, you’ll learn how to turn your pan into a cooking partner that lasts a lifetime.
Always clean thoroughly before seasoning to remove manufacturing residues.
Apply thin, even layers of high-smoke-point oil for best results.
Use oven seasoning for even, consistent coating and better durability.
Regular use, proper cleaning, and light re-oiling keep your pan non-stick and rust-free.
Re-season when food begins to stick or surface dulls—your pan learns from your cooking.
Practical pan-care field guide
How to Season Carbon Steel Pans
Clean steel, whisper-thin oil and controlled heat create a polymerized shield that resists rust and grows slicker with every cook. The result is not a temporary coating—it is a working surface built layer by layer.
Build the first durable layer
Seasoning works when oil is spread extremely thin and heated until it polymerizes—bonding to the steel as a firm, darkening film. Thick oil cannot cure evenly and is the usual cause of sticky patches.
Scrub clean
Remove factory wax, residue and old grease with hot water and a stiff brush. A small amount of soap is acceptable for this first deep clean.
Dry completely
Towel-dry, then warm the pan on the stove until every trace of moisture disappears. Bare steel can flash-rust quickly.
Choose the oil
Use a seasoning-friendly oil such as grapeseed, vegetable or flaxseed. Refined, neutral oil is a practical everyday choice.
Wipe almost dry
Cover the interior, exterior and handle where appropriate. Then buff firmly until the pan looks dry rather than glossy.
Heat for one hour
Place the pan upside down in a 450°F / 230°C oven. Ventilate the kitchen and allow the pan to cool safely.
Repeat 2–3 times
Each microscopic coat reinforces the last. The finish may look uneven at first; regular cooking develops the deeper patina.
The paper-towel test: after oiling, wipe the pan as if the oil were a mistake. The nearly invisible residue left behind is enough to create a strong layer.
Why thin layers win
Heat transforms oil from a liquid lubricant into a linked molecular film. That polymerized film fills microscopic irregularities in the steel, blocks moisture and gives the next layer something stable to grip.
A self-reinforcing shield
The best finish is accumulated, not poured on. Thin + even + repeated produces a harder surface than one heavy application.
Controlled heat, complete cure
Oven seasoning commonly runs from 400–500°F. A 450°F target sits near the center of that working range and supports even coverage.
Practical oil fit
Relative guide based on film quality, availability and ease of use—not a smoke-point ranking.
Oven or stovetop?
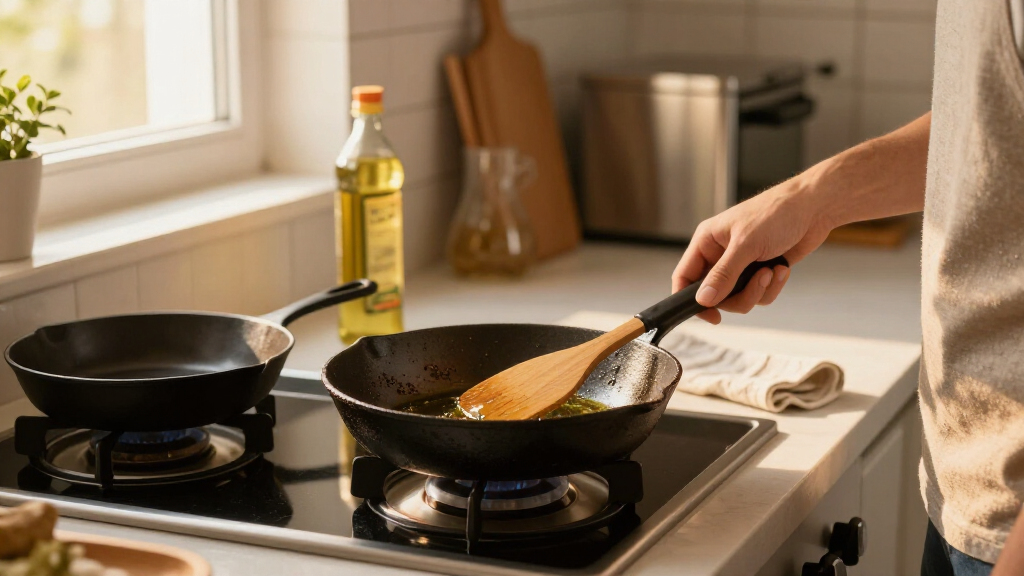
The oven is the stronger choice for an initial, full-pan foundation. Stovetop seasoning is faster and more responsive, making it useful for routine touch-ups or areas that need focused attention.
| Method | Heat coverage | Best use | Tradeoff | Verdict |
|---|---|---|---|---|
| Oven | ✓Even across the whole pan | Initial seasoning and durable multi-layer builds | Requires preheating and roughly one hour per coat | Best foundation |
| Stovetop | ~Concentrated on the cooking surface | Quick maintenance and targeted touch-ups | Hot spots make uniform coverage harder to control | Best touch-up |
Clean gently
Use hot water and a brush. Minimal mild soap is fine when needed; avoid long soaking.
Dry with heat
Warm the cleaned pan on the stove so hidden moisture cannot start rust.
Oil before storage
Buff on a trace of oil every few uses, especially in humid kitchens.
Read the surface
Dullness, sticking or exposed steel signals that a refresh is due.
From bare steel to working patina
Every stage protects the next. Skip drying and moisture can interrupt the bond; apply too much oil and the cure turns sticky. Keep the chain intact and the surface becomes smoother through use.
How often should I re-season?
When food begins to stick or the surface looks dull—often every 3–6 months, depending on use and care.
Can I use soap?
Yes, sparingly. Mild modern soap is unlikely to remove a well-bonded film. Dry the pan immediately afterward.
How do I fix a sticky finish?
Scrub away tacky residue, dry thoroughly, buff on an extremely thin coat and heat again for one hour.
Does a pre-seasoned pan need more?
It is ready to cook, but one or two extra layers can improve coverage, durability and early non-stick performance.
The pan learns from your cooking.
Use it regularly, avoid highly acidic food while the patina is young, dry it every time and keep the oil layers nearly invisible. Within months, the surface can become markedly smoother, darker and more reliable.
What Exactly Is Seasoning and Why Does It Matter?
Seasoning is the process of applying oil to your pan and heating it until that oil bonds with the metal, forming a slick, durable surface. This creates a natural non-stick layer that improves with use. Without it, your pan risks rust and food sticking.
Think of it like a protective armor—each layer of polymerized oil strengthens the surface. When done correctly, it’s what makes a carbon steel pan feel almost alive, developing a richer patina over time.
Beyond just preventing rust and sticking, seasoning influences how your pan performs over its lifespan. A well-seasoned pan heats more evenly, reduces the need for excessive oil during cooking, and develops a unique character that enhances flavor. Neglecting proper seasoning can lead to a dull, sticky surface that’s difficult to restore. The process of seasoning is essentially a tradeoff: investing time initially results in a pan that requires less effort later and provides better cooking results overall.
As an affiliate, we earn on qualifying purchases.
Step-by-Step: How to Properly Season Your Carbon Steel Pan
- Clean the pan thoroughly: Scrub off any manufacturing residues or oils with hot water and a stiff brush. No soap if you want a natural finish.
- Dry completely: Use a towel or heat on the stove to evaporate every drop of moisture, preventing rust.
- Choose your oil: High smoke point oils like flaxseed, grapeseed, or vegetable oil work best. Flaxseed creates a hard, durable coating after polymerization.
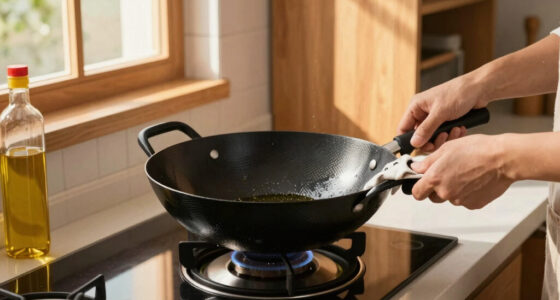
- Apply a thin coat of oil: Use a paper towel or cloth to spread a light, even layer over every surface—interior, exterior, handle.
- Heat the pan: Place it in an oven at 450°F (230°C) for about an hour or on a stovetop over medium-high heat until it smokes lightly.
- Repeat if needed: Several layers build up a strong, non-stick surface. Most cooks do this 2-3 times initially.
Think of each layer of seasoning as building a protective barrier—thin, even coats allow the oil to bond uniformly, creating a smooth, resilient surface. Skipping this or applying thick layers can lead to uneven bonding, resulting in sticky spots or weak layers that chip or degrade faster. Repeating the process multiple times isn’t just about aesthetics; each layer enhances the pan’s ability to withstand high heat and frequent use without deteriorating. This layered approach creates a self-reinforcing shield—think of it as a personalized armor that gets stronger with each coat, ensuring your pan remains non-stick and rust-free for years.
high smoke point cooking oil for cast iron and steel pans
As an affiliate, we earn on qualifying purchases.
As an affiliate, we earn on qualifying purchases.
Oven vs. Stovetop Seasoning: Which Method Works Better?
| Method | Pros | Cons |
|---|---|---|
| Oven Seasoning | Even heat, thorough coating, consistent results | Requires preheating, longer process |
| Stovetop Seasoning | Quick, hands-on, good for touch-ups | Uneven heat, harder to control |
Choosing between oven and stovetop seasoning isn’t just about convenience—it directly impacts the quality, durability, and evenness of your seasoning layer. Oven seasoning offers a controlled, uniform heat that envelops the entire pan, promoting even polymerization across all surfaces. This results in a more consistent, durable non-stick layer that can better withstand high temperatures and frequent use. Conversely, stovetop seasoning is more accessible and quicker, making it ideal for quick touch-ups or small batches. However, the risk of uneven heating can lead to inconsistent layers, which may cause sticking or hot spots over time. For those serious about longevity and performance, investing the extra time in oven seasoning pays off by creating a more resilient, professional-grade finish. Recognizing these tradeoffs allows you to choose the method that best fits your cooking style, available equipment, and patience, ensuring your pan develops a reliable, long-lasting non-stick surface.
As an affiliate, we earn on qualifying purchases.
Maintaining Your Seasoned Pan: Keep the Non-Stick Going
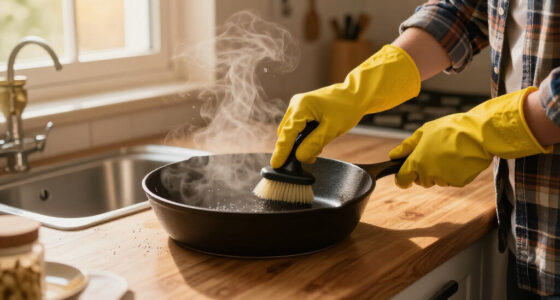
Once your pan develops a shiny, smooth surface, caring for it is straightforward. Use hot water and a stiff brush—no soap, if possible—to clean off food debris. After washing, dry it thoroughly—hot on the stove works well.
Every few uses, apply a light coat of oil, especially before storage. This helps build the patina and prevents rust. If your surface begins to look dull or food sticks more than usual, it’s time for a quick re-season.
Think of your pan as a living thing—feeding it oil keeps it healthy and non-stick. Regular maintenance like this not only prolongs the life of your seasoning but also enhances its non-stick properties over time. Each re-oiling reinforces the polymerized layer, making subsequent cooking easier and more reliable. This ongoing process of feeding and protecting your pan ensures it remains a trusted kitchen companion for years to come. Ignoring this step risks rust formation and degradation of the seasoning, which can be costly and time-consuming to repair. Proper maintenance isn’t just about cleaning; it’s about understanding that your pan’s performance depends on consistent, gentle care. Regularly reapplying a thin layer of oil creates a self-reinforcing cycle that keeps the surface slick and rust-free, much like nurturing a living organism—your pan’s longevity hinges on this ongoing attention.
stainless steel scrub brush for cookware
As an affiliate, we earn on qualifying purchases.
As an affiliate, we earn on qualifying purchases.
Frequently Asked Questions
How often should I re-season my carbon steel pan?
Re-season when the surface feels dull or food starts to stick. Usually every 3-6 months with regular use, but it depends on your cooking habits. Regular oiling and cleaning extend the time between re-seasons.
Can I use soap to clean my seasoned pan?
Yes, a little soap is okay if used sparingly. Hot water and a brush are enough to keep your pan clean without stripping the seasoning. Just dry immediately afterward to prevent rust.
What’s the best oil for seasoning?
High smoke point oils like flaxseed, grapeseed, or vegetable oil work best. Flaxseed is favored for its ability to create a hard, durable coating after polymerization, but vegetable oil is a reliable, accessible choice.
How do I fix a sticky or dull surface?
Re-season with a thin layer of oil and bake at 450°F for an hour. Repeat if needed. This rebuilds the polymerized layer, restoring the pan’s slick, non-stick surface.
Do pre-seasoned pans need extra seasoning?
Pre-seasoned pans are ready to cook on, but adding extra layers of seasoning improves their non-stick qualities and lifespan. A little extra effort now pays off later.
Conclusion
Building a great seasoning on your carbon steel pan isn’t magic; it’s practice and patience. Each layer you add makes your pan more non-stick, more resilient, and more your own.
Think of it as cultivating a garden—consistent care yields the best results. Keep cooking, keep seasoning, and your pan will serve you for decades, quietly getting better with age.
Fall Picks
fall essentials
As an affiliate, we earn on qualifying purchases.