
TL;DR

Get kitchen gear delivered free with Prime
- Fast, free delivery on millions of items
- Prime Video, Amazon Music and more included
- Member-only deals all year
Baking bread in a Dutch oven creates a mini-steam environment and even heat that mimic bakery ovens. This method results in crusty, well-risen loaves with a perfectly textured crumb, making home baking easier and more satisfying.
Preheat your Dutch oven thoroughly — at least 30 minutes at 450°F (230°C) — for the best crust and rise.
Trapped steam inside the Dutch oven is key to crust development and oven spring.
Use a high-hydration dough and proper scoring to prevent uncontrolled cracking.
A Dutch oven turns your home oven into a bakery, giving you professional results with simple tools.
Patience with fermentation and baking times pays off in flavor and texture.
Why a Dutch Oven Is Your Best Friend for Baking Bread
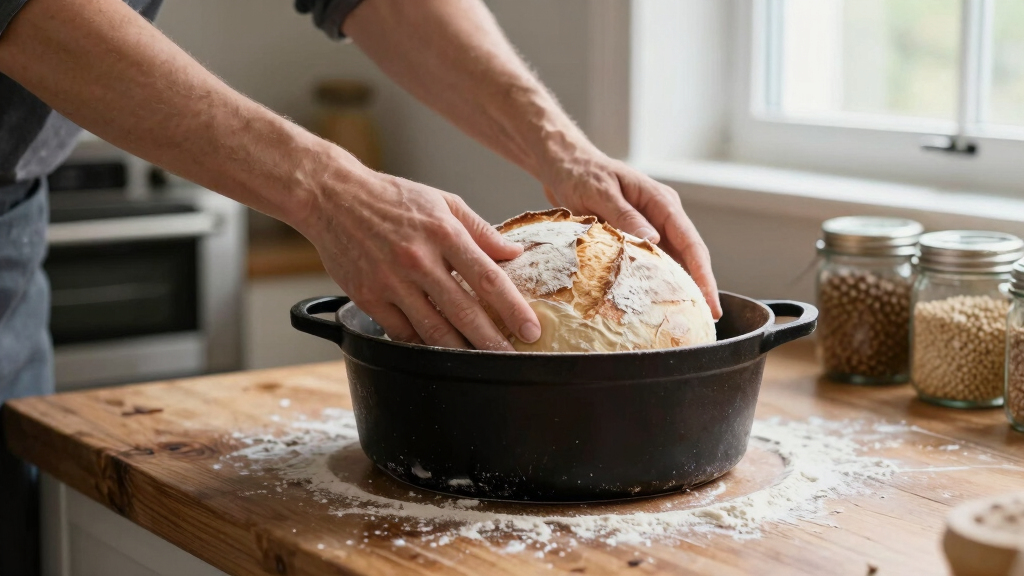
When you bake bread in a Dutch oven, you’re harnessing the power of cast iron’s heat retention and steam creation. The Dutch oven acts like a mini oven within your oven, delivering consistent heat and trapping moisture from the dough. This combination helps your bread rise fully and develop a crust that’s as crunchy as bakery-style loaves.
Imagine placing a ball of dough into a preheated cast iron pot, then covering it tightly. The heat radiates evenly, and the steam released from the dough gets trapped, creating a humid environment. This trapped moisture is crucial because it delays the formation of the crust, allowing the bread to expand fully during oven spring. Without this, the crust would form too early, limiting rise and resulting in a denser loaf. The result is a beautifully risen, airy interior with a shiny, crispy exterior. The tradeoff? You need to preheat the Dutch oven thoroughly, which adds a step but pays dividends in crust quality and rise.
As an affiliate, we earn on qualifying purchases.
How to Bake Perfect Bread in a Dutch Oven in 5 Simple Steps
- Preheat your Dutch oven: Heat it in your oven at 450°F (230°C) for at least 30 minutes. This ensures the cast iron is blazing hot when the dough goes in, yielding maximum oven spring. A hot Dutch oven means the bread gets an immediate burst of heat that helps it rise quickly and develop a crust. Skipping this step can lead to less oven spring and a flatter loaf, because the initial heat is essential for activating the gases in the dough.
- Prepare your dough: Use a wet, sticky dough — 70-80% hydration is ideal. Let it ferment until it doubles in size. No-knead recipes are perfect for beginners. Higher hydration doughs tend to produce a more open crumb and a better crust because the moisture allows the gluten to develop fully and creates steam during baking. However, higher hydration can be trickier to handle, so understanding the tradeoff between ease and quality is key. Proper fermentation also impacts flavor and structure, as longer, slower fermentations develop more complex flavors and a stronger gluten network.
- Shape and score the loaf: Shape your dough into a tight round and make a few slashes with a sharp blade. This controls expansion and prevents uncontrolled cracking. Proper scoring directs where the bread expands during oven spring, leading to a more controlled, attractive appearance. It also releases built-up gases, preventing the loaf from bursting unpredictably. The pattern and depth of scoring influence both aesthetics and how the bread expands, so understanding the balance between a decorative pattern and functional scoring is important for professional-looking results.
- Transfer to the hot Dutch oven: Carefully lift the dough (using parchment paper to prevent sticking) and place it into the hot vessel. Cover immediately. Using parchment makes handling easier and reduces the risk of deflation or tearing. The immediate cover traps steam and heat, which is essential for the oven spring and crust formation. If you remove the lid prematurely, the crust might form too early, limiting rise. The tradeoff is that handling hot dough requires care, but the payoff is a beautifully risen, crusty loaf with a tender crumb.
- Bake and cool: Bake covered for 20-30 minutes, then uncover for the last 10-15 minutes to develop a deep crust. Cooling on a rack prevents moisture from accumulating and softening the crust, which is important for texture. The timing of uncovering allows the crust to caramelize and become crisp without over-baking, which could lead to a burnt flavor or overly dark crust. Patience here ensures the best balance of crust color, flavor, and crumb structure.
As an affiliate, we earn on qualifying purchases.
Compare Baking in a Dutch Oven vs. Other Methods
| Feature | Dutch Oven | Steel or Baking Stone | Open Baking |
|---|---|---|---|
| Steam Creation | Yes, trapped inside the lid | Requires external steaming methods | No, relies on oven moisture |
| Heat Distribution | Even, thanks to cast iron | Good, but less uniform | Uneven, hot spots possible |
| Ease of Use | High, preheating essential | Moderate, needs additional steaming | Challenging, controls difficult |
As an affiliate, we earn on qualifying purchases.
Why Preheating the Dutch Oven Matters Big Time
Preheating your Dutch oven for at least 30 minutes at 450°F (230°C) is the secret to a perfect crust and good oven spring. When the hot cast iron hits the dough, it instantly boosts the rise and creates that beautiful, crusty exterior.
Think of preheating as setting the stage for a successful bake. The immediate exposure to high heat causes a rapid expansion of gases in the dough, known as oven spring, which results in a lighter, airier loaf. Without proper preheating, the crust might not develop fully, and the loaf could end up dense or flat. This step might seem simple, but it’s fundamental because it directly influences how much the bread can rise and how the crust will develop. Skipping or rushing this step can compromise the entire bake, leading to a less desirable texture and appearance. Fully preheating the Dutch oven ensures you’re giving your dough the best chance to perform at its peak, balancing time investment with the quality of the final loaf.
As an affiliate, we earn on qualifying purchases.
Troubleshooting Common Issues When Baking in a Dutch Oven
- Loaf isn’t risen enough: Check your dough’s fermentation time and hydration. Longer fermentation and higher hydration help by allowing gluten to develop more fully and trapping more gas. Also, ensure your oven and Dutch oven are fully preheated to maximize oven spring. Underproofed or insufficiently hydrated dough won’t expand properly, leading to dense loaves. Proper fermentation, hydration, and preheating are interconnected; neglecting one can diminish the others’ effects, so understanding these tradeoffs helps in troubleshooting and improving results.
- Crust is too thick or dark: Reduce baking time or lower temperature slightly. Consider using a lighter-colored Dutch oven or reducing the initial preheat temperature if burning persists. Remember, a darker crust isn’t always better — it can mean over-baking or too high heat, which can lead to a bitter or burnt flavor. Balancing heat and time is essential; a slightly lighter crust can still be delicious if the bread is baked properly, but over-baking can compromise crumb texture and flavor.
- Loaf sticks to the sides: Use parchment paper when transferring the dough, and ensure your Dutch oven is well-seasoned or coated. Proper preparation prevents sticking and damage to the loaf’s surface. Sticky loaves often result from insufficient flouring or seasoning, but forcing the bread out prematurely can also cause tearing. Recognizing when the loaf is ready to come out—usually when it releases easily—is key. This balance between patience and proper handling ensures a clean, intact loaf with a nice crust.
- Cracks or uncontrolled splitting: Score your dough properly — deep enough and with the right pattern — and avoid overproofing, which weakens the dough’s structure, leading to uncontrolled splitting. Proper scoring guides expansion, while overproofing causes the gluten network to weaken, making uncontrolled cracks more likely. Adjust proofing times based on dough behavior; underproofed dough won’t expand enough, while overproofed dough can burst unpredictably. Understanding these tradeoffs helps you achieve a controlled, aesthetically pleasing loaf.
The Best Breads to Make in a Dutch Oven
Some breads lend themselves beautifully to this method. Think rustic sourdoughs, hearty boules, and even some ciabatta. These breads benefit from the high, steady heat and steam environment, resulting in an artisan crust and open crumb.
For example, a sourdough loaf with a thick, crackly crust and airy interior is a classic Dutch oven project. Its characteristics—thick crust and open, irregular holes—are the result of the combination of high heat, steam, and proper fermentation. These traits not only make the bread visually appealing but also enhance flavor and texture. Choosing the right bread for Dutch oven baking is about understanding which dough qualities respond best to this environment, primarily high hydration and good scoring to control expansion. This method elevates the bread’s crust and crumb, making it a favorite for home bakers seeking bakery-quality results.
Tips to Make Your Bread Baking Even Better
- Invest in a good thermometer to check your oven’s actual temperature and ensure consistent results. Knowing your true oven temperature helps you adjust baking times and temperatures more accurately, preventing under- or over-baking. This attention to detail is crucial because oven calibration varies, and a few degrees can significantly affect crust color and crumb texture.
- Use a baking peel or parchment paper for easy transfer to prevent deflation or sticking. This minimizes handling errors, preserves the dough’s shape, and reduces the risk of tearing, which can compromise the crust and appearance. Proper transfer techniques are often overlooked but are vital for achieving professional-looking loaves.
- Let your dough ferment slowly in the fridge if you want more flavor and better structure. This slow fermentation, or cold proofing, allows enzymes to develop more complex flavors and gluten to strengthen, resulting in a more flavorful and resilient dough. It also helps in managing timing, giving you flexibility in your baking schedule. The tradeoff is longer wait times, but the flavor payoff and improved crumb make it worthwhile.
- Practice scoring for controlled expansion and a professional look. Deep, deliberate cuts guide the bread’s expansion, preventing uncontrolled splitting and creating an attractive crust pattern. Mastering scoring techniques can elevate your loaf’s appearance and texture, making it look more artisan and appealing. The key is understanding how different patterns and depths influence expansion and crust formation.
Frequently Asked Questions
Can I use any type of Dutch oven for bread baking?
Most heavy, oven-safe Dutch ovens work well. Enameled cast iron is popular for its ease, but raw cast iron also does the job if properly seasoned. Just avoid thin or fragile materials that can crack under high heat.
How long should I preheat my Dutch oven?
Preheat it at least 30 minutes at 450°F (230°C). This guarantees it’s hot enough to give you that quick oven spring and crunchy crust.
What’s the best way to prevent sticking?
Use parchment paper when transferring dough and ensure your Dutch oven is well-seasoned or coated if unenameled. This simple step makes a big difference in getting your loaf out intact.
Can I bake other types of bread in a Dutch oven?
Absolutely. While artisan sourdoughs are classics, you can also bake batards, rye, or even some sweet bread recipes. The key is keeping the dough hydrated and scoring well.
Conclusion
Baking bread in a Dutch oven isn’t just a trick — it’s a game changer. It transforms humble ingredients into crusty, airy loaves that rival bakery favorites. With a little practice, your home kitchen can become your favorite bakery, one crust at a time.Halloween Picks
halloween
As an affiliate, we earn on qualifying purchases.