TL;DR

Get kitchen gear delivered free with Prime
- Fast, free delivery on millions of items
- Prime Video, Amazon Music and more included
- Member-only deals all year
You can sharpen a knife without a traditional whetstone with a pull-through sharpener, a suitable diamond tool, or, in a pinch, the unglazed ring on a ceramic mug. A honing rod maintains a slightly rolled edge but usually cannot restore a very dull or chipped blade. Keep the tool stable, use light strokes at a consistent angle, and stop as soon as the knife cuts well.
A tomato should yield to your knife, not slump under it while you saw at the skin. If your whetstone is missing—or you never owned one—you still have options, but the right one depends on whether your edge is merely rolled, genuinely dull, or chipped.
This guide shows you how to sharpen a knife without a whetstone using common tools, explains when a honing rod is enough, and walks through a careful mug-bottom method for emergencies. You’ll also learn when an improvised abrasive is more likely to make a mess of the edge than help it.
A honing rod realigns a slightly rolled edge; it usually cannot restore a very dull or chipped blade.
Follow the pull-through sharpener’s instructions, use coarse stages sparingly, and stop once the knife cuts well.
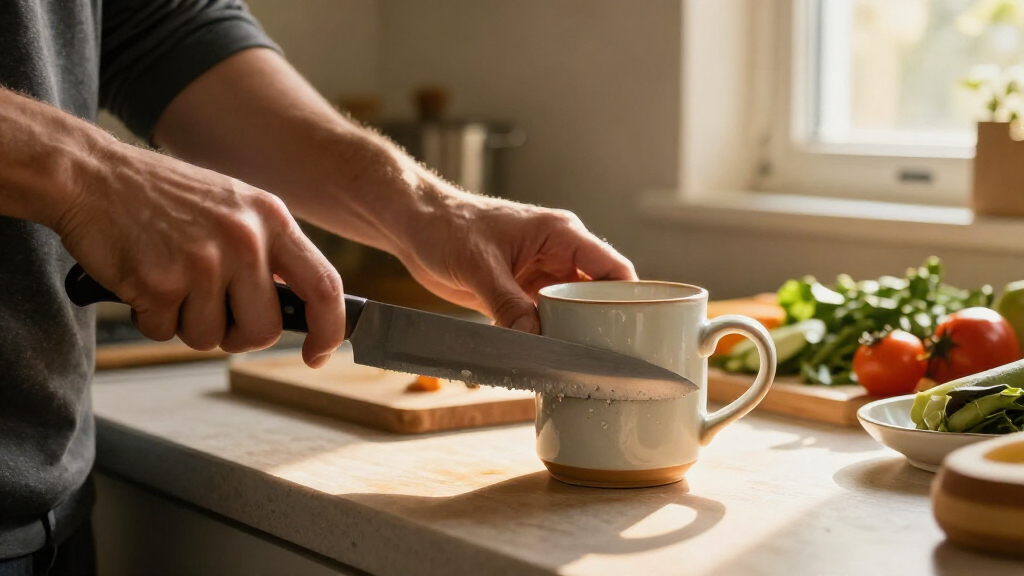
An unglazed ceramic mug base can help in a pinch if it is rough, stable, and used with light, consistent strokes.
Many kitchen knives use about 15–20 degrees per side, but the knife maker’s guidance takes priority.
Keep fingers clear and test the edge by slicing paper away from your body, never by running a finger along the blade.
Sharpen a Knife Without a Whetstone
Choose a method that matches the edge: honing can realign a slightly rolled edge, while sharpening removes steel to create a new one.
Match the tool to the edge
Check how the knife cuts before choosing a method.
Honing rod
Can realign a slightly rolled edge. Usually cannot restore a very dull or chipped blade.
Pull-through sharpener
A straightforward home option. Follow its instructions and use coarse stages sparingly.
Unglazed ceramic
A rough mug or plate base may help temporarily, but offers less control.
Diamond tool
A compact sharpening option that can remove steel quickly; use light pressure.
A careful sharpening routine
Use light, controlled strokes and check progress often.
Secure the sharpener or rough ceramic surface on a stable, nonslip spot.
Follow the tool’s directions and the knife maker’s angle guidance when available.
Avoid hard pressure and unnecessary passes; stop when the knife cuts well.
Slice paper held away from your body. Keep fingers clear of the edge.
What each method can fix
| Method | Best use | Limit |
|---|---|---|
| Honing rod | Slightly rolled edge | Usually cannot restore a very dull or chipped blade |
| Pull-through | Routine sharpening | Angles vary; coarse stages remove more steel |
| Unglazed ceramic | Temporary option | Surface and control vary |
| Improvised abrasives | Emergency use | Harder to control; poor choice for valuable knives |
Choose the right tool for the knife you have
You can sharpen a knife without a traditional whetstone with a pull-through sharpener, a diamond tool, or a suitable unglazed ceramic surface, but each works differently. A honing rod mainly straightens a slightly rolled edge, while abrasives remove steel to form a new one. Start by checking how the knife cuts before choosing a tool.
Think of edge care like straightening a bent fence wire versus filing a fresh point onto a stake. Honing nudges a small bend back into line; sharpening grinds away metal until two sides meet cleanly. If your knife slices a sheet of paper after a few rod passes, honing may be enough. If it crushes a ripe tomato or catches on paper, it likely needs an abrasive.
For example, a cook who uses the same chef’s knife daily may find the edge feels tired after chopping onions, even though it has no chips. A few careful honing strokes might bring back its bite. A knife left in a drawer for a year may need actual sharpening, and a blade with deep nicks may need repair.
Match the method to the damage. A compact pull-through or diamond sharpener offers more control than an improvised surface for most home cooks. Household ceramics and sandpaper can help in a pinch, but results vary and they are poor choices for a valuable knife.
Products Worth Considering

Philips 2200 Series Fully Automatic Espresso Machine with Classic Milk Frother, 2 Coffee Varieties, Intuitive Touch Display, Ceramic Grinder

Instant Pot InstantChill Ice Cream Maker with Rolled Ice Cream, No Pre-Freezing, 2-Pint

Instant Pot Vortex Plus 6-Quart Air Fryer
As an affiliate, we earn on qualifying purchases.
Use a pull-through sharpener without grinding away too much steel
A pull-through sharpener is a straightforward way to sharpen a knife without a whetstone, especially when you need a repeatable setup at home. Its slots guide the blade across abrasive elements, but the angle and pressure vary by model. Read its instructions and use a coarse stage only when the edge needs substantial repair.
- Set the sharpener on a dry, nonslip surface. A sliding tool can pull your hand toward the edge.
- Place the blade in the slot as directed. Keep the heel aligned and follow the maker’s angle guidance.
- Draw the blade through smoothly. Use light pressure and the number of passes recommended by the manufacturer.
- Check the cut before repeating. Stop when the knife slices paper or food cleanly.
Imagine preparing squash for dinner: the blade skates over the firm skin instead of biting. A coarse stage may help restore the bevel, but repeated passes after the edge already cuts well only remove more steel. Fine stages can refine an edge, though they do not make every knife suitable for the same angle.
Let the sharpener’s instructions lead. Some devices require a heel-to-tip pull; others have different guidance. Don’t force the knife backward and forward unless the manufacturer says to. A “universal” angle claim cannot account for every knife design, so check the knife maker’s guidance when you can.
Know when a honing rod can help—and when it cannot
A honing rod can maintain a knife with a slightly rolled edge, but it usually cannot restore a very dull or chipped blade by itself. Honing realigns the thin edge with little metal removal; sharpening uses an abrasive to create a new edge. If the knife still struggles after careful honing, choose an abrasive sharpener.
Many cooks hone before chopping because a rod is quick to pick up and put away. Hold the rod securely with its tip on a stable board, then guide the knife down it at a steady angle. A quiet shhhk should accompany a light pass. Pressing hard does not make the edge straighter; it can make the blade slip or wear unevenly.
For a practical example, imagine a paring knife that has dulled slightly while peeling apples. If it still has an even edge, a few light passes on a honing rod may restore useful cutting. But if it mashes a clove of garlic or has a visible chip, the rod cannot fill in missing steel. Switch to a sharpening tool or seek repair.
Use honing as upkeep, not a cure-all. The method depends on the edge’s condition, the rod, and the knife’s intended use. Follow the rod maker’s directions and keep your fingers behind the blade’s path. Afterward, wipe the knife clean before returning to food prep.
Try an unglazed mug bottom only when you can steady it
The rough, unglazed ring on the bottom of some ceramic mugs or plates can act as a small sharpening surface when no proper sharpener is available. It is an improvised abrasive, so it offers less control than a purpose-built tool. Use light strokes, a consistent angle, and a stable setup; smooth glazed ceramic will not work the same way.
First check the mug’s base. The exposed ring should feel rough, not slick, and the mug must sit flat. Put it on a damp towel or nonslip mat so it cannot skate across the counter. Keep your fingers away from the edge and use a motion you can control from heel to tip.
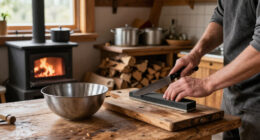
For instance, if you are cooking at a cabin and notice your knife dragging through bread, an unglazed plate base may offer a temporary improvement. Make a few light passes on one side, then the other, keeping the blade angle consistent. Many kitchen knives use about 15–20 degrees per side, but that range is only a guide; the knife’s design and maker’s recommendation come first.
Stop and check often. There is no reliable stroke count because ceramic surfaces differ in roughness and shape. If the base chips, feels too smooth, or wobbles, put the knife down and use another method when available. Clean and dry the blade afterward, and treat the mug method as a pinch option rather than a precise sharpening routine.
Compare the alternatives before you start sharpening
The best way to sharpen a knife without a whetstone depends on the edge, the tool, and how much control you need. A pull-through sharpener is often the simplest dedicated option; a diamond tool can remove steel quickly; ceramic is a temporary substitute; and sandpaper is harder to control. Choose the gentlest method that can solve the problem.
| Method | Best use | Main tradeoff |
|---|---|---|
| Honing rod | Maintaining a slightly rolled edge | Usually cannot restore a very dull or chipped blade |
| Pull-through sharpener | Routine sharpening with a guided slot | Angles vary by model; coarse stages remove more steel |
| Diamond sharpener | Compact, fast sharpening | Can remove metal quickly, so pressure and passes matter |
| Unglazed ceramic | Temporary sharpening in a pinch | Surface quality and stability vary |
| Sandpaper | Emergency use when better tools are absent | Harder to hold securely and keep the angle even |
Say you are packing for a weekend in a cabin. A small dedicated diamond tool may be easier to manage than hoping a plate has the right rough base. At home, a pull-through sharpener with clear instructions can be convenient, while a honing rod can help maintain an edge between sharpening sessions.
No improvised method equals every proper sharpening system. If you own an expensive knife, don’t gamble its bevel on an unknown tile or abrasive surface. Practice with a familiar, inexpensive knife first, and stop if the blade’s edge begins to look uneven.
Keep your hands safe and test the edge without touching it
Safe sharpening starts with a stable tool, a controlled blade path, and fingers kept clear of the edge. Never test sharpness by running a finger along the blade. After sharpening, slice paper held away from your body or make a careful cut into a piece of food on a stable board.
Before you begin, clear the counter so the knife has room to move. Dry the handle and your hands; a wet grip can turn a slow stroke into a slip. Secure a mug, rod, or sharpener according to its design, and use light pressure throughout. The blade should travel in a controlled direction, with no hand in its path.
For example, if you sharpen a knife at the kitchen table while a child is nearby, pause and move the work to a clear counter. A loose mug or distracted stroke changes the risk more than the exact abrasive does. When you finish, wipe the blade carefully from spine toward edge only if your cloth technique keeps your fingers clear, then wash and dry it before storing.
Check performance, not sharpness by touch. A clean slice through paper held away from your body is a simple check. If the knife catches, avoid adding a dozen hurried passes; inspect the edge and revisit your angle or tool. A knife that remains uneven or damaged deserves professional attention.
Stop sharpening when damage calls for repair
Sharpening removes metal to create a new edge, so aggressive or repeated passes can shorten a knife’s useful life. A honing rod mainly realigns a rolled edge, while deep chips, a bent tip, or severe damage may need professional repair. Don’t keep grinding a damaged blade in hopes that every problem will disappear.
Small dull spots often respond to a careful abrasive session. A deep notch is different: removing enough steel to erase it may change the blade’s shape, and an uneven edge can become more uneven if you work freehand without control. If the tip bends or the knife has a large chip, set it aside rather than pressing harder.
Picture a well-used chef’s knife that has chopped through years of vegetables. It may need regular sharpening, but a sudden nick from striking a bone or hard surface is a different problem. If careful work with a suitable sharpener leaves the edge wavy, or the knife still cuts poorly, a professional sharpener can assess the blade and repair it more safely.
Use the knife maker’s guidance when available. A blade designed for a particular angle or use may not perform well after an arbitrary “universal” sharpening. For routine care, sharpen when honing no longer restores useful cutting performance. That approach preserves steel and gives you a clearer signal than following a fixed calendar.
Frequently Asked Questions
Can I sharpen a knife with the bottom of a mug?
Sometimes. Use only a rough, unglazed ring, secure the mug on a nonslip surface, and make light strokes at a steady angle. It is a temporary option, not a precise substitute for a proper sharpener.
Can a honing rod sharpen a very dull knife?
Usually not. A honing rod mainly realigns a slightly rolled edge and removes little metal. A very dull or chipped blade needs an abrasive sharpener or professional repair.
What angle should I use if I do not know the knife’s edge angle?
Check the knife maker’s guidance first. Many kitchen knives use roughly 15–20 degrees per side, but that is a general range rather than a universal rule.
How many sharpening strokes should I make?
There is no fixed number because tools and blades differ. Follow the tool’s instructions, use light and even strokes, and check cutting performance often. Stop once the knife cuts well.
Can I use a ceramic plate or tile instead of a whetstone?
Only if it has a suitable unglazed abrasive area and can be held securely. A smooth glazed surface is generally too slick to sharpen effectively, and an unstable plate can make the blade slip.
When should I take a knife to a professional?
Seek professional sharpening or repair for deep chips, a bent tip, major edge damage, or a blade that remains uneven after careful work. This is especially sensible for an expensive knife you do not want to reshape by guesswork.
Conclusion
Choose the tool that matches the edge: hone a slightly rolled knife, sharpen a dull one with a suitable abrasive, and send serious damage for repair. Keep the setup steady, use light strokes, and stop when the blade cuts cleanly.
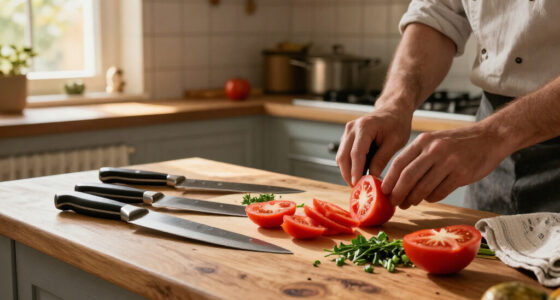
A good edge should glide through a ripe tomato with a soft shhk, not crush it into a puddle. That quiet cut is your cue to put the sharpener away.