
TL;DR

Get kitchen gear delivered free with Prime
- Fast, free delivery on millions of items
- Prime Video, Amazon Music and more included
- Member-only deals all year
Wash a wooden-handled knife by hand with mild soap and a damp cloth, then dry it promptly around the pins and blade joint. Keep it out of the dishwasher, sink, direct heat, and prolonged sun; use food-grade mineral oil only when the maker’s instructions and the handle’s finish allow it. A crack or loose handle needs repair before the knife goes back to work.
A wooden knife handle can look sturdy on the counter and still suffer from one careless night in a wet sink. Water sneaks into the grain and the small joints around pins and blade; heat and detergent add more stress. The damage often starts quietly, with a rough patch, a lifted edge, or a hairline gap.
Caring for a wooden knife handle takes less time than sharpening the blade. You’ll learn how to wash and dry it, when a little food-grade mineral oil can help, why some finishes should stay untouched, and which warning signs call for repair. These habits suit a busy home kitchen, a cabin without a dishwasher, or a camp kitchen where the sink is a basin and the towel is close at hand.
There is no single treatment for every handle: wood species, construction, and finish all matter. Use the maker’s instructions when you have them, and let the handle’s condition guide routine care. A few careful minutes after chopping can help a wooden handle last for many years.
Wash wooden-handled knives by hand with mild soap and a damp cloth; dry promptly around the pins, seams, and blade junction.
Keep the knife out of the dishwasher, sink, direct sun, hot cars, and areas beside a stove.
Use food-grade mineral oil sparingly only on unfinished or oil-finished wood when the maker’s guidance allows it.
Skip olive oil and other cooking oils, which can oxidize or become sticky and unpleasant.
Stop using a knife with a crack that affects stability, a gap near the blade, or a loose handle, and seek repair advice.
Kitchen care · A practical guide
Caring for a Wooden Knife Handle
A few careful minutes after chopping can help a wooden handle last for years. Wash it by hand, dry the joints promptly, and let the wood’s finish guide any extra care.
01 / Everyday routine
Wash, dry, then check the joints
Water can linger around pins, seams, and the blade junction after the broad surface looks dry. Keep the knife out of standing water and wipe those details before storage.
Use mild soap and a damp cloth
Clean promptly after use. Wipe away food and soap without submerging or soaking the knife.
Give seams extra attention
Towel-dry around the pins, scales, and where the handle meets the blade. Recheck any visibly damp seam.
Keep heat and long soaks away
Skip the dishwasher, sink, direct sun, hot cars, and storage beside a stove. Heat, detergent, and moisture can stress wood and joints.
02 / Finish determines care
Oil sparingly—and only when it can help
There is no single treatment for every wooden handle. Species, construction, and finish all matter, so follow the maker’s care instructions whenever available.
Unfinished or oil-finished wood
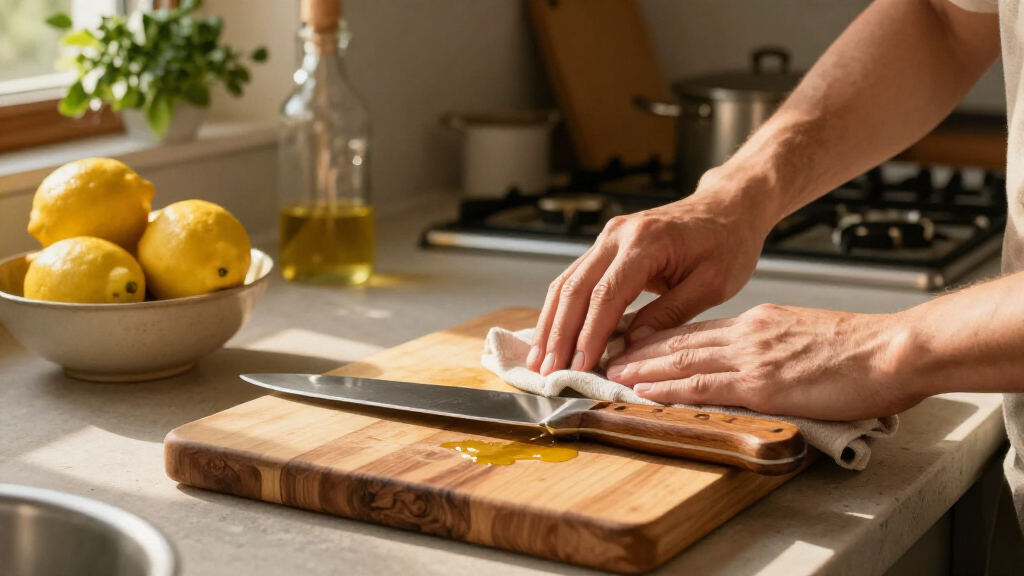
If the maker allows it and the surface looks or feels dry, spread a small amount of food-grade mineral oil with a clean cloth. Let it absorb briefly, then wipe away excess.
Sealed, varnished, or stabilized handles
Oil may sit on top of a coating or affect the intended finish. Glossy, intact, resin-treated, or stabilized handles may need cleaning and drying only.
Olive oil and other cooking oils
They can oxidize and become sticky or develop an unpleasant smell over time. “Food-safe” alone does not mean suitable for every finish.
Oil is upkeep, not waterproofing
A suitable oil can condition compatible wood. It cannot prevent every crack, protect against soaking, or repair a failed joint.
No fixed oiling schedule is needed: let the condition of the compatible wood guide you, and use only enough to condition the surface.
03 / A quick inspection
Catch small changes before they spread
Inspect the clean, dry handle in good light. Residue can hide changes, while moisture can make a seam look different from its usual condition.
Clean and dry
Remove food and moisture so the wood is easy to see.
Look closely
Check for cracks, rough patches, lifted scales, or gaps near the blade.
Check stability
Notice whether a scale moves or the handle feels loose in your hand.
Choose the right help
Ask the maker or a qualified knife repairer about structural damage.
Stop using a knife with a loose handle or stability-affecting crack
Set it aside and seek repair advice before it goes back to work. Oil can’t restore a failed joint, and a moving handle can make the blade harder to control.
The care chain
Wash by hand and dry the handle before water reaches its joints
A wooden knife handle stays in better shape when you wash it briefly by hand, keep the handle out of standing water, and dry it as soon as you finish. Use mild dish soap with a damp cloth or sponge, then wipe away soap and moisture. Take an extra moment around the pins, scales, and joint where the handle meets the blade. Those narrow seams can hold moisture after the open surface appears dry, so a quick check there does more than polishing the handle: it limits the time water has to enter the wood or construction.
After chopping onions for stew, for example, you can wipe the blade and handle with warm water and a drop of dish soap. Rinse without soaking the knife, then dry it with a towel. Water left in a narrow seam can linger after the broad surface looks dry, a little like rain hiding under a roof shingle. Repeated wetting and drying can make wood move unevenly, putting strain on the finish and the small fitted parts that keep the handle secure.
The dishwasher puts a wooden handle through heat, detergent, and long exposure to water. That combination can swell or dry the wood unevenly, weaken joints, and loosen handle components. A knife left overnight in a sink faces its own slow soak; even cool dishwater can penetrate where the wood meets the tang. Hand-washing takes a little more attention, but it gives you control over how much water reaches the handle and how long it stays there.
- Wash promptly: Don’t let food dry onto the handle or blade.
- Use a damp cloth: Avoid submerging the knife or leaving it in the sink.
- Dry around the details: Check pins, seams, and the blade junction before storage.
In a cabin kitchen with limited hot water, a damp cloth and a careful towel dry still do the job. Clean water and prompt drying matter more than a long scrub. If the handle remains visibly wet at a seam, wipe it again before putting the knife away; storage should begin only after the places most likely to trap moisture are dry.
Products Worth Considering
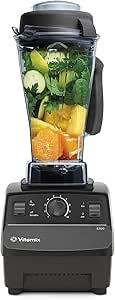
Vitamix 5200 Professional-Grade Blender, 64 oz. Container, Black

Ninja Foodi Dual Zone Smart XL Air Fryer, 10 Qt, 6-in-1, Black (DZ550)

Cuisinart Chef's Classic 7-Piece Stainless Steel Cookware Set
As an affiliate, we earn on qualifying purchases.
Oil only when the wood and finish can use it
Caring for a wooden knife handle may include a small amount of food-grade mineral oil when the wood is unfinished or already oil-finished and looks or feels dry. Mineral oil can condition a suitable surface, but it does not make wood waterproof or stop every crack. Think of oil as limited upkeep for a compatible finish, not a barrier against careless soaking. Check the maker’s care guidance first, especially if you don’t know what finish the handle has.
Sealed or varnished wood behaves differently. Oil may sit on top instead of soaking in, and it may affect a finish the maker intended to leave intact. Stabilized wood and resin-treated materials can also need less routine conditioning than untreated wood. On a knife with a glossy, intact coating, cleaning and drying may be all the care it needs. Applying oil anyway can leave residue without addressing any real need.
When the maker allows oiling, use a clean cloth to spread a small amount over the handle. Let it absorb for a short while, then wipe away any excess so the surface doesn’t feel slick. For instance, a handle that looks pale and feels dry after months in a low-humidity kitchen may take a light application; a glossy handle that beads water does not need an automatic oiling. Using less also makes the result easier to judge: if the wood stops looking or feeling dry, there is no benefit to adding more.
Avoid olive oil and other cooking oils for this task. They can oxidize and develop a sticky feel or unpleasant smell over time. “Food-safe” alone does not tell you whether an oil suits a particular finish; follow the manufacturer’s guidance and keep the application modest. The finish determines whether oil can do useful work, while excess oil can simply make the handle unpleasant to hold.
Use a simple inspection to catch damage before it spreads
You can spot many early handle problems by checking the wood and its joints while the knife is clean and dry. Look for new cracks, rough patches, gaps at the blade, lifted scales, and movement around pins. A handle that stays tight and smooth after washing usually needs routine care; one that shifts in your hand needs attention before you cut with it again. A clean, dry inspection matters because residue can hide small changes, while moisture can make a seam look different than it does under normal use.
Try this short check after a weekly kitchen cleanup. Hold the knife securely and look along both sides of the handle in good light. Without pressing on the blade edge, notice whether any scale moves or a seam catches your fingernail. A tiny change can be easy to miss beneath flour or cooking oil, so clean first and inspect second. Comparing what you see over time can help distinguish a stable mark in the wood from a gap that is growing.
- Clean and dry: Remove food and moisture so you can see the wood clearly.
- Look closely: Check around pins, seams, and the blade junction for gaps or cracks.
- Check stability: If the handle shifts or feels loose, stop using the knife.
- Choose the right help: Ask the maker or a qualified knife repairer about structural damage.
Surface dryness is not the same problem as a split that runs toward the tang. A suitable finish may help a dry surface, but oil won’t repair a loose scale or restore a failed joint. If a crack affects the handle’s stability, put the knife aside; a secure grip matters as much as a sharp edge. Continuing to use it can turn a repairable fault into a worse one, and a moving handle makes it harder to control the blade.
Keep heat, sun, and long soaks away from the handle
A wooden knife handle handles ordinary kitchen use better than repeated extremes of moisture and temperature. Don’t leave it beside a hot stove, in direct sun, in a hot car, or soaking in a basin. As wood repeatedly takes on moisture and dries out, it can swell and shrink; over time, that movement can stress the finish and joints. Avoiding these extremes reduces repeated stress, which matters more than trying to reverse damage after a finish lifts or a joint loosens.
Imagine cleaning up after a long dinner: the knife rests by the sink, then the morning sun lands on it through the window. That small routine combines a wet surface with warmth and direct light. Put the knife on a dry counter away from the stove instead, and return it to a dry drawer or knife block once the handle is clean. This gives the handle time to dry under ordinary room conditions rather than heating one side while moisture remains in another.
In an off-grid kitchen, the same principle applies even if you wash with water from a hand pump. Use only what you need to clean the knife, dry it with a clean towel, and don’t leave it in a wash basin while you fetch more water. A hand-powered routine can be gentle on the handle as long as you keep the washing brief. The practical tradeoff is simple: a small amount of water and a little towel-drying effort protect the handle better than a convenient but prolonged soak.
Storage should let the handle rest dry and protected. A drawer works if the knife won’t slide against other tools; a rack or block can keep it accessible without trapping it in damp cloth. If you carry a knife outdoors, dry it before it goes into a sheath, since a damp handle and a close-fitting cover can hold moisture near the wood. A protected storage spot is useful only if the knife goes into it dry.
Choose care by finish instead of treating every wood handle alike
A wooden knife handle may be unfinished, oil-finished, sealed, varnished, stabilized, or resin-treated, and those surfaces don’t all respond the same way to oil or abrasion. The safest first step is to identify the finish and follow the maker’s instructions. If you can’t identify it, stick to gentle hand-washing and prompt drying until you can check. This cautious default avoids an unnecessary treatment that could sit on top of the finish or damage a coating while still allowing the most important everyday care.
For example, an older knife from a family drawer may have a dull, dry-looking handle, but dullness alone doesn’t prove that the wood needs oil. It could have a coating that has simply lost its shine, or it might be untreated wood. Rubbing oil into an unknown finish can leave a greasy surface without helping the wood beneath it. Appearance is a clue, not a diagnosis; identifying the material first helps avoid mistaking a cosmetic change for a need to condition.
| Handle surface | Practical care | What to avoid |
|---|---|---|
| Unfinished or oil-finished wood | Use a small amount of food-grade mineral oil when it looks or feels dry, if the maker permits. | Heavy applications and rancid-prone cooking oils. |
| Sealed or varnished wood | Hand-wash, dry promptly, and follow the maker’s care directions. | Assuming oil will soak in or improve the coating. |
| Stabilized or resin-treated wood | Clean gently and check the product guidance. | Applying a routine treatment meant for raw wood without checking. |
Care instructions can vary with construction as well as finish. A full-tang handle with fitted scales, for instance, has joints and pins worth drying carefully. A one-piece handle still benefits from avoiding prolonged water and heat, even if it has fewer seams. The finish guides conditioning, while the construction tells you where moisture and movement deserve closer attention.
Know when a rough spot needs a repairer, not more oil
A mildly dry surface and a structural fault call for different responses. If an unfinished or oil-finished handle feels dry, the right finish may improve its feel. If you find a crack, a gap near the blade, or a scale that moves, stop using the knife and ask the maker or a qualified knife repairer to assess it. This distinction matters because surface treatment can improve comfort, but it cannot restore the strength of a failed joint.
Picture slicing firm squash for dinner and feeling the handle shift as you push down. That movement is a warning, not a cosmetic annoyance. Set the knife aside and use a stable one; a loose handle can make control unpredictable, especially when your other hand steadies the food. The interruption is inconvenient, but it prevents a small handling problem from becoming a loss of control during a forceful cut.
A rough patch can come from wear, dried residue, or a damaged coating. Start by cleaning and drying it, then see whether the texture remains. If the maker permits refinishing, gentle sanding and an appropriate food-safe finish may help, but sanding can cut through a protective coating and change the handle’s shape. Don’t sand an unknown finish just to make the surface feel smooth. The tradeoff is between improving a confirmed surface defect and removing material or protection that may still be doing its job.
Repair becomes more important near the blade, where moisture can enter a joint and where handle stability affects safe use. A repairer can determine whether a crack is shallow or whether the scales or tang connection need work. A short pause now beats discovering that a loose handle has worsened midway through meal preparation. Until the cause is clear, keeping the knife out of use preserves both control and the chance of a straightforward repair.
Frequently Asked Questions
Can I put a wooden-handled knife in the dishwasher?
No. Dishwasher heat, detergent, and prolonged water exposure can damage wood and loosen handle components. Wash it by hand, then dry the handle promptly.
What oil should I use on a wooden knife handle?
Food-grade mineral oil is commonly used on unfinished or oil-finished wood when the maker permits it. Check the finish first; a sealed or varnished handle may not benefit from oil.
How often should I oil the handle?
There is no fixed schedule for every knife. Oil only when suitable unfinished or oil-finished wood looks or feels dry, and wipe away excess after a small application.
Can I use olive oil on a wooden knife handle?
It’s better to avoid olive oil and other cooking oils. They can oxidize and leave a sticky feel or unpleasant smell over time.
What should I do if the handle feels rough or has a crack?
Clean and dry a rough handle first, then check the maker’s guidance before attempting any refinishing. If a crack affects stability, a scale is loose, or there is a gap near the blade, stop using the knife and contact the maker or a qualified knife repairer.
Conclusion
Keep the routine plain: wash briefly, dry completely, and oil only when the finish calls for it. Check the joints now and then, and take a loose or cracked handle out of service until someone qualified can assess it.
A wooden knife handle rewards small habits. Give it a dry place to rest after the last slice, and it can stay steady in your hand while the kettle warms and the chopping board waits for tomorrow.