TL;DR

Get kitchen gear delivered free with Prime
- Fast, free delivery on millions of items
- Prime Video, Amazon Music and more included
- Member-only deals all year
Solar dehydrating is an eco-friendly method to dry food by harnessing the sun’s energy. It extends shelf life, preserves nutrients, and can be done affordably with DIY setups, but depends on sunny weather and proper techniques.
Imagine turning a sunny afternoon into a natural food factory. Solar dehydrating uses the sun’s heat to strip moisture from fruits, herbs, and even meats, without electricity or fancy gadgets. It’s a low-cost, eco-friendly way to store your harvest or bulk buy in season.
Whether you’re off-grid, gardening at home, or just want to cut down on energy use, solar drying offers a straightforward method. But it’s not just about sticking food outside—it’s about understanding how to do it right, with safety and efficiency in mind.
Build or buy a solar dehydrator that uses reflective surfaces and insulation for better heat retention.
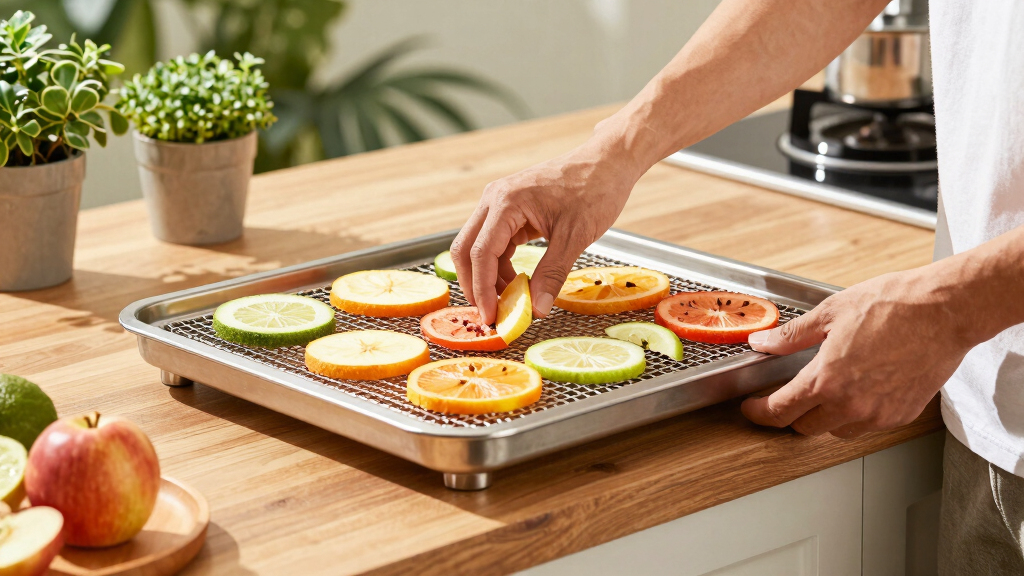
Pre-treat food properly—slice evenly, blanch fruits, and remove skins—to improve drying speed and quality.
Choose the clearest, hottest days for drying; monitor your food daily and remove when adequately dry.
Store dried food in airtight containers in a cool, dark place to prevent spoilage.
Innovations like solar fans and sensor-controlled units are making solar dehydration more reliable and accessible.
Turn a Sunny Afternoon Into a Natural Food Factory
Solar dehydrating uses heat, airflow, and patience to remove moisture from fruits, herbs, vegetables, and meats without electricity. Done well, it extends shelf life, preserves flavor, and makes seasonal abundance easier to store.
Safety comes from controlled heat, clean airflow, even slicing, and airtight storage.
A smart choice for low-cost food preservation
Solar dehydrating removes water that microbes need to grow. A protected solar box improves on basic outdoor drying by holding heat, directing airflow, and shielding food from dust, insects, and animals.
Free heat source
The sun supplies the drying energy, reducing reliance on electric appliances or fossil-fuel-powered preservation.
Gentle preservation
Moderate temperatures help preserve color, flavor, and nutrients while removing enough moisture for storage.
Local materials
Recycled wood, mesh, clear covers, foil, vents, and insulation can become an affordable backyard drying station.
Five steps to a simple solar dehydrator
The best DIY designs combine sun capture, heat retention, ventilation, pest protection, and a south-facing position.
Gather materials
Use wood or scrap metal, mesh trays, clear cover, reflective lining, and basic vents.
Build the box
Create an insulated frame with a sloped top to catch steady sun exposure.
Add trays
Space mesh racks so air can move around each slice, leaf, or strip.
Trap heat
Seal a glass or clear plastic cover while preventing condensation buildup.
Angle south
Elevate the unit and adjust the angle by season for stronger solar gain.
Open-air drying vs. solar dehydrators
Both methods use sunlight, but enclosure and airflow control make a major difference for food safety, consistency, and protection.
| Feature | Open-Air Drying | Solar Dehydrator | Practical Read |
|---|---|---|---|
| Setup | ✓ Simple racks or mats outdoors | ~ Box or cabinet with reflective surfaces | Open-air is easiest; dehydrators reward the extra build. |
| Protection | ✗ Exposed to dust, insects, and animals | ✓ Enclosed and shielded from pests | Protection is the biggest safety upgrade. |
| Drying Time | ~ 2-4 days, weather dependent | ~ 3-7 days, more consistent | Speed varies, but enclosed drying is easier to manage. |
| Moisture Control | ✗ Mostly depends on weather | ✓ Better airflow and heat retention | Controlled airflow reduces mold and uneven drying. |
| Weather Dependency | ✗ Needs dry, sunny days | ~ Can be sheltered in partial cloud | Solar units still need sun, but they are more forgiving. |
What matters most for safe, tasty dried food
Drying success depends on the whole chain: pretreatment, heat, airflow, dryness checks, and storage.
Safety checklist before food goes into storage
The goal is food that snaps or feels leathery, never moist or sticky. Once dried, it needs protection from humidity, light, and contamination.
Before drying
- Slice evenly so pieces finish at the same rate.
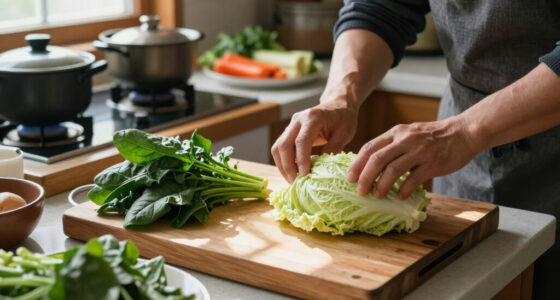
- Blanch or peel fruits when needed to slow enzymes and improve texture.
- Keep trays spaced for steady airflow and lower mold risk.
After drying
- Test for leathery or crisp dryness before packing.
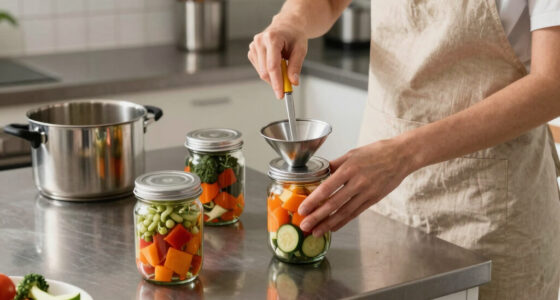
- Use airtight jars or vacuum-sealed bags.
- Store in a cool, dark place to prevent moisture reabsorption.
Solar dehydrating is getting smarter
Newer designs use insulated layers, improved venting, solar-powered fans, temperature sensors, and humidity monitoring. These upgrades reduce guesswork and make drying more reliable in variable weather.
Solar fans
Small fans improve circulation, helping remove moist air before it settles back on the food.
Sensor control
Temperature and humidity readings help users avoid under-drying or accidental cooking.
Hybrid systems
Solar drying can pair with renewable backup or passive cooling to handle changing conditions.
What Makes Solar Dehydrating a Smart Choice for Preserving Food
Solar dehydrating harnesses free, renewable energy—your backyard sun—to remove moisture from food. It’s simple, cost-effective, and environmentally friendly. Think of it as turning sunlight into a natural oven, gently drying your food over a few days.
For example, a well-designed solar dehydrator can dry a basket of apples in 2-3 days, preserving their sweetness and crunch without added chemicals or power bills. Plus, it keeps nutrients intact better than some commercial drying methods.
However, weather plays a big role. Clear, hot days speed up drying, while cloudy or humid conditions slow it down or spoil the process. That’s why choosing the right setup is key. Understanding these environmental factors helps you optimize drying times and quality, ensuring your food is safely preserved without spoilage or mold. The tradeoff is that weather dependency can limit your drying schedule, so planning around forecasted sunny days or using protective modifications can make a big difference in the final product.
As an affiliate, we earn on qualifying purchases.
How to Build a Simple, Effective Solar Dehydrator in 5 Steps
- Gather materials: Use recycled wood or scrap metal, a glass or clear plastic cover, reflective surfaces like aluminum foil, and mesh or screens for airflow. These materials are accessible and affordable, but choosing quality components ensures durability and efficiency. For example, reflective surfaces increase heat absorption, speeding up drying, while proper mesh prevents pests and debris from contaminating your food.
- Construct the frame: Build an insulated box with a sloped roof to maximize sun exposure. Line the interior with reflective material to boost heat. Insulation reduces heat loss, making the dehydrator more effective even on slightly cloudy days, but over-insulation can trap excess heat, so balancing insulation and ventilation is key.
- Install the drying tray: Place mesh or screens inside, allowing air to circulate around the food. Proper spacing prevents mold and spoilage by ensuring even airflow, which is critical for uniform drying and avoiding bacterial growth.
- Add a transparent cover: Cover the top with glass or clear plastic, sealing edges to trap heat and moisture. This creates a greenhouse effect, which increases internal temperature and speeds drying, but careful sealing is necessary to prevent condensation that can reintroduce moisture.
- Position correctly: Set your dehydrator in a south-facing spot, angled to catch the sun most of the day. Elevate it slightly to improve airflow. Adjusting the angle according to the season maximizes solar gain, while elevation helps prevent ground moisture from affecting the drying process.
This DIY approach takes a weekend, costs little, and uses local materials. Once set up, you’ll have a solar-powered drying station ready for seasonal bounty. The tradeoff is that initial setup requires some planning, but the long-term benefits include low operating costs and independence from electricity.
As an affiliate, we earn on qualifying purchases.
Comparison: Open-Air Drying vs. Solar Dehydrators
| Feature | Open-Air Drying | Solar Dehydrator |
|---|---|---|
| Setup | Simple racks or mats outdoors | Box or cabinet with reflective surfaces |
| Protection | None—exposed to dust, insects, animals | Enclosed, shields from pests and debris |
| Drying Time | 2-4 days, weather dependent | 3-7 days, more consistent |
| Moisture Control | Depends on weather | Better airflow and heat retention |
| Weather Dependency | High—needs dry, sunny days | Moderate—can be sheltered in partly cloudy weather |
This comparison highlights that solar dehydrators provide a more reliable and protected environment for drying, especially in variable climates. They reduce the risk of contamination and uneven drying, which can lead to spoilage or mold in open-air setups. However, they require a bit more planning and initial investment. The tradeoff is that with a solar dehydrator, you gain consistency and safety, which are crucial for long-term storage and food quality.
As an affiliate, we earn on qualifying purchases.
Tips for Ensuring Your Dried Food Is Safe and Tasty
- Pre-treat thoroughly: Slice evenly and blanch or peel fruits to kill enzymes and bacteria. Proper pre-treatment reduces the risk of spoilage and mold during storage, ensuring your dried food remains safe and tasty for months.
- Monitor temperature: Keep the drying temperature around 50°C to 60°C (122°F to 140°F). Too hot can cook or burn the food, damaging nutrients and texture, while too cold leaves residual moisture that promotes bacteria growth. Maintaining this range balances effective drying with nutrient preservation.
- Turn food regularly: Rotate or flip slices to promote even drying. Uneven drying can result in some parts remaining moist, which is a breeding ground for mold and bacteria, risking spoilage or foodborne illness.
- Check dryness: Food should snap or feel leathery, not moist or sticky. Properly dried food is less susceptible to mold and bacteria, which thrive in moist environments. Achieving the right dryness ensures long shelf life and safety.
- Store properly: Use airtight jars or vacuum-sealed bags in a cool, dark place to prevent reabsorption of moisture and contamination. Proper storage maintains dryness, preserves flavor, and prevents spoilage, extending the usability of your dried foods.
For example, dried apple slices stored in a sealed jar stay crisp for months, ready for snacks or baking. Proper handling prevents mold, bacteria, and spoilage, ensuring your efforts result in safe, high-quality dried foods.
solar dehydrator with temperature control
As an affiliate, we earn on qualifying purchases.
As an affiliate, we earn on qualifying purchases.
Recent Innovations Making Solar Dehydrating Smarter and Easier
Today’s solar dehydrators aren’t just simple boxes. New designs include insulated layers, better airflow, and even solar-powered fans. Some models feature built-in temperature sensors that you can monitor via smartphone, making the process more predictable and controllable. These advancements allow users to fine-tune drying conditions, reducing guesswork and improving consistency, especially in variable weather.
For instance, a small solar dehydrator with a reflective surface and a metal vent can dry herbs overnight, saving you time and energy. These innovations help deal with unpredictable weather patterns and ensure safety by preventing under- or over-drying, which can compromise food quality.
In developing regions, DIY solar dehydrators with simple materials like cardboard and aluminum foil are gaining popularity, proving that sustainable food preservation can be accessible everywhere. These low-cost, effective designs empower communities to improve food security and reduce waste.
Key Tips for Successful Solar Drying That Lasts
- Pick sunny days: Aim for clear, hot weather with low humidity for best results. Understanding weather patterns helps you plan drying times and avoid unexpected delays or spoilage.
- Prepare your food: Slice fruits and vegetables thinly and evenly, about 1/4 inch thick, to maximize surface area and speed up drying. Uniform slices ensure consistent dehydration, reducing the risk of mold in thicker or uneven pieces.
- Use the right materials: Mesh screens and reflective surfaces boost efficiency and protect food from pests. High-quality materials also withstand weather variations, prolonging the lifespan of your dehydrator.
- Time it right: Check your food daily. Remove when it’s dry but not brittle. Over-dried food can become hard and lose flavor, while under-dried items risk spoilage. Regular checks help you strike the perfect balance.
- Protect your work: Cover your dehydrator overnight or during sudden weather changes to prevent reabsorption of moisture. This safeguard maintains dryness and preserves quality, especially in unpredictable climates.
For example, a gardener drying cherry tomatoes on a sunny porch can expect to finish in about 3 days by following these tips, ending with a shelf-stable snack. Proper timing and protection are crucial for obtaining safe, delicious, and long-lasting dried foods.
Frequently Asked Questions
How long does it take to dry food using a solar dehydrator?
Depending on the food type, thickness, and weather, drying usually takes 2 to 7 days. Thin slices of fruit on a hot, sunny day can dry in as little as 2 days, while thicker vegetables may need closer to a week.Can I dry all kinds of food with solar dehydrating?
Most fruits, vegetables, herbs, and meats like jerky work well. However, foods high in oil or moisture content may need additional pre-treatment or longer drying times. Proper handling and monitoring are key for safety and quality.What materials are best for building a solar dehydrator?
Recycled wood, scrap metal, glass or clear plastic for the cover, aluminum foil for reflectors, and fine mesh for airflow are ideal. These materials are affordable, locally available, and effective if assembled correctly.Is indoor solar drying possible?
Indoor drying is challenging because sunlight is less direct and consistent. You’d need a solar-powered drying unit with controlled airflow and temperature, which can be more complex and expensive than outdoor setups.How do I know my dried food is safe to eat?
Ensure foods are thoroughly dried, snap or feel leathery, and are stored in airtight containers away from humidity. Proper pre-treatment and regular checks prevent mold, bacteria, and spoilage.Conclusion
Solar dehydrating taps into the sun’s power—free, abundant, and sustainable—making it a smart choice for preserving food naturally. With a little effort, you can turn seasonal abundance into pantry staples that last months.
Next time the sun beats down, think of it as your ally in food preservation—quiet, constant, and powerful. A simple solar dehydrator isn’t just a DIY project; it’s a step toward self-reliance and a healthier planet.
Columbus Day / Indigenous Peoples' Day Picks
long weekend sales
As an affiliate, we earn on qualifying purchases.