
TL;DR

Get kitchen gear delivered free — and shop member deals
- Fast, free delivery on millions of items
- Access to Prime Big Deal Days deals on October 6–7
- Prime Video, Amazon Music and more included
Prevent mold in fermentation by keeping everything submerged in brine, using accurate salt levels, and maintaining proper temperature. Follow tested recipes and inspect regularly for safe, tasty results.
Always use a tested recipe with correct salt levels and timing.
Keep all ingredients fully submerged beneath the brine to block oxygen access.
Use a fermentation weight to prevent floating bits that invite mold.
Monitor temperature and avoid opening the jar excessively during active fermentation.
Test acidity with a pH meter or strips—aim for below 4.6 for safety.
How to Ferment Without Mold
Clean fermentation is an exercise in environmental control. Keep vegetables submerged, measure salt accurately, limit oxygen, and maintain a steady temperature so lactic-acid bacteria—not mold—take the lead.
Often used for shredded vegetables; always follow the tested recipe.
Approximately 65–72°F for many vegetable ferments.
Target pH must be verified with a suitable meter or narrow-range strips.
Use a weight and a vented lid; avoid unnecessary opening.
Build a mold-resistant environment
No single gadget guarantees success. Salt, acidity, ingredient quality, submersion, temperature, and time work together as one preservation system.
Start with a tested method
Choose instructions developed for the exact food. Cucumbers, cabbage, peppers, salsa, garlic, and hot sauce can require different salt levels and timing.
Weigh every gram of salt
A digital scale is more dependable than spoons because coarse, flaky, and fine salts occupy very different volumes.
Submerge every fragment
Use a food-safe weight or fermentation spring. Floating spices and small vegetable pieces are frequent starting points for surface growth.
Vent gas, block oxygen
An airlock or self-venting lid releases carbon dioxide while reducing incoming air. It does not correct weak brine or exposed food.
Keep temperature steady
Excess heat can produce soft, yeasty ferments. Excess cold slows acidification and extends the vulnerable early stage.
Use clean, sound produce
Wash hands and equipment thoroughly. Discard rotten, slimy, damaged, or moldy produce and avoid reactive aluminum or copper.
Measure by weight, not by guesswork
Salt suppresses spoilage organisms while favoring salt-tolerant lactic-acid bacteria. Too little weakens protection; too much can delay fermentation.
Classic cabbage ferment
= 20 g salt
This example uses salt equal to 2% of the vegetable weight. It is an illustration, not a universal formula for every ferment.
“2% salt” may refer to vegetable weight, water weight, or the combined weight of water and ingredients. Confirm which system the recipe uses before calculating.
From fresh produce to stable ferment
Each stage protects the next. A weak link—dirty equipment, exposed food, incorrect salt, or poor temperature—raises the chance of failure.
Choose fresh, firm, undamaged vegetables.
Follow the recipe and weigh salt precisely.
Press every solid beneath the brine.
Vent safely and maintain stable temperature.
Inspect, test acidity, then refrigerate.
Normal activity or warning sign?
Bubbles and cloudy brine can be ordinary signs of active fermentation. Surface growth, foul odors, or damaged produce demand a more cautious response.
| Observation | What it may indicate | Status | Response |
|---|---|---|---|
| Bubbles and cloudy brine | Active lactic-acid fermentation | ✓Expected | Keep solids submerged and continue the tested schedule. |
| Pleasantly sour aroma | Acid production is progressing | ✓Positive | Confirm the endpoint with pH testing and recipe timing. |
| Flat white surface film | Possible kahm yeast from oxygen exposure | ~Caution | Do not confuse it with fuzzy mold; when uncertain, discard. |
| Fuzzy green, blue, black, or pink growth | Mold or unwanted microbial growth | ✗Discard | Do not taste or scrape it away. Discard the entire batch. |
| Rotten odor, slime, or unusual discoloration | Spoilage or contamination | ✗Discard | Do not taste. Clean the equipment before starting again. |
Moderate and steady
For many vegetable ferments, 18–22°C (65–72°F) is a practical range. Use the range specified by the tested recipe and keep the vessel away from direct sunlight.
Before you leave the jar
A thirty-second inspection catches the most common causes of mold before they become problems.
Confirm the recipe
Use its exact salt calculation, vessel guidance, temperature range, and fermentation time.
Check the brine line
Vegetables, herbs, spices, and seeds must remain fully covered after bubbling begins.
Leave safe headspace
Allow room for carbon dioxide and rising brine without leaving ingredients exposed.
Use controlled venting
An airlock releases gas. A tightly sealed ordinary jar can build dangerous pressure.
Limit interference
Avoid repeated opening and never insert used utensils into the ferment.
Measure the endpoint
Test a representative sample with calibrated equipment, then refrigerate as directed.
Acidity adds confidence—not a universal guarantee.
A pH below 4.6 is an important food-safety threshold, but it cannot correct contamination, poor handling, toxins produced earlier, or an invalid recipe. Use a calibrated food-compatible meter or narrow-range strips and follow validated instructions throughout.
Start with a tested recipe—your best mold shield
Using a proven fermentation recipe is your first line of defense against mold. Recipes developed specifically for fermenting cucumbers, kraut, or peppers factor in salt, ingredient size, and timing. They guide you to the right salt level and fermentation time, which are crucial for creating a hostile environment for mold. For example, a classic sauerkraut recipe calls for 2% salt by weight, enough to suppress spoilage while promoting good bacteria. Deviating from tested formulas often leads to uneven acidification and mold growth.
fermentation weight for vegetables
As an affiliate, we earn on qualifying purchases.
As an affiliate, we earn on qualifying purchases.
Measure salt by weight—avoid guesswork that invites mold
Salt is a critical control point. Using a digital scale ensures precision—spoons can be misleading because salt crystals vary in size. For shredded vegetables, aim for about 2-3% salt relative to the vegetable weight. For example, 1 kilogram of cabbage needs roughly 20–30 grams of salt. This precise measurement helps create the ideal environment: enough salt to inhibit mold but not so much that it slows fermentation. Remember, incorrect salt levels can allow mold spores to thrive or produce a weak ferment. Too little salt provides a less hostile environment, giving mold spores a foothold. Too much, and it can hinder the beneficial bacteria, prolonging fermentation and increasing the risk of spoilage. Achieving the right balance is a tradeoff — enough to suppress mold but not so much that fermentation stalls, which could create an environment ripe for mold if conditions change.
As an affiliate, we earn on qualifying purchases.
Keep everything below the brine—your mold barrier
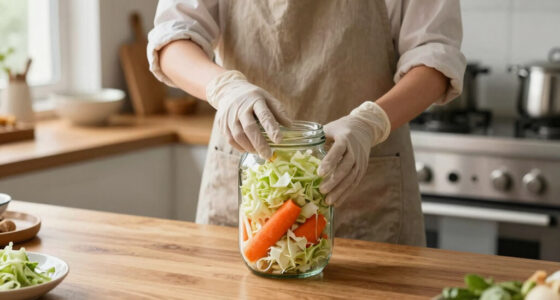
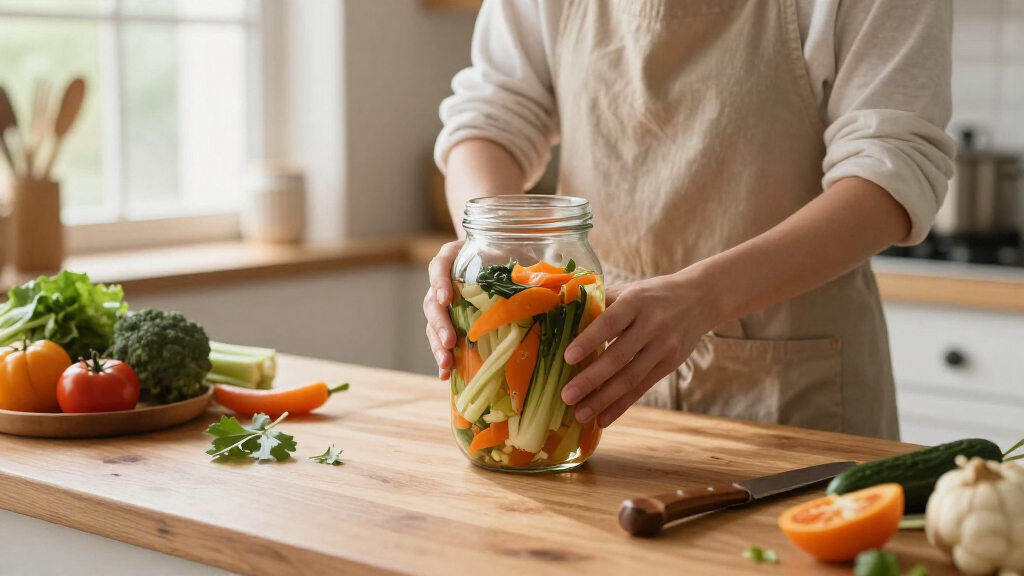
Any floating bits—herbs, seeds, vegetable pieces—are prime spots for mold to start. Use a fermentation weight or a clean stone to press everything down beneath the brine. For instance, when fermenting carrots, ensure all pieces are fully submerged; even a small bit sticking out can invite mold. Leave enough headspace for bubbling gases, and check regularly after bubbling begins. When bubbles push up the brine, top off with fresh brine if needed, maintaining the right salt concentration. Fully submerging ingredients is critical because mold needs oxygen to grow. Exposed surfaces or floating bits provide access points for mold spores, which can quickly colonize the entire batch. By consistently keeping everything under the brine, you create a sealed, anaerobic environment that favors beneficial bacteria and discourages mold. This is a simple yet effective tradeoff—it’s easier to keep everything submerged than to fight mold after it has taken hold. Regular checks and adjustments prevent accidental exposure and ensure the ferment remains safe and stable.
As an affiliate, we earn on qualifying purchases.
Limit oxygen without risking dangerous pressure
Oxygen fuels mold growth. Use an airlock lid or a self-venting system to let gases escape while blocking air from entering. For example, a one-way fermentation lid on a glass jar allows CO2 out, keeping oxygen out. Avoid tightly sealing jars with regular lids—pressure can build and cause breakage or create anaerobic conditions that favor mold. Cloth covers are cheap but need frequent monitoring to prevent oxygen exposure. An airlock makes this easier and safer. The tradeoff here involves balancing pressure release with oxygen exclusion. Improper venting can lead to pressure buildup, risking jar breakage, or oxygen ingress, risking mold. Using a proper system like an airlock reduces this risk by allowing gases to escape safely while maintaining a controlled environment. It simplifies the process, especially for beginners, and minimizes the chance of accidental mold growth caused by improper sealing or venting errors.
As an affiliate, we earn on qualifying purchases.
Control temperature—keep mold out and lactic acid in
Mold loves warmth and chaos. The ideal room temperature for most ferments is 18–22°C (65–72°F). Too warm, and you risk soft, yeasty, or moldy ferments; too cold, and fermentation slows down, giving mold more time to establish. For example, fermenting sauerkraut on a warm kitchen counter might get too soft or develop surface mold, while a cool cellar keeps everything steady. Use a thermometer to monitor, and keep the ferment out of direct sunlight. Maintaining consistent temperature is essential because fluctuations can disrupt the delicate balance of bacteria and yeasts, creating opportunities for mold spores to take hold. A steady environment ensures beneficial bacteria dominate, producing lactic acid that preserves the vegetables and inhibits mold. The tradeoff is between convenience and control—finding a cool, stable spot might require some effort, but it significantly reduces mold risk and enhances the quality of your ferment.
Start with clean, healthy ingredients—no mold starters needed
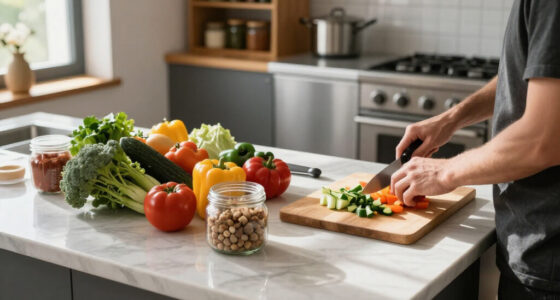
Wash your vegetables thoroughly with clean water, removing dirt and damaged parts. Use sanitized utensils and jars—no need for sterilization, just thorough cleaning. For example, rinse your cabbage leaves and use a clean knife and cutting board. Avoid using reactive metals like aluminum or copper, which can react with acids. Fresh, firm produce is less likely to harbor mold spores, giving your ferment a healthy start. Ensuring ingredients are clean reduces the initial load of mold spores and bacteria, which can otherwise establish a foothold during fermentation. This initial step makes a significant difference because it minimizes the risk of contamination and sets the stage for a successful, mold-free ferment. The tradeoff is that thorough cleaning is simple but essential—skimping here can lead to mold issues later, so investing time upfront pays off in the long run.
Measure acidity confidently—test pH for mold-proof assurance
Fermentation should produce a sour aroma and a pH below 4.6—this is the safety threshold. Use a calibrated pH meter or test strips to verify. For example, after 2 weeks, test your sauerkraut; if it’s below 4.6, it’s safe. Don’t rely on smell or bubbles alone, as they aren’t foolproof. Proper testing confirms your ferment has acidified enough to prevent mold and harmful bacteria. This is crucial because visual cues can be misleading—some molds can appear after the pH has dropped, especially if the environment fluctuates. Regular pH testing provides an objective measure, allowing you to make informed decisions about when your ferment is safe to store or enjoy. The tradeoff involves investing in a good pH meter or strips, but this small step adds a significant layer of safety, reducing the risk of mold-related health issues and ensuring your ferments are consistently safe.
Spotting mold or yeast—know what to look for
Active fermentation shows bubbles, cloudy brine, and a tangy smell. Kahm yeast appears as a flat, white or cream-colored film—harmless but often unpleasant. Mold, however, looks fuzzy, hairy, or raised, and can be green, blue, black, or pink. If you see fuzzy or colorful patches, especially if they are raised or hairy, discard the batch. When in doubt, throw it out. Safety comes before saving a batch. Recognizing these signs is essential because visual cues are your first line of defense. Kahm yeast, while harmless, can spoil the appearance and sometimes the flavor, but mold indicates a failure in the environment—often due to oxygen exposure or improper salt levels. Promptly discarding moldy batches prevents health risks and contamination of future ferments, emphasizing the importance of vigilance and proper technique.
Why mold grows—even when you think you’re safe
Common causes include floating ingredients, too little salt, excessive opening, warm temperatures, or damaged produce. For example, if you forget to weigh salt, the ferment may be too weakly salted, allowing mold spores to take hold. Or if you open the jar frequently, oxygen gets in, encouraging mold growth. Identifying and fixing these issues is key to mold-free ferments. Understanding why mold develops helps you troubleshoot and prevent future problems. For instance, floating ingredients create oxygen exposure, which mold needs to thrive. Insufficient salt weakens the preservative barrier, making it easier for mold spores to establish themselves. Excessive handling introduces oxygen and contaminants. Recognizing these tradeoffs allows you to adjust your process—using weights, minimizing openings, and maintaining proper salt levels—to create an environment inhospitable to mold and conducive to healthy fermentation.
Prevention checklist—your mold-proofing plan
- Choose fresh, undamaged produce.
- Use a tested recipe and weigh salt accurately.
- Keep all ingredients fully submerged.
- Maintain proper temperature and avoid direct sunlight.
- Use a safe venting method, like an airlock.
- Monitor regularly for surface growth or smell.
- Refrigerate once the desired acidity is reached.
Emerging tricks—making fermentation safer and easier
New fermentation lids with built-in airlocks and digital pH meters are changing the game. They help you control oxygen and measure acidity accurately. Home fermenters are increasingly using weight-based formulas—defining salt as a percentage of vegetable weight—to improve consistency. These tools and methods reduce mold risk and boost confidence in your ferments.
Frequently Asked Questions
Is the white layer Kahm yeast or mold?
A flat, cream-colored film usually indicates Kahm yeast—generally harmless but sometimes unpleasant. Fuzzy, hairy, or colored patches suggest mold. When uncertain, discard the batch to stay safe.
Can I scrape mold off and eat what’s underneath?
No. Especially with soft, moist ferments, mold can have roots below the surface. Discard the entire ferment if you see mold—safety is more important than saving a batch.
Why did mold grow despite using an airlock?
Possible reasons include floating ingredients, insufficient salt, too much headspace, or contamination during handling. Ensuring everything stays submerged and conditions are right helps prevent mold, even with an airlock.
Should everything be submerged in brine?
Yes. For vegetable ferments, all solids must stay below the brine to block oxygen. Floating herbs or vegetable pieces are exposure points for mold. Use weights to keep everything submerged.
How accurate does salt measurement need to be?
Very accurate. Use a digital scale to measure about 2–3% salt by weight of vegetables. This balance suppresses mold while promoting good bacteria. Deviations can lead to spoilage or weak fermentation.
Conclusion
Mold in fermentation isn’t just unsightly—it can be unsafe. The best way to prevent it is simple: keep everything submerged, measure your salt precisely, and control the environment. With these steps, you turn vegetables into safe, tangy treasures that last and taste great—no mold required. Think of it as creating a fortress for your ferments, one careful step at a time.Fall Picks
fall essentials
As an affiliate, we earn on qualifying purchases.