
TL;DR

Get kitchen gear delivered free — and shop member deals
- Fast, free delivery on millions of items
- Access to Prime Big Deal Days deals on October 6–7
- Prime Video, Amazon Music and more included
Dehydrating fruit leather at home involves selecting ripe fruit, blending it to a thick purée, spreading it evenly, and drying at low temperatures until fully dry but pliable. The process is simple, flexible, and allows for flavor customization.
If you’ve ever bought fruit leather in a store, you know it’s a chewy, sweet treat. But did you know you can make your own at home, tailored to your taste, with just a few simple steps? Homemade fruit leather isn’t just fun; it’s a way to use up ripe or surplus fruit, cut down on packaging waste, and control ingredients.
In this guide, you’ll learn how to turn fresh fruit into a flexible, shelf-stable snack. From choosing the best fruit to drying techniques and troubleshooting common issues, you’ll get practical tips to make perfect leather every time.
Select ripe, flavor-packed fruit free of spoilage for best results.
Spread purée evenly at about ⅛ inch thick on appropriate liners for uniform drying.
Dry at 135–140°F (57–60°C) for 6–12 hours, checking regularly for doneness.
Cool completely before rolling and store in airtight containers, refrigerated or frozen for longer shelf life.
Troubleshoot issues like uneven drying or stickiness by adjusting thickness, airflow, and drying time.
Dehydrating Fruit Leather at Home
Turn ripe fruit into a flexible, chewy snack. Blend it into a thick purée, spread an even layer, dry it gently, and package only after it has cooled completely.
From ripe fruit to finished leather
The technique is simple, but each stage controls the next. Better fruit and a smoother, thicker purée make even spreading and reliable drying much easier.
Select
Choose ripe, flavorful fruit without mold, fermentation, or spoiled areas.
Prepare
Wash, trim, pit, core, and peel when skins would create a fibrous texture.
Blend
Purée until smooth and aim for the consistency of thick applesauce.
Spread
Use a suitable liner and create a uniform ⅛–¼ inch layer.
Dry
Hold at 135–140°F until the center is dry, flexible, and easy to peel.
Fruit, texture, and flavor decisions
Ripe fruit often needs no added sugar. Customize with restraint: extra liquid sweetener increases stickiness, while oil and fat can shorten storage life.
Flavor-packed fruit
Apples, apricots, berries, cherries, mangoes, peaches, pears, plums, and strawberries all work well.
Thick applesauce
A smooth purée should spread easily without running. Strain berry seeds when a finer finish is preferred.
Add natural body
Reduce excess moisture or blend watermelon and similar fruit with applesauce, banana, or another high-pectin fruit.
Cook briefly first
Softening apples, pears, or peaches before blending can improve texture and slow enzymatic browning.
Layer in brightness
Try lemon juice, cinnamon, ginger, vanilla, citrus zest, or a small amount of herbs.
Sweeteners and fats
Honey and maple syrup can extend drying time. Avoid significant added oil because it can become rancid.
Low heat, steady airflow, patient checks
Actual drying time is a range, not a promise. Moisture content, tray loading, layer thickness, room humidity, airflow, and appliance performance all matter.
Your control settings
Use the manufacturer’s directions when they specify a different setting.
Make the center slightly thinner because tray edges usually dry first.
Parchment may be suitable when permitted. Never use wax paper.
Typical drying progression
Illustrative progress within the common 6–12 hour window; always judge the leather itself.
Choose the setup that keeps heat stable
A dehydrator offers the most predictable low-temperature environment. Oven drying can work, but only when the appliance can hold a sufficiently low temperature without baking the purée.
| Method | Temperature control | Airflow | Best use | Main caution |
|---|---|---|---|---|
| Dehydrator | ✓ Stable | ✓ Designed for drying | Consistent batches and multiple trays | Follow tray-loading and liner guidance |
| Low oven | ~ Variable | ~ May need ventilation | Occasional batches when the oven runs low | Excess heat can bake, brown, or scorch |
| Wax paper liner | ✗ Not applicable | ✗ Poor choice | Not recommended | Wax can soften, transfer, or interfere with drying |
Test the center, not just the edges
The thickest area is the last place to dry. A finished sheet should peel cleanly from the liner while remaining flexible enough to roll without shattering.
Ready to cool
- Surface feels dry rather than wet or tacky.
- Leather peels away without leaving purée behind.
- The center has no soft or visibly moist patches.
- The sheet bends and remains pleasantly pliable.
Pause and correct
- Sticky center means more drying is needed.
- Wet pockets suggest uneven spreading or airflow.
- Excessive cracking indicates overdrying.
- Brittle leather is usually edible but less enjoyable.
Diagnose the texture before packaging
Small adjustments to thickness, airflow, and time solve most fruit-leather problems. Never package a batch while any area still feels moist.
Sticky in the center
Continue drying and check whether the middle was spread thicker than the edges.
Edges turn brittle
Spread the center slightly thinner next time and begin checking earlier.
Drying is uneven
Improve airflow, level the purée, and rotate trays if the manufacturer recommends it.
Purée runs or cracks
Thicken a watery blend or add a little more purée to an overly thin layer.
Keep hidden moisture out of the package
Warm leather can create condensation in a closed container. Cooling fully before rolling and sealing is a small step with a major effect on storage quality.
No universal shelf life: stability depends on dryness, sanitation, ingredients, packaging, temperature, and humidity. Refrigerate or freeze for stronger protection, especially for low-sugar batches or warm, humid conditions. Discard leather with mold, fermentation, off odors, or unusual moisture.
Pick the Right Fruit for Perfect Leather Every Time
Start with ripe, flavorful fruit that’s free from mold or rot. Think: deep red strawberries, bright mangoes, or sweet peaches. Ripe fruit has the natural sugars needed to make the leather sweet and chewy without much added sugar.
Choosing ripe fruit matters because it impacts the final texture and flavor. Overripe fruit can become too mushy or ferment, which might lead to uneven drying or spoilage. Underripe fruit, on the other hand, may lack sufficient sweetness and can result in leather that’s tart or dry. The ripeness level influences the balance of sugars, acids, and moisture, all of which determine how well the leather dries and how it tastes.
For example, a batch of ripe apricots, blended into a smooth purée, will dry faster and taste richer than green, underripe fruit. Avoid watery fruits like watermelon unless you reduce their moisture first, or mix them with thicker purées.
Use fruit that’s mostly free of blemishes or bruises. If you’re using berries, pick ones without mold or fermentation. For apples or pears, remove cores and peels if they’re tough or fibrous.
As an affiliate, we earn on qualifying purchases.
How to Prepare Fruit for the Best Chewy, Flavorful Leather
- Wash the fruit thoroughly under cold water to remove dirt and bacteria.
- Remove stems, pits, cores, and damaged spots.
- Peel firm or fibrous fruit if the skin would affect texture or flavor.
- Puree until smooth in a blender or food processor, adding a splash of water if needed.
- Optional: Strain seeds from berries or fibrous bits for a smoother leather.
- Adjust consistency: it should resemble thick applesauce—not too runny or stiff.
For example, blending mango with a touch of lemon juice creates a bright, flavorful purée that dries evenly. Cooking firm fruits like apples briefly before blending can improve texture and slow enzymatic browning.
Use your judgment—aim for a uniform, thick purée that spreads easily without running off the tray. The consistency affects drying time and final texture: too thin, and it may crack; too thick, and it may remain sticky or take longer to dry. Achieving the right balance ensures a chewy, pleasant leather that’s neither brittle nor overly sticky.
As an affiliate, we earn on qualifying purchases.
The Best Equipment and How to Spread Your Purée for Even Drying
Use a dehydrator with fruit-leather sheets, silicone liners, or parchment paper. Avoid wax paper or plastic wrap—these can melt or trap moisture, leading to uneven drying or mold growth.
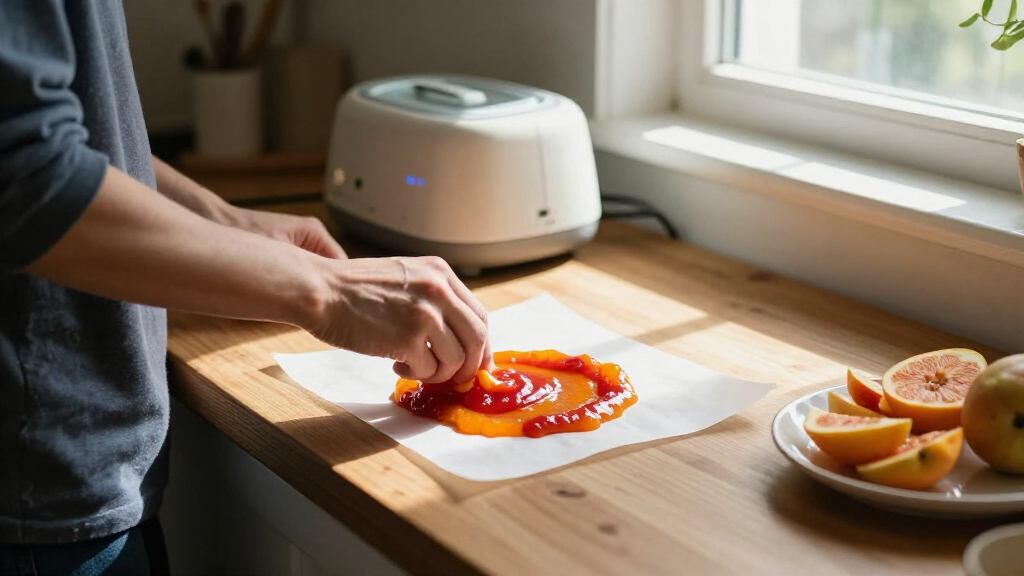
Spread your purée evenly across the tray, about ⅛ to ¼ inch thick. Make the center slightly thinner than the edges to compensate for faster drying at the edges, which helps prevent cracking or curling. For example, a standard tray holds roughly 1½–2 cups of purée, and spreading it uniformly ensures consistent thickness.
Consistency is key: too thick and it won’t dry evenly; too thin and it may crack or become sticky. Use a spatula or the back of a spoon to smooth it out smoothly. Ensuring an even layer minimizes drying time and reduces the risk of over- or under-dried spots, which can compromise texture and shelf life.
Remember: even spreading leads to uniform drying and a better texture, making the final product more pliable and enjoyable to eat.
As an affiliate, we earn on qualifying purchases.
How to Dry Fruit Leather Perfectly — Temperature, Time, and Tips
Set your dehydrator to around 135–140°F (57–60°C). This low, steady heat gently dries the purée without cooking or scorching it, preserving nutrients and flavor. Why does this matter? Because high heat can cause caramelization or browning, which not only alters the taste but can also reduce the shelf life by creating conditions for spoilage. Conversely, too low a temperature prolongs drying, increasing the risk that residual moisture encourages mold growth, especially in humid environments. Maintaining this optimal temperature balances efficient drying with the preservation of flavor and nutrients.
Expect drying to take 6–12 hours, depending on fruit moisture, thickness, and ambient humidity. Check at intervals—especially toward the end—to prevent over-drying. For oven drying, use the lowest temperature setting and prop the door open slightly for airflow, but keep a close eye to prevent baking or uneven drying. The goal is gentle, consistent heat that evaporates moisture without degrading the fruit’s delicate qualities. This careful control ensures your leather remains chewy and flavorful, not brittle or overly sticky, which is crucial for storage and enjoyment.
Don’t rush it. Patience results in more evenly dried, chewy leather. The key signs of readiness: it peels away easily from the liner, feels dry but flexible, and has no sticky patches. Rushing the process can lead to leathery patches that are either too brittle or too sticky, compromising texture and storage stability. Proper timing and temperature control also reduce the risk of mold or spoilage, which can occur if residual moisture persists. Remember, the texture and shelf life of your leather depend on these precise drying conditions.
For example, a batch of mango leather might take 8 hours, while berries could need closer to 10 hours. Adjust based on your results and the specific fruit used. Using a timer and checking periodically helps prevent over- or under-drying, which affects shelf life and texture. This patience and attention to detail are what turn simple dehydrated fruit into a professional-quality snack.
airtight storage containers for dried fruit
As an affiliate, we earn on qualifying purchases.
As an affiliate, we earn on qualifying purchases.
How to Know When Your Fruit Leather is Done (And Not Overdrying!)
Finish drying when the leather feels dry but still pliable. It should peel away from the liner easily and not feel sticky or moist in the center. Why is this important? Because if it’s under-dried, residual moisture can foster mold growth and spoilage during storage. If it’s over-dried, the leather becomes brittle, losing its chewiness and making it prone to cracking or breaking when handled. The goal is a perfect balance: dry enough to be shelf-stable but still flexible enough to chew comfortably.
Test the thickest part—bend it gently. If it cracks but doesn’t break, it’s ready. If it’s too brittle and cracks excessively, it’s over-dried, which can make it prone to cracking during storage or handling. Overdrying also causes the leather to become hard and less enjoyable to eat. Conversely, if it’s still sticky or feels moist, it’s under-dried and susceptible to mold or spoilage, which jeopardizes safety and shelf life. This is why checking the leather’s flexibility and surface dryness is essential—these indicators reflect the internal moisture level and overall quality.
Remember: a little overshoot is better than under-drying, as residual moisture fosters mold growth. Once cooled, it should bend without cracking or sticking to your fingers, indicating optimal dryness and flexibility. Properly dried leather will have a matte finish, with no shiny or sticky spots, and should be easy to peel without tearing. Achieving this perfect dryness ensures a long shelf life and optimal texture.
How to Store Your Fruit Leather for Long-Lasting Freshness
Cool the leather completely before cutting and rolling. Use a sharp knife to cut into strips or squares, then roll each piece in parchment paper.
Place the rolled leather in an airtight container or zip-top bag. Keep it in a cool, dark, and dry place—like a pantry or cupboard.
For longer storage, refrigerate or freeze. Properly stored, homemade fruit leather can last several months, but always check for mold, off odors, or moisture before eating.
Example: a batch stored in a sealed jar in the pantry might last 2–3 months, while frozen leather keeps for up to a year. Freezing slows enzymatic activity and moisture migration, helping maintain freshness and preventing spoilage over time.
It’s important to note that improper storage can lead to mold growth or texture changes. Airtight containers prevent moisture from entering, which is critical because residual humidity can cause mold or make the leather sticky over time. Refrigeration and freezing significantly extend shelf life by halting enzymatic activity that causes spoilage. Proper storage conditions, combined with thorough drying, are essential to maintaining flavor, texture, and safety over time.
Troubleshooting Common Problems (And How to Fix Them)
| Problem | Likely Cause | Practical Solution |
|---|---|---|
| Edges dry before the center | Thicker spread or uneven airflow | Spread more evenly; make the center slightly thinner; rotate trays if needed |
| Leather cracks or becomes brittle | Overdrying or too thin | Shorten drying time; spread purée slightly thicker next batch; monitor closely in the final stages to prevent over-drying. |
| Leather stays sticky | Too much moisture or excess sweetener | Continue drying; reduce liquid sweetener in future; ensure proper spreading to facilitate even moisture evaporation. |
| Color turns brown | Oxidation, high temperature, or overexposure to light | Work quickly, add lemon juice to slow oxidation, and reduce temperature. Proper storage in a cool, dark place also helps prevent discoloration. |
| Develops mold during storage | Insufficient drying or moisture exposure | Dry thoroughly, ensure airtight storage, and keep in low humidity environments. Using desiccants or vacuum sealing can also help extend shelf life. |
Always discard moldy or suspicious batches. Mold can spread beyond what you see, and consuming moldy leather can cause health issues. Proper troubleshooting and prevention help ensure your homemade leather remains safe and enjoyable.
Adjust your process based on these common issues for better results next time.
Latest Trends: Smarter, Healthier, and Waste-Free Fruit Leather
Home preservers are moving toward lower-sugar recipes that rely on fully ripe fruit and natural sweetness. Upcycling leftovers, like pulp from juicing, and using reusable silicone sheets are gaining popularity.
Newer dehydrators with adjustable thermostats and even airflow help get consistent results, reducing guesswork. Combining fruit with vegetables like pumpkin or carrots creates nutrient-rich, colorful blends.
Careful balancing of acidity, thickness, and ingredients leads to better storage and flavor. The trend toward individual roll-ups and freezer-friendly portions minimizes waste and maximizes freshness.
Frequently Asked Questions
Do I need to cook fruit before dehydrating it?
Not always. Soft, ripe fruit can be puréed raw, but cooking firm fruit like apples or peaches can improve texture and slow browning. Always start with clean, good-quality fruit.Is sugar necessary?
No. Fully ripe fruit often provides enough natural sweetness. Adding sugar is optional and can make the leather stickier, so use it sparingly if desired.Can I use frozen fruit?
Yes. Thaw it first and include only the released juice to keep the purée thick. Frozen fruit may dry slightly differently but still works well for homemade leather.How long does drying usually take?
Most batches take 6–12 hours, depending on fruit moisture, thickness, humidity, and equipment. Check often near the end for perfect doneness.Can I make fruit leather in an oven?
Yes, if your oven can hold a steady low temperature like 140°F (60°C). Use the oven’s lowest setting, prop the door open slightly, and monitor closely to avoid baking.Conclusion
Homemade fruit leather is a simple, rewarding project that turns ripe fruit into a chewy, portable snack. With a little patience, you can craft healthy treats tailored to your taste and storage needs. Just remember — even drying, proper storage, and a sharp eye are your best tools for success.
Next time you see a pile of ripe fruit on the counter, think: that’s your next batch of delicious, self-made leather. It’s more satisfying than store-bought and a true sign of your off-grid, self-reliant kitchen skills.
Fall Picks
fall essentials
As an affiliate, we earn on qualifying purchases.