
TL;DR

Get kitchen gear delivered free with Prime
- Fast, free delivery on millions of items
- Prime Video, Amazon Music and more included
- Member-only deals all year
After each batch, empty your fermentation crock promptly, wash it and its parts with warm water and mild dish soap, rinse thoroughly, and let everything dry completely. Clean the lid, weights, and water moat separately; avoid abrasives and unapproved cleaners, and check the maker’s instructions before using a dishwasher, sanitizer, or a damaged crock.
Wash the crock promptly after each batch with warm water, mild dish soap, and a soft cloth or sponge.
Clean the lid, weights, and water moat separately, then rinse and dry every part completely.
Use vinegar, bleach, baking soda, and dishwasher cycles only when the maker’s instructions permit them.
Inspect for chips, cracks, damaged glaze, residue, and odors before reusing; ask the maker about damage or persistent mold.
Store the crock fully dry in a clean, protected place without heavy items stacked on it.
The practical care guide · Home fermentation
Fermentation Crock Care and Cleaning
A gentle wash, a thorough rinse, and complete drying help protect your crock’s finish and water seal. Clean every part after each batch, inspect before reuse, and follow the maker’s instructions for your crock’s material.
Five habits that protect your crock
Small steps after each batch help preserve the smooth surface, keep the seal working, and make the next ferment easier to start.
Wash promptly with warm water, mild dish soap, and a soft cloth or sponge.
Clean the lid, weights, and water moat separately; rinse and dry every piece.
Use vinegar, bleach, baking soda, or a dishwasher only when the maker permits it.
Check for chips, cracks, damaged glaze, residue, and odors before reusing.
Store fully dry in a clean, protected place with no heavy items stacked on top.
Check product instructions first: care can differ by material and finish.
Clean it while residue is still damp
Brine and vegetable fibers come away more easily before they dry. A steady, gentle wash also helps avoid the temptation to scrub with something abrasive.
Remove the ferment and lift out the weights.
Use warm water, mild soap, and a soft cloth.
Wash the lid, weights, and moat if fitted.
Rinse until clear and no longer slippery.
Inspect dry pieces before storing or reuse.
Choose the tool to match the surface
A smooth, intact surface is easier to clean. Avoid rough tools that can scratch glaze, and never force a lid that no longer fits evenly.
Soft cloth or sponge
Wash the crock and parts with warm water and mild dish soap. A soft spatula or wooden spoon can help lift stuck food without scraping.
Skip abrasive scrubbers
Steel wool, scouring powder, and rough scrubbers may scratch a glazed surface. Don’t scrape with a knife; chips and rough areas are harder to clean reliably.
Clear the soap away
Give the rim and corners an extra pass. Soap residue may affect the flavor of the next batch; rinse until the crock feels clean, not slippery.
Clean the moat and lid
Empty and wash the water channel. Dried brine or debris can interfere with the lid’s fit, so inspect the dry pieces before reassembling.
What’s suitable depends on the maker
Glazed ceramic, unglazed stoneware, and other materials can respond differently to heat, detergents, and treatments. Follow instructions for your specific crock.
| Method | Routine guidance | What to check |
|---|---|---|
| Warm water + mild soap | ✓ Dependable starting point | Rinse thoroughly and air-dry completely |
| Dishwasher | ~ Only if approved | Heat, detergent, size, and safe handling |
| Vinegar or sanitizer | ~ Maker’s directions only | Approved product, dilution, and rinsing |
| Bleach | ✗ Avoid unless specifically recommended | Exact safe dilution and rinsing instructions |
| Baking-soda paste | ~ Possible for odor or stains | Check care guidance; test carefully; never mix cleaners |
Clean first, then investigate
Odors can tell you whether residue or moisture may remain. Start with a warm-water soak and gentle scrubbing, then rinse and dry completely.
Faint cabbage smell
A mild food smell after sauerkraut can be normal. Wash away residue, rinse thoroughly, and let the crock and parts dry in a well-aired place.
Musty smell that persists
Check for trapped moisture, leftover residue, or a more porous material. Try a warm-water soak and gentle cleaning; consult the maker if it remains.
Stain or stubborn residue
Soak in warm water and use gentle scrubbing. Baking soda may help with some stains or odors, but use it only if the care guidance allows.
Chip, crack, or damaged glaze
Pause before reuse and ask the manufacturer for advice. Don’t force an ill-fitting lid; damage can affect cleanability or the water seal.
Dry first. Store second.
Leave the crock, lid, and weights with enough space for air to move around them. A towel can catch drips, but don’t close damp pieces inside the crock. Store everything clean and protected.
Before the next batch
When in doubt, use gentle washing and the crock maker’s product-specific care instructions.
Do I need to sterilize between batches?
Usually not. Thorough washing and rinsing are sufficient for most home fermentation; follow the maker’s guidance.
Can I put it in the dishwasher?
Only if the manufacturer says it is dishwasher-safe. Large or heavy crocks may also be difficult to handle safely.
Can I use vinegar or bleach?
Use only treatments approved for your crock. Never mix cleaning products, and follow any specified dilution and rinsing steps.
How do I clean the water moat?
Empty it, remove visible residue, wash it gently, rinse well, and let it dry fully before reuse.
What if the smell remains?
Soak with warm water, wash gently, rinse, and dry completely. If the odor persists, check material guidance or contact the maker.
What if the lid stops fitting?
Check for debris and damage once the parts are dry. Don’t force it into place; ask the manufacturer if the fit has changed.
Wash the Crock Before Residue Dries
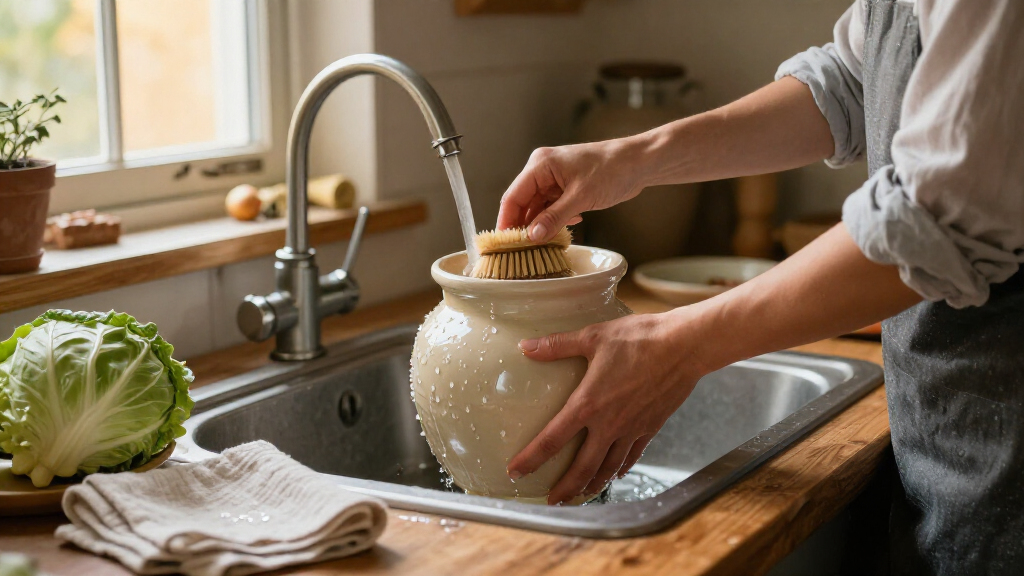
Fermentation crock care starts with a prompt wash: empty the crock after a batch, remove food residue, wash with warm water and mild dish soap, rinse thoroughly, and air-dry every part. Cleaning before brine dries makes the job easier and leaves less residue clinging to the interior. That matters because dried brine and vegetable fibers take more scrubbing to remove, increasing the chance you’ll reach for an abrasive that can damage the finish. Use a soft cloth or sponge on glazed surfaces. A wooden spoon or soft spatula can help lift cabbage leaves stuck near the bottom, but don’t scrape with a knife. Steel wool, scouring powder, and rough scrubbers can scratch glaze; a roughened or chipped surface is harder to clean reliably. Gentle cleaning may take a little longer on stubborn residue, but it protects the smooth surface that makes later washing easier. For example, after packing up a crock of sauerkraut, you might rinse out the brine, wipe away cabbage strands, then wash the crock and weights while the residue is still damp. Rinse until the water runs clear and the crock no longer feels slippery. Soap left behind may affect the flavor of your next batch, so give corners and the rim an extra pass. These checks also help distinguish a clean crock from one that merely looks clean while a slippery film remains. Check the maker’s care instructions first. Glazed ceramic, unglazed stoneware, and other materials can respond differently to water, detergents, and heat. If your crock is too heavy to wash comfortably in a sink, set it on a stable surface and clean it in manageable stages rather than wrestling it over slippery dishes. The tradeoff is a slower wash, but steady handling lowers the chance of dropping the vessel or chipping its rim.Products Worth Considering

Cuisinart Chef's Classic 7-Piece Stainless Steel Cookware Set

Cuisinart Chef's Classic 17-Piece Stainless Steel Cookware Set

Cuisinart MultiClad Pro 12-Piece Stainless Steel Cookware Set
As an affiliate, we earn on qualifying purchases.
Clean the Lid, Weights, and Water Moat Too
Fermentation crock care includes each piece that touches food or helps the seal work: wash the lid, weights, and any water-seal moat with warm water and mild dish soap, then rinse and dry them. A clean crock can still be hard to use if dried brine blocks the lid’s channel or leaves grit on a weight. Debris in the moat can also interfere with the lid’s fit, so cleaning these parts supports both hygiene and the seal’s function. Follow this simple sequence after removing the finished ferment:- Lift out the weights and rinse away cabbage, brine, or other food residue.
- Wash the crock and lid with a soft cloth or sponge and mild dish soap.
- Empty and wash the water moat if your crock has one; clear out any dried brine or debris.
- Rinse every part well and set it aside to air-dry completely.
- Inspect the dry pieces before storage or the next batch.
Use Gentle Cleaning, Not an Unapproved Sanitizer
For most home fermentation, careful washing and rinsing are sufficient between batches; sterilizing the crock is generally unnecessary. Your goal is to remove food residue and leave clean, dry surfaces, not to expose an unknown glaze or stoneware to the strongest cleaner on the shelf. Routine sterilizing adds effort without usually improving ordinary between-batch cleaning, and an unsuitable treatment can harm a surface or leave residue. Vinegar, bleach, and other sanitizing treatments are not universal crock-care shortcuts. Some makers permit diluted vinegar or a specific sanitizer, while another crock’s material or finish may not tolerate it. Use a treatment only when the manufacturer gives instructions for that exact kind of crock, including dilution and rinsing directions. Never mix cleaning products. The tradeoff is that checking instructions takes an extra moment, but it avoids guessing about both material compatibility and chemical residue. Suppose you finish a batch and wonder whether a quick bleach rinse will make the next one safer. Pause and check the care guide first. Bleach can damage some materials, and using an improvised concentration leaves you guessing about residue as well as surface compatibility. A thorough wash with mild dish soap and a complete rinse is the more dependable starting point because it removes visible food soils without relying on an unverified chemical treatment. Dishwashers also depend on the maker’s instructions. Heat and detergent may be unsuitable for some crocks, and a large, heavy vessel can be awkward to load or remove. If the instructions don’t say that the crock is dishwasher-safe, wash it by hand. Don’t read silence as permission. Handwashing takes more effort, but it gives you control over temperature and handling, which can matter for a heavy or delicate crock.Clear Odors and Stains Without Scratching the Surface
To handle a lingering smell or stain, begin with a warm-water soak and gentle scrubbing, then rinse and dry the crock fully. A mild sour smell after a ferment can cling to residue; a musty odor that remains after cleaning may point to trapped moisture or a more porous surface. Treating those smells as clues helps you choose the next step: remove residue first, then consider drying conditions and material if the odor persists. Imagine you’ve made garlic-heavy pickles and the empty crock still smells sharp the next morning. Soak it in warm water, wash with mild dish soap, and rinse it well. Leave the parts in a place with good airflow until completely dry, then check the smell again. Don’t put the lid on a damp crock and hope the odor disappears in storage. A smell that fades after drying often came from residual moisture; one that stays may need material-specific advice. A baking-soda paste may help with some surface stains or odors, but apply it gently and follow the crock’s care guidance. Test a small area if you’re unsure whether the finish will tolerate it. Skip scouring powder and abrasive pads; they can turn a simple stain into a scratched surface that catches food residue later. A mild approach can require repeat cleaning, but that is preferable to removing or roughening a finish that cannot be restored at home. If a smell persists after a careful wash and full drying, consider whether the crock is unglazed or porous and consult the maker’s advice. The same cleaning routine may not suit every material. Mold on a removable weight or other part calls for thorough washing and an inspection; if it has penetrated a porous piece or won’t come off, ask the maker before reusing it. That pause matters because persistent odor or embedded mold can indicate that routine washing is not reaching the affected surface.Inspect Chips and Cracks Before the Next Batch
Check the crock, lid, and weights before each reuse for chips, cracks, damaged glaze, lingering residue, and odors. A damaged food-contact surface can be harder to clean, and a small flaw may worsen with handling or temperature changes. Inspection is most useful while the crock is empty: you can assess the surface without food obscuring it and decide what to do before investing time in another batch. Run your eyes over the rim and interior in good light, especially after a crock has been moved or stored in a busy cupboard. For instance, a tiny chip near the rim might be easy to miss under kitchen shadows, but it can change how the lid sits. Don’t assume a damaged crock remains suitable for food just because it held the last batch without trouble. A previous successful ferment cannot show whether the flaw will deepen or whether residue can collect in it over time. If you find a crack or a chipped food-contact surface, pause before filling the crock again and ask the manufacturer whether it can still be used. Their advice can account for the material and construction. A hairline mark may be hard to judge at home, so don’t try to patch it with an unapproved coating or household glue. A repair that looks smooth may not be suitable for food contact or repeated washing, so maker guidance is more useful than appearance alone. Inspect the weights too. If a weight is cracked, has a damaged finish, or holds residue you cannot remove, get maker guidance before using it again. The point is practical: catching a problem while the crock is empty is easier than discovering it after you’ve prepared a batch of vegetables and brine. It also gives you time to find a safe replacement if one is needed.Store the Crock Dry, Protected, and Ready
A fermentation crock can last for years with routine cleaning and careful handling, provided you follow its material-specific care instructions. Before storage, wash and rinse all pieces, let them dry completely, and put them somewhere clean where they won’t be knocked or crushed. Storage continues the care routine: even a well-washed crock can develop musty odors or be damaged if it is sealed damp or crowded into an unstable spot. A crock drying beside an open window after a weekend batch is easier to store safely than one sealed away while damp. Make sure moisture has left the crock, lid, weights, and water channel. Then choose a stable cupboard or shelf with enough clearance to lift the vessel without banging its rim against a cabinet frame. Waiting for full dryness can delay storage, but it reduces the chance that moisture will sit unnoticed between uses.- Store it dry: don’t trap water inside a closed crock.
- Protect the rim and lid: avoid bumping them against hard surfaces.
- Keep heavy objects off it: stacking pans or jars on top risks chips and cracks.
- Avoid sudden temperature changes: follow the maker’s limits for moving the crock between hot and cold settings.
- Keep the pieces together: store weights and lid where you can inspect them before the next batch.