TL;DR

Get kitchen gear delivered free with Prime
- Fast, free delivery on millions of items
- Prime Video, Amazon Music and more included
- Member-only deals all year
You can can food without a dishwasher or household power by hand-washing jars, using a safe non-electric heat source, and following a current tested recipe. Use boiling-water canning only for tested high-acid foods, and use a pressure canner for low-acid foods such as vegetables and meat. Clean jars help, but the tested processing step is what makes food shelf-stable.
The power goes out just as a pot of peaches starts to bubble, and your clean jars are still waiting by the sink. You can keep going if you have a safe heat source and the right canner. A dishwasher and electricity are convenient, but neither one makes food shelf-stable.
This guide shows you how to wash and warm jars by hand, choose equipment for the food you are preserving, and plan for wood, propane, or camp-stove heat. You will also learn where improvisation becomes dangerous: low-acid foods need pressure canning, and a longer boiling-water bath cannot take its place.
The key points for canning without a dishwasher or power are simple: clean jars, a tested recipe, suitable equipment, and enough steady heat to complete the process. Think of the recipe as a map and your heat source as the road. If either one fails, stop and choose a safer plan.
Wash canning jars by hand with hot water and dish soap, rinse thoroughly, inspect the rims, and keep jars warm when the recipe calls for it.
Many boiling-water processes lasting 10 minutes or longer do not need separate jar sterilizing; follow recipe directions for shorter processes.
Use boiling-water canning only for tested high-acid recipes; low-acid vegetables, meat, poultry, seafood, and soups require a pressure canner.
A stockpot can serve for boiling-water canning only when it is deep enough, has a lid, and holds a rack that allows water to cover and circulate around jars.
Do not improvise with an unsuitable burner, pressure cooker, altered recipe, oven canning, or open-kettle method; use another preservation plan if you cannot c…
Off-grid food preservation · Safety guide
Canning Without a Dishwasher or Power
Hand-wash jars, choose a safe non-electric heat source, and follow a current tested recipe. Clean jars matter, but the tested processing step is what makes food shelf-stable.
Match the canner to the food
A boiling-water bath cannot replace pressure canning for low-acid foods. Extra boiling time does not make that substitution safe.
Tested high-acid recipes
For most fruits, jams, pickles, and properly acidified tomatoes. A deep stockpot can work if it has a close-fitting lid, a rack, and enough depth to keep jars covered by the recipe’s required water level throughout processing.
Low-acid foods
Required for plain vegetables, meat, poultry, seafood, and soups. Use a pressure canner designed for the tested process, food, jar size, and altitude. A pressure cooker or multicooker is not an automatic substitute.
Hand-wash, inspect, keep warm
A dishwasher is convenient, not essential. Careful hand washing can prepare jars for a safe canning session.
Wash and rinse well
Scrub canning jars in hot water with dish soap, then rinse thoroughly. Set them in hot water to keep them warm when the recipe calls for it.
Check rims and glass
Use jars intended for canning. Set aside jars with cracks, rough rims, chips, or damaged sealing surfaces; a damaged rim can prevent a proper seal.
Follow process time
Many boiling-water processes of 10 minutes or longer do not require separate jar sterilizing. Shorter processes may; follow the tested recipe.
Steady heat. Exact instructions.
Non-electric heat can work when it safely holds the required conditions for the full process.
Bars indicate planning checks, not a ranking of equipment. Confirm burner capacity and stability. For pressure canners, follow the manufacturer’s heat-source guidance; intense or uneven heat may be unsuitable for some canners. Plan fuel and water before filling jars, and monitor timing and required water levels.
Prepare before food is ready
Think of the tested recipe as a map and your heat source as the road. If either fails, stop and choose a safer plan.
Choose recipe
Use a current tested recipe from a reliable food-preservation authority.
Check equipment
Confirm the correct canner, jar size, rack, lid, gauge, and burner setup.
Prep jars and fuel
Hand-wash and inspect jars. Lay out tools, ingredients, water, and fuel.
Process as written
Use the specified time, pressure, method, and altitude adjustment.
Shortcuts that change the process
Follow ingredient proportions, jar size, processing time, method, and pressure exactly unless the tested recipe allows a change.
Do not alter the recipe
Changing acidity, ingredients, jar size, time, or pressure can make the process unsafe.
Account for altitude
Check the recipe for the adjustment where you live. Follow the specified pressure and gauge type.
No oven or open-kettle canning
Do not use oven canning, open-kettle methods, or turning filled jars upside down as substitutes.
A sealed lid proves only a seal
A lid that seals does not show that food received the tested process needed for safe storage.
Hand-wash jars and keep them ready for hot food
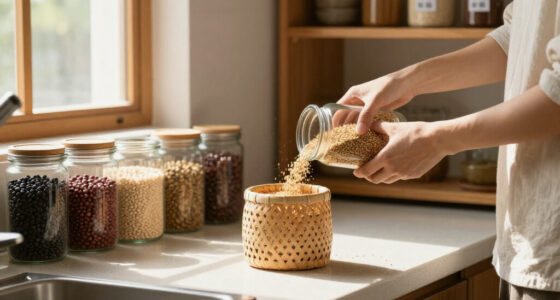
Canning Without a Dishwasher or Power starts with a thorough hand wash: scrub jars in hot water with dish soap, rinse them well, inspect them, and keep them warm until filling. A dishwasher can wash jars, but clean running water, soap, and careful hands can do the job too. The jar’s rim deserves special attention because a chip there can prevent a proper seal.
For example, if you are filling jars with hot peach slices, wash the jars before the fruit reaches its simmer and set them in a pot of hot water. Warm jars are less likely to crack when they meet hot food or canner water. Use jars intended for canning, and set aside any with cracks, rough rims, or damaged sealing surfaces.
Separate sterilizing depends on the recipe and processing time. In general, jars processed for 10 minutes or longer in a boiling-water canner do not need a separate sterilizing step. A shorter process may require sterilized jars, so follow the tested recipe instead of guessing.
Remember that jar preparation and food processing are different jobs. Washing removes dirt and residue; the prescribed heat process treats the food for safe storage. A spotless jar that skips its proper processing is still not shelf-stable.
Products Worth Considering

Cuisinart Chef's Classic 7-Piece Stainless Steel Cookware Set

Cuisinart Chef's Classic 17-Piece Stainless Steel Cookware Set

Instant Pot Pro 8-Quart 10-in-1 Electric Pressure Cooker, Black
As an affiliate, we earn on qualifying purchases.
Match the canner to the food before you light the stove
Canning Without a Dishwasher or Power still requires the canning method the food calls for. A boiling-water canner is for tested high-acid recipes, including most fruits, jams, pickles, and properly acidified tomatoes. Low-acid foods—such as plain vegetables, meat, poultry, seafood, and soups—need a pressure canner and a tested process.
This distinction matters because boiling water reaches a lower temperature than a pressure canner. No amount of extra boiling time turns a water bath into a safe substitute for pressure canning low-acid food. If you have a basket of green beans and no pressure canner, refrigerate or freeze them, or choose another preservation method suited to them.
A deep stockpot can work as a boiling-water canner if it has a close-fitting lid, enough depth to keep jars covered by the recipe’s required amount of water throughout processing, and a rack that holds jars off the bottom while water circulates. Picture a rack as a little bridge: it prevents direct contact with the pot floor and lets hot water move around the glass.
A stockpot is not a pressure canner. Neither is a pressure cooker or electric multicooker automatically suitable for shelf-stable canning. Use a pressure canner designed for the tested process, food, jar size, and altitude. Check the recipe’s pressure setting and whether it specifies a dial gauge or weighted gauge.
Choose a heat source that can hold steady through processing
A non-electric heat source can power canning only if it safely supplies controllable heat for the full process. Depending on your setup, that may mean a wood stove, propane burner, or camp stove. The flame is only part of the equation: you need to maintain the required conditions while monitoring the canner and timing the recipe.
Suppose you have a propane camp stove and a batch of pickles. Before you start, check that the burner supports the pot’s size and weight, then confirm that you can keep the water at a full boil for the required time. A gusty outdoor setup or a weak flame can disrupt the process; if you cannot hold the conditions, do not rely on an approximate time.
Pressure canners call for extra care. Not every outdoor burner, campfire, or wood-stove surface works safely with every canner. Intense or uneven heat can cause problems, and some canners have specific requirements for flat-bottomed surfaces. Read the manufacturer’s instructions for your equipment and follow the tested recipe.
Plan for fuel and water before filling jars. A canning session can use plenty of both, and hand-powered preparation takes attention: ingredients need chopping, jars need handling, and timing needs watching. Lay out tools and ingredients first. If the heat source falters halfway through, pause and follow reliable canning guidance for that situation rather than improvising a new process.
Follow the tested recipe instead of making canning shortcuts
A tested recipe sets the food proportions, jar size, processing time, method, and pressure that make a canning process safe. Use a current recipe from a reliable food-preservation authority and follow it as written. That rule matters whether you cook over an electric range or a wood fire.
Imagine a family recipe for salsa that calls for a certain amount of vinegar. Adding less because the batch tastes too sharp changes the acidity and can change the safety of the process. Likewise, changing jar size, extending or shortening time, or swapping water-bath processing for pressure canning can invalidate the instructions.
Altitude can affect processing instructions, so check the recipe for the adjustment that applies where you live. For pressure canning, use the specified pressure and account for your canner’s gauge type. A dial gauge and a weighted gauge do not necessarily use the same directions.
Do not use oven canning, open-kettle canning, or turning filled jars upside down as substitutes for tested processing. A lid that seals is not proof that food was safely treated. The seal helps close the jar; the tested heat process is what makes the contents suitable for shelf storage.
Use a simple checklist to prepare an off-grid canning session
You can make a no-power canning session more manageable by checking your recipe, jars, canner, and heat source before food is ready. That short pause prevents the scramble of discovering a cracked jar or inadequate pot after the fruit is cooked. Here is a practical order to follow.
- Choose the recipe and method. Confirm whether the food calls for boiling-water or pressure canning, and check jar size, time, pressure, and altitude directions.
- Inspect the equipment. Look over jars and rims, set up the rack, and check that the canner and heat source are compatible.
- Prepare water and fuel. Have enough water for the process and enough fuel to maintain the required heat. If you are outdoors, account for wind and changing weather.
- Wash and warm the jars. Use hot soapy water, rinse thoroughly, and follow the recipe’s jar-preparation instructions.
- Process and monitor. Follow the tested steps and timing. For water-bath canning, keep jars covered by the required depth of water; for pressure canning, follow the specified pressure and gauge directions.
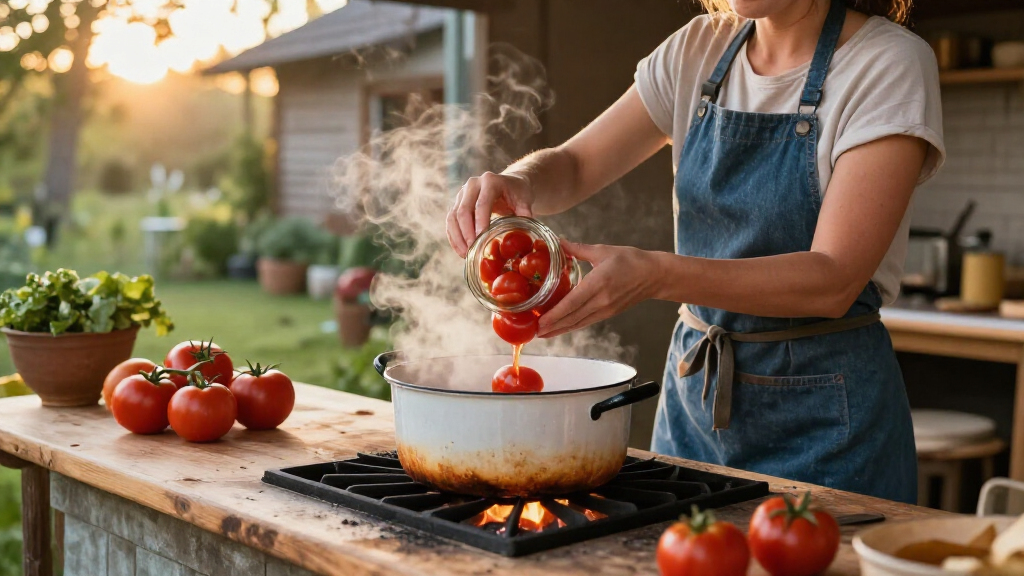
For instance, before a late-summer tomato batch, you might discover that your stockpot is deep enough for pint jars but not quart jars with the required water cover. Catching that before you heat the food lets you choose suitable jars or equipment. It is a small check with a real payoff.
Know when to stop and store the food another way
Pause a canning session whenever you cannot maintain the tested process or verify that your equipment suits the recipe. A power outage does not automatically end canning, but losing the only reliable burner, running short of water, or finding that your pressure canner is unsuitable means you need another plan. A safe batch is worth more than a hurried shelf of jars.
Say you planned to pressure-can soup on a camp stove, then notice the burner manual does not support your canner’s weight or heat needs. Do not try to make it work by shifting the pot over a fire. Refrigerate or freeze the soup if possible, or use a preservation method validated for that food and setup.
If a jar fails to seal, treat that as a separate problem from whether the food was processed correctly. Refrigerate the contents and use them promptly, freeze them if suitable, or reprocess within the time and conditions recommended by a reliable canning authority. Do not assume a lid that stays down proves the food is safe.
Electricity can be convenient for lighting, timing, or heating, but canning without it depends on preparation and control. A hand timer, written process notes, and a stable heat source can help. If any essential condition is uncertain, choose cold storage or another appropriate method instead of room-temperature storage.
Frequently Asked Questions
Do canning jars have to go through a dishwasher?
No. Wash jars thoroughly by hand with hot water and dish soap, rinse them well, and keep them warm when the recipe calls for hot jars. Inspect each rim for chips before filling.
Can I can food during a power outage?
Yes, if you have a safe, reliable non-electric heat source and the equipment required by a tested recipe. Use a boiling-water canner for suitable high-acid foods and a pressure canner for low-acid foods. Do not begin if you cannot maintain the required process.
Can I use a regular stockpot for water-bath canning?
A stockpot may work if it has a lid, is deep enough to keep jars covered by the recipe’s required amount of water, and holds a rack that keeps jars off the bottom while water circulates. It cannot replace a pressure canner for low-acid foods.
Can I pressure-can in a pressure cooker or multicooker?
Do not assume that a pressure cooker or multicooker is validated for shelf-stable canning. Use a pressure canner suitable for the tested process, food, jar size, and altitude, and follow its manufacturer’s directions.
Do I need to sterilize jars before every batch?
Not always. For many boiling-water processes of 10 minutes or longer, a separate sterilizing step is unnecessary. Shorter processes may require sterilized jars, so follow the tested recipe.
Can I water-bath can vegetables if I boil the jars longer?
No. Low-acid vegetables require pressure canning using a tested recipe. Extending a boiling-water process does not make it a safe substitute, so refrigerate or freeze the vegetables if you do not have a suitable pressure canner.
Conclusion
Remember the part that makes the difference: clean jars prepare the food for filling, but the tested process makes it shelf-stable. Hand-wash, choose the correct canner, and use a steady heat source that can carry the recipe through.
If your setup cannot meet those directions, put the food in cold storage or choose another validated method. A row of safely preserved jars should feel like a quiet promise on the pantry shelf, not a gamble.