
TL;DR

Get kitchen gear delivered free with Prime
- Fast, free delivery on millions of items
- Prime Video, Amazon Music and more included
- Member-only deals all year
Canning tomatoes safely hinges on proper equipment, acidification, and tested recipes. Pressure canning is safest for low-acid varieties, while water bath works for high-acid tomato products with added acid. Follow recent guidelines to avoid foodborne risks.
Always use a pressure canner for low-acid tomato products to prevent botulism.
Add the correct amount of bottled lemon juice or citric acid—never skip this step.
Follow tested recipes from reliable sources like USDA or university extension services.
Adjust processing times and pressure for your altitude; don’t guess.
Inspect jars carefully after processing; discard any with compromised seals or signs of spoilage.
Canning Tomatoes Safely
Behind every bright, tangy jar of summer tomatoes lies a crucial question: is it truly safe to eat? Safety hinges on proper equipment, precise acidification, and tested recipes — because when it comes to home canning, safety isn’t optional; it’s the foundation of every jar.
Two Canners, One Rule: Acidity Decides
Tomatoes are borderline in acidity — some varieties are naturally more acidic than others. The method you choose depends entirely on whether the pH of your final product sits safely below 4.6.
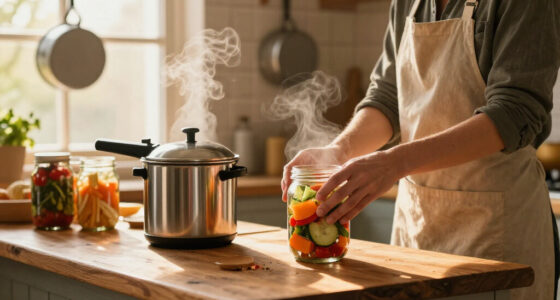
Pressure Canning
The only reliable way to process low-acid foods — especially tomatoes combined with vegetables or meats. Destroys botulism spores at temperatures above boiling.
✓ Safest for low-acidWater Bath Canning
Works only for high-acid tomato products with added bottled lemon juice, vinegar, or citric acid. Never use for low-acid recipes without acidification.
~ Only with added acidDigital Pressure Canners
Precise temperature controls make safe processing easier — even off-grid. Manual models work fine too, if gauges are calibrated and seals inspected before each use.
✓ Calibrate your gaugeAcidify Correctly, Every Jar
Adding the right amount of acid transforms the jar into an inhospitable environment for Clostridium botulinum. Without it, even a perfectly sealed jar can become a breeding ground for deadly toxin. Follow USDA-tested measurements — never guess.
Seven Steps to a Safe Jar
Each step builds a fortress against spoilage and botulism. Skipping even one can compromise the safety of your entire harvest.
Sterilize jars & lids
Wash in hot soapy water, boil or oven-sterilize. Keep warm until filling.
Peel & prep tomatoes
Score an “X,” blanch 30–60 sec, ice-bath, peel. Ensures even heat penetration.
Add acid to each jar
Bottled lemon juice or citric acid — precise measurements push pH below 4.6.
Hot pack with headspace
Fill with hot tomatoes, leaving ½ inch. Prevents overflow and seal failure.
Debubble & wipe rims
Release trapped air with a non-metallic tool; wipe rims for a proper seal.
Seal & process
Finger-tight rings; process at correct pressure and time, adjusted for altitude.
Cool, check & store
Cool undisturbed 12–24 hrs. Lid must not flex. Store cool, dark, and dry.
Reader Questions, Answered
The most common questions home canners ask — with clear verdicts based on USDA and university extension guidance.
| Question | Safety Verdict | Details |
|---|---|---|
| Water bath for tomatoes? | ~ Conditional | Safe only if properly acidified; otherwise pressure canning is required. |
| Can I skip peeling? | ~ Acceptable | Peeling improves quality and reduces spoilage risk; recommended for clear products. |
| Use old family recipes? | ✗ Risky | Use tested recipes from USDA or university extensions — improvising risks botulism. |
| Reuse old lids and jars? | ✗ Never | Use new, food-grade lids and jars; worn seals cause contamination. |
| Adjust for altitude? | ✓ Mandatory | Higher altitudes need increased pressure and/or longer processing times. |
| Signs of spoilage? | ✓ Discard | Bulging lids, leaks, foul odor, or mold — when in doubt, throw it out. |
Common Canning Failures
Most home-canning incidents trace back to a handful of preventable mistakes. Rank-ordered by how frequently they appear in food safety reports.
The Traceability of a Safe Jar
Why Proper Equipment and Techniques Matter More Than You Think
Using the right tools makes all the difference. A pressure canner is the only reliable way to process low-acid foods like tomatoes, especially when you add vegetables or meats. A water bath canner works only if you’ve acidified your tomatoes thoroughly. Cheaping out on jars or lids risks spoilage and contamination. When you pick your equipment, check that your pressure canner is functioning correctly—gauge calibrated, seals tight, and safety features intact. I’ve seen folks use old boiling water bath setups for low-acid tomato recipes, only to learn the hard way that botulism doesn’t care about good intentions. Modern digital pressure canners with precise controls make safe processing easier, even off-grid, but manual models work fine if you follow instructions. The takeaway? Use tested equipment and inspect it before each use. Proper equipment ensures your jars reach the necessary internal temperatures to destroy harmful bacteria and spores. Using inadequate or malfunctioning tools can lead to underprocessing, which is a silent threat—botulism spores can survive at lower temperatures and produce deadly toxin if not properly killed. The choice of equipment is a safety investment, and regular maintenance or calibration of gauges is essential to trust your processing times and pressures.
As an affiliate, we earn on qualifying purchases.
How to Acidify Tomatoes Correctly—Don’t Skip This Step
Acidification is the key to safety—especially with tomatoes. Tomatoes are borderline in acidity; some varieties are naturally more acidic than others. To ensure safety, you must add acid—usually bottled lemon juice, vinegar, or citric acid—to lower the pH below 4.6. This threshold is critical because it inhibits the growth of Clostridium botulinum, the bacteria responsible for botulism. Without proper acidification, even a perfectly sealed jar can become a breeding ground for this deadly toxin. The addition of acid effectively transforms the environment inside the jar into an inhospitable one for bacteria. For example, a common rule: add 1 tablespoon of bottled lemon juice per pint or 2 tablespoons per quart. This standard is based on extensive testing to achieve consistent pH levels. Failing to acidify adequately means relying solely on processing time, which might be insufficient if the pH isn’t low enough. It’s a tradeoff: adding too much acid can alter flavor, but under-acidifying risks health. Therefore, always adhere to tested recipes; they balance safety and flavor, ensuring your canned tomatoes are both delicious and safe for storage. This step is essential because it provides a margin of safety, regardless of the tomato variety or ripeness, and helps prevent foodborne illness in your home kitchen.
water bath canning kit for tomatoes
As an affiliate, we earn on qualifying purchases.
As an affiliate, we earn on qualifying purchases.
Step-by-Step Guide to Safe Canning of Tomatoes
- Prepare your jars and lids: Wash with hot soapy water, rinse, then sterilize in boiling water or a hot oven. Keep warm until ready to fill. Proper sterilization prevents introducing bacteria or spores that could spoil the contents or produce toxins.
- Peel and prep tomatoes: Score an ‘X’ on each tomato’s bottom, blanch in boiling water for 30-60 seconds until skins loosen. Cool in ice water, peel, and remove stems and seeds if desired. Peeling improves product clarity and reduces microbial hiding places, but more importantly, it removes the skin’s natural barrier that can harbor spoilage organisms. Removing seeds and stems can also improve texture and reduce bitterness, but the primary goal is to create a uniform, safe product. Proper preparation ensures even heat penetration during processing, which is vital for killing bacteria and spores. Skipping peeling might be acceptable for some recipes, but it can compromise safety if the skins trap bacteria or prevent proper heat transfer.
- Add acid: For each jar, squeeze in or add the recommended amount of bottled lemon juice, vinegar, or citric acid. Ensuring the right amount of acid is crucial because it guarantees the pH is below 4.6, which is the safety threshold for water bath canning. Inaccurate acidification can lead to unsafe pH levels, risking botulism. Using tested recipes and precise measurements is the best way to mitigate this risk—improvising or guessing can have serious health implications.
- Hot pack the tomatoes: Fill jars with hot tomatoes or juice, leaving proper headspace (about ½ inch). Hot packing helps to uniformly heat the product, reducing air pockets and ensuring proper seal formation. It also minimizes microbial contamination by sealing in the heat. Proper headspace prevents overflow during processing, which can compromise seal integrity and create pathways for bacteria.
- Remove air bubbles and wipe rims: Use a non-metallic spatula or chopstick to release trapped air. Wipe rims clean with a damp cloth. Removing air bubbles prevents false seals and spoilage, while clean rims ensure a proper seal with the lid. Any debris or residue on the rim can cause sealing failures, which can allow bacteria or mold to enter the jar post-processing.
- Seal with lids and process: Place lids and screw rings finger-tight. Place jars in the canner, process at the recommended pressure and time based on altitude and jar size. Proper sealing ensures vacuum formation, preventing oxygen entry, which is essential for long-term preservation. Processing at the correct pressure and time destroys spores and bacteria, especially in low-acid foods. Adjustments for altitude are necessary because atmospheric pressure affects boiling point and heat transfer, directly impacting safety and quality.
- Cool and store: After processing, let jars cool undisturbed for 12-24 hours. Check seals—lid should not flex. Store in a cool, dark place. Proper cooling allows the vacuum seal to set fully, preventing spoilage. Storing in a consistent, cool, dark environment minimizes temperature fluctuations that could weaken seals or promote mold growth. Always verify seals before storage; unsealed or broken jars should be refrigerated and used promptly.
This process ensures your canned tomatoes are safe and shelf-stable for months or even years. Following these steps is like building a fortress against spoilage and botulism, with each detail contributing to overall safety and quality.
As an affiliate, we earn on qualifying purchases.
Frequently Asked Questions
Is it safe to can tomatoes in a water bath canner?
Only if you’ve acidified your tomatoes adequately. For low-acid varieties or unacidified tomatoes, pressure canning is the only safe method. Always follow tested recipes to ensure safety.How much acid should I add to my canned tomatoes?
Typically, add 1 tablespoon of bottled lemon juice per pint or 2 tablespoons per quart. Adjust based on your recipe, but always stick to trusted guidelines to keep the pH below 4.6.Can I can tomatoes without peeling?
Yes, peeling isn’t mandatory, but it improves product clarity and reduces spoilage risk. For a smooth, stable jar, peel tomatoes before processing—especially if you want a clear sauce or puree.How do I know if my canned tomatoes are safe to eat?
Check for bulging lids, leaks, foul odors, mold, or discoloration. If you notice any of these signs, discard the jar. When in doubt, it’s safer to toss it than risk foodborne illness.What are the best practices for storing canned tomatoes?
Store in a cool, dark, dry place—like a pantry or cellar. Keep jars away from sunlight and temperature fluctuations. Consume within 1-2 years for the best flavor and safety.As an affiliate, we earn on qualifying purchases.
Conclusion
Canning tomatoes safely isn’t complicated once you understand the basics. It’s about precision—using the right equipment, adding acid correctly, and following tested recipes. When you get each step right, you get to enjoy summer’s bounty all year long, worry-free. Remember, safety starts with your choices—think of each jar as a tiny fortress that keeps your harvest fresh, vibrant, and safe. So, roll up your sleeves, follow the steps, and turn your garden’s abundance into lasting, delicious storage. Your future self will thank you for the effort—every jar a testament to your skill and care.Halloween Picks
halloween
As an affiliate, we earn on qualifying purchases.