
TL;DR

Get kitchen gear delivered free with Prime
- Fast, free delivery on millions of items
- Prime Video, Amazon Music and more included
- Member-only deals all year
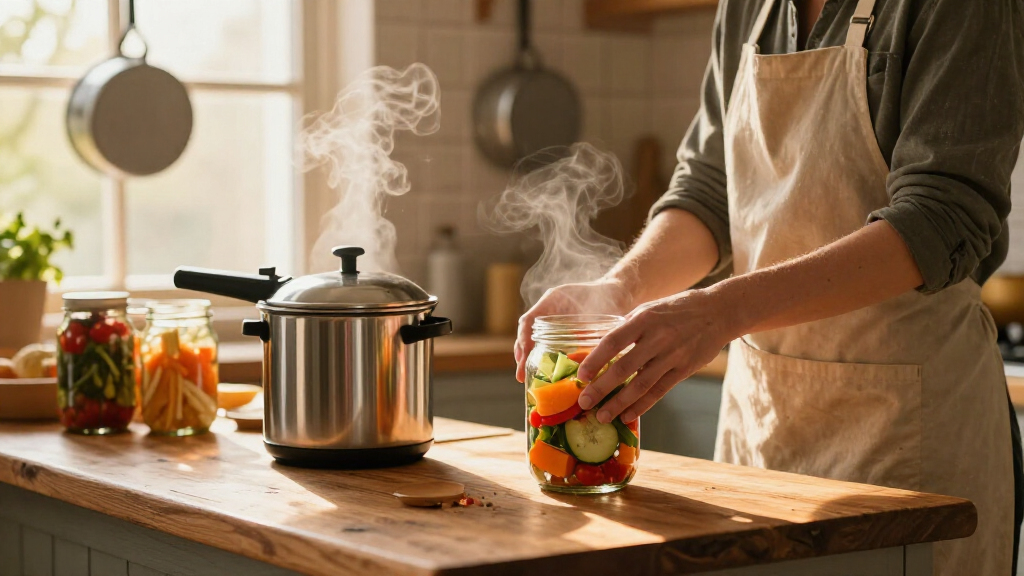
Pressure canning is the only safe method for low-acid foods. This guide walks you through every step—from choosing recipes to sealing jars—so you can preserve food confidently and safely at home.
Always start with a research-tested recipe tailored to your jar size and altitude.
Venting steam for 10 minutes before pressurizing removes air and ensures accurate pressure build-up.
Maintain steady pressure during processing; fluctuations can compromise safety.
Natural cooling is essential—never force cool a pressure canner to stop processing.
Check seals carefully after cooling—re-seal or discard any jars with compromised lids.
Pressure Canning Step by Step
Pressure canning is the only recommended home-canning method for low-acid foods. Every safe jar depends on a tested recipe, correct altitude-adjusted pressure, complete processing time, and patient natural cooling.
Start with evidence, not improvisation
Low-acid foods can support the growth of Clostridium botulinum. The toxin cannot be reliably detected by sight, smell, or taste, so prevention must come from a validated process.
Use a tested source
Choose current guidance from the USDA, the National Center for Home Food Preservation, a university extension, or the canner manufacturer.
Confirm every variable
Match the food, preparation method, jar size, canner type, processing time, pressure, and altitude adjustment.
Use a pressure canner
Use a vessel large enough for at least four upright quart jars. Small pressure cookers and multicookers are not substitutes.
Check the canner
Inspect the gasket, vent, safety plug, gauge, rack, lid lock, and manual. The vent pipe must be completely unobstructed.
Verify accuracy
Have a dial gauge checked before each canning season. Keep weighted-gauge components clean and undamaged.
Respect untested foods
Do not pressure-can dairy, eggs, flour, cornstarch, pasta, rice, or puréed pumpkin without an approved process.
Control the details before heat begins
Pressure canning is not a boiling-water bath. Jars sit on a rack in shallow water while pressurized steam creates the required processing temperature.
Prepare the canner
Add the amount of water specified in the manual—commonly a few inches. Do not submerge the jars unless the manufacturer explicitly directs it.
Warm jars and prepare lids
Wash jars, lids, and bands. Keep jars warm to reduce thermal shock. Use new flat lids and follow the lid maker’s current directions.
Prepare food exactly
Follow the recipe for cutting, peeling, precooking, hot packing, or raw packing. Do not add dense ingredients or reduce required liquid.
Fill one jar at a time
Use a funnel and the specified hot liquid. Leave the exact headspace—often 1 inch, but not always.
Release trapped air
Slide a nonmetallic tool around the inside edge. Recheck headspace, then wipe the rim so food or grease cannot disrupt the seal.
Apply lids correctly
Center each lid and tighten the band only to fingertip tight. Air must escape during processing so a vacuum can form later.
Load upright on the rack
Keep jars upright and spaced for circulation. Lock the canner lid, but leave the vent open or the weight off.
Prepare to vent
Apply heat until a strong, steady funnel of steam flows from the open vent. The processing timer has not started yet.
The critical processing chain
Each stage depends on the one before it. Trapped air lowers the temperature at a given gauge reading, while pressure loss can invalidate the processing time.
Free-flowing steam
Wait for a strong, continuous funnel from the vent.
Vent 10 minutes
Drive trapped air out of the canner before sealing the vent.
Build pressure
Add the weight or close the petcock after venting is complete.
Reach the target
Use the tested setting for the gauge type and altitude.
Start the timer
Count processing time only after full pressure is reached.
Maintain steady pressure
Adjust the heat gradually. Pressure above the target may reduce quality, but pressure below the target means the food has not received the validated process.
Pressure dropped?
Return the canner to the correct pressure and restart the complete processing time from zero. Do not simply add the minutes lost during the drop.
Method comparison at a glance
The acidity of the food determines the safe canning method. Low-acid foods require the higher temperatures produced by a tested pressure-canning process.
| Method | Low-acid foods | Temperature capability | Typical use | Home-canning status |
|---|---|---|---|---|
| Pressure canner | ✓Appropriate | Approximately 240°F / 116°C | Vegetables, meats, poultry, seafood, soups | Use a current tested process |
| Boiling-water canner | ✗Not appropriate | About 212°F / 100°C at sea level | Properly acidified or naturally high-acid foods | Safe only for suitable tested recipes |
| Small pressure cooker | ✗Not a substitute | Heating behavior differs by appliance | Cooking meals | No general replacement for a pressure canner |
| Oven or dishwasher | ✗Unsafe | Uncontrolled jar heat penetration | Not a validated canning method | Do not use for home canning |
Water boils at a lower temperature as elevation rises. Even a small pressure increase can be critical, so identify your altitude and follow the exact adjustment for your gauge type and tested recipe.
The process continues after the heat stops
Cooling time is part of safe handling. Forced cooling can trigger liquid loss, seal failure, thermal shock, and broken jars.
Cool the canner naturally
Turn off the heat after the full processing time. Leave the canner undisturbed until it depressurizes on its own.
Check every seal
After cooling, remove the screw bands and inspect the lid, jar, and contents before labeling and storage.
The lid is concave, does not flex when pressed, and remains firmly attached.
Refrigerate promptly, freeze in a suitable container, or reprocess within the tested guidance.
Label and date sealed jars. Store without bands in a cool, dark, dry location.
Do not use jars that leak, bulge, spurt, smell abnormal, or show an uncertain seal.
Never taste food from a suspect jar. Botulism toxin may be present even when the food looks and smells normal.
Five rules for every batch
Confidence comes from repeatable controls. Record the recipe, jar size, pressure, altitude adjustment, processing time, and date for each batch.
Begin with a current research-tested recipe matched to the food and jar size.
Vent a steady stream of steam for 10 full minutes before pressurizing.
Adjust for altitude and hold the tested pressure without interruption.
Allow natural depressurization. Never force a pressure canner to cool.
Inspect seals after 12–24 hours and never taste food from a suspect jar.
Pick a Recipe That Has Been Tested and Approved
Start with a recipe from a trusted source like the USDA or your local extension. These recipes include exact processing times and pressure levels. Using an untested recipe is like playing with fire—your food might spoil or worse, cause illness.
For example, a basic green bean recipe tested at 11 psi for 20 minutes ensures safety and texture. Don’t try to modify ingredients or times unless the source explicitly says it’s safe to do so.
pressure canner for home food preservation
As an affiliate, we earn on qualifying purchases.
As an affiliate, we earn on qualifying purchases.
Inspect and Prepare Your Canner for a Safe, Smooth Process
Check the gasket, vent pipe, and gauge. Make sure the vent is clear—clogged vents cause pressure issues. Fill the canner with the amount of water specified—usually a few inches—not enough to submerge jars. Keep in mind, pressure canning isn’t a water bath; steam and pressure do most of the work.
Imagine a sturdy, sealed vessel ready to handle the heat—your canner should be in perfect condition before starting.
high altitude pressure canning kit
As an affiliate, we earn on qualifying purchases.
As an affiliate, we earn on qualifying purchases.
Prepare Jars and Lids Properly to Guarantee a Seal
Wash jars and lids with hot soapy water. Keep jars warm to prevent cracking when hot food is added. Use new lids—these are designed for one-time sealing—while bands can be reused if undamaged. Follow the lid manufacturer’s instructions carefully—most modern lids don’t require boiling.
Pre-warming jars in hot water helps prevent thermal shock, which can cause jars to crack or break when filled with hot food. A proper seal depends on this temperature compatibility, ensuring the vacuum forms effectively and maintains the safety of the preserved food.
As an affiliate, we earn on qualifying purchases.
Fill Jars Correctly and Remove Trapped Air
Fill each jar quickly but carefully, using a funnel. Add hot liquid as specified—usually boiling water, syrup, or brine. Leave the exact headspace—typically 1 inch—so the vacuum can form properly. Use a nonmetallic utensil to dislodge air bubbles, then recheck the headspace and wipe the rim clean.
Removing trapped air is crucial because air pockets can prevent the lid from sealing properly and can cause spoilage or bacterial growth. Properly eliminating air ensures a vacuum seal, which is vital for long-term safety and quality of preserved foods.
As an affiliate, we earn on qualifying purchases.
Apply Lids and Bands Firmly but Not Overtightened
Center the lid, then screw the band on fingertip tight. Too tight, and air can’t escape; too loose, and the seal might fail. The goal is a snug fit that allows air to vent during processing.
This balance is important because if the lid is too tight, excess pressure can cause the jar to break or prevent the vacuum from forming properly. Conversely, if too loose, the lid may not seal correctly, risking spoilage. Achieving the right tightness ensures the lid can vent during processing and then vacuum seal as the jar cools, locking in freshness and safety.
Load Your Jars Carefully into the Canner
Place jars upright on the rack, spaced apart for heat circulation. Lock the lid according to your canner’s instructions. Keep the weight off the vent or leave it open initially—this step is crucial for removing trapped air.
Proper loading prevents jars from knocking against each other or the sides of the canner, which could cause breakage. It also allows steam and heat to circulate evenly, ensuring each jar processes uniformly. Gentle handling during this step maintains safety and preserves the integrity of your preserved foods.
Venting Is Key—Let the Steam Escape for 10 Minutes
Turn on heat and wait until steam flows freely from the vent pipe. Keep it venting for 10 full minutes unless your canner’s manual states otherwise. This step removes air pockets that can cause uneven heat and unsafe pressure levels.
Venting is critical because trapped air can insulate parts of the food, preventing proper heat penetration and risking underprocessing. It also helps stabilize pressure build-up, reducing the chance of dangerous pressure fluctuations that could compromise jar seals or safety. Skipping this step can lead to unsafe preservation, especially with low-acid foods.
Pressurize the Canner to the Correct Level
After venting, place the weight on the vent or close the petcock. Adjust your stove to reach the pressure specified—often 11 psi at low elevation. Use a dial gauge or weighted gauge as directed. The precise pressure ensures the jars reach the necessary 240°F/116°C to kill spores.
Maintaining the correct pressure is vital because it directly affects the temperature inside the jars. Too low, and spores might survive, risking botulism. Too high, and you risk overprocessing, which can degrade food quality. Accurate pressure control balances safety and quality, making it a cornerstone of successful home canning.
Start Timing Only When You Reach the Correct Pressure
Begin counting your processing time once the canner hits the target pressure. If pressure drops, return to the right level before restarting the timer. Steady pressure is essential—fluctuations mean underprocessing or risk.
This step ensures that your food reaches the necessary internal temperature for safety. Starting the timer prematurely at lower pressures can result in insufficient sterilization, risking bacterial survival. Conversely, over-processing can harm texture and flavor. Timing accurately at the correct pressure guarantees both safety and quality in your preserved foods.
Let the Canner Cool Naturally—No Forcing It
Turn off heat and wait for the pressure to drop to zero naturally. Do not pour cold water or remove the weight prematurely. Forced cooling can cause jar breakage and seal failures. Patience here is key—rushing ruins your work.
Natural cooling allows the internal temperature and pressure to decrease gradually, preventing sudden temperature shocks that can crack jars or compromise seals. Rushing this process increases the risk of accidents and spoiled food. It’s a crucial safety step that ensures the integrity of each jar and the safety of your preserved harvest.
Open and Remove Jars Safely
Only open the lid once the pressure gauge reads zero and the weight is removed. Tilt the lid away from you to release steam safely. Carefully lift jars straight up to avoid breakage. Wait 12–24 hours before checking seals.
Opening jars too early or forcefully can cause the glass to break or the seal to fail, risking contamination. Letting jars cool undisturbed ensures the vacuum seal is set correctly, preserving safety and quality. Handling jars with care during this step helps prevent accidents and guarantees the longevity of your preserved foods.
Check Seals and Store Your Preserves Properly
Remove bands, then press the center of each lid. A good seal will be concave and stay attached when lifted. Store jars in a cool, dark place, label with date and contents. Use within a year for best quality, but safety depends on seal integrity and proper processing.
Proper sealing is the final guarantee of safety. A secure vacuum prevents bacteria from re-entering the jar. Storing in a cool, dark environment slows spoilage and preserves flavor. Regularly checking seals ensures your storage methods remain effective, and reprocessing or discarding compromised jars keeps your food safe.
Adjust for Altitude to Keep It Safe
Higher elevations require more pressure—up to 15 psi at over 8,000 ft. Use the table below to modify your pressure accordingly. This prevents underprocessing, which can leave spores alive, or overprocessing, which can damage food quality.
Altitude affects boiling temperatures because atmospheric pressure decreases as you go higher. Without adjusting pressure, you risk inadequate sterilization or overcooking your food. Understanding and compensating for altitude ensures your canned goods are safe and of high quality, regardless of location.
Know When Pressure Canning Is Necessary, Not Water Bath
Pressure canning is essential for low-acid foods like meats, beans, and vegetables. The boiling water bath can’t reach the temperatures needed to destroy botulism spores—only pressure can do that safely.
This distinction is critical because using the wrong method can result in dangerous botulism toxin surviving in your jars. Low-acid foods require the higher temperatures achieved through pressure canning—no shortcuts. Recognizing which foods need this method is vital for safety and peace of mind.
Foods You Can Safely Pressure Can
Tested recipes cover vegetables, meats, seafood, broths, soups, and tomato mixtures. Follow the exact instructions—density, packing method, and processing time matter. Don’t try to pressure can dairy, eggs, or thickened foods unless specifically tested for that purpose.
This focus on tested recipes is about ensuring safety—deviating from proven methods can introduce risks of spoilage or bacteria survival. Knowing what can and cannot be safely pressure canned helps you make informed choices, ensuring your preserved foods are both safe and delicious.
What Not to Can—Foods and Methods That Are Unsafe
Avoid canning dairy, eggs, pasta, rice, mashed pumpkin, or thickened sauces unless a tested process exists. Also, skip oven, microwave, dishwasher, or open-kettle methods. These can cause jar breakage or spoilage, risking food safety.
Using unapproved methods or unsafe foods can lead to catastrophic failures like jar explosions or bacterial growth, including deadly toxins. Recognizing the limitations of home canning methods ensures you don’t inadvertently create hazards. Always stick to tested procedures and avoid shortcuts that compromise safety and quality.
Electric and Multicooker Canners—When They’re Safe to Use
Electric pressure canners aren’t automatically safe for home-canning. Confirm that your model has been tested and approved for the process. Many multicookers lack the capacity or precise temperature control needed for safe canning.
Always consult the manufacturer’s instructions and reliable sources—don’t assume a pressure cooker can double as a canner.
Using untested or incompatible devices can create serious safety hazards, including incomplete sterilization or jar failure. Ensuring your equipment is approved and suitable for canning is essential for safe preservation, especially when using modern appliances that may not have been designed for this purpose.
Troubleshooting Common Problems and How to Fix Them
Liquid siphoning? Check for over-tightened bands or rapid cooling. Food floating? Usually from raw packing or excess trapped air. Buckled lids? Overtightening or insufficient headspace. Cloudy liquid? Mineral deposits, spoilage, or starch. Breakage? Sudden temperature changes or damaged jars.
Understanding these signs helps you avoid wasted food and ensures safety.
Recognizing and addressing common issues prevents unsafe conditions and preserves the quality of your canned goods. For example, liquid siphoning often indicates over-processing or temperature fluctuations, which can compromise seals. Learning these troubleshooting tips helps ensure each batch is safe, effective, and long-lasting.
When to Discard a Jar—Spot the Red Flags
Discard jars with bulging lids, leaks, foam, mold, foul odors, or cracks. Don’t taste suspicious food—botulinum toxin is invisible and odorless. When in doubt, safety comes first—reprocess or discard contaminated jars.
Ignoring these signs can lead to food poisoning or even life-threatening illness. Properly recognizing and disposing of compromised jars safeguards your health and ensures your food storage remains safe and reliable.
Your Final Checklist: Do It Right Every Time
Use a tested recipe, check your canner, prepare jars properly, vent, pressure, time, cool naturally, and check seals. Altitude adjustments are vital—don’t skip them. Remember: safety depends on every step being correct.
It’s like assembling a piece of furniture—missing one screw can cause everything to fall apart.
Frequently Asked Questions
Can I use a regular pressure cooker for canning?
No. A regular pressure cooker isn’t designed for the slow, controlled pressure and temperature regulation required for home-canning. Use a proper pressure canner that meets tested safety standards.How do I adjust pressure for high altitude?
Increase pressure according to your altitude—generally, add 1 psi for every 1,000 feet above sea level. Refer to the USDA table to ensure you process at the correct pressure for safety and quality.Do I need to sterilize jars first?
If processing for 10 minutes or more, jars don’t need to be sterilized, just cleaned and kept warm. For shorter processing, sterilize jars in hot water beforehand to prevent contamination.What happens if my pressure drops during processing?
Reduce the heat to bring pressure back up, then restart the timer from the beginning. Don’t open the canner until pressure drops to zero—rushing can cause jar breakage or seal failures.Are electric canners safe for pressure canning?
Only if the specific model has been tested and approved for home-canning. Many electric or multicooker appliances lack the precise temperature controls needed for safety and shouldn’t be used unless explicitly validated.Conclusion
Pressure canning isn’t magic; it’s a deliberate process grounded in science. Follow every step precisely, and your stored foods will be safe and delicious for months. It’s about trust—trust your process, your tools, and your knowledge. That’s how you turn raw ingredients into preserved treasures, off-grid and foolproof.Fall Picks
fall essentials
As an affiliate, we earn on qualifying purchases.