TL;DR
Roasting in a Dutch oven over coals offers even heat, rich smoky flavors, and versatility for outdoor cooking. Proper heat management and safety are key to successful, flavorful meals in any setting.
Imagine the smell of sizzling meat, the crackle of burning wood, and the rich aroma filling your outdoor space. Roasting in a Dutch oven over coals isn’t just a method; it’s a tradition that brings hearty flavors and a sense of self-reliance. Whether you’re deep in the woods or just off-grid at your campsite, mastering this technique opens the door to simple yet satisfying meals that taste like they’ve been cooking all day.
If you’ve ever wondered how to get that perfect, evenly cooked roast or bake bread in the wild, this guide will walk you through everything you need. From equipment setup to safety tips, you’ll learn how to harness coals for consistent heat and flavor. Ready to turn your outdoor cooking into a true craft? Let’s dive in.
Adjust coals’ placement—more on top, fewer underneath—to control temperature precisely.
Preheat your Dutch oven and set coals strategically for even heat distribution, mimicking an oven.
Use a thermometer or visual cues to prevent burning or undercooking during outdoor roasting.
Choose hearty foods like roasts, vegetables, and bread for best results in a Dutch oven over coals.
Always prioritize safety—wear gloves, handle coals carefully, and keep water nearby.
Field Guide · Live-Fire Cooking
Roasting in a Dutch Oven Over Coals
Turn a cast-iron pot into a steady outdoor oven. With controlled coals above and below, you can build even heat, smoky depth, crisp crusts, and tender centers—whether you are cooking at camp or off-grid.
01 · Essential kit
Build a stable outdoor oven
The method depends on stored heat and controlled airflow. Start with durable cast iron, stable fuel, safe handling tools, and a surface that will not scorch or shift.
Heat vessel
Cast-Iron Dutch Oven
Choose a heavy pot with a tight-fitting lid. A rimmed lid helps hold top coals and creates oven-like radiant heat.
Fuel
Stable Hot Coals
Fully lit charcoal offers predictable heat. Hardwood coals add character but require closer monitoring as they fade.
Handling
Lifter, Tongs & Gloves
Use long tools and heat-resistant gloves whenever lifting the lid, rotating the pot, or moving glowing coals.
Foundation
Fire-Safe Surface
Cook on stone, bare mineral soil, a metal stand, or a designated fire area clear of dry vegetation.
Before food goes in: preheat the empty Dutch oven for 10–15 minutes, confirm the coals are fully ignited, and keep water or an extinguisher within reach.
02 · Heat control
Think top-heavy for a roast
Top coals radiate heat across the lid for browning, while a smaller bed underneath cooks the base without scorching it. Wind, cold, pot size, and food volume will all change the final temperature.
Illustrative coal distribution
Coal counts are starting points, not guarantees. Add or remove coals gradually, rotate the lid and pot to offset hot spots, and verify doneness with a thermometer.
Working temperature
350°FA practical target for many roasts, breads, and casseroles. Visible scorching or heavy smoke means the heat is too aggressive.
Tender
Beef & Pork
Large, hearty cuts benefit from slow, enclosed heat and retained moisture.
Crisp skin
Whole Chicken
A top-heavy coal pattern encourages browning while the covered pot preserves juices.
Caramelized
Root Vegetables
Potatoes, carrots, onions, and garlic develop sweetness and smoky edges.
Baked
Bread & Cobbler
Balanced radiant heat turns the covered oven into a compact wilderness bakery.
03 · Method comparison
Why coals beat open flame
Open flames fluctuate and concentrate heat. A managed coal bed is calmer, easier to reposition, and better suited to the long, even cooking that roasting requires.
| Cooking setup | Heat consistency | Top browning | Easy adjustment | Best use |
|---|---|---|---|---|
| Coals above + below | ✓ High | ✓ Excellent | ✓ Precise | Roasts, bread, casseroles |
| Coals underneath only | ~ Moderate | ✗ Limited | ~ Moderate | Stews, simmering, braises |
| Direct open flame | ✗ Variable | ~ Uneven | ✗ Difficult | Boiling or quick heating |
✓ Strong fit · ~ Workable with attention · ✗ Poor fit for controlled roasting
04 · Step by step
From cold iron to rested roast
Treat cooking as a connected system: preheat, load evenly, establish the coal pattern, monitor conditions, verify doneness, and rest before serving.
Warm the oven for 10–15 minutes.
Distribute seasoned food evenly.
Set coals above and below.
Check heat, smell, and smoke.
Confirm internal doneness.
Let juices redistribute.
05 · Safety first
Respect heat, sparks, and heavy iron
What Equipment Do You Need for Perfect Roasting in a Dutch Oven?
Roasting over coals demands a few key tools to keep things safe and effective. First, a heavy-duty cast iron Dutch oven with a tight-fitting lid is your main star. It retains heat evenly and can handle high temperatures without warping.
Next, you’ll want charcoal or hot coals. These are the fire’s backbone, providing consistent heat. A lifter or tongs makes handling hot coals and the oven safer—never touch them with bare hands. Finally, place everything on a sturdy, heat-resistant surface like a stone or metal stand to prevent heat damage and keep your workspace safe.
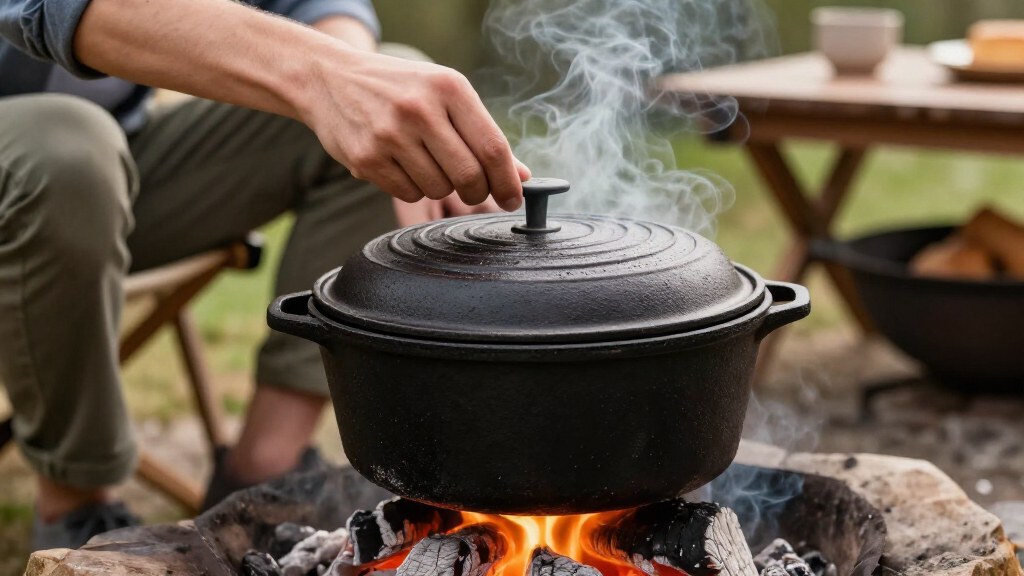
For example, I once roasted a whole chicken in my cast iron Dutch oven using a bed of hot coals beneath and glowing coals on top. The right tools made all the difference in managing heat and safety.
As an affiliate, we earn on qualifying purchases.
How to Prepare Your Dutch Oven and Coals for Roasting Success
Preparing well is the secret to even roasting. Start by preheating your Dutch oven over hot coals or in a fire for about 10-15 minutes. A well-seasoned cast iron will develop a natural non-stick surface and enhance flavor.
Meanwhile, arrange your coals. To mimic an oven’s consistent heat, place roughly half of your coals underneath and the remaining half on top. This strategic placement ensures even heat distribution, which is crucial because uneven heat can lead to undercooked spots or burnt edges. Proper preparation minimizes the need for constant adjustments during cooking, saving you time and preventing mishaps.
For example, when roasting a pork shoulder, I seasoned it, then set the coals so that the heat was evenly distributed. I checked every 30 minutes, adjusting coals as needed, and ended up with a tender, perfectly browned roast after 2 hours. This balance of heat meant the meat cooked uniformly, avoiding dry edges or raw centers, which often happens when heat is uneven.
As an affiliate, we earn on qualifying purchases.
Mastering the Art of Heat Control with Coals
Controlling heat in outdoor roasting hinges on how you manage your coals. More coals on top—say, 8-10 medium-sized briquettes—raises the temperature, perfect for browning or searing. Fewer underneath—around 4-6—keeps things gentle and slow. This balance allows you to achieve different textures and doneness levels, which is essential for diverse recipes.
Here’s a quick rule of thumb: Use a thermometer if possible. Aim for an internal oven temperature of about 350°F for roasted meats, adjusting coals accordingly. If you see smoke or your food starts to burn, remove some coals or shift them around. This precise control is what separates amateur attempts from professional results, ensuring your food is cooked thoroughly without burning or drying out.
Once, I was roasting a whole chicken. I placed 10 coals on top and only 4 underneath, then checked the meat’s temperature every 20 minutes. The result? Juicy, evenly cooked chicken with crispy skin. This method prevented hot spots that often cause uneven cooking, demonstrating how strategic heat management leads to better outcomes.
As an affiliate, we earn on qualifying purchases.
What Foods Work Best for Roasting in a Dutch Oven Over Coals?
Almost anything that benefits from slow, even heat works well—think hearty cuts of meat, root vegetables, or even bread. Large roasts like beef or pork shoulder come out tender and flavorful, thanks to the even heat of coals. Vegetables like potatoes, carrots, and onions roast beautifully, developing caramelization and sweetness.
For instance, I once roasted a batch of garlic and rosemary potatoes alongside a chicken, and the potatoes came out crispy on the outside, fluffy inside, with a smoky aroma that made everyone ask for seconds. The key is that the Dutch oven’s even heat ensures these foods cook uniformly, avoiding burnt edges or raw centers, which can happen with uneven heat sources.
Roasting desserts like bread pudding or cobbler is also doable, turning your Dutch oven into an outdoor oven. This versatility means you can experiment with a variety of dishes, making outdoor cooking both practical and exciting.
As an affiliate, we earn on qualifying purchases.
Step-by-Step: How to Roast in a Dutch Oven Over Coals
- Preheat your Dutch oven over hot coals for about 10 minutes to ensure even heat absorption.
- Season and prepare your ingredients, then place them inside the oven, ensuring even distribution for uniform cooking.
- Arrange coals so that half are beneath and half on top for even heat distribution, mimicking an oven’s environment.
- Cover the Dutch oven tightly and monitor your temperature with a thermometer or by sight and smell, adjusting coals as needed to maintain consistent heat.
- Cook, turning or adjusting coals as needed, until your food reaches the desired doneness. Regular checks prevent overcooking or burning, especially since outdoor conditions can vary.
- Remove the Dutch oven carefully—use tongs or a lifter—and let it rest before serving to allow juices to redistribute, ensuring maximum flavor and tenderness.
For example, I followed this process when roasting a beef roast — the lid held in moisture, and the coals gave it that smoky, caramelized crust. Proper preparation and attentive monitoring are key to achieving restaurant-quality results outdoors.
Safety Tips for Roasting with Coals and Cast Iron
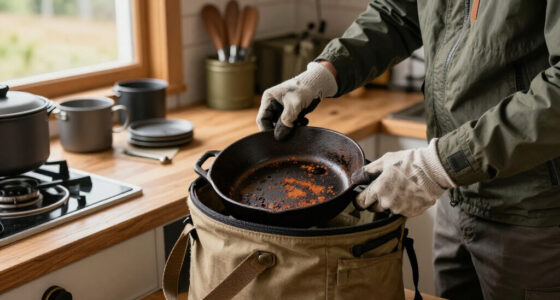
Handling hot coals and cast iron demands respect. Always wear heat-resistant gloves and use tongs or a sturdy lifter. This protects you from burns and accidents, especially when repositioning coals or removing the Dutch oven.
Ensure your coals are fully ignited and stable before placing the Dutch oven on top. Keep a water source or fire extinguisher nearby in case of emergencies. This readiness can prevent small mishaps from escalating into dangerous situations.
Never leave your fire unattended, and be mindful of sparks or stray embers that could ignite nearby materials. After cooking, let everything cool completely before cleaning or packing away your gear to prevent burns and preserve your equipment’s longevity.
In a recent camping trip, I kept a bucket of water close by, just in case a rogue ember escaped. It’s simple safety that prevents mishaps and keeps your outdoor kitchen humming smoothly. Prioritizing safety ensures that outdoor cooking remains a rewarding experience rather than an emergency.
Frequently Asked Questions
How do I prevent my food from burning when roasting in a Dutch oven over coals?
Control the heat by adjusting the number and placement of coals—more on top for browning, fewer underneath for gentle cooking. Using a thermometer helps keep your internal temperature in check, preventing burning.Can I roast multiple dishes at once in a Dutch oven over coals?
While a Dutch oven is versatile, it’s best for one main dish at a time for even cooking. If you want to cook multiple items, consider stacking or using separate pots, but watch the heat carefully to avoid uneven results.How long should I expect to roast in a Dutch oven over coals?
Most roasts and hearty dishes take about 1-2 hours, depending on size and temperature. Always check internal temperatures and don’t rush—slow, steady heat yields the best flavor and tenderness.What’s the best way to clean my Dutch oven after outdoor roasting?
Let it cool, then scrub with hot water and a stiff brush—avoid soap if it’s well-seasoned. Dry thoroughly, then apply a light coat of oil to protect the seasoning before storing.Is it safe to use a Dutch oven directly over open coals?
Yes, cast iron handles high heat well, but always wear gloves, handle hot parts carefully, and ensure coals are fully ignited and stable before starting. Safety first keeps outdoor cooking fun and injury-free.Conclusion
Roasting in a Dutch oven over coals is a reliable way to get hearty, flavorful meals outdoors. The key is controlling heat with thoughtful placement of coals and respecting safety measures. With practice, you’ll turn outdoor cooking into a skill that rewards you with rich flavors and satisfying results.
Now, next time you’re out in the woods or under the open sky, remember: the simple act of managing coals can transform a basic meal into a memorable feast. Fire up those coals, and let your cast iron do the work.