TL;DR

Get kitchen gear delivered free with Prime
- Fast, free delivery on millions of items
- Prime Video, Amazon Music and more included
- Member-only deals all year
A 72-hour kitchen kit is a household-sized supply of water, familiar shelf-stable food, and basic tools for three days without normal kitchen services. Start with at least one gallon of water per person per day, include meals you can eat without cooking, and add tools only for a cooking method you can use safely. Store the kit where you can reach it, then check it twice a year.
A three-day outage can turn an ordinary kitchen into a room full of things you can’t use: a silent refrigerator, a dark electric range, and a tap that may not run. A 72-hour kitchen kit gives you a simple way to feed your household while normal services are disrupted. It is not a second pantry or a pile of gear. It is a small, practical reserve built around water, familiar food, and safe preparation.
You’ll learn how much water to set aside, how to choose food you can eat with or without heat, and which hand tools make a real difference. You’ll also see how to account for children, pets, allergies, and anyone who may struggle with a jar or can opener. A good kit should feel like a spare key: plain, easy to find, and useful the moment you need it.
Start with what your household already eats and the kitchen you already have. If your family likes beans on crackers for lunch, that familiar meal is a better starting point than a case of food nobody wants when the lights are out.
Store at least three gallons of water per person for 72 hours, then add water for pets, heat, health needs, and sanitation.
Choose familiar shelf-stable food and keep several meals ready to eat without heat or added water.
Read package directions and match tools to actual meals; shelf-stable food may still need a can opener, water, or cooking.
Use camp stoves and other fuel-burning appliances outdoors according to their instructions; never use them in a home or garage.
Keep the kit accessible and review it at least twice a year, replacing used food and checking dates, packaging, and household needs.
Build a 72-Hour Kitchen Kit Ready for Three Days
Keep water, familiar food, and practical tools ready so your household can eat safely when kitchen services are disrupted.
Start with water
The baseline is one gallon per person per day for drinking and basic food preparation.
Count three days
Set aside at least three gallons per person, then add more for heat, health needs, physical activity, and sanitation.
Plan separately
Keep extra water for pets so their needs do not draw from the household baseline.
Choose food that fits
Plan three days of meals and snacks around what your household already eats.
| Food need | Plan for it |
|---|---|
| No cooking | Keep several ready-to-eat meals and snacks |
| Can opening | Pack a manual can opener |
| Water or heat | Check package directions and count what preparation requires |
| Household needs | Account for allergies, medical diets, infants, and pets |
Build the kit in six steps
Choose meals first, then add the supplies those meals actually need.
Include people, pets, diets, and accessibility needs.
Include familiar breakfasts, lunches, dinners, and snacks.
Note water, heat, can openers, and utensils.
Meet the water baseline and include ready-to-eat choices.
Choose only tools that suit your meals and cooking plan.
Keep supplies accessible and check them at least twice a year.
Cook with safety in mind
A no-cook plan can be useful; any cooking equipment should match your menu and safe setup.
- Manual can opener
- Eating utensils and a suitable pot
- Flashlight and safely stored matches or lighter
- Use fuel-burning appliances outdoors
- Follow appliance instructions
- Never use a camp stove, grill, or generator indoors or in a garage
Start with three gallons of water per person
A 72-hour kitchen kit starts with at least one gallon of water per person per day for drinking and basic food preparation. That gives you a baseline of three gallons per person for three days, before extra needs for pets, washing, or difficult conditions. Water comes first because dry food and cooking plans both fail when you cannot safely drink or prepare a meal.
For a household of four, the baseline is twelve gallons. Picture twelve one-gallon jugs on a pantry shelf: bulky, but simple to count and rotate. A family in a hot climate, someone with an illness, a pregnant household member, or a person doing hard physical work may need more. Set aside pet water separately, too; a thirsty dog should not quietly drain the water you counted for people.
Keep stored water sealed, labeled with the date, and away from heat and direct sun. If you use containers that need filling, follow local public health guidance for washing, filling, and storage. Store the supply where you can reach it quickly, and think through the walk from storage to kitchen: a full five-gallon container weighs more than many people can comfortably lift.
Water for cooking can disappear faster than you expect. A pot of instant oats, a cup of coffee, or rehydrating a dried meal all use some of your reserve. If your menu depends on adding water to food, count that need before you choose the menu, then keep extra water for washing hands and basic cleanup.
Products Worth Considering

Cuisinart Chef's Style Portable Propane Tabletop Gas Grill, CGG-306P

Traeger Pro 22 Wood Pellet Grill and Smoker, 572 Sq. In.

Vitamix VX1 Professional-Grade Blender, 64 oz, Black
As an affiliate, we earn on qualifying purchases.
Choose food you can eat when the stove stays cold
Choose familiar, shelf-stable foods that still work if you cannot cook. A 72-hour kitchen kit should cover three days of basic meals and snacks, with ready-to-eat choices as its backbone. Canned meals, fish, beans, nut or seed butter, crackers, dried fruit, and shelf-stable milk can all help, depending on what your household eats.
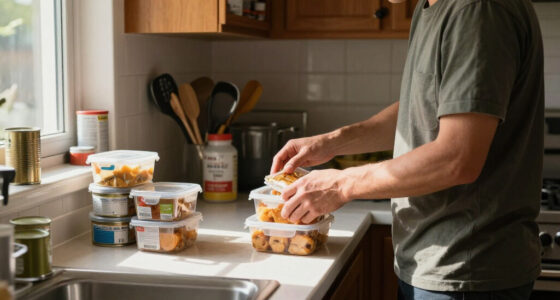
Think about a rainy evening when the power has been out for hours and everyone is tired. Crackers, a can of beans, and fruit make a meal without a burner or extra water. A bag of dried rice may last a long time, but it still needs water and heat; shelf-stable does not automatically mean ready to eat. Read labels and group foods by what they need: nothing, a can opener, water, or cooking.
Build around allergies, medical diets, infant feeding, and pet needs, not around a generic list. If a child drinks a particular shelf-stable milk, include the kind they know. If someone cannot open a pull-tab can, choose another package or add a tool they can manage. Familiar flavors matter when an outage already makes the house feel strange.
There is no single calorie target that fits every person. Age, activity, health, and climate change what people need, so plan a realistic set of meals and snacks for your household rather than counting on a universal number. For example, an active teenager may eat more than a small child, while a person with a medical diet may need specific foods on hand. Keep meals plain enough to prepare easily, but varied enough that day three does not feel like punishment.
Build your kit in six practical steps
To build a 72-hour kitchen kit, choose meals first, count the water and food those meals require, then add the tools and supplies that match your setup. This order keeps you from buying gear that does not help you eat. Think of it like laying a small trail of stepping stones: each item should get you from a disruption to a meal safely.
- List household needs. Write down the people, pets, allergies, infant supplies, medical diets, and accessibility needs you must cover.
- Draft three days of meals. Include breakfast, lunch, dinner, and snacks, favoring food you already eat.
- Mark each meal’s needs. Note whether it requires water, heat, a can opener, or utensils. Keep several ready-to-eat meals.
- Count water. Set aside at least three gallons per person, plus added water for pets and other needs.
- Add matching tools. Include only what your meals and cooking plan call for, such as a manual can opener, pot, eating utensils, or flashlight.
- Store, label, and review. Keep the kit accessible, record dates, and check supplies at least twice a year.
For a household that eats canned soup and crackers, this list may lead to a manual opener, spoons, bowls, and a no-cook first day. Another household that regularly cooks outdoors might add a suitable pot and a small stove. A complete plan can become an hour kitchen kit project: start with water and no-cook food, then add the rest in a focused hour.
Keep the kit together enough that you can find its parts in a hurry. That does not require a special container. A labeled shelf or sturdy tote works if everyone knows where it lives and can reach it.
Choose cooking tools that match your safest plan
You do not need a camp stove to make a useful kit; a no-cook plan is a valid plan. If you include a fuel-burning appliance, use it outdoors and follow its instructions. Never use a camp stove, charcoal grill, or generator indoors or in an enclosed space, including a garage: carbon monoxide can be deadly and has no reliable warning smell.
Decide what cooking would add before you store a stove and fuel. If your menu already contains beans, fish, crackers, nut butter, and fruit, a stove may not earn its space. If you plan to heat a meal, pair the appliance with the right pot and fuel, learn its directions in advance, and cook in a safe outdoor spot away from doors, windows, and other hazards.
A few simple tools often matter more than a big collection of equipment. A manual can opener can turn a sealed can of soup into lunch; a sturdy spoon, bowl, and knife help you serve food without hunting through dark drawers. Add matches or a lighter only if you have a safe use for them, and store them securely. A flashlight belongs with the kit because searching for a can opener by phone light is a poor start to dinner.
Keep cleanup in the plan. Disposable plates can reduce the water needed for washing, though they create waste. Reusable bowls use less disposable material but require a way to clean them. For example, if your stored water is limited and the kit includes a single pot, you might eat directly from clean containers and reserve water for drinking and hand hygiene.
Fuel-burning gear belongs outdoors. A covered porch or attached garage is not a safe indoor substitute. Follow the appliance directions and keep people clear of hot cookware and flame.
Keep refrigerator food separate from your kit plan
Your kitchen kit covers meals; it does not keep refrigerated food safe during a long outage. Keep refrigerator and freezer doors closed to hold cold air inside. A closed refrigerator generally stays cold for about four hours, while a full, closed freezer may hold temperature for roughly 48 hours, or about 24 hours if it is half full. These are estimates, and actual conditions vary.
That difference matters when you decide what to eat first. If the power goes out after dinner, opening the refrigerator every few minutes to check on milk lets cold escape. Use appliance thermometers if you have them, and follow local food-safety guidance to decide whether perishable food is safe. When you cannot tell whether food stayed at a safe temperature, discard it rather than gambling with illness.
Plan your kit so you can move to shelf-stable food without relying on the refrigerator. On the first evening, you might eat food that is already safe and needs no cooking; after that, canned beans, fish, crackers, and fruit give you options without repeated refrigerator trips. This is where a collection of food that lets a household prepare simple meals if power fails earns its place: it buys calm and reduces pressure to open doors or improvise.
Do not treat a camp stove as a way to preserve food or warm an indoor kitchen. Outdoor cooking can heat one meal, but it does not replace refrigeration, and it does not make questionable leftovers safe. Keep the kit’s purpose modest: feed people simply while you follow food-safety guidance for everything that was cold.
Make the kit work for every person in your home
A kit works only when the people who need it can use it. Include food, water, and tools for children, older adults, pets, and anyone with access needs. A jar that you can twist open may be a barrier for someone with arthritis, while an unfamiliar meal may be a problem for a young child already upset by a dark, noisy night.
Walk through one ordinary meal with each person in mind. Can your older parent reach the stored food and lift the water container? Can your child open a snack without a sharp knife? Does your cat eat a special diet, or does a pet need a separate water bowl? A household that includes an infant may need specific feeding supplies and a plan suited to that child; generic canned food will not meet that need.
Package choices can make the difference between a usable meal and a frustrating one. Pull-tab cans are convenient for many people, but they are not always easy for everyone to open. Pair difficult packaging with an accessible opener or choose alternatives. Store familiar utensils where hands can find them, and label any special food plainly so another caregiver can identify it in low light.
For example, if a family member follows a low-sodium diet, check the labels on canned soup and beans rather than assuming every shelf-stable option fits. If a dog eats measured food, store enough for three days and note how much water the animal needs. The goal is not to make a separate emergency kitchen for every person; it is to make one shared kit flexible enough to serve the household you actually have.
Store supplies where you can find and rotate them
Store your kit in a cool, dry place where household members can reach it quickly. Heat can shorten the life of food, damp can damage packaging, and pests can turn a sealed reserve into a mess. Put the kit somewhere people can find without rummaging: a labeled pantry shelf, a sturdy tote, or a cabinet near the kitchen can all work.
Write purchase or review dates on a simple list and check food labels as part of your regular household routine. Replace anything you use, inspect packages for damage, and rotate items before their dates. A twice-a-year review is a practical rhythm; you can do it when you change clocks or at the start of spring and fall. Check stored water and tools at the same time.
Rotation works best when it feeds back into daily life. If you store canned beans your family already enjoys, use the older cans for lunch and replace them with new ones. That way the kit stays familiar and you are less likely to end up with a dusty row of food nobody knows how to prepare. Even a shelf-stable item can lose quality or become unusable if its package leaks or gets crushed.
Think about evacuation, too. A shelf full of supplies may help during a stay-at-home outage, but it will not travel easily. If leaving home is possible in your area, keep a small portable set of food, water, and essential utensils that you can grab. The larger home supply and the portable set serve different situations; you do not have to carry the entire pantry to make a useful plan.
Frequently Asked Questions
How much food should I store per person for 72 hours?
Plan three days of meals and snacks that fit each person’s age, activity, health, and climate. There is no single calorie target that suits every household. A practical plan might include breakfast foods, ready-to-eat lunches, dinners, and familiar snacks for each person.
How much water should I store for a three-day kit?
Start with at least one gallon per person per day for drinking and basic food preparation, or three gallons per person for 72 hours. Add extra water for pets, hot weather, illness, physical activity, and sanitation needs.
What foods work best if I cannot cook?
Choose foods you already eat that are ready to serve, such as canned meals, beans, fish, crackers, nut or seed butter, and dried fruit. Check that you can open the package and that the food does not need added water or heat. A manual can opener helps with cans that lack pull tabs.
Do I need a camp stove for a 72-hour kitchen kit?
No. A kit built around no-cook food can work well without a stove. If you choose a fuel-burning appliance, use it outdoors according to its instructions; never use it indoors, in a garage, or in another enclosed space because carbon monoxide can be deadly.
How often should I check my kitchen kit?
Review it at least twice a year and whenever you use it or household needs change. Replace used food, check dates and packaging, and confirm that stored water and tools are still ready to use. Rotating familiar foods into everyday meals helps keep the supply fresh.
What should I do with refrigerator food during a power outage?
Keep refrigerator and freezer doors closed, and use appliance thermometers if available. A closed refrigerator generally stays cold for about four hours; a full, closed freezer may hold temperature for roughly 48 hours, though conditions vary. Follow local food-safety guidance and discard perishables if you cannot tell whether they stayed safe.
Conclusion
Build your kit around the meal you can make when the kitchen goes quiet: safe water, familiar food, and tools you can use without guesswork. Begin with three gallons of water per person, add ready-to-eat choices, and shape the rest around the needs and abilities of your household.
Then put it somewhere you can reach in the dark and check it twice a year. When the lights go out, a simple meal and a full glass of water can make the room feel steady again.