
TL;DR

Get kitchen gear delivered free with Prime
- Fast, free delivery on millions of items
- Prime Video, Amazon Music and more included
- Member-only deals all year
Test your canning jar seals by gently pressing the lid to check for a slight concave dip and firm attachment. The tap test offers a quick sound cue, but visual and physical checks are more reliable. Always confirm a proper seal before storing or using your canned goods.
Nothing beats the satisfaction of pulling a jar from your pantry and knowing it’s safe to eat. But that feeling of security hinges on whether you’ve actually sealed it correctly. You might see a lid that looks good, but that doesn’t always mean it’s truly sealed or safe.
Knowing how to test your jars properly can save you from spoilage, waste, or worse—foodborne illness. In this guide, you’ll learn straightforward, proven methods to verify your canning seals. No hype, just real-world tips for off-grid or everyday home preservation.
Test seals after 12–24 hours of cooling, not during or immediately after processing.
Use the press-and-lift method for the most reliable seal check—avoid just listening or quick taps.
Removing screw bands before storage helps reveal failed seals and prevents rust or mold buildup.
A seal’s appearance isn’t foolproof; always confirm by physical test and visual inspection.
Never reprocess or taste food from unsealed jars—safety first, always.
How to Test Canning Jar Seals
A dependable seal is slightly concave, firm, and securely attached after the screw band is removed. Test only after the jar has cooled undisturbed for 12–24 hours—and remember that a sealed lid cannot correct an unsafe recipe or processing method.
Use visual, fingertip, and gentle edge-lift checks together.
Let the vacuum stabilize before touching or moving the lids.
A current tested recipe and correct processing remain essential.
Let the seal finish forming
Testing too soon can disturb a fragile seal or make an unstable lid appear secure. Leave jars alone until they are fully cool.
Hours at room temperature before checking the seal.
Never invert jars to encourage sealing. Tilting can move food beneath the lid.
Leave the center untouched while the vacuum develops and the gasket cools.
Do not tighten, loosen, or remove screw bands during the cooling period.
Set jars on a protected surface and let them cool without shifting or bumping.
The four-part seal check
Combine inspection, pressure, and gentle attachment checks. No single sound is as useful as this sequence.
Remove the band
Take off the screw band so it cannot disguise a loose or failed lid.
Inspect the curve
The lid center should bow slightly downward, without bulging or leakage.
Press the center
A good lid stays firm. It should not flex, click, or spring back.
Lift gently
Use fingertips at the edge. The lid should remain firmly attached.
Handle carefully: perform the edge-lift check close to a counter. Never lift or carry a full jar by its lid alone.
Trust touch and sight over sound
A cooling “ping” can be reassuring, but it is not proof. Food contact, lid material, and jar contents can all change the sound.
Visual + press + gentle lift
Use these checks together after cooling. They directly test the lid’s shape, movement, and physical attachment.
The tapping test
A metal spoon may produce a clear ring on a sealed jar and a dull sound on an unsealed one. Treat this only as a quick clue, never the final decision.
The lid center is subtly concave rather than flat or raised.
Firm fingertip pressure produces no movement or spring-back.
The lid remains secured when tested gently at its edge.
Read the evidence correctly
Use multiple indicators. A jar can seal silently, and an audible ping can occur without proving long-term attachment or safe processing.
| Check | Likely sealed | Likely unsealed | Decision value |
|---|---|---|---|
| Lid shape | Slightly concave center | Flat, raised, or bulging center | Useful visual evidence |
| Center press | Firm and motionless | Flexes, clicks, or springs back | Strong physical evidence |
| Edge lift | Lid remains attached | Lid shifts or lifts easily | Strong attachment evidence |
| Tap sound | May sound clear or ringing | May sound dull | Supporting clue only |
| Cooling ping | May occur | May be absent | Not proof of a seal |
| Processing history | Current tested recipe followed | Unknown or incorrect method | Essential for food safety |
A physical seal protects storage quality; safe processing controls dangerous microorganisms.
Why seals fail
Most failures trace back to rim condition, jar preparation, lid placement, processing errors, or movement during cooling.
Residue or damage
Food, grease, syrup, chips, or an uneven rim can interrupt contact with the sealing compound.
Headspace or air
Incorrect headspace and trapped air can interfere with venting and vacuum formation.
Lid or band errors
Damaged lids and bands applied too loosely or too tightly may prevent a dependable seal.
Time or pressure
Wrong processing time, temperature, pressure, or altitude adjustment can make food unsafe.
Tilting or moving
Tilting hot jars or pressing lids early may move residue under the lid or disrupt sealing.
Sudden changes
Thermal shock and liquid loss can weaken sealing conditions or deposit food beneath the lid.
Do not leave an unsealed jar at room temperature. Choose an appropriate safe option promptly.
A seal is one link—not the whole safety chain
A false seal can form when hot food pulls down a lid without receiving adequate heat treatment. Every link must be sound.
False or weak seals matter: a lid may look secure after unsafe processing, or fail later because of residue, rim defects, or poor placement. Inspect before storage and again before opening.
Protect the seal after testing
Correct storage makes failures easier to spot and helps prevent moisture, rust, mold, and accidental disturbance.
Storage checklist
- Remove screw bands after confirming the seal.
- Wash and dry jars and lids if residue is present.
- Label each jar with its contents and processing date.
- Store jars upright in a cool, dark, dry location.
- Avoid stacking heavy jars on top of one another.
- Inspect every jar again before opening.
Never taste suspicious food
Discard without tasting if the lid is loose or bulging, the jar is cracked, or you see leakage, dried streaks, unusual bubbling, or rising liquid.
Botulism cannot be reliably detected by sight, smell, or taste. When processing history or safety is uncertain, discard the food.
Seal-testing questions
The shortest safe answer is consistent: wait, remove the band, inspect, press, and verify attachment.
How long should I wait?
Wait 12–24 hours after processing while the jars remain undisturbed and upright.
Does a ping prove the jar sealed?
No. Always verify the cooled lid with visual, press, and gentle-lift checks.
What does an unsealed lid feel like?
It may flex, click, spring back, shift, or lift easily when the band is removed.
Can I replace the lid without reprocessing?
No. Use a new lid and repeat the full tested process, or refrigerate or freeze the food.
Why can a seal fail during storage?
Residue, rim damage, temperature changes, microbial activity, or improper processing may weaken it.
Should screw bands stay on?
No. Removing them exposes seal failure and prevents trapped moisture, rust, and mold buildup.
A firm, slightly concave lid is a good sign—but safe food also requires a current tested recipe, the correct method, and accurate processing from start to finish.
When to test your jar seals — and why waiting matters
Test your jars after they’ve cooled undisturbed for 12–24 hours. During this period, keep jars upright, don’t press the lids, and avoid moving or turning them. Rushing this step can give a false sense of security or disrupt a fragile seal.
Imagine pulling your jars from the water bath after 10 hours and pressing the lid. You might see it flex or pop. That’s because it’s still settling. Waiting ensures the vacuum has stabilized and the seal has fully formed.
As an affiliate, we earn on qualifying purchases.
The foolproof way to check if your jar is sealed
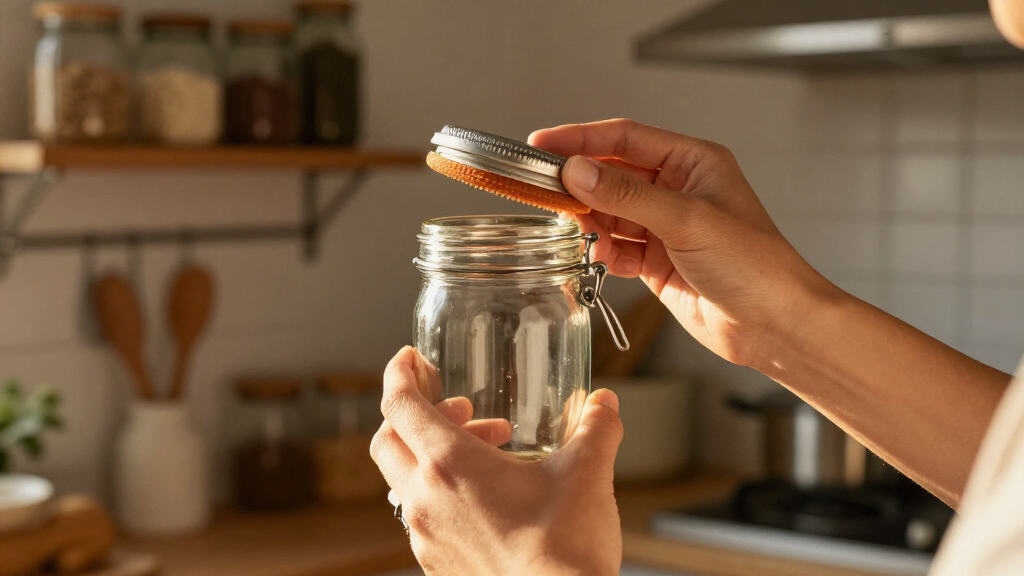
The most reliable test is the press-and-lift method. After 12–24 hours, remove the screw band, then press gently in the center of the lid. A good seal will be slightly concave, firm, and won’t flex or make a clicking sound. Try lifting the lid at its edge with your fingertips.
If it stays attached and doesn’t lift, you’re good. If it moves, flexes, or lifts easily, that jar didn’t seal properly. Never lift a full jar by the lid alone—use caution close to a counter.
home canning jar lid testing tools
As an affiliate, we earn on qualifying purchases.
As an affiliate, we earn on qualifying purchases.
Using the tapping test — quick or tricky?
Tapping the lid with a metal spoon can sometimes indicate a good seal with a ringing sound, or a bad one with a dull thud. However, this method isn’t foolproof. Food touching the lid, lid material, or liquid inside can distort the sound.
Think of it as a quick check—use it, but don’t rely on it exclusively. The visual press test and physical lift are more dependable.
As an affiliate, we earn on qualifying purchases.
What a properly sealed jar actually looks like
Look for a lid that’s bowed slightly downward in the center, with no movement when pressed. It should stay attached after removing the band, with no leaks, bubbling, or bulging during storage.
Some lids make a ‘ping’ sound while cooling—yet the sound alone isn’t proof of a seal. Visual and tactile checks win every time.
As an affiliate, we earn on qualifying purchases.
What to do if your jar didn’t seal
If a jar doesn’t seal within 24 hours, act fast. Refrigerate it, freeze it, or reprocess it with a new lid and the full, correct processing time. Check the jar rim for chips, cracks, or residue before re-canning.
Remember—an unsealed jar isn’t just a waste; it could be unsafe. When in doubt, discard. Safety comes first.
Common reasons jars fail to seal — and how to prevent it
Most failures happen because of food or syrup on the rim, chips or cracks, incorrect headspace, or trapped air. Damaged lids, loose or tight bands, or improper processing times also cause issues. Avoid tilting jars during removal and don’t rush cooling.
Pro tip: keep jar rims clean and check every jar’s rim before sealing. Proper technique prevents most failures.
False and weak seals — what they are and why they matter
A false seal occurs when hot food creates a vacuum that pulls the lid down without proper heat processing. A weak seal might look good but can fail later due to residue, rim damage, or improper lid placement.
Always inspect your jars before storage and again before opening. A seal is only as good as the process behind it.
Best practices for storing sealed jars safely
Remove screw bands to prevent moisture and rust buildup. Wash and dry jars and lids if needed. Label with contents and date, then store upright in a cool, dark, dry place. Avoid stacking heavy jars—stability matters.
Proper storage protects your seals and preserves quality. Remember, bands can hide a failed seal and trap moisture.
Checking jars before opening — what to look for
Before using, examine for loose or bulging lids, dried streaks, bubbling, or odd odors. Check for cracks or damage. If anything seems off, don’t taste—discard. Microorganisms like botulism can’t be detected visually or by smell.
Always prioritize safety over salvage.
Frequently Asked Questions
How long should I wait before checking a seal?
Wait 12–24 hours after processing, with jars undisturbed and upright. This allows the vacuum to form properly and the lid to settle.
Is a popping or pinging sound proof that the jar sealed?
No. While it might indicate movement during cooling, always verify by pressing and inspecting the lid after the waiting period.
What does an unsealed lid feel like?
It may lift easily, flex, or make a clicking sound when pressed. A loose or flat lid suggests the seal failed.
Can I replace a lid without reprocessing?
No. Simply replacing the lid doesn’t restore safety. The jar must be reprocessed with a new lid and proper heat treatment.
Why do some jars lose their seal during storage?
Possible reasons include residue on the rim, temperature fluctuations, microbial activity, or improper processing—inspect carefully before use.
Conclusion
Confirming your jar’s seal might seem simple, but it’s a crucial step that keeps your food safe. A gentle press and visual check often reveal more than a quick tap or a shiny lid. Remember, a good seal isn’t just about appearance—trust your hands and eyes.
When in doubt, refrigerate or reprocess. Your future self will thank you for your careful attention today, turning good food into lasting safety.
Halloween Picks
halloween
As an affiliate, we earn on qualifying purchases.