
TL;DR

Get kitchen gear delivered free with Prime
- Fast, free delivery on millions of items
- Prime Video, Amazon Music and more included
- Member-only deals all year
Building a prepper’s kitchen is a step-by-step process that emphasizes food storage, preservation skills, and off-grid cooking. Small, consistent efforts create a resilient setup that can sustain your family through disruptions.
Start small with inexpensive staples and build your supplies gradually.
Prioritize food storage in airtight containers kept in cool, dark places for maximum longevity.
Learn preservation skills like canning and dehydration to turn perishable foods into long-term assets.
Choose manual, durable tools suited for off-grid cooking—cast iron, hand mills, solar ovens.
Keep your prepper kitchen organized with clear labels, rotation, and inventory tracking to stay prepared.
A Prepper’s Kitchen: Building It Step by Step
A dependable kitchen is built through steady, practical choices—not instant perfection. Balance budget, space, food storage, preservation skills and off-grid cooking to create a system that can sustain your family when everyday supply chains fail.
Add affordable staples and versatile equipment in deliberate phases.
Control heat, light, air and moisture to protect food quality.
Inventory checks prevent waste and keep supplies familiar.
Five layers of kitchen resilience
Treat preparedness like building a sturdy house: establish the load-bearing basics first, then expand capacity, variety and comfort as your budget and skills grow.
Define the disruption
Plan for a realistic scenario: a week without power, a short supply interruption or a longer emergency. Set household size, dietary needs, storage space and budget.
Stock the staples
Begin with rice, beans, oats, pasta, canned vegetables and dried herbs. Choose ingredients your household already knows how to eat.
Control the storage
Transfer dry foods into airtight containers. Label contents and dates, then protect every container from heat, moisture, light and pests.
Preserve the harvest
Learn canning, dehydration, fermentation and vacuum sealing. Tested techniques turn seasonal abundance and bulk purchases into durable assets.
Cook without the grid
Add manual, maintainable tools such as cast iron cookware, a hand mill, a manual can opener, a rocket stove or a solar oven.
Audit and adapt
Check inventory, condition and expiration dates regularly. Use older stock first, replace what is consumed and adjust quantities to real habits.
From a clear plan to a reliable meal
Each stage supports the next. A gap anywhere in the chain—fuel, water, storage, skills or rotation—can reduce the value of everything around it.
Plan
Scenario, people, calories, water, budget and available space.
Acquire
Affordable staples, containers, fuel and essential manual tools.
Preserve
Use tested methods to extend shelf life safely and add variety.
Organize
Label, zone and record supplies so every item stays visible.
Practice
Cook from storage, rotate stock and improve the system.
Build depth without sacrificing variety
Long storage life is valuable, but resilience also depends on nutrition, familiarity and morale. Combine deep reserves of versatile staples with canned, preserved and routinely replenished foods.
Illustrative relative scale. Actual shelf life varies by product, packaging, processing method and storage conditions; follow manufacturer guidance and tested preservation procedures.
Choose simple tools that earn their space
Prioritize versatility, durability and maintainability. The best equipment matches the foods you store, the fuel you can safely access and the skills you have practiced.
| Tool | Primary use | Strength | Tradeoff | Readiness role |
|---|---|---|---|---|
| Cast iron skillet | Frying, baking and stovetop cooking | Durable, even heat, multi-purpose | Heavy and requires seasoning | Core |
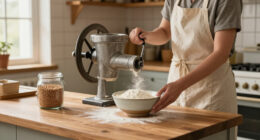
| Manual grain mill | Grinding stored grains into flour | No electricity; fresh flour on demand | Slow and physically demanding | Expand |
| Solar oven | Baking and slow cooking | Uses free sunlight and no stored fuel | Weather-dependent and slower | Backup |
| Rocket stove | Boiling water and cooking outdoors | Efficient with small amounts of fuel | Needs ventilation and safe placement | Core |
| Manual can opener | Accessing canned reserves | Compact, inexpensive and essential | Single-purpose; keep a spare | Day one |
Supplies run out. Capability remains.
Equipment creates potential; practiced skills turn it into dependable meals. Begin with low-risk projects, follow tested food-safety procedures and repeat them before an emergency.
Canning
Store sauces, vegetables, fruit, soups and—using the correct tested method—low-acid foods.
Dehydration
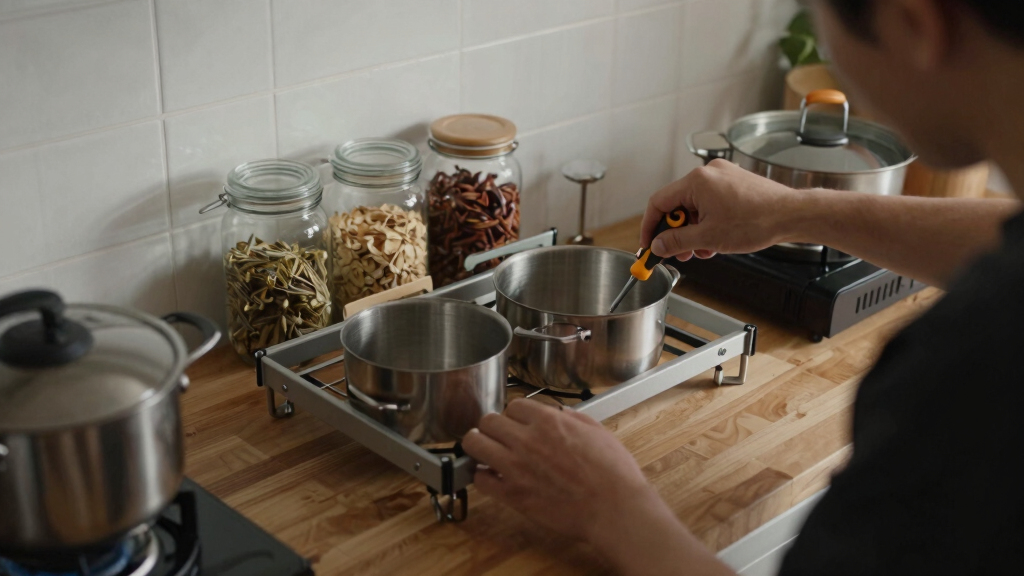
Reduce moisture, weight and storage space while keeping herbs, fruit and meal ingredients useful.
Fermentation
Add flavor and pantry variety through controlled, properly monitored preservation.
Meal planning
Match recipes to stored food, available water, fuel, nutrition requirements and cooking time.
Make rotation a repeatable habit
Clear labels, dedicated zones and regular inventory checks protect food quality, reduce waste and make cooking faster during stressful conditions.
Record the item, quantity, packed date and relevant use-by guidance.
Group water, grains, cans, preserved food, cooking tools and sanitation supplies.
Move older stock forward and use it in ordinary weekly meals.
Update the inventory and replace consumed, damaged or expired items.
Regular inventory checks and rotation are crucial. A visible, maintained pantry is more reliable than a larger stockpile that is forgotten, poorly stored or unfamiliar to the people expected to use it.
Start with a Clear Plan and Budget — Know What You Need First
Before you buy a single jar or piece of equipment, sketch out your goals. Are you prepping for a week-long power outage or a long-term collapse? Your answers shape your priorities.
Set a realistic budget. Focus on inexpensive staples like rice, beans, and dried herbs. These basics last years and form the foundation of meals. Think of it as building a sturdy house: you need solid walls before adding fancy finishes.
For example, a simple plan might include 50 pounds of rice, 30 pounds of dried beans, a manual grain mill, and some basic preservation tools like jars and a hand-crank dehydrator.
As an affiliate, we earn on qualifying purchases.
Build Your Food Storage with Practical, Long-Lasting Staples
Food storage is the backbone of a prepper kitchen. Focus on foods that store well and are versatile in recipes.
Think in terms of shelf life: canned goods last 2-5 years, dried grains and legumes often over a decade. Store them in airtight, dark containers in a cool, dry place — a pantry, cellar, or insulated shed.
Choosing the right staples isn’t just about longevity; it’s about creating a flexible pantry that can support a variety of meals during crises. For example, rice and beans can be combined with dried herbs and canned vegetables to create hearty, nutritious dishes. The tradeoff is that some long-lasting foods may lack fresh flavor or variety, so balancing staples with occasional fresh or frozen items enhances nutrition and morale. Proper storage conditions—cool, dark, and dry—are essential because heat, light, and moisture accelerate spoilage. Neglecting these factors can drastically shorten shelf life, leading to waste and wasted resources.
For example, a batch of 25 cans of vegetables, 10 pounds of dried oats, and a few vacuum-sealed bags of dried fruit can sustain your family for months with proper rotation.
As an affiliate, we earn on qualifying purchases.
Preservation Techniques That Turn Short-Term Supplies into Long-Term Assets
Preservation is your secret weapon. Canning, dehydration, and fermentation transform fresh or purchased foods into resilient supplies.
For instance, canning a batch of tomato sauce takes a day but creates a year’s worth of flavor and nutrition in jars. Dehydrating apples or herbs reduces weight and boosts shelf life. These techniques not only extend the usability of your foods but also provide variety and flavor, which are vital for morale during stressful times.
Dehydration, for example, removes moisture that bacteria and mold need to grow, making foods safe and long-lasting, even without refrigeration. Fermentation adds beneficial probiotics and enhances flavor, creating a more diverse pantry. The tradeoff is that these methods require some initial investment in equipment and learning curve, but mastering them pays off by reducing dependency on commercial supplies and increasing resilience. Properly preserved foods can be stored for years, but improper techniques or storage conditions can lead to spoilage or foodborne illness. It’s essential to follow tested procedures and monitor stored foods regularly to ensure safety and quality.
As an affiliate, we earn on qualifying purchases.
Choosing the Right Tools for Off-Grid Cooking and Food Prep
Your tools shape what’s possible in an unplugged kitchen. Manual appliances—like cast iron cookware, hand-crank grain mills, and solar ovens—are reliable and durable.
For example, a cast iron Dutch oven can bake bread, cook stews, or even fry. A simple rocket stove made from bricks can boil water and prepare meals without electricity.
Compare some common tools:
| Tool | Use | Pros | Cons |
|---|---|---|---|
| Cast Iron Skillet | Cooking, frying, baking | Durable, heats evenly, lasts generations | Heavy, needs seasoning |
| Manual Grain Mill | Grinding grains | No power needed, fresh flour | Requires effort, slower |
| Solar Oven | Baking, slow cooking | Uses free sun, no fuel | Dependent on weather, slow |
Choosing versatile, durable tools makes your kitchen resilient. Consider how they fit your space, skills, and the types of food you plan to prepare. Investing in quality manual tools might cost more upfront but pays off in reliability and long-term usability. Remember, the goal is to create a kitchen that can operate independently of the grid, so prioritize tools that are simple, durable, and easy to maintain.
As an affiliate, we earn on qualifying purchases.
Develop Skills Like Canning, Dehydration, and Meal Planning
Skills turn raw supplies into a lasting pantry. Canning ensures you can preserve excess harvests or bulk buys. Dehydration creates lightweight snacks and ingredients.
For example, canning a batch of apple slices or pickled vegetables gives you shelf-stable flavors. Dehydrated garlic or herbs can spice up meals months later. These skills allow you to make the most of seasonal abundance and reduce waste, which is crucial when supplies are limited or unavailable.
Meal planning saves effort and reduces waste by ensuring you use what you have efficiently. It also helps you anticipate needs and avoid impulse purchases that might not be shelf-stable. Developing these skills involves a learning curve and practice, but the long-term payoff is a more resilient, self-sufficient kitchen. For instance, mastering pressure canning can enable you to store meats and soups safely, expanding your meal options. The tradeoff is time and initial effort, but the confidence and independence gained are invaluable during emergencies.
Organize Your Prepper Kitchen for Easy Access and Rotation
An organized prepper kitchen is a game-changer. Use labeled bins, clear shelves, and dedicated zones for different food groups.
For example, keep canned goods on one shelf, dried grains in airtight buckets, and preserved foods in a separate area. Rotation is vital; moving older supplies to the front and replenishing stocks prevents spoilage and ensures freshness during crises. Regularly checking expiration dates and practicing rotation keeps your supplies reliable and reduces waste. Well-organized storage also minimizes the time spent searching for ingredients during stressful situations, making meal prep quicker and less frustrating. Think of your kitchen as a well-oiled machine—every item has its place, and routine maintenance ensures everything functions smoothly when you need it most.
Creating a systematic inventory, whether on paper or digitally, helps you stay aware of what’s available and what needs replacing. This proactive approach minimizes surprises and maximizes readiness for any emergency scenario.
Frequently Asked Questions
How do I start building a prepper’s kitchen on a tight budget?
Begin with inexpensive staples like rice, beans, and dried herbs. Focus on acquiring versatile, long-lasting items first. Over time, add preservation tools and specialty equipment as your budget allows.
What are the absolute essentials for a prepper’s kitchen?
Water storage, canned foods, dried grains and legumes, a manual can opener, preservation tools (like jars and dehydrators), and durable cooking gear like cast iron cookware are core essentials.
How can I preserve food effectively for long-term storage?
Use techniques like canning, dehydration, vacuum sealing, and storing in airtight containers in cool, dark environments. Rotate your stock regularly to keep supplies fresh and usable.
What safety precautions are vital in my prepper kitchen?
Maintain cleanliness, use proper sanitation, store foods away from pests, and follow safety procedures when using preservation equipment. Always handle pressure canners and sharp tools with care.
How should I organize my prepper kitchen for efficiency?
Label all containers clearly, keep frequently used items accessible, track inventory, and rotate stock regularly. Designate zones for different food types to streamline meal prep and inventory checks.
Conclusion
A well-built prepper’s kitchen isn’t built overnight. It’s a series of deliberate, practical steps—each stacking onto the last. Focus on skills, durability, and organization. With patience, your off-grid kitchen becomes a fortress of resilience, ready to serve you when supply chains falter and times get tough.Halloween Picks
halloween
As an affiliate, we earn on qualifying purchases.