TL;DR

Get kitchen gear delivered free — and shop member deals
- Fast, free delivery on millions of items
- Access to Prime Big Deal Days deals on October 6–7
- Prime Video, Amazon Music and more included
Lighting a wood cooking fire requires good wood, proper stacking, and patience. Managing the fire involves controlling heat zones and timing coals, ensuring safe extinguishing afterward. This guide covers everything from choosing wood to safety tips.
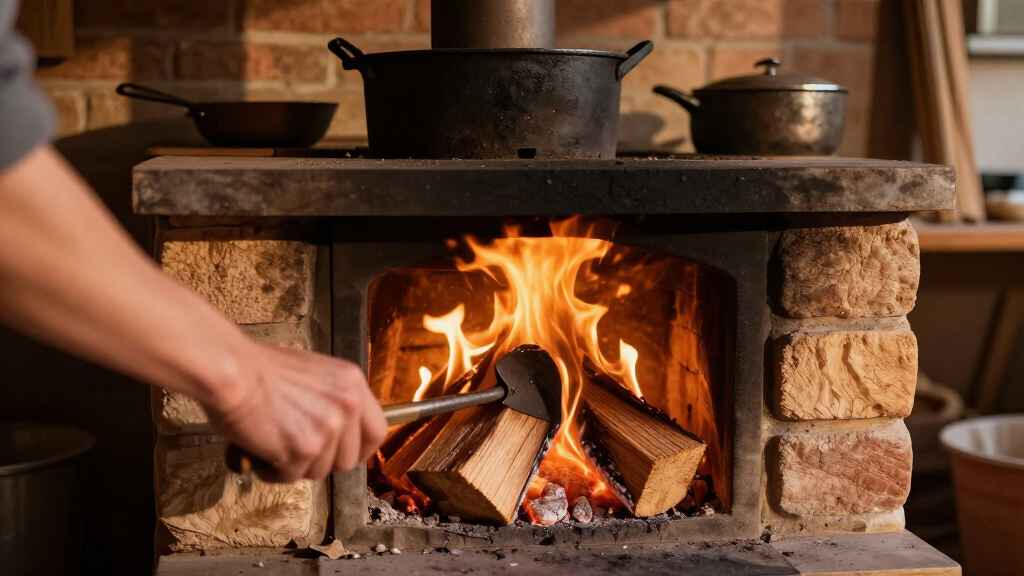
Forget quick-start gas—there’s something deeply satisfying about lighting a wood fire for cooking. It’s an art, a craft, and a connection to traditional techniques that never go out of style. But it’s also a skill that rewards patience and attention to detail. When you master the right methods, you’ll produce better flavors, more reliable heat, and a real sense of self-reliance.
In this guide, you’ll learn how to choose your wood, build the perfect fire, manage it for both high heat and gentle simmering, and extinguish it safely. Whether you’re grilling steaks, roasting vegetables, or baking pizza, understanding fire management makes all the difference.
Use well-seasoned hardwoods for longer, cleaner burns and richer flavors.
Build fires with the top-down method to reduce smoke and flare-ups during long cooks.
Timing is key—wait 45–90 minutes for a stable coal bed before cooking.
Control heat by creating zones and raking coals, matching wood to your food for optimal flavor.
Always extinguish fires completely and clean ashes safely to prevent hazards.
The Complete Field Guide · Live-Fire Cooking
How to Light & Manage a Wood Cooking Fire
Forget quick-start gas. A wood fire is an art — a connection to traditional technique that rewards patience with better flavor, reliable heat, and real self-reliance. From seasoned hardwood to a glowing coal bed, here is the whole craft: build it, light it, read it, control it, and put it safely to bed.
Key Insight
“Cook over coals, not flames. A well-managed fire takes 45–90 minutes to develop a stable coal bed — and that bed is the entire secret to consistent heat and clean flavor.”
45–90 min
Burn-down to a usable coal bed
15–20 %
Target wood moisture, meter-verified
~1 hr
Rule of thumb: light the fire an hour before cooking
6–12 mo
Seasoning time, split & stacked
230–290°C
Searing zone over a hot coal bed
30–45 min
Coal life from one decent hardwood log
12 cm
Hand height for the no-thermometer heat test
Step 01 · Fuel & Structure
Pick the Right Wood, Build the Right Lay
Your fire’s foundation is the wood itself. Seasoned hardwoods — oak, hickory, maple, fruitwoods — burn longer, build better coals, and taste richer. Softwoods like pine ignite fast but burn dirty and resinous: kindling only, never the main event. Most failed cooking fires skip a rung on the size ladder.
Tinder
Dry newspaper, shredded bark, fatwood shavings, dry grass. Catches instantly.
Matchstick size
Kindling
Small dry twigs and thin splits. Bridges flame from tinder to real fuel.
Pencil to thumb size
Splits
Quarter-split hardwood. The workhorse that builds your glowing coal bed.
Wrist size
Logs
Full splits & logs sustain long cooks. Add at the edges to keep the core steady.
Forearm size
Method A · Cleanest
Top-Down (Upside-Down)
Logs on the bottom, tinder and kindling on top. Lit from above, it burns downward — less smoke, less tending, fewer flare-ups.
- Best for long cooks & barbecues
- Ignites evenly, saves time
- Increasingly the pro standard
Method B · Fastest
Teepee
Kindling leaned cone-style over a tinder nest, lit from the bottom. Quick to establish, but needs attention as it collapses.
- Fast ignition for weeknight grills
- Great airflow, tall flame
- Requires rebuilding as it burns
Method C · Classic
Log Cabin
Logs stacked in a square like a campfire, kindling inside. Stable and long-lasting, but slower to reach cooking coals.
- Sturdy structure for fire pits
- Even, predictable burn
- More tending than top-down
Step 02 · Timing Is Everything
Wait for the Coals — Then Read the Heat
Rushing to cook over flames is the #1 beginner mistake: it scorches food, causes flare-ups, and deposits acrid, bitter creosote flavors. Patience until the coal bed matures gives you control a gas grill can only imitate.
Burn-down window · minutes after lighting
Clean Smoke · Thin Blue
Nearly invisible, sweet-smelling. Complete combustion — this is what flavors food beautifully.
Dirty Smoke · Thick White
Billowing and acrid. Incomplete combustion from green wood or smothered fires — wait it out.
The Hand-Count Test
Palm down · ~12 cm above the coals
| Seconds Held | Heat Level | Temp / Use |
|---|---|---|
| 2–3 s | High | 230–290°C · searing steaks |
| 4–5 s | Medium | 175–230°C · grilling |
| 6–8 s | Low | 120–175°C · slow roasting |
| 9+ s | Too cool | Feed the edges, wait 15 min |
Step 03 · Fire Management
Command the Heat: Zones, Rakes & Airflow
Managing the fire means sculpting the coal bed. Bank coals high on one side for searing heat, spread them thin for gentle roasting, and rake between them to adjust on the fly — a professional kitchen’s heat control with a stick and some patience.
Zone 01 · Direct
Banked Coals — High Heat
Pile coals two layers deep on one side. Sear steaks, char vegetables, crisp skin. If chicken browns too fast, rake coals away and drop the intensity in seconds.
TARGET 230–290°C / 450–550°F
Zone 02 · Indirect
Spread Coals — Gentle Heat
Push coals thin or to the perimeter; cook beside, not over, the bed. Ideal for whole birds, roasts, simmering pots, and finishing what you seared.
TARGET 120–175°C / 250–350°F
Coal-bed temperature spectrum
Feed the Edges
On long cooks, add fresh splits at the perimeter, never the center — the core stays steady and you avoid flare-ups.
Steer with Airflow
Open grill vents and firebox doors to raise heat; choke them down to coast. Air, not fuel, is your fine-tuning dial.
Multitask the Zones
Sear a steak over the hot bank while vegetables roast gently alongside — strategic placement beats raw power.
Step 04 · Flavor Pairing
Match the Wood to the Food
Smoke is an ingredient. Mild woods perfume delicate proteins; bold woods stand up to red meat. Overdo a strong wood and bitterness masks everything — balance wood, cook time, and food.
| Wood | Smoke Strength | Best With | Verdict | Notes |
|---|---|---|---|---|
| Apple / Cherry | Fish, poultry, vegetables | ✓ Ideal | Sweet, subtle, fruity hint that never overpowers | |
| Alder | Salmon, delicate seafood | ✓ Ideal | Pacific-Northwest classic; gentle and clean | |
| Oak | Beef, lamb, pizza ovens | ✓ Ideal | The all-rounder: long coals, medium-bold smoke | |
| Hickory | Brisket, pork shoulder, ribs | ✓ Ideal | Deep, bacon-like aroma; the barbecue benchmark | |
| Mesquite | Red meat, short hot grills | ~ Sparingly | Intensely bold — turns bitter on long cooks | |
| Pine / Fir | Kindling only — never the meal | ✗ Avoid | Resinous soot and acrid flavor on food | |
| Treated lumber / pallets | Nothing, ever | ✗ Never | Toxic chemicals — dangerous to burn and eat over |
Sustainability note: favor locally sourced wood and orchard prunings — transported firewood spreads pests like the emerald ash borer. Check local burn restrictions before lighting up.
Step 05 · Shutdown Protocol
Extinguish Completely, Clean Up Safely
Never leave a fire unattended, and never call it done until the last ember is dead. A drown-and-stir routine eliminates hidden hotspots that can reignite hours later.
Burn Down
Let coals fade to gray and ashy — roughly 30 minutes after cooking.
Drown
Pour water slowly over the bed; expect steam and hiss, stand back.
Stir
Turn the slurry with a stick to expose buried, still-live embers.
Repeat
Douse again until no smoke, hiss, or heat rises. Cold to the hover-test.
Store Ashes
Cooled ashes go in a lidded metal container, far from combustibles.
Clearance First
Set up well away from structures, overhanging branches, and dry brush. Keep water or an extinguisher on hand before the first match strikes.
Never Unattended
A live fire is a commitment. Wind shifts and falling coals turn minutes of neglect into genuine hazard.
Respect the Air
Check local burn rules and air-quality advisories — wildfire seasons increasingly bring restrictions, and dirty smoke bothers neighbors fast.
The Full Chain · From Forest to Plate
Pick the Right Wood and Prepare It for Easy Lighting
Your fire’s foundation is the wood. Using seasoned hardwoods like oak, hickory, or maple is key—they burn longer, produce better coals, and impart richer flavor. Avoid softwoods like pine or fir, which ignite quickly but burn hot and produce resinous smoke that can tarnish your food.
Proper seasoning matters more than species. Aim for firewood dried to 15–20% moisture. Green wood is full of moisture, making it hard to light and creating more smoke and creosote. Store your wood in a dry, well-ventilated place, split and stacked for at least 6 months.
The size of your wood affects how your fire burns. Start with small tinder and kindling—dry twigs, shredded bark, or paper. Follow up with larger splits and logs, which sustain the fire longer. Think of it as climbing a ladder from quick ignition to long-lasting heat.
As an affiliate, we earn on qualifying purchases.
Build Your Fire the Smart Way: Top-Down, Teepee, or Log Cabin?
How you build your fire shapes how easy it is to light and control. The top-down (upside-down) method is increasingly popular—logs go on the bottom, tinder and kindling on top. When lit, it burns downward, producing less smoke and requiring less tending.
Traditional methods like the teepee or log cabin are faster to set up but need more attention. Teepees focus on quick ignition—add small twigs and light from the bottom. Log cabins mimic a campfire, stacking logs in a square, then filling inside with kindling. Both work well, but top-down reduces smoke and flare-ups.
For example, a backyard chef might prefer the top-down for a barbecue because it’s cleaner and easier to manage during a long cook.
seasoned hardwood for outdoor fire
As an affiliate, we earn on qualifying purchases.
As an affiliate, we earn on qualifying purchases.
Light Your Fire Efficiently Without Lighter Fluid
Lighting a fire cleanly means avoiding lighter fluid. Instead, use dry newspaper, shredded bark, or natural fire starters like fatwood sticks. Place your tinder in the center of your fire lay, then add kindling around it. Light from the bottom—this encourages a steady, smokeless burn.
For a top-down fire, arrange your logs with the tinder on top, then light from the top, letting the fire burn downward. This method produces less smoke and tends to ignite more evenly, saving time and reducing frustration.
Remember, patience pays off. Wait until the tinder and kindling are glowing before adding larger splits. This gentle start prevents flare-ups and creates a steady heat source.
As an affiliate, we earn on qualifying purchases.
Timing and Patience: When Are the Coals Ready for Cooking?
It takes about 45 to 90 minutes for a fire to burn down to a bed of hot, glowing coals. Rushing this step often results in uneven cooking, flare-ups, and inconsistent heat. The importance of patience here cannot be overstated because the quality of your coals directly affects your cooking results. Properly developed coals provide a stable, even heat source that allows your food to cook thoroughly without burning or undercooking.
Look for a grayish, ashy coating on the coals—this signals readiness. You can also perform the hand test: hold your hand about 12 cm above the bed. If you can keep your hand there for 4-5 seconds without burning, the fire is at a moderate temperature suitable for grilling. Longer seconds indicate lower heat, ideal for slow roasting or gentle simmering. Rushing this process can cause flare-ups or uneven heat distribution, leading to disappointing results. Patience in this phase ensures your fire is at its optimal cooking power, giving you control and consistency.
For example, a dinner of roasted vegetables works best when the coals are at a gentle glow, not flaming or white-hot, which could scorch or burn the food.
fire safety tools for outdoor fire
As an affiliate, we earn on qualifying purchases.
As an affiliate, we earn on qualifying purchases.
Control Heat Zones for Perfectly Cooked Meals
Managing your fire means creating distinct heat zones on your grill or fire pit. Bank the coals to one side for direct, high heat — ideal for searing steaks. Spread them out for indirect heat, perfect for gentle roasting or simmering.
Raking coals helps adjust the temperature on the fly. For example, if your chicken skin is crisping too fast, move coals away and lower the heat. When you need a sustained low simmer, push coals to one side and keep your pot or pan over the cooler zone.
During a long cook, you might add fresh splits to the edges, keeping the core steady without flare-ups. This method mimics a professional kitchen’s heat control, just with a stick and some patience.
Understanding how to manipulate heat zones allows you to multitask—searing a steak on high heat while slowly roasting vegetables nearby. It’s about strategic placement and constant adjustment, which takes practice but pays off with perfectly cooked dishes.
Match Wood Types to Your Food for Flavor and Control
Choosing the right wood makes a big difference in flavor. Mild woods like apple, cherry, or alder produce sweet, subtle smoke—great for fish, poultry, and vegetables. Stronger woods like oak, hickory, or mesquite give a bold, smoky punch—ideal for red meats.
For example, smoking a brisket with mesquite or hickory lends a deep, smoky aroma that permeates the meat. Conversely, grilling fish over applewood adds a gentle, fruity hint that doesn’t overpower.
Remember, too much of a strong smoke flavor can become bitter if overdone. Balance your wood choice with cooking time and food type. Over-smoking can lead to bitter, overpowering flavors that mask the natural taste of your ingredients. Conversely, using too mild a wood might result in insufficient smoky flavor, especially for hearty meats. Choosing the appropriate wood and understanding its impact ensures your food not only cooks well but also develops the desired depth of flavor. This balance is crucial for achieving culinary harmony and avoiding the common trap of either bland or overly smoky dishes.
Extinguishing Your Fire Safely and Cleaning Up
Never leave your fire unattended. When you’re done cooking, let the coals burn down until they turn gray and ashy—this takes about 30 minutes. Then, carefully drown the coals with water, stirring to extinguish all embers. This thorough approach ensures no hidden hotspots remain that could reignite later, preventing accidental fires. Repeat until no smoke or heat rises, confirming complete extinguishment. Properly doused coals reduce environmental impact and ensure safety for future use.
Store cooled ashes in a metal container, away from combustible materials. Proper disposal prevents accidental fires and keeps your space safe. Consider mixing cooled ashes into compost or soil as they contain minerals that can benefit plants, but avoid using large quantities directly on delicate garden beds.
For cleanup, rake out remaining ash and debris, and inspect your fire area for hotspots or sparks. Maintaining a clean, safe fire zone ensures your outdoor cooking remains a pleasure—not a hazard. Regular maintenance not only prolongs the life of your fire pit or grill but also minimizes the risk of unintended fires, especially in dry or windy conditions. Safety and cleanliness are integral to responsible outdoor cooking, transforming a simple fire into a sustainable, enjoyable practice.
Frequently Asked Questions
How long before I can start cooking after lighting the fire?
Plan for about 45 to 90 minutes for the fire to burn down to a bed of hot, glowing coals. Rushing this step can lead to uneven cooking or flare-ups. Wait until the coals are gray and ashy for best results.Why does my food taste bitter or acrid?
This often results from cooking over flames or incomplete combustion, especially with green or resinous woods. Use seasoned hardwoods and wait until the coals are ready to avoid harsh flavors.Can I cook directly on the coals?
Yes, you can cook directly on hot coals for certain foods like root vegetables or kebabs. Just be sure your coals are at the right temperature and your food is prepared to handle direct heat. Use a cast iron pan or grill grate for more control.How do I keep the heat steady during a long cook?
Create heat zones by banking coals on one side for high heat, and spread them out for low, indirect heat. Add fresh splits at the edges and rake coals as needed to maintain consistent temperature.How do I extinguish my fire safely?
Douse the remaining coals with water, stir thoroughly, and repeat until no heat or smoke remains. Store cooled ashes in a metal container away from combustible materials to prevent fires.Conclusion
Mastering a wood fire isn’t just about lighting it—it’s about understanding how to build, manage, and extinguish it with purpose. When you get comfortable with timing, heat control, and safety, your outdoor cooking transforms from a challenge into a rewarding ritual. Each flame is a chance to connect with traditional skills that never go out of style.
Next time you start a fire, think of yourself as a craftsman wielding both fire and flavor. The smell, the crackle, the satisfying glow—all waiting for you to turn raw wood into a delicious meal. This is your craft; make it count.
Evergreen bestsellers Picks
bestsellers
As an affiliate, we earn on qualifying purchases.