TL;DR

Get kitchen gear delivered free — and shop member deals
- Fast, free delivery on millions of items
- Access to Prime Big Deal Days deals on October 6–7
- Prime Video, Amazon Music and more included
A manual can opener uses a cutting wheel and feed gear to travel around a can’s rim, powered by a turning knob and handle leverage. Choose between familiar top-cut models, smoother-edge side-cut models, and compact designs by weighing comfort, cutting style, cleaning, and storage. Reposition a slipping opener rather than forcing it, then clean and dry the wheel and gears after use.
A can opener that slips halfway around a tomato can can turn a quick supper into a wrestling match. A well-fitted manual can opener, by contrast, gives you a steady cut without a cord, batteries, or a crowded drawer.
The basic tool is simple: you clamp it onto a rim, turn a knob, and guide a cutting wheel around the can. But small differences in grip, cutting style, and cleanup can matter a lot—especially if you open cans often, have sore hands, or keep a kitchen running without reliable power.
Here, you’ll learn how the main styles work, what matters most when you choose one, how to use it safely, and how to spot trouble before a dull wheel ruins dinner. You’ll also get practical care advice that can help a dependable opener earn its place in your kitchen for years.
Choose a top-cut opener for familiar operation or a side-cut design if smoother lid and can edges are a priority.
If hand strength or dexterity is limited, look for broad handles and an easy-turn knob, then try the grip when possible.
Seat the cutting wheel and feed gear correctly, turn steadily, and reposition the tool if it slips.
Clean residue from around the wheel and gears, then dry the opener thoroughly before storage.
Replace an opener with a damaged wheel, repeated slipping, or rust that will not clean off.
How a manual can opener cuts through a can
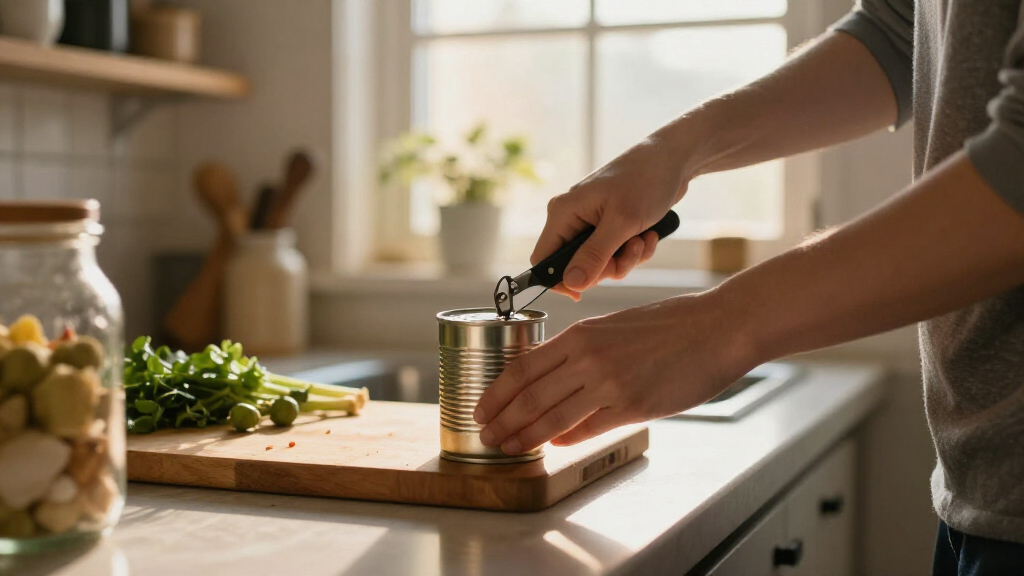
A manual can opener uses two working parts to move around a can: the cutting wheel pierces the metal, and the feed gear grips the rim and advances the opener as you turn the knob. The handles clamp those parts in position and give you leverage. That division of work matters: the wheel makes the cut, but a secure grip and correctly seated gear keep the cut consistent. If either part loses contact, the crank may spin without making progress.
On a traditional top-cut model, the wheel cuts through the lid just inside the rim. The lid separates, but its edge can be sharp enough to nick a fingertip. A side-cut opener works near the seam instead, separating the lid from the can with a different cut. That often leaves smoother edges, though the loose lid and the opener’s own mechanism still need careful handling. The cutting style therefore changes how you handle the result, not whether you need to be cautious.
For instance, if you are opening beans for a pot of chili, a traditional opener is familiar and usually straightforward. If you want to pour the beans without brushing your fingers near a sharp lid, a side-cut model may feel more comfortable. No design removes every sharp part: the cutting wheel is still a blade, and a detached lid can still cut you. The practical benefit of a smoother edge is reduced risk during ordinary handling, not a guarantee against injury.
The tool rewards a calm rhythm. A steady turn helps the feed gear move around the rim; a hard yank can make the opener slip or leave an uneven cut. If you hear the wheel grind or feel it jump, pause and check the alignment instead of trying to muscle through. Forcing it can turn a small positioning problem into a jagged cut, and extra pressure does not restore a worn wheel or gear.
manual can opener with comfortable grip
As an affiliate, we earn on qualifying purchases.
As an affiliate, we earn on qualifying purchases.
Choose between top-cut, side-cut, and compact openers
The right opener style depends on what you value most: familiar operation, smoother edges, or compact storage. Traditional top-cut models are widely available and simple to understand; side-cut designs aim for smoother can and lid edges; compact openers save space but can demand more practice and hand effort. These are practical tradeoffs, not a ranking: a feature that helps in one kitchen may be a drawback in another.
Consider where you will use the tool. In a home kitchen, a larger model with broad handles can feel steady during weekly meal prep. In a camping kit, a folding opener takes less room, but its short lever may feel tiring when you open several cans for a group dinner. Multi-purpose models add conveniences such as a bottle opener, though extra shapes and joints can make cleaning harder. The more often you use an opener, the more a comfortable grip and easy-to-clean mechanism may outweigh a small space saving or added feature.
| Style | What it does well | Tradeoff |
|---|---|---|
| Traditional top-cut | Familiar operation and common availability | The lid edge can be sharp |
| Side-cut or smooth-edge | Often leaves smoother can and lid edges | The lid may fall into the can; parts still need careful handling |
| Compact or camping | Small footprint and easy packing | Shorter levers may take more effort |
| Multi-purpose | Adds tools such as a bottle opener | Extra features can add bulk and complicate cleaning |
These tradeoffs affect more than convenience. A smoother cut may help when pouring directly from a can, but it does not remove the need to handle a loose lid carefully. A compact opener saves pack space, yet a short lever can make each turn harder, especially if your hands tire quickly. Extra functions can be useful when you have limited storage, but every crevice around an added tool gives food residue another place to collect. Consider whether you will actually use those features often enough to justify the extra cleaning.
Think about a crowded cabin kitchen: a compact tool may be worth its smaller grip if storage is tight, while a roomy home setup can make comfort the priority. There is no universal winner. Match the style to your hands, cans, and storage space, not to a feature list alone; the best choice is the one whose compromises you can live with every time you use it.
side-cut can opener for smooth edges
As an affiliate, we earn on qualifying purchases.
As an affiliate, we earn on qualifying purchases.
Find a handle and knob you can use comfortably
A comfortable opener has handles you can hold securely and a knob you can turn without pinching or straining. If you have arthritis, limited hand strength, or sore fingers, look for a broad knob and larger, well-shaped handles; a smooth mechanism can matter more than a clever extra feature. Comfort is not just a preference: a grip that lets you maintain control reduces the temptation to squeeze harder or yank when the opener meets resistance.
Try to judge the grip as you would a hand tool. Do the handles feel stable when you press them together? Can your fingers wrap around the knob without sliding? If possible, try the turning action before you buy. Labels such as “easy grip” can help you narrow a search, but your own hand gives the more useful answer. A knob that feels fine for one turn may become uncomfortable over several cans, so consider how the tool feels through repeated motion.
For instance, imagine opening three cans of soup before a winter storm. A tiny knob may work for one can, then become uncomfortable as your fingers tire. A larger turning surface spreads pressure across more of your hand, making repeated turns feel less fiddly. That difference matters even if you only open cans occasionally: when your grip is tiring, you may lose control just when the opener needs steady pressure.
Look at the mechanism as well as the grip. A sturdy body and well-aligned cutting wheel and feed gear help the opener track around the rim. Stainless steel parts can resist corrosion, but stainless does not mean maintenance-free; food residue and damp storage can still cause trouble. Choose solid construction and clean, dry the tool rather than paying extra for claims that promise effortless use. Good ergonomics make the work easier, but they cannot compensate for a poorly aligned or damaged mechanism.
As an affiliate, we earn on qualifying purchases.
Open a can safely without forcing the crank
To use a manual can opener safely, wipe the can if needed, seat the wheel correctly on the rim, clamp the handles, and turn steadily around the can. If the opener slips or cuts unevenly, stop and reposition it rather than forcing the knob. A few extra seconds at the start can prevent a jagged lid and a scraped hand. Proper alignment also makes the tool easier to turn because the feed gear can do its job instead of skating over the rim.
- Check the can. Wipe away dust or grit from the top, and look for a badly dented rim that may stop the feed gear from gripping.
- Seat the opener. Place the cutting wheel and feed gear on the rim as the manufacturer directs. Keep your fingers away from the wheel.
- Clamp and turn. Squeeze the handles together and turn the knob in a steady rhythm. Let the mechanism travel; don’t yank it around the rim.
- Stop if it slips. Release the handles, reposition the tool, and try again. A worn wheel or damaged gear may need replacement instead of more force.
- Lift carefully. Handle the lid and opener with care, even if you use a smooth-edge design.
Suppose you are opening a dented can of tomatoes and the knob suddenly turns without moving the cut. That is a sign to pause, not to twist harder. A quick reset can put the gear back on the rim; if it keeps slipping, switch tools and check the opener before using it again. Continuing to force it can make the opening rougher without solving the underlying grip problem.
Steady pressure beats brute force. When an opener slips, stop and realign it; force can make the cut rougher and your grip less safe.
For someone with reduced hand strength, a helper or a more comfortable design may be the safer choice. The goal is a controlled cut, not proving that you can overpower a stubborn can. If a can is badly dented near the rim, using another can or another tool may be more sensible than repeatedly trying to make the opener track.
ergonomic can opener for limited hand strength
As an affiliate, we earn on qualifying purchases.
As an affiliate, we earn on qualifying purchases.
Clean the wheel and gears before food residue hardens
Clean a manual can opener by removing visible food residue, washing it according to its care instructions, and drying it thoroughly. The wheel and gears can trap small bits of food, especially after opening sticky tomato sauce or syrup. Rinsing only the handles may leave the working parts dirty, where residue can harden and interfere with the gear’s grip the next time you use the tool.
After opening a can, inspect the cutting area under good light. Wipe away residue with a cloth or small brush, taking care around the sharp wheel. Wash the tool as its maker directs, then dry the joints and metal parts before putting it away. Avoid soaking or dishwasher cleaning unless the instructions say that method is safe. A method that seems convenient may leave water in tight joints, so the manufacturer’s directions matter as much as whether the opener appears clean on the surface.
For example, after making tomato soup, a red smear can cling near the feed gear even when the opener looks clean from above. If you put it wet into a drawer, moisture can linger around the mechanism. A quick rinse, careful wipe, and thorough dry help prevent residue buildup and reduce corrosion risk. This is especially useful for openers with close-fitting gears, where trapped food and water are harder to see and remove.
A hanging loop can help air circulate around the opener and keep it easy to find, but it does not replace drying. If you see rust that will not clean off, or the cutting mechanism is damaged, replace the tool. Clean, dry storage is a simple habit that supports dependable operation; it cannot repair a worn cutting wheel. Cleaning helps preserve a sound opener, while replacement addresses mechanical wear or damage.
Know when slipping means a reset—or a replacement
An opener that slips may be misaligned, worn, or fighting a dented can rim. Reposition it and turn steadily once; if it repeatedly skips, leaves an uneven cut, or has a damaged or badly rusted mechanism, stop using it and replace it. More force rarely fixes worn parts. Distinguishing a one-time positioning problem from repeated failure helps you avoid both unnecessary replacement and an unsafe attempt to keep using a faulty tool.
Check the can first. A dent near the rim can interrupt the feed gear’s grip, while a small or unusual can may not fit a standard opener well. If the rim is sound, reseat the opener so the wheel and gear meet the rim correctly. A smooth, consistent turn should carry it around the can. This quick check isolates the likely cause: trouble on one damaged can is different from trouble across several normal cans.
For instance, if your opener cuts one can cleanly but skips on a can with a crumpled edge, the can may be the problem. If it skips on several ordinary cans, inspect the wheel and gears. A dull or damaged wheel can make every opening feel like a fight, while rust around the mechanism is a warning to take seriously. Repeated skipping can also produce an uneven lid that is harder to remove safely.
The pattern of the problem is useful evidence: trouble on one dented can points toward the rim, while repeated skipping on sound cans points toward the opener’s alignment or condition. A single careful reset is reasonable; repeated attempts with more pressure can worsen the cut without restoring a worn wheel or gear. Replacing a faulty opener is safer and often less frustrating than relying on it until it fails midway through a meal. If cleaning and correct positioning do not restore smooth movement, treat the problem as mechanical rather than something to overcome with strength.
Manual models remain useful because they need no power and take little storage space. They are not automatically better than electric models, though: an electric opener may require less hand effort if you open cans often or have difficulty gripping a knob. Choose by comfort and use, and keep a manual model if a power-free backup suits your kitchen or camping kit. The important tradeoff is independence from power versus the hand effort required; the right balance depends on how and where you open cans.
Frequently Asked Questions
Which manual can opener leaves the smoothest edge?
Side-cut openers are designed to separate the lid near the seam and often leave smoother edges on the can and lid than traditional top-cut models. Results vary, and the detached lid and cutting parts still need careful handling.
Are smooth-edge can openers completely safe?
No opener makes every part harmless. A smooth-edge design can reduce sharp edges, but its cutting mechanism and detached lid can still cut you. Keep fingers clear of the wheel and lift the lid carefully.
Why does my can opener keep slipping?
The opener may be misaligned, its cutting wheel or feed gear may be worn, or the can rim may be dented. Stop, check the rim, and reposition the tool; if it repeatedly slips on ordinary cans, inspect or replace the opener instead of forcing the knob.
Can I put a manual can opener in the dishwasher?
Some models can go in the dishwasher, but others need hand-washing or thorough drying to limit residue buildup and corrosion. Follow the maker’s care instructions, and pay attention to water around the cutting wheel and gears.
What kind of manual opener is easier for weak hands or arthritis?
Look for large, comfortable handles and a broad knob that turns without pinching your fingers. If you can, try the grip and turning action before buying; how the opener feels in your hand matters more than an “easy grip” label.
Conclusion
Choose a manual can opener that fits your hands and your routine, then keep its cutting wheel and gears clean and dry. A side-cut model may leave smoother edges; a traditional opener may feel simpler; neither choice makes careful handling optional.
When the crank turns smoothly and the cut follows the rim, dinner gets back to being dinner. Keep a steady grip, respect the sharp parts, and let a small hand tool do its quiet work.
Fall Picks
fall essentials
As an affiliate, we earn on qualifying purchases.