
TL;DR
Open a free Amazon Business account
Business pricing, bulk buying and tax-exempt orders.
Create a free accountAs an affiliate, we earn on qualifying purchases.
Dry-curing a whole muscle requires selecting quality meat, applying a precise curing mix, controlling environment, and aging properly. When done right, it yields rich, shelf-stable cured meat, but safety and environment control are key.
Most people think dry-curing is only for pros. In reality, with the right technique, a clean environment, and patience, you can turn a simple cut of meat into something akin to prosciutto or bresaola. It’s a blend of art and science that rewards your effort with deeply flavored, shelf-stable meat.
Whether you’re off-grid or just seeking a more self-reliant kitchen, mastering dry-curing a whole muscle opens up a world of flavorful preservation. You’ll learn how to pick the right meat, apply the cure, and create conditions that keep your meat safe and delicious for months.
Choose fresh, lean cuts like pork loin or beef tenderloin for best results.
Apply curing mix evenly, and consider injecting for thicker muscles.
Maintain strict temperature and humidity controls during curing and aging.
Use curing salts with nitrates/nitrites to prevent botulism and develop authentic color/flavor.
Regularly inspect your meat for signs of spoilage; safety is non-negotiable.
How to Dry-Cure a Whole Muscle
Salt, time, and controlled air can turn a simple cut of meat into prosciutto or bresaola. It’s a blend of art and science that rewards patience with deeply flavored, shelf-stable meat — no professional lab required.
“Curing salts containing nitrites or nitrates are essential to prevent botulism and develop the characteristic color and flavor of dry-cured meats.”
Choosing the Perfect Muscle
Start with fresh, high-quality meat. Lean, whole muscles cure evenly and develop better texture — but composition tradeoffs matter.
Pork Loin
Firm texture, bright color, minimal surface fat. An ideal first project — typically cures in 7–10 days depending on thickness.
Beef Tenderloin
Lean and dense — the classic base for bresaola. Thick enough to benefit from cure injection for uniform preservation.
Ham / Shoulder
Fattier cuts add flavor and moisture retention but demand stricter environment control — a longer, riskier path to prosciutto.
The Core Process
From raw cut to hanging muscle — six connected steps, each one building safety and flavor.
Trim
Remove fat, silverskin & connective tissue for even cure penetration.
Mix
Blend salt, sugar & curing salt (Prague Powder #1) by weight.
Apply
Rub evenly — or inject thick muscles with a clean syringe.
Cure
36–40°F, 5–21 days. Turn and massage every few days.
Dry & Age
Hang at ~55°F, ~70% humidity, good airflow. 4–12 weeks.
Inspect
Watch for off-odors, slime, or unusual mold. Safety is non-negotiable.
Environment Control Is Everything
Slight variations in temperature and humidity dramatically affect flavor, texture, and safety. Know your targets.
| Phase | Temperature | Humidity | Duration | Key Risk If Wrong |
|---|---|---|---|---|
| Equalization Cure | 36–40°F (2–4°C) | ~75% | 5–21 days | Bacterial growth |
| Drying & Aging | ~55°F (13°C) | ~70% | 4–12 weeks | Case hardening / spoilage |
| Storage | Cool & dry | Well ventilated | Months | Rancidity |
| Airflow | — | Steady, gentle | Throughout | Uneven drying |
| Turning / Massage | — | — | Every few days | Prevents uneven cure |
Safety: The Non-Negotiables
Dry-curing is safe for home use — with strict adherence to guidelines. Know the green flags and red flags.
Healthy Signs
- Firm texture with steady, gradual weight loss
- Characteristic cured color from nitrite reaction
- Clean, salty-meaty aroma throughout aging
- Specific edible white molds (intentional, controlled)
Danger Signs — Act Immediately
- Off-odor or sour smell at any stage
- Slimy patches or unusual discoloration
- Green, black, or fuzzy unexpected mold
- Soft, wet pockets indicating under-curing
Innovations Making It Easier
New tech brings pro-level consistency to home and off-grid setups.
Precision Climate Control
Affordable systems now regulate temperature, humidity, and airflow — achievable even off-grid with simple equipment.
Vacuum-Seal Pre-Cure
Sealing before traditional curing boosts safety and flavor infusion — a hybrid of modern and classic methods.
Natural Curing Agents
Celery powder and alternative salts deliver nitrates while reducing sodium — safety still comes first.
How to Choose the Perfect Meat for Dry-Curing
Start with fresh, high-quality meat. Lean, whole muscles like pork loin, beef tenderloin, or ham are excellent choices. Look for meat with firm texture, bright color, and a good fat-marrow balance. The better the quality, the better your cured product will turn out.
For example, a fresh pork loin with minimal surface fat and a firm feel makes an ideal candidate. Avoid meat with discoloration or slimy patches. The meat’s initial freshness sets the foundation for flavor and safety.
Choosing the right meat isn’t just about appearance; it’s about understanding how the meat’s composition affects curing. Leaner cuts cure more evenly and develop better texture, but they can also dry out faster if over-aged. Fattier meats can add flavor and moisture retention but require careful control to prevent spoilage. Balancing these factors influences the final taste, texture, and safety of your cured meat.
As an affiliate, we earn on qualifying purchases.
Preparing and Trimming Your Meat for Even Curing
Trim away excess fat, connective tissue, and any silvery-skin to ensure even curing and reduce spoilage risks. Fat can go rancid during long cures, so a thin layer—if any—is best. Removing uneven surfaces helps salt and spices penetrate uniformly, producing consistent flavor.
Imagine a pork loin, freshly trimmed, with a clean, smooth surface ready for the cure. This step is about setting the stage for flavor and safety.
Proper trimming is crucial because uneven surfaces or excess fat can create pockets where bacteria can thrive or where curing agents don’t penetrate effectively. This can lead to inconsistent flavor or safety issues. Striking a balance is key: you want enough fat for flavor but not so much that it hampers preservation. The goal is to prepare a surface that allows for uniform salt and spice absorption, which directly impacts the final product’s safety, flavor, and texture.
As an affiliate, we earn on qualifying purchases.
Creating a Curing Mix That Balances Flavor and Safety
A good curing mixture binds salt, sugar, and curing salts—like Prague Powder #1—into a reliable formula. Typically, 2-3% salt and 0.25-0.5% curing salt by weight are used. Add herbs, garlic, or spices for flavor, but keep the salt-to-meat ratio consistent.
For example, a common mix for pork loin might include 50g salt, 10g sugar, and 2g curing salt per kilogram of meat. This blend preserves, colors, and flavors the meat while inhibiting bacteria.
Understanding the tradeoffs in curing mixes is essential. Too much salt or curing salts can lead to overly salty or chemically tasting meat, while too little may compromise safety. Incorporating herbs and spices enhances flavor but can also introduce moisture or contaminants if not handled properly. The balance ensures safety, flavor, and preservation, and the choice of ingredients can influence the final product’s shelf life and taste profile. Experimentation with small batches can help find the ideal balance for your preferences and environment.
As an affiliate, we earn on qualifying purchases.
Applying the Cure: Rub or Inject for Uniform Flavor
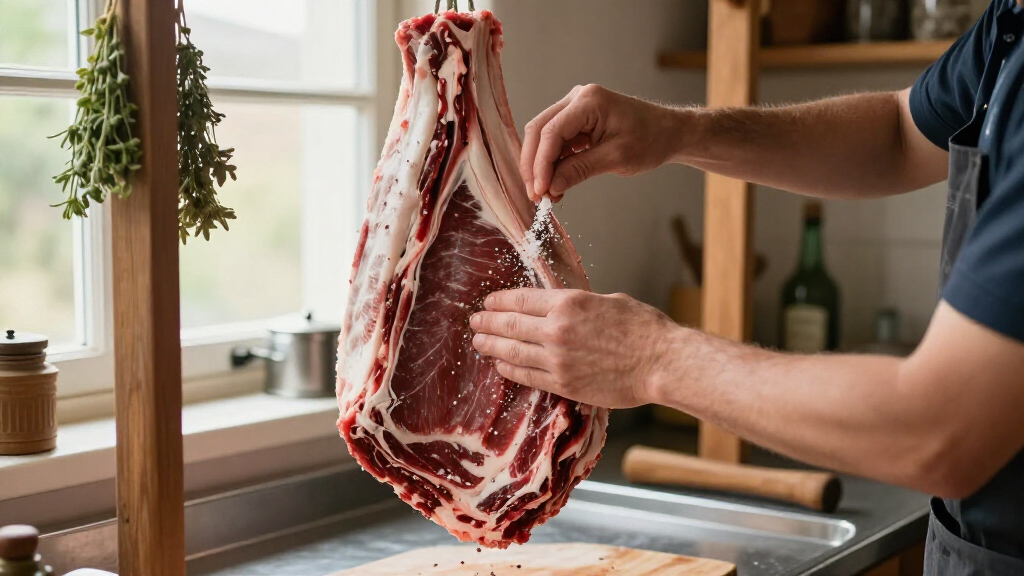
Apply your curing mix evenly by rubbing it onto the meat’s surface. For thicker muscles, injecting the cure into the center ensures even preservation and flavor. Use a clean syringe to distribute the mixture throughout the meat’s interior.
Imagine carefully injecting a beef tenderloin with a seasoned cure, then massaging the exterior to ensure every inch is coated. This step guarantees the cure reaches deep into the muscle.
Applying the cure uniformly is vital because uneven application can lead to areas that are under- or over-cured. Under-curing can pose safety risks, while over-curing may lead to overly salty flavors or texture issues. Injection allows for more precise control in thicker cuts, ensuring the entire muscle is protected and flavored evenly. This step impacts the consistency, safety, and flavor development of your final product.
As an affiliate, we earn on qualifying purchases.
The Curing Process: How Long and at What Conditions?
Place the coated meat in a non-reactive container, like a glass or food-grade plastic, and keep it in a cool environment—around 36-40°F (2-4°C)—for a period that ranges from 5 to 21 days. Turn or massage the meat every few days to redistribute cure and prevent unevenness.
For example, a pork loin might cure for 7-10 days, depending on thickness. During this time, the salt draws out moisture and begins flavor development.
Controlling humidity (around 75%) and airflow is critical. Too dry, and the meat will become overly hard; too moist, and it risks spoilage. Balancing these conditions is a tradeoff: too much humidity can encourage mold or bacteria, while too little can cause excessive drying and loss of flavor. Regular turning and monitoring help ensure the cure penetrates evenly and that the environment remains safe. The timing influences not only safety but also the development of texture and flavor, making patience essential to achieve optimal results.
How to Dry and Age Your Cured Muscle Safely
After curing, hang the meat in a controlled environment—cool (around 55°F or 13°C), humid (about 70%), with good airflow. The goal is slow drying that develops flavor without encouraging mold or bacteria.
For example, hanging a pork shoulder in a dedicated curing chamber or a cool cellar can take 4-12 weeks. During aging, the meat loses moisture, intensifies flavor, and develops a firm texture.
Monitor carefully—any off-odor, slimy patches, or unusual mold should be addressed immediately. Managing the environment during aging is crucial because improper conditions can lead to spoilage or undesirable mold growth. Slight variations in temperature or humidity can significantly impact the aging process, affecting flavor, texture, and safety. Understanding these tradeoffs helps you make informed adjustments, ensuring your cured meat matures safely and develops the desired characteristics.
Recent Innovations Making Dry-Curing Easier and Safer
New tech helps home curers get consistent results. Precision climate control systems regulate temperature and humidity, simplifying the process. Some use vacuum-sealing before traditional curing to boost safety and flavor infusion.
Artisanal producers are experimenting with natural curing agents—like celery powder—that contain nitrates, reducing sodium while maintaining safety. These innovations make dry-curing accessible outside professional labs.
According to an anonymous researcher, maintaining precise environmental conditions is now more achievable than ever, even in off-grid setups with simple equipment.
Safety First: How to Prevent Foodborne Illness
Proper sanitation and environment control are essential. Keep your workspace clean and tools sterilized. Use curing salts with nitrates/nitrites, and always keep the meat at safe temperatures—below 40°F (4°C) during curing.
Watch for signs of spoilage: foul smell, slimy texture, or discoloration. When in doubt, discard suspect meat. These steps prevent dangerous bacteria like Clostridium botulinum from thriving.
Remember: patience and vigilance are your best tools for safe, successful curing.
Comparison: Traditional vs. Modern Dry-Curing Techniques
| Aspect | Traditional Curing | Modern Innovations |
|---|---|---|
| Environment Control | Basic, relies on cellar or cool pantry | Precise climate chambers, vacuum-sealing |
| Safety | Requires experience and vigilance | Enhanced safety with controlled humidity/temperature |
| Flavor Variations | Limited, traditional herbs/spices | Experiment with infused herbs, alcohols |
| Time | Weeks to months | Same, but more predictable |
Conclusion
Dry-curing a whole muscle is a rewarding process blending patience, precision, and a touch of tradition. When you control every detail—meat quality, environment, and timing—you create something truly special.
Next time you see a thick cut at the market, imagine it transformed into a rich, flavorful cured masterpiece. With practice, your off-grid kitchen can produce cured meats that rival even the best artisan producers—no hype, just skill and care.
College move-in / dorm season Picks
dorm essentials
As an affiliate, we earn on qualifying purchases.