
TL;DR
Open a free Amazon Business account
Business pricing, bulk buying and tax-exempt orders.
Create a free accountAs an affiliate, we earn on qualifying purchases.
Proper home curing extends meat’s shelf life and flavor, but safety hinges on hygiene, correct ingredient use, and temperature control. This guide walks you through safe curing methods with real-world tips.
Imagine biting into a perfectly cured piece of bacon, tender and bursting with flavor. Now, think about doing that yourself—at home, with tools and ingredients you control. Curing meat isn’t just for pros; with the right knowledge, you can craft safe, delicious cured meats in your own kitchen.
This guide is about helping you understand the ins and outs of home curing—what works, what doesn’t, and how to keep it safe. We’ll cover the key techniques, safety steps, and common questions so you can confidently preserve meat on your terms, off-grid or in your manual kitchen.
Always measure curing agents precisely using a reliable scale to avoid health risks.
Maintain a stable environment—0-4°C and 70% humidity—to prevent bacterial growth.
Use visual and smell cues to detect spoilage; discard suspicious meat immediately.
Natural curing with celery powder is a safe alternative to synthetic nitrates, but follow specific recipes and ensure proper conversion of nitrates to nitrites…
Patience and careful monitoring are essential—rushing can compromise safety and quality.
How to Cure Meat at Home Safely
Proper home curing can extend shelf life and build deep flavor, but safety depends on hygiene, exact curing-agent measurements, cold temperatures, stable humidity, and disciplined monitoring. This guide turns the process into a controlled kitchen system.
Using nitrites or nitrates can sharply reduce botulism risk, but only when measured precisely and handled with strict temperature control.
Target curing temperature range for safer home projects.
Balanced moisture control helps avoid drying and spoilage.
Correct curing and storage can extend meat’s usable life dramatically.
Low-oxygen cured meats require careful salt, nitrite, and cold control.
Cure time depends on cut size, method, recipe, and storage conditions.
Use a reliable scale. Small deviations can affect safety and flavor.
Three Safe Curing Paths
Dry curing, wet curing, and combination curing all work at home, but each method changes how salt, moisture, curing agents, and bacteria behave.
Dry Cure
Salt, sugar, spices, and curing agents are rubbed directly onto the meat. Best for bacon, lonza, and smaller cuts when you can control time, cold, and surface coverage.
Wet Cure
Meat is submerged in a measured brine. It supports even distribution for ham or corned beef, but sanitation and refrigeration become especially important.
Combination
A dry rub plus brine or staged immersion gives extra control over flavor and timing. It still demands clean containers, steady cold, and full recipe discipline.
The Safety Sequence
Think of curing as a chain. If one link fails, the batch can become unsafe even when the rest looks right.
Select
Start with fresh, high-quality meat. Pork belly and shoulder are forgiving beginner cuts.
Measure
Weigh salt, sugar, and curing agents from a trusted recipe using a precise scale.
Apply
Rub or submerge completely in a glass, food-grade plastic, or stainless container.
Control
Hold at 0-4°C with about 70% humidity and enough air movement around the meat.
Inspect
Check daily for off smells, slime, fuzzy mold, leaks, or temperature drift.
Wait
Let the recipe finish. Rushing can compromise salt penetration and safety.
Method Comparison
Choose the method that matches your equipment, patience, and tolerance for monitoring. Safer curing is less about romance and more about repeatable control.
| Method | Best For | Precision Needed | Contamination Risk | Beginner Fit | Safety Notes |
|---|---|---|---|---|---|
| Dry Curing | Bacon, lonza, small whole-muscle cuts | ✓ High | ~ Moderate | ✓ Good | Keep cure coverage even and turn meat as directed by the recipe. |
| Wet Curing | Ham, corned beef, larger pieces | ✓ High | ~ Higher if warm | ✓ Good | Use clean brine, full submersion, cold storage, and non-reactive containers. |
| Combination | Flavor-driven projects and staged curing | ✓ Very high | ~ Managed by process | ~ Intermediate | Document dates, weights, temperatures, and each handling step. |
| No Nitrite Cure | Short-term, fully cooked products only | ✓ High | ✗ Higher | ✗ Limited | Shelf life and botulism protection may be reduced. Follow tested recipes. |
Control Points That Matter Most
The safest home setup is simple: a dedicated cold space, accurate measuring tools, clean containers, and daily checks logged without guesswork.
Temperature Risk Scale
The safe target sits near the cold end. A dedicated fridge, digital controller, and thermometer remove most of the guesswork.
When to Throw It Out
Do not taste questionable meat. Spoilage cues are decision points, not invitations to investigate further.
Off Odor
Sour, rotten, ammonia-like, or unusually sharp smells mean the batch should be discarded.
Slimy Surface
Sticky or slick texture can indicate bacterial growth, especially if paired with temperature drift.
Questionable Mold
Pink, green, fuzzy, or unfamiliar mold is not worth the risk unless you have expert identification.
Traceability Chain
A home curing notebook is more than tidy recordkeeping. It helps you connect ingredients, conditions, observations, and final safety decisions.
The Secret to Safe Home Curing: Know Your Methods
There are three main ways to cure meat at home: dry curing, wet curing (brining), and a mix of both. Each has its quirks, but understanding them is the first step to safe results.
Dry curing involves rubbing salt, sugar, and curing agents directly onto the meat, then letting it sit. Think of a slab of pork belly coated with a thick layer of salt and spices, slowly drawing out moisture. This method is great for bacon or lonza, but it requires careful control of salt and curing times to prevent spoilage or overly salty meat.
Wet curing, or brining, submerges meat in a salt-based solution. Imagine a large glass jar filled with a salty, flavorful liquid that keeps ham or corned beef tender and safe. The immersion allows for even distribution of curing agents but increases the risk of bacterial growth if not managed correctly. Proper sanitation and consistent temperatures are critical to avoid contamination or spoilage.
Combination curing uses both methods—dry rubs followed by immersion—to balance flavor and safety. This approach often allows for more control over curing time and flavor development, but it still demands strict hygiene and temperature management to ensure safety.
As an affiliate, we earn on qualifying purchases.
How to Use Curing Agents Correctly and Safely
Using the right amount of curing agents is crucial because it directly impacts safety and flavor. Salt is the backbone of preservation, drawing moisture out of the meat to inhibit bacterial growth. Nitrites and nitrates are added specifically to prevent the growth of Clostridium botulinum, which can produce deadly toxins in low-acid, anaerobic environments like cured meats. The balance is delicate: too little, and bacteria may survive; too much, and you risk health issues like methemoglobinemia or carcinogenic effects from excess nitrites.
Understanding the chemistry helps clarify why precise measurement matters. For instance, too high a concentration of nitrites can cause a metallic or bitter flavor, and excessive nitrate levels can lead to health risks. Conversely, insufficient curing agents may result in spoilage or botulism risk, especially in low-acid, vacuum-sealed products. Therefore, following trusted recipes and guidelines isn’t just about tradition—it’s about scientifically balancing safety and quality. Proper use of curing agents ensures your meat remains safe over time, reduces spoilage risks, and achieves the desired color and flavor profile that consumers expect from cured meats.
As an affiliate, we earn on qualifying purchases.
Set Your Curing Space and Conditions for Perfect Safety
Controlling temperature and humidity during curing is where most home projects go wrong. Keep your meat between 0-4°C (32-39°F)—the cold of a dedicated fridge or a cool cellar. Humidity should hover around 70%, enough to prevent drying out but not promote mold. If the environment is too warm or humid, bacteria and mold can flourish, turning your curing process into a safety hazard rather than a preservation method.
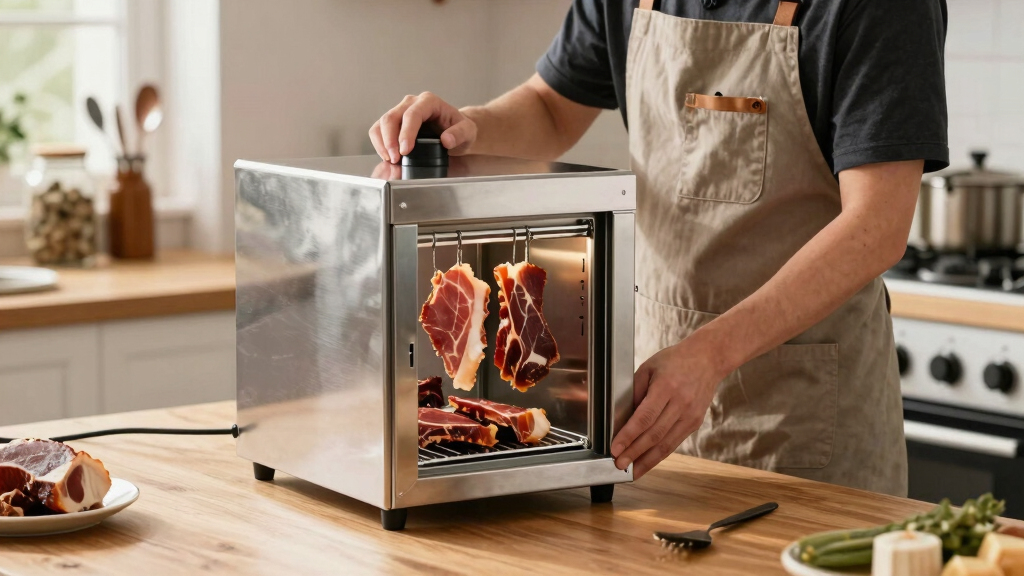
Imagine a small, insulated curing chamber—an old cooler equipped with a digital temperature controller and a hygrometer. This setup maintains a stable, safe environment, mimicking commercial curing chambers but on a smaller scale. Such control is essential because fluctuations in temperature or humidity can lead to uneven curing, spoilage, or mold growth. Proper air circulation—placing your meat on a rack and ensuring it’s not touching the sides—further promotes even curing and prevents localized spoilage. Regular monitoring and adjustments are key to avoiding safety pitfalls and ensuring your meat cures evenly and safely.
As an affiliate, we earn on qualifying purchases.
Step-by-Step: How to Cure Meat at Home (With Safety in Mind)
- Select quality meat: Use fresh, high-quality cuts. For beginners, pork shoulder or belly are forgiving options because their higher fat content and relatively forgiving curing times reduce the risk of spoilage if not perfect.
- Prepare your cure: Mix salt, sugar, and curing agents following trusted recipes. Weigh everything accurately—precision here reduces health risks and ensures consistent results. Remember, small deviations can significantly impact safety and flavor.
- Apply the cure: Rub it thoroughly onto the meat’s surface or submerge it in your brine, ensuring complete coverage for even curing. Seal in a non-reactive container, like glass or food-grade plastic, to prevent contamination and chemical reactions.
- Set the right environment: Place the meat in your controlled space at 0-4°C with 70% humidity. This stable environment inhibits bacterial growth while allowing safe enzymatic activity that develops flavor.
- Monitor regularly: Check for spoilage signs—off smells, slimy textures, mold. Use a thermometer to verify internal temperatures stay below 4°C, and inspect the curing environment daily to catch issues early.
- Wait patiently: Curing durations vary based on cut size—small bacon slices may cure in a week, while large hams can take several weeks. Use a meat thermometer to verify the internal temperature if planning to cook the meat afterward, ensuring it reaches a safe temperature.
Patience is key. Rushing or neglecting safety checks invites spoilage, bacteria growth, or toxin development. Proper timing and vigilance are what turn home curing into a safe, rewarding process.
As an affiliate, we earn on qualifying purchases.
What to Watch Out For and When to Call It Quits
Safety isn’t just about following steps—it’s about recognizing signs of trouble early. A bad smell, slimy or sticky texture, or fuzzy mold are clear indicators of spoilage or unsafe conditions. Mold can sometimes be harmless, but certain molds produce toxins—when in doubt, discard the batch to avoid health risks. Tasting suspicious meat is never advisable; always err on the side of caution.
Use a thermometer to ensure the internal temperature remains below 4°C during curing. If you notice pink or green mold, or if the meat develops an off smell or slimy surface, these are signs that bacteria or mold have taken hold and the meat should be discarded immediately. Understanding these cues is vital because they can prevent foodborne illnesses. Remember, some mold types are harmless, but unless you are an expert, it’s safest to discard any batch showing questionable signs, reinforcing the importance of vigilance in home curing.
Natural Curing Hacks and Modern Tricks for Better Results
Natural curing is gaining popularity. Using celery powder or juice, which contains natural nitrates, can be a safer alternative for those avoiding synthetic chemicals. These natural nitrates work similarly to synthetic nitrites, but their potency can vary depending on the source and processing, so understanding their strength and consistency is important. Curing with celery juice requires precise measurement and timing to ensure the nitrates convert effectively into nitrites during curing, mimicking traditional methods while reducing chemical additives.
Modern tools like small curing chambers, digital temperature controllers, and vacuum sealers make home curing more predictable and safer. Imagine sealing your cured meat in a vacuum bag inside a temperature-controlled box—this combination minimizes oxygen exposure and maintains a consistent environment, greatly reducing spoilage risks. Such gadgets also help you achieve more uniform curing, which is vital for safety and flavor quality. Combining traditional techniques with these modern tools not only enhances safety but also improves the overall quality and consistency of your cured meats, making home curing more accessible and reliable for enthusiasts.
Frequently Asked Questions
Is home curing safe without using nitrates or nitrites?
Yes, you can cure meat without nitrates or nitrites, but it’s riskier and the shelf life shorter. Natural methods using celery powder or juice contain nitrates naturally, which can be a safer alternative if used properly. These methods require careful attention to ingredient quality, precise measurement, and strict hygiene practices to minimize bacterial growth and spoilage. While natural curing can produce delicious results, it demands a good understanding of nitrate conversion and environmental controls to ensure safety. In essence, avoiding synthetic nitrates isn’t impossible, but it shifts the responsibility onto meticulous process management to prevent foodborne illnesses.
How long does it take to cure meat at home?
Curing times vary widely—from about 3 days for small cuts like bacon to 4-6 weeks for larger hams or salami. The duration depends on the size and thickness of the meat, the curing method, and environmental conditions. Longer curing enhances flavor complexity but also increases the risk if not managed properly. Patience is essential because rushing the process can lead to incomplete preservation or unsafe meat. Always follow your specific recipe’s recommended timing and monitor the environment diligently. Using a thermometer to verify the internal temperature is crucial, especially if you plan to cook or store the cured meat for extended periods.
What’s the biggest mistake to avoid when home curing?
The most critical mistake is failing to control the environment—specifically temperature and humidity. Warm or humid conditions foster bacterial and mold growth, turning your curing project into a health hazard. Inconsistent temperatures can also cause uneven curing, leading to spoiled spots or unsafe meat. In addition, inaccurate measurement of curing agents—using a kitchen teaspoon instead of a precise scale—can result in unsafe levels of nitrates or nitrites, risking poisoning or insufficient preservation. Keeping your environment stable, measuring precisely, and regularly inspecting your meat are fundamental to safe home curing. Neglecting these factors can compromise both safety and quality, so vigilance is key.
Can I cure meat in my regular fridge?
Yes, a standard home fridge can be suitable for curing, provided it maintains a consistent temperature between 0-4°C. Use a reliable thermometer to verify and prevent fluctuations that could promote bacterial growth. Keep the meat away from other foods to avoid cross-contamination, and ensure good air circulation by placing it on a rack. For more controlled or larger projects, a dedicated curing chamber or a modified cooler with temperature regulation offers added safety and consistency. Proper environment control is vital because even slight temperature deviations can lead to spoilage or unsafe conditions, especially during longer curing periods.
Are there legal restrictions on home curing meat?
Regulations regarding home curing vary depending on your region. Some areas restrict the use of certain curing agents, require specific labeling if you sell cured products, or have rules about processing meat at home for sale. It’s important to research local food safety laws and health department regulations before starting. These rules are designed to protect consumers and ensure safety standards are met. If you plan to share or sell your cured meats, obtaining proper permits and adhering to legal guidelines is essential. Even if curing for personal use, understanding local laws can prevent inadvertent violations and ensure your curing practices remain compliant.
Conclusion
Mastering safe meat curing at home is about respect for the process and attention to detail. When you control every step—ingredients, environment, timing—you turn simple meat into a shelf-stable delight that’s both satisfying and safe.
Next time you see a cut of pork, think beyond just cooking—consider how a little salt, patience, and the right conditions can transform it into something truly special. Safety first, flavor always.
Baby shower & registry season Picks
baby registry must-haves
As an affiliate, we earn on qualifying purchases.