
TL;DR

Get kitchen gear delivered free — and shop member deals
- Fast, free delivery on millions of items
- Access to Prime Big Deal Days deals on October 6–7
- Prime Video, Amazon Music and more included
A Dutch oven can function as a versatile outdoor oven. By controlling coals and heat, you can bake bread, roast, or stew outside, with cast iron’s natural heat retention making it reliable. Proper prep and safety make all the difference.
Preheat your Dutch oven on hot coals for even baking and crust development.
Control oven temperature outdoors with the number and placement of coals—start small and adjust.
Always set up on a stable, fireproof surface and keep safety gear nearby.
Clean and oil your Dutch oven promptly after use to prevent rust and maintain seasoning.
Practice makes perfect—test coaling arrangements and baking times to master outdoor oven cooking.
How to Use a Dutch Oven as an Oven Outdoors
A cast-iron Dutch oven can bake bread, roast a meal, or finish dessert far from a kitchen. The key is to preheat the iron, balance coals above and below, and make small heat adjustments before the food burns.
A miniature oven built for the fire
Thick walls absorb and distribute energy while a heavy, rimmed lid traps heat and holds coals above the food. That creates radiant heat from both directions—the basic behavior of a conventional oven.
Heat that stays put
Cast iron changes temperature slowly. Once preheated, it reduces sudden swings caused by wind, cooling coals, or a briefly lifted lid.
A lid made for coals
The raised rim keeps embers from rolling away. More heat above encourages browning; restrained heat below protects the base.
Choose the right size
A 2–4 quart oven suits desserts and quick breads. An 8-quart or larger model gives roasts, casseroles, and loaves room to expand.
From cold iron to outdoor bake
Build repeatability by following the same sequence each time. Prepare the cookware first, then control heat through fuel placement—not guesswork.
Prepare the site
Use stable, level, fireproof ground with clear space around the oven.
Light the coals
Wait until charcoal is hot and lightly ashed over. Never add accelerants.
Preheat the iron
Warm the closed oven for 15–20 minutes to stabilize its interior.
Load and balance
Add food, replace the lid, and distribute more coals above than below.
Rotate and refine
Turn pot and lid periodically; adjust a few coals at a time.
The coals trick
Outdoor temperature is never perfectly fixed. Wind, fuel type, ambient temperature, and oven size all matter, so treat coal counts as a starting point and read the food as you go.
Where the heat should work
Relative starting emphasis for an oven-style bake—not a literal coal count.
Read the result, move the heat
Make modest corrections. Cast iron responds slowly, so moving many coals at once can overshoot the target and make the next problem worse.
| What you see | Likely cause | Best adjustment | Continue baking? |
|---|---|---|---|
| Bottom darkens first | Too much heat underneath | Remove lower coals; raise the pot slightly | ~ Monitor closely |
| Top remains pale | Insufficient lid heat | Add a few hot coals to the lid | ✓ Yes |
| One side cooks faster | Wind or uneven coal pattern | Rotate pot and lid in opposite directions | ✓ Yes |
| Crust burns quickly | Excess overall heat | Remove top coals and shield from wind | ✗ Pause and correct |
| Center stays underdone | Pot was not fully preheated | Extend bake gently with balanced heat | ~ Add time |
Every good bake follows the same logic
Preparation affects heat stability; heat stability affects the crust and center; prompt care protects the seasoning that makes the next bake easier.
Seasoned iron
Resists rust and helps food release.
Even preheat
Builds a stable thermal base.
Balanced coals
Directs heat above and below.
Consistent bake
Produces a browned crust and cooked center.
Clean and oil
Preserves the surface for next time.
Hot iron stays hot
A Dutch oven may remain dangerously hot after the visible fire has faded. Use purpose-made tools and assume every metal surface can burn skin.
Choose a fireproof base
Set the oven on stable mineral soil, a fire pan, or another heat-resistant surface away from dry vegetation and flammable materials.
Use proper handling tools
Keep heat-resistant gloves, long tongs, and a lid lifter nearby. Open the lid away from your face to avoid steam burns.
Burn clean fuel outdoors
Use charcoal or clean wood coals only in open, well-ventilated areas. Avoid chemical accelerants and never cook this way indoors.
Clean, dry, and oil promptly
Scrub with hot water and a stiff brush, dry completely over gentle heat, then apply a very light coat of vegetable oil before storage.
Quick answers around the fire
The first few bakes are calibration runs. Record the weather, coal pattern, and timing so your setup becomes more predictable with every meal.
Can I bake bread over an open fire?
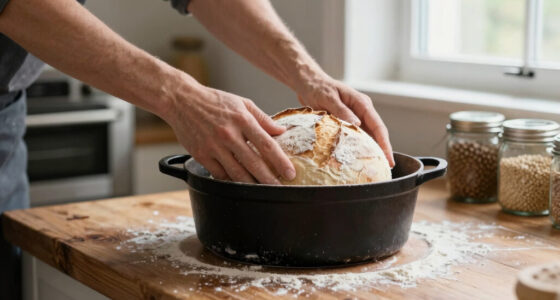
Yes. Use a bed of mature coals rather than tall flames, preheat the oven, load the dough, and place additional coals on the lid.
How do I know the oven is ready?
After roughly 15 minutes, sprinkle in a few drops of water. If they sizzle and evaporate quickly, the iron is hot enough to begin.
How do I prevent rust?
Remove food residue, dry the oven fully, apply a thin oil film, and store it in a dry place with slight airflow beneath the lid.
What should I cook first?
Start with forgiving recipes such as cobbler, casserole, roasted vegetables, or a simple no-knead loaf before attempting delicate cakes.
Your portable bakery
Preheat thoroughly, favor lid heat, rotate for evenness, and make small coal adjustments. With practice, the same cast-iron pot can deliver crusty bread, tender roasts, casseroles, pizza, and dessert under the open sky.
What Makes a Dutch Oven Perfect for Outdoor Baking?
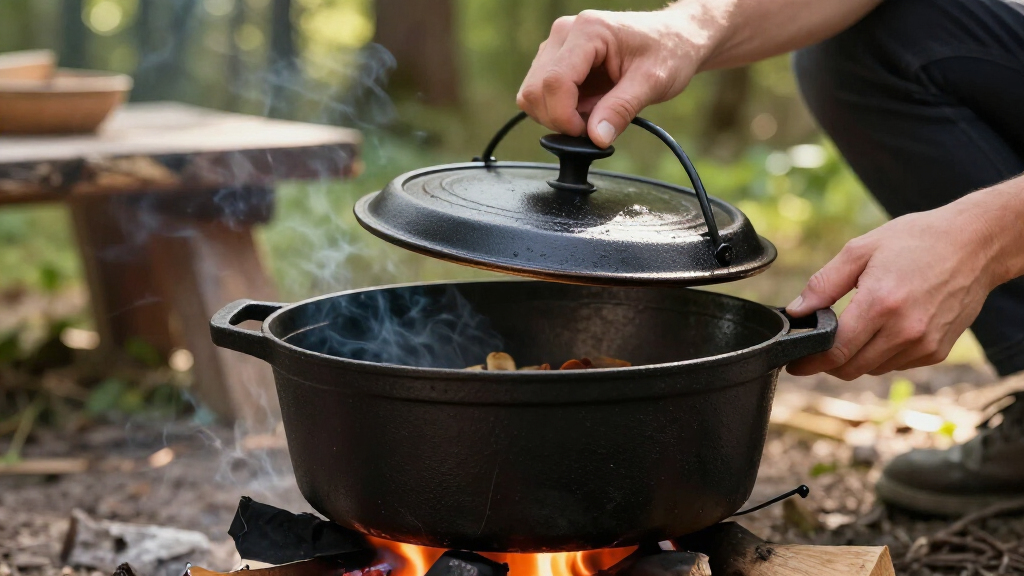
Cast iron Dutch ovens are natural heat magnets, known for their durability and excellent heat retention. Their thick walls and heavy lids trap heat like a miniature oven, perfect for baking inside a campfire or on coals. The lid’s raised rim allows you to pile hot coals on top, creating an oven-like environment. For example, that crusty sourdough bread you’ve seen in camping videos? It’s often baked in a Dutch oven.
Choosing the right size matters—an 8-quart oven offers room for large roasts or multiple loaves, while smaller ones excel for quick breads or desserts. Properly seasoned, cast iron develops a natural non-stick surface that improves with each use, making baked goods slide out easily.
Understanding why these qualities matter helps you make the most of your Dutch oven. The heat retention ensures even baking and consistent results, but it also means you need to manage your heat sources carefully to avoid overcooking or burning. The heavy lid and thick walls act as insulators, allowing for slow, even heat distribution which is ideal for baking. However, this also means that once hot coals are removed, the oven stays hot longer, so timing your coals and understanding how your Dutch oven responds to heat adjustments are key to successful outdoor baking.
As an affiliate, we earn on qualifying purchases.
How to Prepare Your Dutch Oven for Outdoor Baking
Start with a well-seasoned Dutch oven. If it’s new, give it a few coats of oven-safe oil and bake it at 450°F for an hour—this builds a durable non-stick layer that improves with each use. Proper seasoning is crucial because it creates a natural barrier that prevents rust and enhances the non-stick surface, making baked goods easier to remove and reducing sticking. After each use, clean with hot water and a stiff brush, then dry thoroughly to prevent rust. Lightly coat with oil before storing to maintain the seasoning.
Preheating your Dutch oven before baking is vital. Placing it on hot coals for 15-20 minutes ensures the entire interior reaches an even temperature, which helps develop a crispy crust and prevents the bottom from burning. Think of it as preheating an oven—it’s about creating a stable, uniform heat environment. If you skip this step, you risk uneven baking, resulting in burnt bottoms or undercooked centers. Proper preheating, combined with good heat management, allows you to achieve bakery-quality results even outdoors, where temperature fluctuations are common.
Understanding the importance of seasoning, cleaning, and preheating helps you develop a consistent baking process. Each step influences how evenly your baked goods cook, how easily they release, and how well your Dutch oven withstand the outdoor elements. Taking care of your cast iron not only prolongs its lifespan but also ensures that every bake is as good as the last.
As an affiliate, we earn on qualifying purchases.
Controlling Heat Outdoors: The Coals Trick
Controlling temperature outdoors is all about managing coals. To bake at around 350°F, spread 10-15 hot coals evenly underneath and on top of your Dutch oven. More coals on top mean a hotter oven, while fewer underneath help prevent the bottom from burning. The distribution of coals directly affects how heat radiates into the Dutch oven, which in turn influences baking time and crust development.
For example, if your bread crust is too dark or burnt, removing some coals from the top and adding a few underneath can help lower the temperature. Conversely, if the crust isn’t browning enough, adding coals on top will increase the heat. Experimenting with coaling arrangements is essential because outdoor conditions—wind, ambient temperature, and coals’ heat—vary, affecting how your oven performs. Start with small test batches to establish your ideal setup, then adjust accordingly for consistent results.
Remember, the heat retention property of cast iron means your Dutch oven stays hot even after coals are moved. This is advantageous because it allows you to maintain a stable baking environment, but it also requires you to be attentive to coals’ placement and timing. Proper heat control minimizes the risk of uneven baking and helps you produce perfect loaves or roasts every time.
As an affiliate, we earn on qualifying purchases.
Frequently Asked Questions
How do I prevent my Dutch oven from rusting after outdoor use?
Thoroughly clean it with hot water and a stiff brush, dry completely, then coat lightly with vegetable oil before storing. Re-season periodically to keep the surface resilient.Can I bake bread in a Dutch oven over an open fire?
Yes! Preheat the Dutch oven on hot coals, shape your dough, and bake inside with coals on top. It replicates a traditional oven and produces a crusty loaf.How many coals should I use for baking at 350°F outdoors?
Typically, 10-15 hot coals underneath and on top of the Dutch oven create a stable 350°F environment. Adjust based on your specific setup and experience.Is it safe to use charcoal or wood coals for baking?
Absolutely, but always outdoors and away from flammable materials. Avoid accelerants and ensure good ventilation to prevent smoke buildup.What’s the best way to tell if my Dutch oven is hot enough?
Preheat it on coals for about 15 minutes, then sprinkle a few drops of water inside—if they sizzle and evaporate quickly, it’s ready for baking.As an affiliate, we earn on qualifying purchases.
Conclusion
A Dutch oven transforms outdoor cooking into a true baking experience. With patience and a little practice, you can produce crusty bread, tender roasts, or even desserts, all under the open sky. Next time you set up camp or grill in the yard, think of your cast iron as a portable oven—ready to turn simple ingredients into hearty, homemade meals.Fall Picks
fall essentials
As an affiliate, we earn on qualifying purchases.