
TL;DR

Get kitchen gear delivered free with Prime
- Fast, free delivery on millions of items
- Prime Video, Amazon Music and more included
- Member-only deals all year
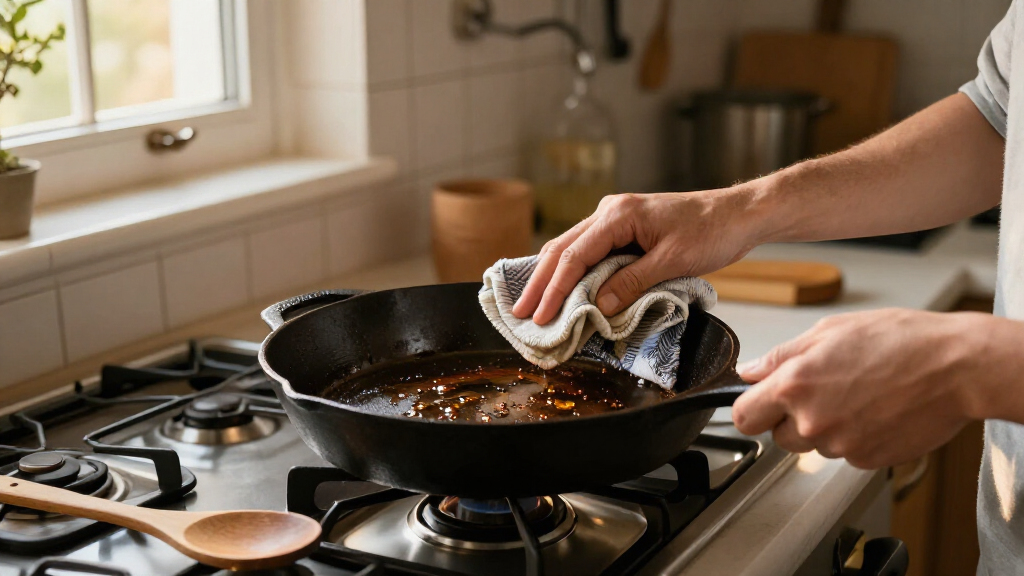
Bare cast iron can handle brief washing with mild soap, and routine cooking does not require full reseasoning after every meal. Dry the pan promptly, use only a thin film of oil when the surface needs it, and address rust or damaged seasoning when it appears.
Wash bare cast iron briefly with mild soap when grease or residue calls for it; dry it promptly.
After drying, use only a nearly invisible film of cooking oil if the surface looks dry or dull.
Reserve full oven seasoning for patchy, damaged, or stripped seasoning instead of repeating it after every meal.
Use bare cast iron for short acidic cooks when its seasoning is sound; choose another pot for long tomato or wine simmers.
Remove surface rust with focused scrubbing, then dry and oil the pan; check cracks or deep pitting separately.
Kitchen Field Guide · Cast Iron Care
Common Myths About Cast Iron Care
A quick wash with mild soap will not erase sound seasoning. Clean the pan, dry it promptly, and use a trace of oil only when the surface needs it. Simple care beats turning every meal into a ritual.
The useful test
“A dark color alone cannot tell you whether a pan is well seasoned.”
Look at feel, cooking performance, and rust resistanceBrief water contact is fine. Prolonged moisture, long acidic simmering, and the care needs of enameled cookware call for different choices.
At a glance · What works
Five habits that keep care simple
Routine washing and cooking usually maintain sound seasoning. Match the repair to the problem, and use how the pan cooks—not its color—as your guide.
Use mild soap briefly when grease or residue calls for it; dry promptly.
After drying, add a nearly invisible film only if the surface looks dry or dull.
Save full oven seasoning for patchy, damaged, or stripped seasoning.
Short acidic cooks are fine with sound seasoning; use another pot for long simmers.
Scrub surface rust, dry, and oil. Check deep pitting or cracks separately.
Myth check · The everyday rules
What the old warnings get wrong
Seasoning is polymerized oil bonded to the iron—not a fragile film that disappears the moment it meets a little detergent or water.
Mild dish soap is fine
A short wash does not strip properly bonded seasoning. Use soap when the pan feels greasy; skip harsh cleaners and prolonged soaking.
Wash briefly, then dry well
Rinse and wash as needed. Rust becomes a concern when water lingers or the pan is stored damp.
Routine care usually maintains seasoning
Clean and dry after cooking. A full oven seasoning is useful when the layer is damaged, patchy, or stripped.
Build confidence gradually
Preseasoned pans are ready to use, but heat and technique matter. Start with forgiving foods and enough cooking fat before trying delicate eggs.
Short cooks can be fine
Sound seasoning can handle brief acidic cooking. Long tomato or wine simmers may loosen seasoning and add a metallic taste.
Surface rust is often repairable
Scrub surface rust away, dry thoroughly, and apply a thin coat of oil. Deep pitting or structural damage needs separate assessment.
It is polymerized oil bonded to iron
Sticky patches can mean too much oil; flakes may signal residue or weak seasoning. Assess the surface before choosing a repair.
Performance tells you more
A dark pan can still be sticky, uneven, or prone to rust. Feel, food release, and surface condition are better clues.
It holds heat, but warms slowly
Hot spots can form. Preheat gradually and move the pan or food as needed for more reliable cooking.
Everyday tools are enough
Mild dish soap, a brush or scraper, and a little cooking oil cover most care. Match tools to the surface.
A practical flow · After cooking
Clean, dry, protect, store
Give the pan a brief cleanup while warm and safe to handle. The thin oil step is optional when the surface is already in good shape.
Remove food
Scrape or brush the pan while it is warm, not dangerously hot.
Wash briefly
Use warm water and a little mild soap if grease or residue remains.
Dry completely
Towel-dry all surfaces; use low heat briefly if moisture remains.
Oil only if needed
Wipe on a trace, then buff away visible excess to avoid stickiness.
Store dry
Choose a dry place. Add a paper towel between stacked pans.
For stuck-on food, simmer a little water briefly or use a scraper. Avoid soaking and never put bare cast iron away damp.
Use judgment · Heat and ingredients
Know where caution matters
Cast iron rewards gradual heat and sensible cooking times. A pan’s finish also matters: enameled cast iron has a glass-like surface and needs its maker’s care instructions.
Acidic cooking: short vs. long
A well-seasoned pan can handle short cooks with mildly acidic ingredients. For long tomato or wine simmers, choose another pot to protect seasoning and avoid metallic flavors.
Preheat gradually for better control
Cast iron retains heat well, but warms slowly and can develop hot spots. Give it time to heat evenly; use enough fat and let food release before moving it.
Mild soap won’t erase sound seasoning
You can wash well-seasoned bare cast iron with a little mild dish soap; a short wash does not strip a properly bonded seasoning layer. Seasoning is polymerized oil on the iron, not a delicate film that dissolves the moment soap touches it. Modern dish soaps generally lack the lye that older warnings often referred to. Skip harsh cleaners and long soaking, which can cause other problems. After frying potatoes, for example, scrape out the crumbs, wash off greasy residue with a small amount of soap and warm water, then dry the pan promptly. A brush or scraper usually handles the food; soap helps when the surface still feels greasy. If you prefer to clean with hot water alone, that can work too, but you don’t need to fear a drop of detergent. The point of cleaning is to remove food and old grease, not to scrub every dark mark away. Use an ordinary sponge or brush for routine washing. If cooked-on bits cling, simmer a little water briefly or use a pan scraper, then rinse and dry. Avoid leaving the pan in the sink while you finish the dishes.A dishwasher and a soaking tub are different from a quick hand wash: both can leave bare iron exposed to moisture for too long. For a newly purchased pan, follow its maker’s directions, especially if the finish is unusual. Enameled cast iron has a glass-like surface and needs different care from bare iron.Soap is a cleaning tool, not a seasoning test. Judge the pan by its surface and cooking performance, not by whether it has ever met dish detergent.
Products Worth Considering

Le Creuset Enameled Cast Iron Round Bread Oven, 9.5-Inch, Cerise

Le Creuset Signature 6.5-Quart Deep Round Dutch Oven with Light Gold Crucible Knob, Enameled Cast Iron, Bleu Riviera

Le Creuset Signature Enameled Cast Iron Round Dutch Oven, 5.5 qt, Deep Teal
As an affiliate, we earn on qualifying purchases.
Brief water contact is safe when you dry the pan
Bare cast iron can be rinsed or washed briefly; the problem is storing it wet or leaving it submerged. Water can trigger rust on exposed iron, particularly where seasoning is thin or damaged. A prompt, thorough dry keeps an ordinary cleanup from turning into an orange-speckled repair job. That distinction matters because avoiding all water makes it harder to remove grease and food, while letting water linger gives rust time to form. Think of the pan like a sturdy work boot: rain isn’t a disaster, but putting it away soaked invites trouble. After rinsing, towel-dry the inside, outside, handle, and any pouring lips. If the pan still feels damp, set it over low heat for a few minutes until the moisture evaporates. Use an oven mitt when moving it; the handle can heat up quickly. The extra heat is a practical way to evaporate moisture from seams and edges a towel may miss, but it is not a reason to leave the pan unattended or heat it aggressively. Here’s a simple routine after cooking eggs or cornbread:- Let the pan cool until it is warm and safe to handle, not dangerously hot.
- Scrape or brush away food. Use a little mild soap if grease or residue remains.
- Rinse briefly, then towel-dry the entire pan.
- Warm it over low heat if needed to remove hidden moisture.
- If the surface looks dry or dull, wipe on a very thin film of cooking oil and buff away visible excess.
You don’t need to reseason after every meal
Routine cooking and cleaning usually maintain sound seasoning; a full oven seasoning is for a pan that needs repair, not a mandatory chore after dinner. Seasoning builds through repeated thin layers of polymerized oil, then proves itself in use. Cooking a pan of cornbread doesn’t erase those layers, and washing it doesn’t mean you have to start over. Treating every meal as a reason to reseason adds work without addressing a real problem, and repeated heavy oiling can make the surface tacky. After a week of cooking, you might notice that the pan looks a little dull. If it still releases food well and shows no bare rusting spots, clean and dry it, then wipe on a trace of oil if you like. That small touch-up takes less time than heating the oven for a full reseasoning. A dull patch by itself isn’t an emergency: appearance can change with use, while the more useful question is whether the surface still protects the iron and cooks reliably. Full oven seasoning makes more sense when seasoning is patchy, damaged, or stripped. Sticky areas often mean someone used too much oil during seasoning; visible flakes can point to weak seasoning or built-up residue. Clean off loose material and assess what remains before deciding how much work the pan needs. A pan with just one rough patch may call for a local cleanup, not a dramatic overhaul. Matching the repair to the damage saves time and preserves the sound seasoning elsewhere. When you do apply oil, use a thin layer and wipe the surface as if you were trying to remove it. Excess oil can cure into a tacky coating instead of a smooth one. Imagine polishing a table: the goal is an even sheen, not a puddle. You’ll build skill faster by paying attention to how food releases and how the surface feels than by reseasoning on a fixed schedule.A new pan benefits from a gradual start
A preseasoned pan is ready for use, but it may become easier to cook on as you use it and learn its heat. Starting with forgiving foods, enough cooking fat, and gradual preheating gives you room to get comfortable before attempting delicate eggs. A dark surface isn’t a promise that every food will slide around on day one. The pan’s performance depends on both its seasoning and how it is heated; learning the second part can make the first easier to judge. Try bacon, sautéed vegetables, or a skillet of cornbread before making a thin omelet. Those meals tolerate small mistakes in heat and timing better than flaky fish or eggs. If you put cold eggs into a pan that hasn’t warmed evenly, they can stick even when the seasoning is sound. Add a little butter or oil, let the pan heat gradually, and give food time to release before scraping at it. Waiting can feel counterintuitive, but food often releases once its surface has browned enough; forcing it early can tear it and leave residue to clean. Cast iron retains heat well, but it warms more slowly than many thin pans and can develop hot spots. That’s why steady preheating matters: high heat for a short burst may scorch one area while another stays cool. On a woodstove, for instance, rotate the skillet or shift it across the cooktop to spread the heat. On a gas or electric stove, use a burner that fits the pan and raise the temperature in steps. This patient approach takes a few extra minutes, but it gives you more control and can prevent burned food and unnecessary scraping. If eggs stick, look at heat, fat, and timing before blaming the seasoning. Let the pan cool, clean off residue, and try again with a lower flame and a little more butter. The pan is a heat reservoir, like a warm brick: once it gets hot, it holds that warmth. You can cook well with it, but you have to give it time.Short acidic cooks work; long simmering needs care
A well-seasoned pan can handle a short cook with mildly acidic ingredients, but long or frequent acidic cooking can weaken seasoning and add a metallic taste. Tomatoes, wine, and vinegar are not instant seasoning removers. The length of the cook, the condition of the seasoning, and the recipe all affect the result. Acid and moisture have more time to interact with the surface during a long simmer, so the tradeoff is greater risk of flavor changes or a repair afterward. For example, deglazing a pan with a splash of wine after browning onions is a brief task. Simmering tomato sauce for several hours in a newer or poorly seasoned skillet is a different one. If you’re making a long tomato sauce, a pot with an enamel interior or another suitable vessel may give you less worry and a cleaner flavor. If you use bare cast iron for a short acidic step, wash and dry it promptly afterward. Choosing another pot for a long simmer protects the seasoning and avoids having the cookware flavor compete with the sauce. Here’s a quick comparison:| Cooking job | What to expect | Practical choice |
|---|---|---|
| Quick pan deglaze with wine | Brief contact is usually manageable on sound seasoning | Finish the dish, clean and dry the pan |
| Long tomato sauce simmer | May loosen seasoning or taste metallic | Use another pot, especially for a newer pan |
| Short sauté with a small amount of vinegar | Usually less demanding than a long simmer | Keep the cook brief and check the surface afterward |